Up next in 10

48V Power! Ecoflow + Nomadic Cooling A/C | Ultimate Custom AWD Ford Transit Camper Van Build Tour!
May 3, 2025

Nick from Odyssey Custom Vans showcases his latest custom adventure van build. Featuring the new Ecoflow 48V power system paired with the latest 48V rooftop A/C by Nomadic Cooling, this van offers exceptional comfort for all your adventures!
Don't forget to check out Odyssey Custom Vans latest build currently for sale here: https://www.odysseycustomvans.com/
Whenever you’re ready, there are 2 ways we can help you:
1. If you need a vetted parts list, download our → FREE DIY Van Build Cheatsheet to help you save time and money on Van Parts and Gear: CLICK HERE: https://van-builder-hq.ck.page/846c83ab54
2. If you want to get Done-For-You Van Build help, book a → FREE Consultation with my Calendly Link: CLICK HERE: https://calendly.com/odysseycustomvans/intro-call?month=2023-07
Show More Show Less View Video Transcript
0:00
[Music]
0:08
hey everyone welcome to the video my name is Nick iserman owner of Odyssey custom vans and I'm getting ready to do
0:14
a van tour of John and Susan's custom Adventure van build and uh can't wait to show it to you all right what we have
0:21
here is a 2021 Ford Transit all-wheel drive high roof and it's the 148 in
0:28
wheelbase the chassis of this van uh it's very heavy duty so it's a 350
0:34
chassis um we're going to go up front do a tour of the front of the van we'll
0:40
come to the middle check out the kitchen Galley and then we'll end with the power system we're using the ecoflow power
0:46
system and then we'll talk about the roof rack the rooftop AC unit which is a 48volt uh AC unit really cool from
0:53
pneumatic Cooling and then uh couple other features of the van so let's go ahead and wrap over uh move over here to
1:00
the front so on this front we just left everything stock what's nice about a
1:08
20121 is you can get this blacked out Grill and it comes standard so if you
1:14
want to change it you can uh they do make upgrades as you guys may have seen in some other videos where you can put a
1:20
raptor Style Grill pops right in so that's a cool easy add-on um as we come
1:27
inside the van uh I got the keys right here because I want to show you guys some really cool
1:32
features um inside the van so what we're going to do is I'm going to have you
1:38
guys come inside the van don't worry we're going to do a tour of the kitchen here in a second but I'm going to have
1:43
you stand right here and we're going to uh I'm going to hop in the driver's seat
1:49
and I'm going to talk to you about the wolf box which is the rearview mirror which has a built-in
1:55
camera um the Dyan which is a really cool add-on
2:00
and then uh the scopa swivel seats uh they're not swiveled because I'm going to show you the jump seat as well so a
2:07
lot of cool stuff to cover so stay right there I'm going to walk around the van and get inside and uh show you the cool
2:22
features all right so come a little bit closer we want to check out this and this so I'm going to go ahead and start
2:28
this up and we have two components in here that
2:34
they're just awesome so if you guys remember in Marine One the Thomas Thomas's van
2:40
tour he had a wolf box uh we didn't talk too much about it so this video I do want to talk about it because this is
2:46
the second one I've installed and I think it is incredible so it's not a rearview
2:53
mirrror it is a video screen that looks like a rearview mirror and it uh straps
2:59
to the back of a factory review mirror um we got three Connections in the top
3:05
so it has power review camera feed and GPS so the
3:12
GPS gives you directions and all that good stuff and then uh you got the time but this thing is fantastic so you can
3:19
actually swipe and when we go in reverse um
3:26
actually here I'll just show you where we we can do reverse so that is the uh rear view
3:40
camera so this one up here always is on it's on the whole entire time you can do
3:46
a couple options you can swipe this is giving you
3:52
uh another view of the front so if my hands here you can see this is the front
3:57
view while you're driving it's always recording in the top
4:02
and then what you can do is you can swipe one more time and then you can get a front view and a rear view like a
4:10
split view so um pretty it's really cool
4:15
now what's nice is uh if you're going to be installing this you want to make sure
4:20
that you have it ignition controlled so that when I turn the key off this has a
4:27
uh a delay and then it turns off it does have an internal battery so you're going to be able to
4:34
um do some different options where if you want it to come on at certain times or or whatnot but when the power's
4:40
disconnected it does have a backup feature battery inside um yeah there's there's so many
4:47
things in here I'm not going to dive into it in this video but the wolf box is something I think everybody should
4:53
have an adventure van having the ability to look in your reiew mirror or an emulated one because your van uh this
5:01
van does not have rear windows and the bed's so high you can't see over it so this is just again great option uh we
5:09
move on down this is a new component that I found uh they wanted to take we
5:15
had a little tiny uh I forgot what it's called but it's the it's the default
5:22
Ford infotainment system sink uh sync yeah so it had the sync 3 but it had the
5:28
had the it like a three and a half inch screen or something like that for um it didn't really display any information it
5:34
was just an LCD screen so we definitely wanted to update that believe it or not
5:39
this whole entire panel right here is a dynan upgrade so you're going to get this whole entire piece of plastic and
5:47
this whole thing's going to be brand new you'll retain the gauges and the vents but that's pretty much it everything
5:53
else comes into a kit so it's dynaman d y na a VIN and this is the system um so
5:59
I'm going to turn the engine off and then I'm just going to show you how quickly this screen comes on it's slow
6:06
the uh so that's the wolf box just telling you that it's shutting off the
6:12
Dyan so watch how fast it starts up the first time you install it it's a little slow because it does like a little I
6:19
know startup sequence but once you've had it started up one time this is how
6:24
fast it uh comes on so it's it's almost instant
6:30
this is going to allow you to pair with your uh you know Apple cardplay for example um they use something called
6:37
zlink so when you touch zlink that's going to connect it to your iPhone um there's a couple different
6:44
screens on here if we swipe over you'll see something called camera if we touch
6:50
camera we actually have a we're not in Reverse but we now have a live rear view
6:57
camera feed from the back um um so that was a bonus I actually didn't know that it came with that
7:03
feature but then you can just touch you can go back you're at your home screen
7:09
now watch I'm going to go into reverse um this also has to be wired in as well um when I do that it's going to
7:16
give you the grids and it's going to give you the factory rear camera so really cool system
7:25
um the Google Play Store icon is where you're going to go in and get get your GPS maps so we're actually going to do
7:31
that with John and Susan um tomorrow actually but yeah this is the system um
7:39
you know believe it or not you can click apps you've got YouTube uh obviously yeah obviously you're going
7:47
to have to uh have Wi-Fi but um it's a really cool system and this
7:53
screen very high res um yeah so check it out if you are wanting to have something
7:59
that looks Factory and you're wanting to upgrade your dash uh so we're going to
8:04
cut the car off hear that wolf box turn off one more
8:10
time scopa swivel seats for the front I really like them uh they don't increase
8:16
the height too much and uh they're really robust if you um check out the channel
8:24
you'll also be able to see on a live stream um when I installed these you
8:29
want to get a good idea of how to install these there's a couple of quirks as far as having wires feed through for
8:35
the heated or electrical seats if you have them and the airbag sensors so that's all
8:42
available all right we're going to move through we're going to have you go outside and then we will uh we'll start
8:48
talking about the inside yeah so uh right here this is the
8:55
front of our kitchen Galley uh we got a couple components here um the running board we did upgraded
9:03
running boards on the driver and the passenger and we actually plumbed or did
9:10
a bracket to hold the basto
9:15
exhaust um this van isn't lifted so that's just
9:21
one thing you got to check on is any type of ground clearance you just want to be aware if you install side steps
9:29
you may have to be a little bit of careful uh but the benefit is you get nice entry and exit out of your
9:35
van coming on up we have uh I almost
9:40
think this is kind of like a a standard thing I'm going to be doing I really like ever since I did it on the other
9:46
Adventure van I really like this bamboo backing for any type of kitchen Galley
9:51
this Galley I built uh it's a one-off kitchen Galley um sometimes I use flatl
9:57
vanco but the backs are is bare so you can't you can see everything from the back you need to cover it the reason I
10:04
like the bamboo it's very dense and when you're hooking up
10:09
a uh Lagoon table some electrical outlets it just gives you a nice
10:14
structure to bolt stuff too and uh I like it because I I you can see there's screws I want this to be removable in
10:21
case I need to work on the plumbing in the future or if they need to work on anything
10:27
um but if you're looking looking at this entry level uh trim this is from a
10:32
company called AVC rig uh so I talk about that on the channel and it's just a finishing step and trim that you can
10:41
get for your flooring system and they have paper templates so that you can cut your own plywood out if
10:48
you want to or they do sell floor kits uh as a one whole unit um I like to get
10:55
the paper templates because I do so much uh modific to the floor that I'm
11:01
basically cutting up a whole brand new floor so it's better to do paper templates and do your own uh install
11:08
that's my uh recommendation but the Step is great I would always try to figure
11:15
out how to install that um yeah so the step trim comes over there goes inside
11:21
the kitchen gallery and then comes out here so you're going to have a little bit of a Nook in here uh pretty much um
11:28
it's just a enough to maybe a pair of flipflops or something like that um they have dogs so this would be a good place
11:34
to put dog leashes we do have a outdoor outlet this
11:40
is a really nice uh solid metal Outlet it comes with two plugs and then two USB
11:48
the USB are powered via the inverter so these won't be powered unless the inverter is on there are other USB ports
11:56
in the van that are always powered however these two outlets will be only if the inverter is turned on but what's
12:03
nice is this gives you a little bit of a delay if the rain starts coming in it is
12:09
water resistant so if it starts pouring down rain you got a couple minutes to come in here close that it does have a foam
12:16
gasket it's water resistant but be careful just keep it closed
12:23
protected um over here we've got a standard Lagoon Mount this is great uh
12:28
for if you wanted to cook outside um you know make coffee in the morning that sort of thing you'll notice how this is
12:34
offset so this is offset uh for the sole purpose of the the Lagoon table Mount
12:40
arm um if you don't have this offset of 3/4 of an inch the arm is going to run
12:46
into this and you're not going to be able to move and swivel the table it'll be in a fixed position so little tip
12:52
there once again this is a/2 in solid bamboo uh we just did a matte clear coat
12:58
on this and to get this finished we did about six coats of uh matte
13:05
clear I came up here and did about a 2-in um little backsplash for the
13:13
kitchen coming in here we've got two switches so we've got uh the front and
13:19
then we've got the rear so two LED light areas front and rear and
13:26
then this is the dimming section so we can dim dim
13:33
that um let's see next let's talk about I'll have you step
13:43
inside so right here we've got the uh the kitchen galy and so this is a
13:48
one-off piece um it's oneoff because we we had
13:54
uh a lot of constraints in here we wanted to have as much opening
13:59
but then also have as much space to work um they definitely like to make coffee
14:05
and uh we wanted to have as much prep area if as
14:10
possible and not only that instead of sleeping east to west we're doing a north south configuration so this panel
14:18
right here is as uh as forward as it is more more forward than
14:24
typical um yeah so kitchen Galley we got a revat sink uh we got a nice faucet
14:31
right here um whenever you're in your adventure van I always tell everyone to
14:37
you know put a put like a uh like a washcloth or something like that
14:43
because you will have some drips out of here there's really no faucet that's not going to have some residual water so
14:50
just kind of keep that in mind the power for the water pump we cut
14:57
and put a switch right here so check this this out this thing is awesome so it's very convenient you're
15:03
always going to want to make sure that your water is uh you can see the blue
15:08
light so that means your water is okay just pull
15:15
away and you just want to make a habit of turn my glasses off here you just want to make the habit of turning the
15:22
water pump off um a habit so that one your water pump is not staying primed
15:28
the whole entire time or it's on uh if you're doing a DIY and you're doing your
15:34
own Plumbing if you get into the situation where you're doing your own plumbing and uh there may be a leak as
15:43
long as your water pump is off and you're out of the van that's that's a good safe thing to have um however if
15:49
you kept the water pump on you forgot and left your van and you had that leak might not be so good so just good habit
15:55
to turn the water pump off when you're not using it okay next let's talk about the kitchen Galley uh I really like this
16:02
I designed this to be open enough so that you could get in but also wide
16:09
enough so that you could actually you know have some good working space like I said earlier the bed is a north to south
16:16
sleeping Arrangement so it does minimize how much kitchen Galley you can build so to make this
16:24
better really try to consolidate the drawers as far as having a lot of drawers but also really tight tolerances
16:32
so you can see here we've only got an inch gap between each of the drawers um
16:37
all these drawers are uh Rockler drawer slides uh it's like the Blum brand but
16:45
Rockler makes them um I really like them not only are they uh under mount
16:54
but they're also soft clothes as well now that's kind of you know soft clo and
17:00
slam latch technically don't go together but if you do them I still think it's a
17:05
good option because when you slow close the drawer the drawer doesn't slam but
17:11
having the slam latch gives you that uh gives you that Positive Locking ability
17:17
so that the drawer doesn't come out when you're driving so you can kind of come in and then positively latch the
17:24
drawer each one of these is uh I really dialed in the drawer setting so you can see there's no movement or rattling it's
17:32
just a very uh positive connection and John and sus actually
17:38
taken this uh for I think two trips now and everything's been great no rattles
17:44
no no no drawers popping out um plus
17:49
these slam latches uh the reason we did them not only I like them CU they
17:55
positively shut but you'll notice there's no knob sticking out so one requ
18:00
request that they had was that there was nothing to you know catch on your pant leg or you know hit your knee or
18:05
something like that so these are all flush nice and clean I did add a little
18:11
lip here and this just gives you a sense of depth to the kitchen Galley um since
18:16
we are working in such a tight space if we Zoom back out we're going to
18:21
check out this so I went with a bamboo door because I needed something that was
18:27
very rigid but also uh not a lot of depth on Thomas's van I did a double /in
18:35
ply to make the door strong um this one I didn't have the room I wanted to give
18:40
a area for them to have some you know cleaning supplies paper towel maybe this
18:47
little area to put some stuff we do have a six gallon uh graywater
18:54
tank uh this can fit two they just want to do one right now just easier to maintain taking one in and out at a time
19:01
behind here we've got a water drop water filter for the cold side and it's uh right behind there see if you can see
19:08
that back there yep and then we also have two uh disconnects for the water as
19:16
well um we have a hot and a cold and that's just in case if something happens to this say you goof and this you know
19:23
is outside the door and I don't know you rip it off or something you can shut the valves off and then you can use the rear
19:30
shower um faucet if you're in that situation over here with this little red
19:37
box we've got the hot water control so when the inverter is on you just flip
19:42
this switch up your hot water is going to be ready in about 15 minutes and we're using a 4G Bosch uh it's a little
19:50
mini residential hot water heater uh they're great easy to find you can pick them up at Lowe's um AOS Smith brand
19:57
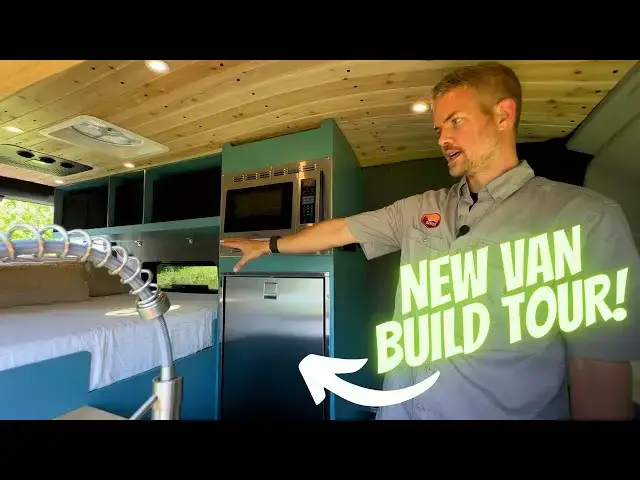
also makes them as well that's the one that's in Thomas's van let's move over here to the right hand side this is the
20:03
star of the show this is the fridge stack so um when we were spec uh
20:08
specking out the van for these guys um there was a couple requests they wanted to have and one was that the fridge was
20:14
not on the floor it was up so what I did was I just kind of took all the
20:20
measurements of stuff that we were using and did a kind of reverse engineering on where the heights needed to be so for my
20:29
curvature of the van and everything this is was the height that we went with for
20:34
the microwave uh it's 24 in wide this is a
20:40
Rec Pro and it's a convection microwave um we were thinking about going with
20:45
more a you know power friendly uh microwave takes a little bit longer to
20:50
cook but we just went ahead and said hey you know we've already got this width let's just go with the convection so
20:57
they're going to be able to cook a lot of stuff in here we got the isotherm Cruise 130
21:03
fridge amazing fridge tons of room uh you've got know little freezer box as
21:10
well always make sure that you have a thermometer you never know what's happening in your van and if you have
21:16
food in here you need to have something that makes sure that something hasn't happened with your electrical system and
21:22
the fridge is gone off and uh you the food's possibly spoiled so get a aumb
21:28
ometer for your fridge other than that this isotherm Cruise 130 it's awesome uh
21:34
uses extremely low power very efficient and the stainless steel again
21:40
just looks really cool um and then down here at the bottom we have one more
21:47
drawer and when you're designing drawers in your van if you're doing DIY make sure that all your drawers can
21:54
be are not too deep to where you can't remove them to either clean out or go
21:59
underneath here and access the electrical I've designed this drawer it's low so I can pull this out and I
22:05
can go in and do any type of electrical maintenance on the system inside here uh you probably won't be able to see any
22:10
wires but uh let me take the camera in there so let's see
22:18
here so back here in the bottom we have
22:23
see if you guys can see any of that so we got all our wires cable manag nice and neat
22:29
and we do have some room for modifications and stuff like that in the future if we want to change anything uh
22:37
but again access for your stuff so we're going to move from the fridge stack
22:43
we're going to move over here to this area so what I just did off camera was I reset the driver's seat to the swivel
22:51
position on a Ford Transit you do have to open the door to swivel the seat around just just a little Quirk about a
22:57
Ford Transit so we got this we got it moved all the way back and we went to uh we really
23:05
want to maximize the space between these two areas so that they could actually sit down and you know have some
23:11
breakfast in the morning drink some coffee um so we got a lagoon table
23:16
Mount and then what we also did is uh this table we actually uh this is one I
23:21
didn't make this one but we got this off at Etsy it's a really really nice quality table these are leafes full out
23:29
and that just allows you to just really you know maximize the area to have two plates and
23:36
actually have a space to eat but if you don't need the space you can pull
23:41
something back and then have a little bit more room it's you know you got different
23:48
options um so we got a lagoon table Mount here and then we also have one on the passenger
23:56
side all right so now we got this this out of the way let's check out this this
24:01
is their jump seat that I built this allows someone to sit here
24:07
hang out you can have you know three people comfortably seated underneath here is their uh
24:14
trolino and so this is the uh we get the lid taken off but this is
24:19
their toilet uh this is the medium size if you guys are wondering so it's the
24:25
medium size as far as depth and width and you guys can look up those specs online there's a lot of storage space in
24:32
here as you saw for toilet paper cleaning supplies stuff like that but
24:37
yeah this is just uh you know gotten good feedback as far as they love using
24:43
this space and uh as far as how big it is they're really happy with how much
24:48
room they have to actually you know their feet are kind of not completely in the way we decided not to do a window
24:56
here just because this space is very uh tight and
25:03
um right here is where the Ford Transit uh body is so you know unless you're
25:09
going with an Arctic Turn Style window and doing a lot of modifications um we
25:14
kind of for uh foro the window up here we have these lights
25:20
throughout the van we got three of them they're really nice so they have uh different settings they have a USB port
25:27
in under here for charging and then at night time this is something they really enjoy is that you
25:35
can leave this on at night time if you need to use the restroom and this just keeps this place
25:40
lit red light uh it's really nice at night it's not kind of in your face um
25:46
so they just kind of leave that on it's really nice we wrapped all the Ford
25:55
blobs and uh you guys can kind of see the beginning of this Cedar ceiling so
26:01
it's quarin Cedar it's a naughty
26:06
Cedar got some nice character to it um okay so I'm going to uh show you
26:14
guys this right here this is the the bed below the bed we have access to our
26:20
garage so they have dogs in the van and one thing they wanted to do is
26:26
make sure that the two areas were separate gear storage versus where the dog so that they wouldn't uh they
26:32
wouldn't you know kind of come and go so this door shuts seals
26:39
off that area it's also for conditioning the space so if you have that secluded
26:45
you're only conditioning with air conditioner the heater the bed area in this area and not the garage
26:52
area this bed is a uh Queen so fulls size queen
26:59
and on the sides since we're doing North and South we got about 6 in of storage space on the sides of the bed both on
27:06
the driver and passenger side again north to south so they're going to sleep like this and hop in and out of the bed
27:14
right here I remove this because it's more comfortable they do have a stool by
27:19
the way so that's how they're getting in here they're not they're not jumping in and out every night this relief right
27:25
here is really nice cuz when you're getting into the bed you don't want to hit this hard wood it's just not
27:32
comfortable so rounded edges keep this open um queen size we added lrak on the
27:40
left side for a bunch of hanging bags and gear kind of pretty much whatever they want we got the crl aw 1033 awning
27:48
style Windows got that on the passenger and then we also have on the driver's side and uh so while you're there
27:58
uh let me show you let me show you this this is the uh
28:06
overhead storage and this is a one-off piece as well so I built this um because we
28:12
needed such a custom design uh we needed to be able to have these boxes right
28:18
here I have five of them and a specific dimensions so this is what we went with
28:24
where is it going to go with uh bung cords to hold this in um but I designed
28:30
it in a way to where this actually locks in place so when you do that it unless
28:37
you lift the basket you can't get it out um due to the the height so it goes
28:43
almost right up to the top as you can see and then you can see down here we got a minimal Gap so it actually has to
28:49
come out and over to come out so they're
28:54
secure they haven't had any issues with their uh two trips they've taken
28:59
right here we've got a Max fan um this is a 7500 K so it's the uh the topof
29:06
line one that's got your auto open at 78° it's got a wireless remote it's
29:13
really nice Ed the dark smoke tint back here we have the pneumatic
29:20
48volt X2 rooftop AC and again yes it's 48
29:26
volts we're going to talk about that when we get to the the ecoflow power system um it's incredible starts up very
29:33
quickly cools down the van very nice um and speaking of cooling we have
29:40
havock wool throughout the whole entire van the whole entire ceiling all the walls um pretty much anywhere we could
29:47
stuff it and over there you can see uh we did four-way stretch carpet wrapping all the
29:53
pillars in the rear just to really clean it up the passenger has has a reading
29:59
light with a USB outlet and on the driver's side we have a light with the USB outlet it's the same one with the
30:05
white light and the red light combo we're going to come over here and
30:13
uh this is one thing I forgot to show you guys we have a storage shelf bamboo
30:18
storage shelf that I uh built really nice and it actually bolts into some Riv nuts that I put in the van but this is
30:25
uh another customer request for some more storage you know as much storage as
30:30
you can get in a van before we swing on back to look at the power we have one more Outlet right
30:37
here so this is a popup Outlet again same thing two household plugs two USB
30:43
USB is only on when the inverter's on these USB lights are always
30:50
on so you just push this button push it down and it's nice you know keeps this from uh in case you had accidental spill
30:57
it's covered all right guys is time to hit the back
31:03
of the van and check out the ecoflow power system a lot of people have been asking me about this online and so I'm
31:10
going to cover a couple of those questions that you had and go over some
31:16
features um so we'll do uh the quick things first
31:23
this is uh behind here we have that Bosch 4 gon hot water tank in the middle
31:28
here we have the Northwest conversions uh 36 gallon water over the wheel well
31:34
water tank we've got a little window here and hold the camera right there I'm
31:40
going to turn the water pump
31:45
on so you guys can see when the water pump is on we've got a backlight to
31:50
indicate uh where the water level is in here so I can see that it's about right there where my fingers it finger is
31:58
easy way to not have to wire in a gauge and uh it's hard to see on camera but trust me you can see a difference in the
32:04
water line this is an emergency switch so if you're back here and you're
32:09
washing the dogs down or doing something having an outdoor shower and say you you walk away and I don't you break the
32:16
water line and there's water going everywhere you can just quickly go here turn the button off disconnect the power
32:22
to the water pump just a nice safety feature the way those circuit's wired you'll always need to have this rear
32:29
button pushed in to complete the circuit but stay right
32:35
there now when I press the in the sink button the light goes off so the first
32:44
switch on the sink is the main it's the master and this would be the second one to where you can uh Auto disconnect it
32:52
to be safe both of these are the aqua system uh this is a very high-end water
33:00
connection system um it's usually for very high-end homes uh we're using it in a van because it is a simple push and
33:06
twist connect when you twist out it has a gasket a double gasket so it seals so
33:12
you don't get any drips so this is the city water fill Port here this is the
33:17
wash down Port here uh we have a scandic mixing valve so you've got off on and then you twist
33:26
for hot and cold very clean very minimal design like
33:31
it we went two pieces of LR and uh what we've done is I've set
33:38
the spacing to where in the future if they want to buy a flatline vanco pull
33:43
out draw slide like we have in the glacier build um all they have to do is
33:48
bring back to me we have two mounts that we have four mounts we install and then we put the tray in into
33:56
these um and then you got these you know little L track things you can put around
34:03
you know wherever you want to need them uh on our builds we always Bolt the
34:08
L TR through the chassis so it's not even though it's screwed into the floor each rail has two
34:15
bolts through the chassis to really make sure that you uh you know we do it right it's very strong all right so inside the
34:22
van we have the 5 KW hour ecoflow battery this is going to going to be
34:28
equivalent to a little over 400 amp hours of lithium iron phosphate so four
34:34
car size batteries and they put it in a really nice footprint of Just One battery now it's not a 12volt system
34:41
it's a 48volt system and uh the 48 volt system uh it's all
34:48
enclosed you don't have to worry about messing with 48 voltage the power hub over here this is where it's going to
34:55
change everything for you we're going to talk about this short power here in a second but uh keep an eye on the ecof
35:01
flow so the powerhub is going to take care of doing all your power inversion
35:07
so it's going to have the inverter for 110 it's going to have your converter for 12vt it's also going to have your uh
35:15
Shore power conversion for when you're charging up a Shore power it's going to auto switch all of that you have
35:22
independent on and off for your AC your alternating current circuits as well as your DC circuits so if you want to have
35:30
your DC and AC off you can just toggle both switches when you leave the van come back in turn them both
35:36
on uh we have a I haven't seen this so I I guess I could call it like a
35:42
unique setup I have the first alternator input
35:47
populated and then I went ahead and went with a second alternator input now this is not a second engor Al second engine
35:55
alternator there's only one alternator in this van but by combining this first one and this
36:01
second one they're independently fused under the driver's seat but we have 60
36:06
amps plus 30 amps so when they drive they have a total of 90 amps to charge
36:13
this system while they're driving plus whatever solar we have um we have 580 watts of solar so uh we've done a couple
36:19
test drives this stuff this thing is awesome it it went from 85% to 100% And
36:25
probably uh you know 8 10-minute driver in the block full sun
36:31
so very efficient system the third one that is our solar
36:37
input for our 580 watts of solar up top we've got uh Rich solar and we have the
36:43
unaka and explorer. life uh collaboration roof rack uh from unaka
36:51
and then we have these solar panels that are recommended from explore. life to complete the kit and that's what we're using for our roof rack and solar panels
36:58
we talked about the pneumatic AC 48 volt uh rooftop air conditioner this this
37:05
first one is the battery cable the second one is actually directly connected to the pneumatic cooling 48
37:12
volt rooftop AC so this is a direct one to one with the battery and when you
37:18
turn the ecoflow system on it's a automatically going to turn on the automatic cooling um it is fused up in
37:25
the ceiling uh you can can't access it through the the vent but the fuse and
37:31
the ceiling is how this circuit is fused so there's no fuse here uh between this cable the fuse is in the ceiling uh
37:38
right before the positive connection going into the pneumatic um last but not least you have
37:45
the shore power so we're going to uh we'll hop around here and show you the shore power in a second um the back two
37:53
cables back here that you can kind of barely see that is your power for your
37:59
uh smart distribution panel so this one and this one provide your AC and DC
38:07
circuit power to this box so we're going to open this
38:13
up okay and what I love about ecoflow everything is just so clean we've got
38:18
our AC circuits here so we've got both of our outlets and I've wired them to
38:25
receive you know these are 30 amp circuits um so these first two so the outside
38:30
Outlet the inside Outlet we have our microwave and we have our hot water heater so this is uh super clean again
38:38
you can togg these on and off or just keep them on and then over here we have our DC circuits and see there's all the
38:44
DC circuits in the van um all appropriately fused and again this is ecoflow again is
38:52
just very very clean streamlined system we have two garage
38:58
lights uh that's something that uh John requested and they work really well he
39:04
really likes them before we check out the shore power let's talk about the bed system so what I did is uh I installed
39:13
the IKEA bed rail system so essentially one of these comes with an IKEA bed and
39:20
you can actually buy all the brackets and uh Runners online so you get the brackets off of Amazon and then you go
39:27
into the Kia store and you can buy these adjustable bed rails now one rail
39:33
supports two adults we have five so we're not worried about strength or
39:38
anything like that um what we like is if they want to take the bed panels out
39:44
this is two panels they are removable the rails are also removable so you can
39:49
reclaim your van and actually use it to haul some stuff if you have some bigger things that you need to
39:55
move um yeah let's back out we're going to talk about the rear of the van uh
40:00
let's talk about the shore power so over here we've got our Furon 30 amp uh Shore power plug so stay right
40:13
here so a recommendation to any van lifers out there get a plug that converts your 30
40:21
amp to a 15 amp plug but then also buy the one now this is expensive but buy
40:26
the one that has this built-in surge protector and circuit analyzer looks like a lot but it's going
40:32
to save you a lot you can plug this into an RV Park Campground and you can test
40:39
their circuit before you actually plug this in into your van so if they have uh
40:45
you know bad ground or bad voltage or or simply they they wired the circuit in
40:51
correctly you'll know before you actually hook it up to your van so this is just going to plug right into here
40:58
and then you just spin this to to lock it on um and then the blue light will come on Blue will come on and you'll be
41:07
ready to go and charging outside the van nice and clean the kna roof rack is just it's a great
41:14
install we've got a video on that very nice easy going uh very low
41:21
profile awning windows on the outside uh there's that running board for the driver's side
41:31
now the back of the van we didn't do any Windows um really focused on you know
41:38
maximizing the insulation in this van so we just uh these are ABC rig panels that
41:44
you can upholster so we bought the panels we upholstered them in the shop
41:50
um we use Marathon heather gray fabric heather gray is the color or gray
41:56
Heather um yep so we did that to both sides and throughout the van yeah and
42:02
throughout the whole entire van so all the van panels inside the van are the ABC rig uh uh essentially under layment
42:10
it's quarter inch and they CNC cut it out and then you you know we at the shop will wrap
42:17
the panels in whatever fabric uh you like whatever color all right we're going to shut the
42:24
door and um
42:30
oh yeah that's what I want to talking about this is part of the ABC rig trim
42:37
so again it's just a really nice way to cleanly or clean up the rear of your
42:42
van uh I even went I even go to the links of finding these little caps so
42:48
that you guys can still access your spare tire from
42:53
Ford and uh got a little cap clean up that so it doesn't even look like it's not even
43:00
there and um yeah let's see we'll shut the doors here give you guys one more
43:05
view you can see how the lights pretty good right
43:16
now um this is the last thing I wanted to show you this is the rear view camera
43:22
from wolfbox so up here that's the Ford factory camera so that is what you saw
43:28
on the Dyan that's where the Dinan feed's coming from this is where the wolf boox feed is coming from down here
43:35
so you got two cameras and um all whe drive
43:43
van and finishing off with the Odyssey custom van sticker and guys that is going to do it
43:49
for this van tour um if you have any questions on John and Susan's van whether the stuff that we used in the
43:55
van uh any type of products or something like that uh put those in the comments I'd love to answer those questions if
44:01
you're interested in getting your own custom van conversion by me Odyssey custom vans I'd love to uh hear from you
44:09
you can go to Odyssey customs.com scroll down click on the appointment link you can pull my calendar find a date and
44:15
time that's most convenient for you and we can hop on a phone consultation and talk about your uh Your Own Adventure
44:22
van build hey guys hope you enjoyed that van tour of John and Susan's build if if
44:27
you're doing your own DIY van build then I have something that is really I think you'll find uh very helpful it's called
44:33
our DIY van build cheat sheet so over the last three years of doing this van business I have uh all of my Amazon
44:40
purchases I have taken them and put them into an Excel sheet organized it from anything from electrical fittings
44:46
bracket screws anything I do with 8020 water pumps solar panels um a lot of the
44:52
Ry compon components that I use and I've taken all that I've organized it and and
44:57
um I've put it into this sheet and guess what it is completely free and it is for you guys so you can download this list
45:04
of over 250 curated items uh completely free all you have to do is go to Van
45:09
Builder hq.com or you can click in the link in the description below you're just going to put your name and email
45:15
address in uh click download it's going to go right to your inbox and I really think it's going to help you out once
45:20
again it's called the DIY van build cheat sheet and uh I think it's going to be great check it out um if you guys
45:27
have any other questions put those in the comments below other than that we'll see you guys in the next
45:33
video all right guys that is going to do it for this van tour um really enjoyed this one uh oh the
45:41
paint color I need to put that in the description this paint color was is awesome uh worked out really well in
45:49
this build but um yeah all right guys that is going to do
45:55
it for this tour thanks so much for watching and we'll see you guys in the next video
46:01
[Music]
#Campers & RVs
#Motor Vehicles (By Type)
#Trucks, Vans & SUVs
#Vehicle Parts & Services
#Vehicle Parts & Accessories
#Travel & Transportation
#Custom & Performance Vehicles
#Land Rover
#Vehicle Specs, Reviews & Comparisons
#Motor Vehicles (By Brand)
#Transportation