0:00
hello and welcome to tutorials point my
0:02
name is Faz and we are continuing our
0:04
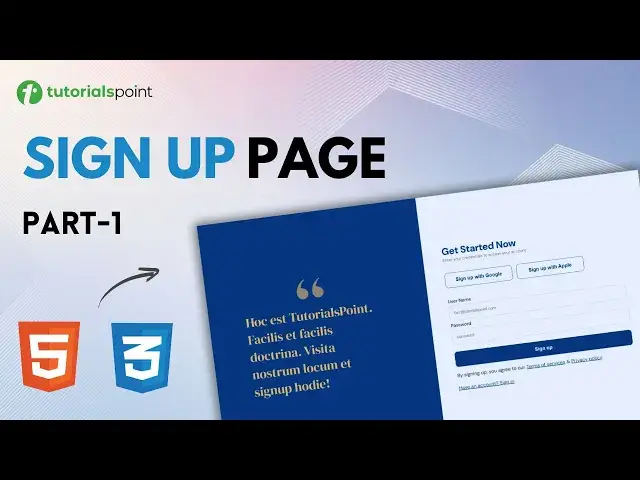
CSS series and in this video we are
0:06
going to build this beautiful sign up
0:08
landing page using HTML and CSS so let's
0:11
not waste time and get started so I have
0:15
already opened vs code and I have
0:16
created an index.html file as you can
0:18
see this is the file right here we also
0:20
have a style. CSS file which is EMP for
0:23
now and also in the images folder I have
0:25
a image of this icon basically that we
0:28
are going to use in our assign a landing
0:30
page so let's get started with the HTML
0:33
portion first so I'm going to quickly
0:35
open the image of the final product that
0:37
is this one and we are going to discuss
0:39
how we are going to make this uh page
0:42
the sign up page so what I'm going to do
0:44
is let me just highlight this one for
0:47
you quickly mark up okay so what we're
0:50
going to do is let us just understand
0:51
once let me just select a different
0:54
color for the pen so basically this one
0:56
is going to be the container so this
1:00
entire thing we will call it a container
1:03
okay now this container we will divide
1:05
it into two divs so I'll say something
1:07
like this this will be our d 1 and this
1:11
will be our da two okay fine what is
1:14
going to be next is that we are going to
1:17
have two divs here we can
1:19
see now basically we will call this div
1:23
left and let's call this D right okay so
1:27
we are basically planning how we are
1:28
going to design this and then then here
1:30
inside the first Tu inside the left Tu
1:33
we are going to have this Tu right okay
1:36
so we will divide this into two divs
1:38
first will be a div that will hold this
1:40
icon and second will be the div that
1:42
will hold this uh heading text portion
1:45
similarly for the right one what we are
1:47
going to do is this is going to be a
1:49
heading tag this will be a paragraph tag
1:52
and these two buttons of sign up with
1:54
Google and sign up with apple we will
1:56
just uh basically have them in a d and
2:00
we are going to use of course Flex works
2:03
and then uh for a separate de we are
2:05
going to have this form element which
2:07
will have username and input for it and
2:10
then a password label and input for it
2:12
and a submit sign up button and then we
2:15
are going to have a paragraph tag for
2:17
these two also we will have uh link tags
2:21
here for the links one so this is the
2:24
overview of how we are going to write
2:26
the HTML and CSS for this one so let me
2:30
just close this and I'm back here so
2:33
we'll start with the HTML and I'm going
2:37
to write a section element and for this
2:39
section element as we talked about
2:41
earlier we're going to have two divs so
2:45
I will have two divs and the first D
2:48
will have a class of left and the second
2:51
D will have a class of right now first
2:54
we're going to design this left page as
2:57
we talked earlier this left side of the
3:00
page we are going to design and that has
3:01
this icon this blue color and some
3:04
heading text so inside our left de the
3:07
first thing is as I told you earlier we
3:09
are going to have two divs here so the
3:11
first div is going to be for our icon so
3:13
I'll give it a class of Icon as well and
3:16
in this we are going to have a image
3:18
element and for the source the source is
3:20
going to be images and inside images we
3:22
have this icon.png for the alternate tag
3:25
we can write icon here and then we are
3:29
going to have a second D here and let's
3:31
give it a glass of banner
3:35
heading and we can have any text here
3:38
let me just copy paste the text quickly
3:42
we're going to have a paragraph tag and
3:44
inside we will have this text and let me
3:46
save it and I'm going to start my server
3:49
to start the server I'll just click on
3:51
go live so here our website is live as
3:54
you can see we have this icon and some
3:57
text now let's go back to vs code to
3:59
continue writing our HTML now next up we
4:02
are going to design our right side of
4:04
the page now firstly inside right side
4:08
we are going to have a heading so I'll
4:09
write a H1 tag and the text will be get
4:13
started now next up we are going to have
4:16
a paragraph tag and for the paragraph
4:19
tag let me just quickly bring the
4:21
text something like this enter your
4:24
credentials to access your account uh
4:27
next up after this is we have we are
4:29
going to have a d all right for our
4:32
social media buttons so I'll write D and
4:34
give it a class of social
4:38
buttons and inside social buttons we are
4:40
going to have two button elements so let
4:43
me just copy paste now I'm going to give
4:46
them a class of button so that we can
4:48
Target them easily later on using CSS
4:53
button will have a text of sign up with
5:00
Google and the second button will have
5:03
the same text of sign up with sorry sign
5:11
apple okay right so after this St we are
5:15
going to we are going to have a form
5:18
right so I'll write another D and I'll
5:20
give this inside this D I will have a
5:23
form element and inside the form element
5:26
we don't need this action attribute that
5:28
is used for packing if we submit the
5:30
form we're only creating the front end
5:32
right now inside this form element we
5:34
are going to have some labels and inputs
5:37
so firstly I'm going to start with the
5:38
first label and this one is going to be
5:42
user name and then we are going to need
5:46
a input for this so the input will be of
5:49
type text so a shortcut here is input
5:52
and then text hit enter and as you can
5:54
see we have an input of type text right
5:58
and we don't need need this
6:01
name but we'll be needing this ID
6:03
attribute here because this will link
6:05
this input with this label so for this
6:09
uh username label I'm in the for
6:11
attribute I will write something like
6:13
username and the same text should be
6:16
used in the input so for the ID as well
6:19
I'll write this username this will link
6:21
this label and input element
6:24
together okay after this we can have
6:27
something more for example we will have
6:31
placeholder and we can have any email
6:40
this let me just close this Explorer
6:43
okay so this is going to be our first
6:45
input and then uh for the password we
6:48
are going to have a second input one so
6:54
password and here we're going to write
7:00
and for this we will have a input that
7:02
will be of type password itself hit
7:05
enter and we have this one as well and
7:08
the ID will be same as the label that is
7:10
password and placeholder can also be
7:14
there and we can have some starts as
7:17
placeholder now after this placeholder
7:19
what we can do is we need a submit
7:21
button so I will create a button and
7:24
this button uh is going to be of type
7:30
and we are going to write here something
7:32
like sign up and we can also give it a
7:36
class so I will give this button a glass
7:38
of BTN so that I can Target this button
7:41
as well as these buttons right here all
7:44
right what is next after this
7:46
form what we are going to do is we need
7:49
some more elements so after this form
7:52
I'll write a paragraph element and the
8:13
privacy policy we'll be needing another
8:19
well or we can use the link tag directly
8:22
here and we don't need any hrf href for
8:25
that one so it will be have an account
8:29
Cod question mark and then sign
8:32
in so let me just save it quickly so
8:36
let's go to browser to check and as you
8:39
can see we have all these elements right
8:41
here now it's time to design this so
8:44
let's go back to visual studio code and
8:46
I'm going to open my style. CSS right
8:49
here side by side so that basically we
8:51
can see and edit our elements
8:54
accordingly let me close the Explorer
8:56
that will be enough for this video in
8:58
the next video we will continue
9:00
designing our sign up page using CSS so
9:03
make sure to subscribe to the channel
9:05
hit that like button and I will see you