live_tv
Livestream Starting Soon
00
Hours
:
00
Minutes
:
00
Seconds
Up next in 10

How To Create a Cloud-Based POS System Using ChatGPT AI (html, css, php and MySQL)
Jan 31, 2025
How To Create a Cloud-Based POS System Using ChatGPT AI. Ready to revolutionize your business? In this comprehensive guide, learn How to Create Your Own Cloud-Based POS System Using ChatGPT AI!
With step-by-step instructions on implementing essential coding languages, including HTML, CSS,PHP, and MySQL, you’ll be equipped to boost your sales and manage your inventory like a pro!
This video is perfect for entrepreneurs, developers, and tech enthusiasts who want to leverage the power of AI in point-of-sale systems. Don’t miss out—hit that PLAY button and unlock the future of retail management! Subscribe for more AI-driven project tutorials! #POSSystem #ChatGPT #WebDevelopment
Show More Show Less View Video Transcript
0:00
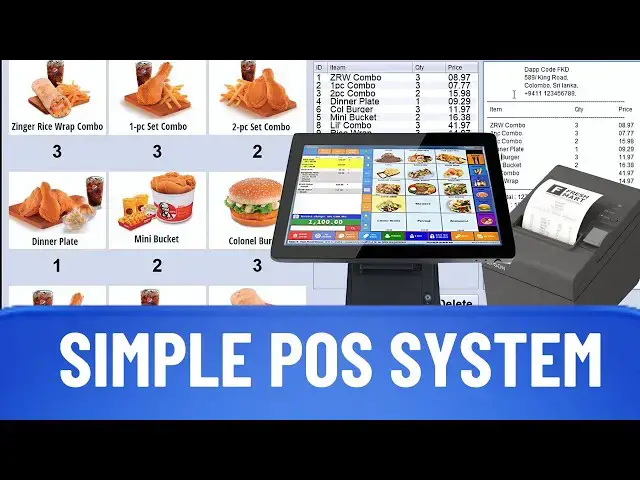
I built this POS system using chat GPT
0:02
and today I'll show you how you can
0:04
develop a system like this with HTML CSS
0:07
JavaScript PHP and SQL but without
0:09
needing to learn any of these
0:11
programming languages this one is not an
0:13
already built script trust me by the end
0:15
of this video you'll have all the
0:16
knowledge you need to start offering
0:18
Billing System development services and
0:20
make money from it you can use the same
0:21
knowledge to build another website this
0:23
video is packed with valuable
0:25
information that you typically find only
0:27
in paid courses so don't skip anything
0:29
and I invite you to stay with me until
0:30
the end of this video and don't forget
0:32
to subscribe to Radell for more for a
0:34
POS system we need at least two pages
0:36
one for billing and another for adding
0:38
items to the billing page first let's
0:40
work on creating the insert page let's
0:42
go chat GPT and type I want you to act
0:44
like a cloud-based system developer
0:46
create a page to insert a few data into
0:48
the database create HTML form to input
0:51
category name price and an image get
0:53
that data using JS and send it into the
0:56
PHP code using Ajax method insert all of
0:59
that data and the path with the name of
1:01
that uploaded image into the stock Table
1:03
after inserting successfully give a
1:05
success message as an alert give me HTML
1:08
CSS JS and PHP codes also I need SQL
1:12
code to create that stock table if you
1:14
don't have a database or any idea about
1:16
that just write database logins the same
1:18
as I did here in general cloud-based
1:20
systems have three main parts the front
1:22
end back end and database the front end
1:24
is the user interface you can learn
1:26
front end design from my previous video
1:28
in this video I will focus m mainly on
1:30
the backend and database handling we now
1:32
have some code and it's time to set up
1:34
the environment for our project first of
1:36
all we need zamp for this project if you
1:37
don't have zamp yet I explained how to
1:39
install it in one of my previous videos
1:41
so I won't go over that again now let me
1:43
copy the HTML code I've created a folder
1:45
called pause in the root directory of
1:47
the zamp server in this folder I created
1:49
an index.html file and pasted the HTML
1:52
code into it we also need to create a
1:54
file named insert.php as chat GPT
1:58
mentioned and paste the relevant code
1:59
there as
2:04
well next we need to create a folder
2:07
called uploads as chat GPT mentioned now
2:09
that we've created all the files it's
2:11
time to set up the database go to Local
2:13
Host before this step make sure you have
2:15
both the Apache and MySQL servers
2:17
running in Zam P if you're unsure how to
2:20
do that watch this video first once
2:22
you're ready go to PHP my admin and
2:24
create a new database named POS now
2:27
let's create the stock tapable copy the
2:28
SQL code from GPT go to the SQL tab in
2:32
PHP my admin paste the code and run it
2:34
you should see the stock table created
2:36
successfully now let's test the insert
2:37
page open a new tab and go to the Local
2:40
Host POS let's take a look at the insert
2:42
page I'll add an item category one
2:44
testing item one price 160 and select an
2:47
image now let's insert it the item was
2:49
added successfully let's check the stock
2:51
table a new row has been added and the
2:53
image is saved in the uploads folder
2:55
here it is so the item insertion process
2:56
works perfectly let me quickly add a few
2:58
items
3:07
now we can start building the billing
3:08
page this part is crucial and has lots
3:10
of valuable information for you so stay
3:12
focused create the billing page split
3:14
the page into three sections Flex
3:16
Direction row get all the categories
3:18
from that stock table don't duplicate
3:20
categories and print them in section one
3:22
when clicking on one category get all
3:24
the items that belong to that category
3:26
and print them in section two as cards
3:28
with images of each item when loading
3:30
the page print all the items of all the
3:32
categories when clicking on one item
3:34
card add it to the bill bill should be
3:36
created in section three give me HTML
3:38
CSS JS and PHP codes if you're
3:41
interested in learning about prompt
3:43
engineering and how to communicate with
3:45
generative AI effectively give this
3:47
video a like if this video gets more
3:48
likes I'll make more videos like this
3:51
our codes are ready you know what to do
3:52
next I'll copy the HTML code create a
3:55
file called billing. HTML and paste it
3:58
there do the same for the PHP code
4:01
create the PHP files then copy and paste
4:03
the code into them just make sure you
4:04
name the PHP files exactly as chat GPT
4:18
mentioned after preparing these files we
4:21
can check our billing
4:26
page go to Local Host pulse billing HTML
4:30
our items appear in the middle and the
4:32
categories are on the left click on an
4:34
item and you'll see it adding to the
4:35
bill now let's click on a category it
4:37
looks like it's working fine but it's
4:39
not complete yet we still need a
4:40
checkout button to print the bill let's
4:42
add that next upgrade the code add the
4:43
checkout button to the end of Section 3
4:45
when clicking the checkout button want
4:47
to print a receipt just give me only
4:49
upgraded code lines then I can place
4:51
them into related
4:55
locations we have everything we need to
4:57
add the checkout button now we just need
4:59
to place it in the correct parts of the
5:01
code chat GPT has given us all the
5:03
instructions so it's easy to find the
5:05
right spots when you try this yourself
5:06
your results might not be exactly the
5:08
same as mine so don't copy me exactly
5:10
just focus on understanding the method
5:12
it's almost
5:20
done now we can check the update go to
5:22
the billing page and refresh it it's
5:24
best to refresh by pressing both control
5:26
and F5 let me select a few items and
5:28
press the checkout button there we go
5:30
our bill is ready to print you can now
5:32
select the printer here and adjust the
5:33
settings
5:35
too okay now we can insert items find
5:37
them by category and add them to the
5:39
bill by clicking we can also check out
5:41
and print the bill these are the basics
5:42
of a POS system you can see that this
5:44
POS system has more features and looks
5:47
good as well you can also develop this
5:49
system further by upgrading it bit by
5:51
bit I won't go into too much detail now
5:52
since the video is getting long but if
5:54
you want to learn more I'll cover it in
5:55
another video so don't forget to comment
5:57
below and subscribe
#Management
#Retail Trade
#Retail Equipment & Technology
#Enterprise Technology
#Programming
#Affiliate Programs
#Helpdesk & Customer Support Systems