Up next in 10



English Wheel Plans:
https://www.proshaper.com/tool-designs/
Our Amazon Storefront:
https://www.amazon.com/shop/proshaper
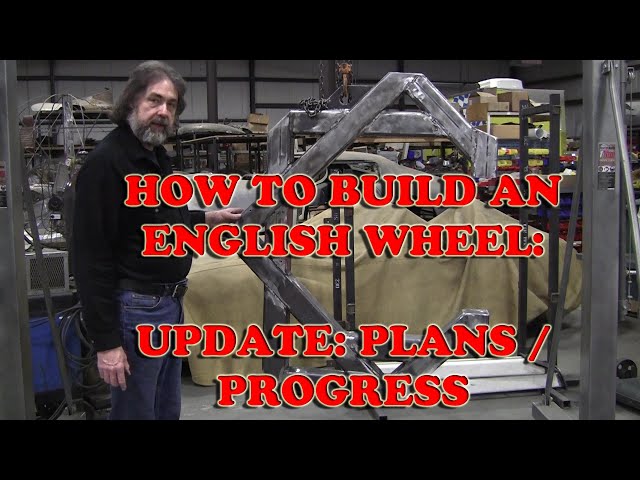
Here is another update discussing the plans and showing the progress Frank has made over the last week. We hope to film the complete build next week.
Email: [email protected]
Website: https://www.proshaper.com
Facebook: https://www.facebook.com/ProShaper/
Instagram: https://www.instagram.com/proshaper/
Twitter: https://twitter.com/ProshaperM
Linkedin: https://www.linkedin.com/company/proshaper/
Show More Show Less View Video Transcript
0:01
you
0:07
[Music]
0:17
hi it's ray from proshape
0:19
sheet metal and this is racially pne's
0:20
Pro shaper workshop and today we're
0:23
talking about the crochet per new tube
0:27
frame English wheel and this is the
0:30
deluxe frame plan kit this is all the
0:35
drawings you'll get in the deluxe kit
0:37
and also these two nice aluminum name
0:42
plates you can glue them on or screw
0:45
them on these are the individual
0:47
drawings you'll get these are the angles
0:50
of the legs this is the front leg and
0:53
these are the real electing goals and it
0:55
gives you the length there you can use
0:57
it at all actual size and angles so you
1:01
can copy all this and these are the foot
1:04
pads this is the rear foot pad and this
1:06
is half of the front foot pad and you
1:09
can have those cut out or you can cut
1:11
them out yourself here's the lifting
1:14
ring that gets welded in at the top the
1:17
lifting ring gets welded in right here
1:19
you'll see it in a minute and this is
1:22
the mount pad for the front leg and
1:24
these are the all the block off covers
1:30
for where the tubes they're going to be
1:33
open so you can close all the tubes up
1:35
and this is the bolt pattern here that
1:38
goes on the front leading edge of both
1:42
the top and bottom for the adjuster and
1:44
the lower yoke assembly now how you can
1:48
use this is in this case I have some old
1:52
40 aluminum strips that I cut four
1:54
inches wide and I cut them longer and
1:58
then made them fit the drawing like this
2:01
and the drawing is all numbered so this
2:05
is a number four template now you can
2:08
take that template and that'll give you
2:10
the exact size of what you have to cut
2:13
out of the four inch tubing so you can
2:15
make a paper template off of this master
2:19
drawing label them all with the numbers
2:22
cut all your pieces and then you just
2:25
have to put it on a flat bench and start
2:28
welding it up and you can use this as a
2:30
reference for
2:32
with the welding should be because
2:34
whenever you weld it'll move if you
2:36
don't have a way of clamping or
2:38
confining it it'll move but you can
2:40
always check with the measurements the
2:43
actual measurements here this is
2:45
full-scale everything is full-scale so
2:48
it makes it very easy to make the plans
2:50
so now I'm going to show you where we're
2:52
at on that English wheel that Frank's
2:55
been getting prepped for paint so we'll
2:57
take a look at that okay this is the
3:00
prototype English wheel with the mid out
3:02
of the four inch square tubing and Frank
3:05
my volunteers been doing it and this
3:08
week he's finished grinding all the
3:11
wells some of them a MIG some of them
3:14
were TIG and he's following up the
3:17
finish grinding with a little orbital
3:19
Deepti tail sand that I like they come
3:21
from Harbor Freight does a great job of
3:24
smoothing stuff like this out nice with
3:26
a t paper and Frank also has all the
3:30
attachment points for the legs here
3:33
they're two 5/16 18 threads I believe
3:36
here and his attachment points also
3:39
underneath here for the front leg and
3:42
these are the attachment points here for
3:45
the upper yoke and the lower yoke and
3:47
all those bolt pads and everything come
3:49
with the deluxe plan for the English
3:52
wheel when you buy the deluxe plan so
3:55
this is going to get all bondo'd up and
3:58
smooth and then painted with a hammer
4:01
finish rust-oleum black and hopefully
4:05
sometime next week we'll get it all done
4:07
except for attaching the yokes and and
4:10
the bottom adjuster but the frame will
4:13
be finished and when Frank gets this
4:17
frame finished the first thing we're
4:18
going to do is right away start on the
4:21
second one and the second one will be
4:24
built on camera every step we're going
4:27
to try to film every step so that it
4:30
becomes very easy for anybody that wants
4:32
to build one of these to do it at home
4:34
also and we'll show like I mentioned
4:37
before we'll show the different ways you
4:39
can cut all these joints and we'll try
4:41
to simplify it as much as possible
4:44
so as I said earlier in another video
4:47
I'm going to try to do these tool bills
4:50
as much as possible and if you want to
4:53
continue to see this great content you
4:57
can support the channel by purchasing
5:00
the plans you can also get a t-shirt
5:03
they're available right on every video
5:05
used on the bottom of the video there's
5:09
a link to teespring and there's several
5:10
different t-shirts that we sell so
5:13
thanks for watching we hope to keep our
5:16
content quality high we're expanding as
5:20
much as possible but we need your
5:22
support thank you very much it's
5:25
racially
5:26
[Music]
Hobbies & Leisure