Up next in 10



https://www.proshaper.com
Our Amazon Storefront: https://www.amazon.com/shop/proshaper
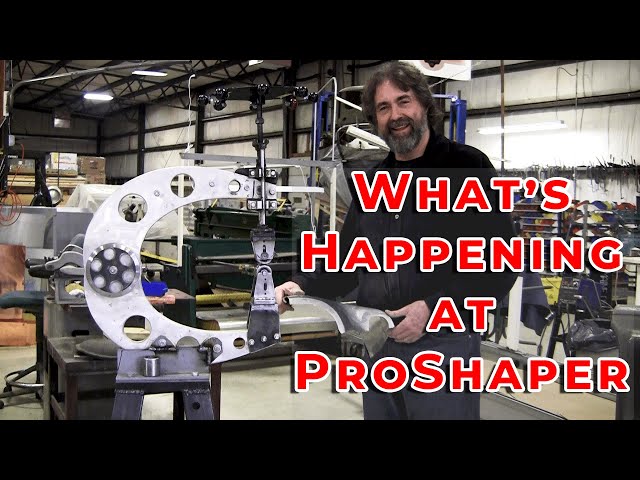
What's happening at ProShaper
Since we've been gone for a little while, we thought you would enjoy seeing what's been happening in the shop for the past few months. Wray shows what our students have done with the Alfa Romeo that Ed brought in. Then we show you the progress being made on both the fender of the Cadillac and also the chassis. We walk through more progress a student has made on the scout fender and also show you a neat little trick towards the end. We hope you enjoy it!
Email: [email protected]
Website: https://www.proshaper.com
Facebook: https://www.facebook.com/ProShaper/
Instagram: https://www.instagram.com/proshaper/
Twitter: https://twitter.com/ProshaperM
Linkedin: https://www.linkedin.com/company/proshaper
Show More Show Less View Video Transcript
0:01
[Music]
0:06
hi it's ray from pro shape a workshop in
0:08
child massachusetts and we had a big
0:11
long hiatus we did a rust removal video
0:13
on the cadillac chassis last week this
0:16
week we're only going to do one video
0:18
right now we're going to do a little
0:19
recap of what's been going on in the
0:20
shop
0:21
i did i think two or three videos on
0:24
this project here this is a project
0:25
we've been using at the class
0:28
it's a
0:29
1950s design that one of my students
0:32
ed from uh san diego area
0:35
he's a retired medical doctor he's 74
0:38
years old a lifelong car guy
0:41
no i don't know nothing lifelong i think
0:43
last 25 years or so and
0:46
he fell in love with alphas he's got a
0:48
whole bunch of alphas and he had the
0:50
ambition to
0:52
draw his own alpha up on a napkin and
0:56
he looked at all the classic designs
0:57
from the 50s and he came up with this
0:59
beautiful design you see here
1:02
and it's taken him quite a while to do
1:04
it uh
1:06
he made it out of
1:08
plywood and mdf and
1:10
and 33 35 gallons of bondo and a lot of
1:14
foam
1:15
and he got it pretty symmetrical but
1:18
we've decided that we're going to make
1:20
one side of it with my flexible shea
1:22
patent method and then flip it
1:24
so ed's i've been taking advantage of
1:27
the fact that i often have eight 10 12
1:30
students in a class
1:31
and
1:32
sometimes four or five of the students
1:34
might want to work on ed's project
1:37
along with ed ed's learning and the
1:39
other students come in and they need
1:41
something to learn on
1:42
what better to learn on and to be able
1:45
to build
1:46
a car like ed's here we've done that a
1:49
bunch with
1:50
some other cars maybe mark can put some
1:52
pictures in of gary ash's beautiful 31
1:55
studebaker race car which is now all
1:58
together was built a lot by students
2:00
here including gary
2:02
and
2:03
also we have
2:06
jerry's uh 120 jag
2:09
a lot of that was done here by students
2:12
too helping them out so that's something
2:14
that someone out in the audience they
2:16
want to have a nice car built
2:19
a perfect
2:20
possibility is like i just had a student
2:22
from new jersey
2:24
dan and he wants to buy a 33 fiberglass
2:28
ford
2:29
custom
2:30
coupe
2:31
and he'll use that fiberglass body the
2:34
same way as ed is using this alpha by
2:38
taking flexible shape patterns off of it
2:40
he'll true up the surfaces first by
2:42
bonding them board filing them and
2:43
everything get them really nice
2:45
and then
2:47
make all the panels using the flexible
2:49
shape patterning gauge system
2:51
and
2:52
i hope dan when he does that next spring
2:56
he'll bring that 33 up and we can start
2:59
making a 33
3:01
uh coupe which would be a nice little
3:02
project but i just wanted to show you
3:04
some of the panels that the students
3:06
have made and oftentimes it's it's uh
3:09
they're brand new to this whole craft
3:12
they might have watched one of my
3:13
youtube videos and they fell in love
3:15
with the idea of
3:17
either restoring a car or building a car
3:19
and they figured that if they learn
3:21
these skill sets they would open up the
3:22
potential for for doing whatever they
3:25
wanted to
3:26
and i just wanted to show you some of
3:27
the panels that the students have made
3:29
over the last couple months
3:32
at the classes
3:34
this is the headrest fairing
3:36
ed made this out of foam in bondo
3:39
and that goes right behind the driver's
3:42
seat
3:43
gives you a nice fearing for the
3:44
headrest
3:45
and this was the first panel ever made
3:47
by
3:48
a student robert who actually is a
3:50
designer for nissan
3:53
in detroit and he's been a designer for
3:56
23 years the first time he ever did any
3:58
metal work he was absolutely blown away
4:00
how nice it came out
4:03
and he wants to come back too
4:06
and then we have an unfinished
4:08
fender section here which is
4:11
well on its way and then this was the uh
4:14
the front uh hood section or the front
4:17
part of the
4:18
a grill top
4:21
that's been welded together two pieces i
4:23
think these are either for the back
4:26
uh underneath the the rear fenders
4:29
and then uh over here we got some nice
4:31
little pieces
4:33
these were done by a real young student
4:36
first panels he ever made
4:38
it's a matching set i guess he's missing
4:40
one
4:41
one little tip right here
4:43
and these these little panels are tricky
4:45
sometimes there's some simple ones
4:47
and here's part of a fender
4:50
and ed incorporated in the fenders these
4:52
really nice beads
4:53
and this has this beautiful taper to it
4:56
and one of my students from new
4:57
hampshire
4:58
latched on to that and this was kind of
5:00
rough and he
5:01
shrunk it where it needed to be shrunk
5:03
and stretched it where it needed to be
5:05
stretched and planished that all out
5:07
nice
5:08
so that's coming all along really nice
5:10
these are all pieces will be all welded
5:12
together into a solid eventually but you
5:15
have to start at this point
5:17
this is another part of the rear fender
5:20
made by one student door skins made by
5:23
another student
5:25
we've got the
5:27
trunk skin which needs to be tipped
5:29
still
5:30
and there'll be a highlight line in it
5:32
that was another student made that ed's
5:34
been making these around the grill we
5:37
made little dies and uh
5:40
he's burned hammering in these in
5:43
with this little
5:44
tool i showed before
5:47
with these little delrin die sets
5:49
before
5:50
first just hitting it like this
5:53
with a hammer but now we're putting an
5:55
air hammer in here
5:57
we put the air hammer in like this
6:00
and then you can feed it through and
6:01
it's working really nice it's just an
6:04
inexpensive way of doing it versus doing
6:06
it in a pull max we do have a
6:09
trump machine which is similar to a
6:11
pullmax but
6:12
i like to do the simple methods like
6:14
this here's a rear fender assembly we
6:16
get welded that one together it still
6:18
needs a little work all these panels
6:20
will be tuned a little bit more
6:22
there's another panel that was made by
6:25
another student this is a real tricky
6:27
little one
6:29
this goes underneath uh
6:31
underneath where the headlight is goes
6:33
like that
6:34
on the left side over here
6:37
and
6:41
parts of the rear fender here
6:43
but overall it's just a amazing quality
6:47
and i'm always really awed by how well
6:49
the students can do
6:52
so that's one thing is just ed's car
6:54
which is coming along really well
6:56
and let's show you some more stuff
6:59
all right so here's another project this
7:01
is a 52 caddy convertible
7:04
that i bought from an old
7:06
friend that i went to elementary in high
7:09
school with and
7:12
this is the one that was sitting in the
7:13
garage since 1965
7:16
we de-rusted it there's a few little
7:18
spots we still need to de-rust
7:21
and
7:23
the major problems were
7:26
very little denting a few little minor
7:28
dents that's it but
7:30
this
7:32
lower section was pretty rotted
7:35
so
7:36
we decided that we're going to change
7:38
that out and i had a student from
7:40
california dan
7:42
and uh his interest was to make a patch
7:45
panel so i says well you can try on this
7:48
one so
7:49
i had to make the flexible shape pattern
7:52
off of the the original which still took
7:54
the pattern pretty well it just has a
7:56
little swiss cheese going on we made a
7:58
bunch of gauges
8:00
uh little cardboard gauges that gives
8:03
you all the information of the the bend
8:06
here
8:07
the roll
8:08
and welding in position and everything
8:11
so there's a bunch of little gauges
8:12
they're all indexed on the flexible
8:14
shape pattern
8:16
and
8:17
you put the roll in the panel and the
8:20
flexible shape pattern even tells you
8:21
where you've got to put the holes for
8:23
the trim
8:25
and where it mounts on the bottom all
8:27
those hole locations are all there right
8:29
in the flexible shape pattern exactly
8:31
where they need to be
8:34
another thing that was missing on this
8:36
was
8:37
let me swing this around
8:39
so dan welded it in and we got a pretty
8:41
good job except for right here and here
8:44
uh it it sunk in a little bit so we got
8:46
to build this up a little with a little
8:48
weld and grind it a little
8:51
and this is the way your welds are going
8:52
to finish off and after you put the
8:54
shrinking disc to the your welded
8:56
section it's absolutely perfect you'll
8:58
not see any uh repair action or anything
9:02
there
9:04
so
9:06
in the back here
9:09
they have an inner panel
9:11
and on this side it rusted away
9:14
on the other side it's still there so
9:18
we we
9:19
esteban
9:20
another student and friend
9:23
made this flexible shape hat and off of
9:25
the one that's still on the car the
9:27
other fender
9:28
and then made up this little piece here
9:31
and this piece is going to be
9:33
eventually welded in right here it needs
9:35
to be all trimmed down and everything
9:38
and that supports this it gets actually
9:42
tied in right here
9:44
you can see we still get to make this
9:46
little
9:48
this little bracket here which is a
9:49
mount bracket also that gets added on
9:52
spot welded on to right here
9:55
and
9:56
that finished the lower section but then
9:58
the upper section
10:01
was where the raccoon was going in the
10:03
garage and
10:05
taking a pee on the hood and
10:08
the fender and it caused it to rot out
10:10
pretty bad all right so the same student
10:12
dan from california who made
10:15
this lower repair section
10:19
he made the flexible shape pattern off
10:21
of the other
10:22
side of the car
10:24
uh it would have been like this it's on
10:26
the this the left side so he made it off
10:28
the right side
10:29
and then
10:31
we couldn't take the information off of
10:32
here because the information is damaged
10:35
so now we flip this
10:38
and we make the new panel and then
10:41
got most of the new panel done but now
10:43
esteban is finishing it up
10:45
he put the bends in here and now he's
10:47
doing the final trim
10:49
and that will
10:52
fit right in like that and that'll get
10:54
welded in
10:55
and then all that
10:57
rust
10:58
goes away and then we'll have a pretty
11:00
pristine fender there's a few spots that
11:02
are really heavy rust we'll we'll fix
11:05
those up uh with a little um
11:07
probably we'll use uh the phosphoric
11:10
acid naval jelly on that to get those
11:12
out
11:13
and then a little bit of the home depot
11:15
phosphoric acid just to take some of
11:17
this light stuff off
11:18
and then we're going to epoxy prime this
11:21
and
11:22
that will fender will be ready there
11:24
might be
11:25
a very little filler here and there
11:28
generally try to do all this repair work
11:30
without using any
11:31
uh fillers so
11:34
uh just like the factory the factory
11:36
never had uh
11:38
filler on these panels the stampings
11:40
were actually pretty good to make that
11:43
uh
11:44
panel again he needed a bunch of gauges
11:47
to pull the roll and everything
11:49
so
11:50
he's done between esteban and dan
11:52
they've done a beautiful job that'll
11:54
come out really nice so that's the
11:56
cadillac fender we'll continue on the
11:58
cadillac let's just take a little quick
12:00
peek in the back here to see what we're
12:02
doing with the de-rusting
12:06
all right max just gave you a nice
12:08
little overview of what the cocoon looks
12:10
like we made out of some plastic top
12:13
and
12:15
you saw the video last week we made and
12:17
some of the progress we made on the back
12:22
this is our little splash shield that we
12:24
put in here
12:25
and they actually have double uh top in
12:28
here but
12:29
it kind of got screwed up so we're only
12:31
using one but
12:33
but uh we've made some great progress
12:36
unfortunately it ran out of solution
12:39
today
12:41
so i got more on the way it's coming
12:43
tomorrow
12:44
you can see this last time was still
12:47
loaded with rust and now
12:49
it's just about gone the beams are all
12:51
getting clean here
12:53
even in the front there you can see the
12:55
the frame members on the side are all
12:57
nice and clean the springs are showing a
13:00
black color
13:01
they were just coated with rust but
13:03
apparently the black paint is still
13:05
underneath the rust amazingly
13:07
all of the u-bolts are all
13:10
clean on the threads i believe once
13:12
we're going to show this once we get
13:13
this all done we'll take a
13:16
wrench and put them on there and also on
13:18
the
13:19
the the wheel cylinders how hard those
13:22
hydraulic
13:23
uh lines are to take generally to take
13:27
out of the wheel cylinders i believe
13:29
we'll be able to back them right off no
13:30
problem
13:32
so you can see here the the spring
13:34
hangers are all getting nice now
13:37
the threads are all getting good so and
13:39
what i did today was i made this nice
13:42
little
13:43
adjustable sprayer head it's got a
13:45
magnet in it and i used a pot from my
13:48
lathe as a shield eye shield
13:51
and it's infinitely adjustable so now i
13:53
can locate this wherever i want and i'm
13:56
doing
13:57
uh detail de-rusting in in little spots
14:01
so i did the the big amount with the big
14:04
giant sprinkler and now i'm hitting
14:07
spots a little bit of time you can see
14:09
the shock absorbers are all getting
14:11
de-rusted there it doesn't hurt anything
14:13
doesn't hurt plastic it doesn't hurt
14:15
leather it doesn't hurt
14:18
copper or aluminum and actually you can
14:20
see the aluminum around the springs
14:22
they're
14:22
really cleaning up nice
14:24
you can see a little bit of the copper
14:26
plating on the on the uh
14:28
the hydraulic brake lines on the rear
14:30
end still it's still a little copper
14:32
showing
14:33
and it's hidden over here on the inside
14:35
of the fender
14:37
and there was a little no no paint left
14:39
there or no undercoating and it's
14:42
totally de-rusted that lower section
14:44
there now we're going to take these
14:46
quarters off and we're going to be
14:47
de-rusting them separately also
14:50
so the caddy is coming along really nice
14:54
uh
14:55
in a couple weeks it's going to look
14:56
like an arizona car it's just going to
14:58
be absolutely amazing
15:01
with
15:02
no cleanup of the sand after
15:05
no dismantling needed
15:08
all we got to do is
15:10
put some new brake shoes in it and new
15:12
hydraulic pistons if it needs it and new
15:15
seals on the rear end and
15:18
change out the oil in the rear end and
15:21
the rubbers will look for the body
15:23
rubbers and see how they look if they're
15:24
a little squash we'll just take one bolt
15:26
out at a time put a new rubber in and
15:28
put it back
15:29
we'll have to adjust them of course
15:30
later on once we start fitting the doors
15:33
and everything but the caddy is coming
15:35
along good now let me show you the scout
15:37
fender all right here's the scout 800
15:39
fender i think it's a 66 i believe
15:42
and again one of my students or actually
15:44
was a husband and wife team from florida
15:47
dave and nancy uh they both were going
15:50
to want to do a
15:51
pickup truck and jeep work and they said
15:54
mostly what they were going to do was
15:56
patch panels so they wanted to learn how
15:57
to do patch panels
15:59
this is the one i made earlier i still
16:01
haven't got a chance to weld it on
16:04
but i really didn't want to weld it on
16:06
until i got this piece finished and
16:10
nancy made this piece it's her first
16:12
piece ever it needs a little smoothing
16:14
here
16:15
but overall she did a really nice job on
16:18
it it's got to be
16:19
a little bit of finessing and then weld
16:21
it in
16:22
and her husband dave
16:24
made this piece here
16:26
and we just tacked it in with the tig
16:28
welder
16:29
and he did a beautiful job on that
16:32
and
16:34
once that gets welded that takes care of
16:36
all that rust that was down there that's
16:37
gone
16:39
and this front section has still got a
16:41
little bit of rust and
16:42
and plus a whole hole so
16:45
we get that welded on that will enable
16:48
us to
16:49
finally weld this on so we get back to
16:51
this project and stop picking away at
16:53
the scout
16:54
the intent is to pick away at the scout
16:56
pick away at the cadillac and
16:58
also show you some really good stuff now
17:01
a nice little trick i wanted to show
17:03
everybody held it to the end so the
17:04
people that
17:07
waited to the end there's a good little
17:09
trick one of my students was doing a
17:11
small little part for his motorcycle it
17:13
was the little tail the seat tail part
17:16
and he needed to get a a dolly up in
17:19
there to planish a little bit
17:21
it was aluminum piece he was doing so i
17:23
said well
17:25
i have a ton of post ollies these are my
17:27
post ollies
17:29
and i didn't have one that really fitted
17:31
circumstance but i did have a nice
17:34
hand dolly that he could use so i said
17:36
well here's what we can do
17:38
and it's another use of clay i use clay
17:40
quite a bit
17:42
so you can take
17:43
a big blob of clay like this
17:46
and you just
17:48
plant it in there like that you can
17:50
hammer it in with a
17:51
with a leather hammer or a dead blow
17:54
hammer
17:55
and and you can and it just really
17:57
stabilizes the dolly so that's a nice
17:59
little trick just a little pexto dolly
18:01
that i picked no stanley textile makes
18:03
the same one though
18:05
but
18:07
being able to lock your dolly on there
18:09
any way you want you can put it anyway
18:12
and it pretty much stays there really
18:14
nicely too
18:15
and you know you can reach under and
18:16
hold it with your hand while you're
18:18
slapping the piece but that's a neat
18:20
little trick all right this is one other
18:22
little tool trick here this is a little
18:24
english wheel i made
18:25
probably a couple years ago and the tent
18:27
with this was i made it out of a piece
18:29
of eighth inch aluminum
18:31
it's a
18:33
laminated piece and it's got a hinge in
18:35
it and the idea was to make a
18:36
lightweight english wheel that fit over
18:38
the fender so you could wheel right on
18:40
the fender
18:41
and i intended to make all this stuff
18:43
out of aluminum this was just all a
18:45
little prototype i made
18:47
and
18:48
it just was even if i had made all the
18:50
stuff out of aluminum it still would
18:52
have been too cumbersome so i just
18:54
basically threw it in the corner and
18:55
it's been sitting there collecting dust
18:58
and ed was working on his alpha and we
19:00
needed to get into some little tight
19:02
spots and i'll show you where it works
19:03
out really well yeah this panel here
19:05
which is a real challenging little panel
19:07
with the reverse curve in here and all
19:09
kinds of stuff going on
19:11
uh james who made this panel
19:14
this is where this english wheel really
19:17
starts you can get in and smooth
19:19
stuff really easy with this
19:22
these yolks are not ideal yet i got to
19:24
do some a little bit of work on them
19:26
and but anyways i'm not going to do any
19:28
more on this particular wheel but i'm
19:30
going to make a smaller english wheel
19:33
for doing detail work like this now
19:35
typically it's done a lot with a
19:37
planishing hammer but
19:39
every time i use a planishing hammer i'm
19:42
so used to the absolutely amazing
19:43
results you get from an english wheel
19:45
that chrome plate finish
19:47
and i just don't like the the faceted
19:50
look that you get from the intermittent
19:52
hammer hammer look
19:54
and i feel there's a better feel
19:57
you can feel the little vibrations as
20:00
you're going through and you can feel
20:01
the smoothness so i'm definitely an
20:03
english wheel guy as opposed to a hammer
20:05
guy
20:06
and i'm just i'm going to design a small
20:09
little wheel like that maybe i'll sell
20:11
plans for it or something
20:13
but
20:13
this is this is a real nice little tool
20:15
ed's been using this quite a bit a lot
20:17
of my students have been using it and
20:19
this is actually a terrible example
20:21
because it's not idealized yet but
20:24
the overall
20:26
trick of it is a small diameter top
20:29
wheel
20:30
and and little two inch wheels
20:33
total and it just allows you to get into
20:36
those nice little tight spots all right
20:38
i hope you enjoyed that video i think we
20:40
gave a lot of good information we always
20:43
try to give a really good information on
20:45
my pro shaper channel please give us the
20:47
likes
20:48
subscribe tell your friends tell your
20:50
car club friends and thanks for watching
20:52
and remember metal is clay i'm ray
20:54
chalene