Up next in 10

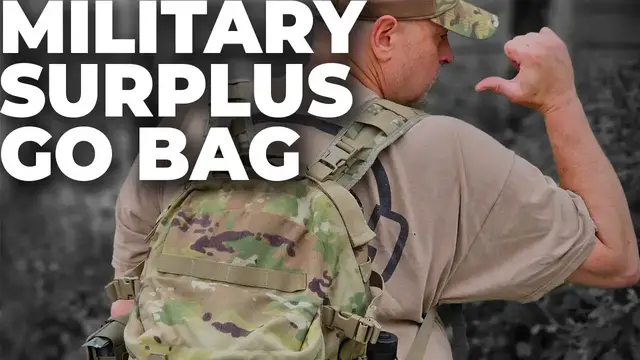
I show how to put together a go bag using military surplus items. Plus an overview of the molle II assault pack.
Nutrient Survival (Use TPW15 for 15% off your first order):
https://alnk.to/7X2Aj5A
Prepared Wanderer Patches and Stickers:
https://thepreparedwanderer.bigcartel.com
Prepared Wanderer WEBSITE:
https://preparedwanderer.com
Prepared Wanderer AMAZON STORE:
https://bit.ly/3Jjs1iO
Prepared Wanderer FACEBOOK GROUP:
https://www.facebook.com/groups/1835005976546722
Prepared Wanderer INSTAGRAM:
prepared_wanderer
Show More Show Less View Video Transcript
0:00
In today's video we're going to be putting together a preppers go bag with military surplus
0:06
Stick around. So we're doing something a little different today
0:15
We're going to be shooting this video in the man cave. And the reason we're doing that is because the weather has been so crazy and of course
0:23
we have all this air pollution coming down from Canada with these wildfires
0:30
Just the air quality is really horrible. So I thought what I would do is I want to show a go bag start to finish and what I'm
0:39
going to be putting in it. Now when you think about go bags you're probably wondering what exactly that is if you're not
0:46
familiar with that terminology. I'm kind of replacing the whole idea of a bug out bag or a get home bag because I think
0:59
with my evolution of gear and trying new things the idea really is just to have some kind
1:07
of pack that has all the necessities that if I have to grab it and go, leave my house
1:15
leave my vehicle, wherever it's easily accessible but it has all the items that are needed for
1:23
a survival situation where I'm away from my home. So here are all the items that I've assembled for this bag and the pack we're going to be
1:32
looking at today is the MOLLE 2 Assault Pack. This is the current issue military or US Army backpack
1:45
The MOLLE 2 Assault Pack has actually been around for quite a while
1:49
It's been made in woodland camo and then the horrid ACU camo, that digital grake stuff
1:57
Those can be found, of course the digital is very very cheap and then the woodland is
2:02
very very expensive but the sweet spot is these multicam packs because they are available
2:10
I found this one on ebay for like $45 shipped and it's complete and it's in excellent condition
2:19
You just need to do your research because a lot of these will come really messed up
2:25
with holes, tears, sand in them, all kinds of stuff so you really need to pay attention
2:31
to the listings, you need to do some reading and research to make sure you're getting what
2:34
you want because you obviously want something that is in good shape
2:39
So this pack here has some key features. It has a very generous front pocket that has a pocket on top of that which is accessed
2:51
by velcro on the inside. You open it up it has another velcro pocket in the back
2:59
It also has some snaps. See those? There's one there and there's one there on this corner
3:07
That is for the 3 mag bandolier that snaps into it or the 6 mag bandolier so the army
3:14
bandolier snaps into that so you can grab rifle mags if you need to if that's something
3:18
you're concerned about, you're carrying a weapon, it's a great way of storing rifle mags
3:23
I'm not going to do that for this particular bag just because I have other setups that we'll be going into in the future on other videos but for this one this is going to be sustainment
3:33
This is for a 24 to 72 hour event so I need basics that are going to basically keep me
3:42
alive, keep me healthy, keep me warm, dry, things like that. Big front pocket and then of course a very generous inside pocket
3:52
Now a lot of these will come with a frame sheet and then these straps are actually for
4:00
airborne operations so you can actually rig this for airborne operations but there will
4:04
be a foam insert and we're going to take this one out because it's kind of useless
4:21
It's pretty floppy. It doesn't serve a lot of purpose for me
4:26
Now there's also another strap in here and I think eventually what we're going to do
4:32
is we're going to cut these out because I don't need them but they are in the pack in
4:40
case you want to keep that webbing for other projects. I prefer a foam pad cut from the Army sleeping pad, the green ones
4:53
It's a little bit thicker, it's more stiff and if you cut the right size it'll fit right
5:04
down in that pocket and that's going to give me some padding for my back
5:15
Then for a frame sheet I found this from 5.11. I think this is some type of panel that you can hang from the back seat of your car and
5:27
then put pouches on it but it's got a pretty decent stiffness to it
5:32
It's a lot stiffer than this flimsy thing and I like the size of it
5:40
It's narrow but if I want to use this for adding pouches to it I can do that
5:47
I can strap stuff to it that way if I want to pull this out I can
5:52
So that's going to go in there. So now we're going to go through categories of items
5:58
Categories are real important. You want to think about the different types of things and kind of lump those into categories
6:04
and how they're going to work for you. So the first thing is some type of shelter
6:10
We want something under us, we want something over us and hopefully something around us
6:15
So it's going to keep us dry, warm and then also it's going to prevent moisture and cold
6:22
coming up through the ground. So I think one of the tried and true items that I've had in a lot of my kits for years
6:29
and years are these old military surplus casualty blankets. It's basically just the grabber blanket that I think a lot of you are probably familiar
6:39
with but it's the reflective material on one side, OD green on the other
6:44
But these make fantastic ground cloths. They keep the moisture off of you and they're big enough that you can sleep on top of one
6:54
and move around and not be rolling in the dirt. So that'll go in here
7:02
One for the item that is going to go around us, help keep us warm
7:08
Now of course we're thinking we're going to be dressed appropriately for the environment
7:12
but I'm going to be going with the good old military woobie
7:18
It's a fantastic blanket rated to around 50 degrees so it's not super, super warm but
7:25
if I have a jacket, pants, decent shirt for the weather I should be alright with this
7:34
if I wrap myself in it and I wrap myself in the casualty blanket as kind of a makeshift
7:39
sleeping bag. So that's going to go in here. Then we need something over us
7:46
So I've done a video on this. This is actually an aftermarket military style poncho
7:56
Very easy to set up. It does not take much. The bungee cords are actually used to tie out on the corners and then I just run a ridge
8:06
line underneath it and it makes a nice little A-frame. Just some cheap Walmart stakes with gutted 550 cord for pulls on the end of them
8:15
Put this all together and then I put this all in this old stuff sack but I also have
8:25
550 cord, 100 feet. So we got our stakes, we got our 550 cord and then a couple of these just as extras
8:41
These are little carabiners from Night Eyes. They're like a figure eight so if I need these to set up with for putting together
8:49
my ridge line I can. Don't necessarily need them but they're nice to have
8:53
Make things a little bit easier especially if you're tired. So there is our shelter system
9:02
Easily fits inside the bag so far. Ok, next thing we want to talk about is food, sustainment, nourishment
9:12
Calories are important especially in an emergency situation where you don't know what you're
9:18
going to be doing. You want to have food. So one thing I did a couple videos ago was making my own MRE packs with these food bags
9:32
This one is filled with some meals from Nutrient Survival. There will be a link down below with a discount code so check that out if you're interested
9:39
in checking these guys out. They make fantastic little meals. But then I added some other stuff
9:46
Some liquid IV, there's some trail mix, hot sauces, different things like that
9:50
There's some Spam, some coffee. So this is one whole day's food in this bag
9:56
So go back, check that video out, it'll give you some ideas
10:01
And then of course there's nothing wrong with having a couple of these pre-made dehydrated
10:09
meals that you just add hot water to. They're quick, they're easy, readily available, and a lot lighter than a whole MRE bag
10:19
I just don't really care for MREs that much. They're expensive, don't taste that good
10:24
And then to supplement that, of course, coffee packs and then more liquid IVs because dehydration
10:36
is not fun and you're probably going to be drinking from questionable water sources possibly
10:41
if you're outside in the woods. And I'm going to throw in titanium spork
10:47
So boiling water and cooking with water is super important
10:57
So I don't think you can go wrong with a military style stainless steel canteen with
11:07
a lid. They are fantastic. And then also a stove stand. The stove stands, if you have never used these, try them out because they actually work pretty well
11:24
By doing that, putting the cup into the stand, now you have a space underneath here and then
11:29
if you put some fuel tabs, espet tabs, sticks, debris, you can get a little fire going under
11:35
here and that'll heat your water. And then just an aftermarket lid
11:40
I think this is Rothko, fits perfectly. But these old military canteen cups, super cheap, easy to find, and they work
11:53
And the great thing about them is if you get the MOLLE 2 canteen pouch, this will fit
12:05
right in there along with the lid. You can take the strap off, run the lid behind the cup, and then that will fit
12:40
Just like that. And what's great about this is this will strap using this PALS webbing system right to the
13:00
side of this MOLLE pack. Undo the side compression straps, give you some room, and then you're going to thread
13:06
this through. And back up to the top one on the pouch
13:30
Back through that one. Keep weaving it
13:47
Pull that through, snap it. Get this one, weave that through, snap it
13:59
There, now you have a canteen on the side of your pack, easily accessible
14:06
And these pouches are really nice because they have these big pockets on the side which
14:10
are great for water purification tablets. And you of course can tighten the pouch up with the bungees on the side
14:19
So it's a great, great piece of kit and it matches so well to this Assault pack
14:30
The other thing about hydration of course is water purification. Now a lot of people use the Sawyers, and the Sawyers are great
14:40
But there is another alternative, and I wanted to show this because I don't think these get
14:46
enough attention and they're pretty decent. This is the Frontier Pro, and it is very similar to a Sawyer
15:00
So you've got a tube, but there's your valve for actually drinking it out of if you want
15:09
to drink directly from this. But what's great about these is they work really well with platypus water containers
15:19
And I actually did a video on these a long time ago, so I'll probably cut some footage
15:23
in of me working with one of these into this video so you can see that, or you can go back
15:28
and find that video. But they work well, and if you have two or three of these bags, one can be your dirty
15:36
water bag, and then the other ones can be your clean water bag
15:40
But you can actually hang these and do a drip style filtration, and have that drip
15:50
into your canteen or into a clean bag, and that way you can get a lot of water disinfected
15:58
or filtered, I guess would be the better term, in case you need it
16:03
So one thing that is really important is navigation, and I think also the ability to
16:12
take notes of what's happening around you. I really like these larger write and rain notebooks, a couple different pens to work
16:23
with, and then of course in here I keep a compass. Another thing, of course, is first aid
16:30
Now this kit, this is the military individual first aid kit, and it's already been pre-packaged
16:41
And what I like about this is, it's everything in there that I need as an individual first
16:46
aid kit, not a trauma kit, so this is cuts and things like that
16:51
But it's sealed in a package that's dry, so I don't open this, I leave this as is until
16:57
I need it. So it's a great piece of military surplus, but that goes in the front pocket so I can
17:02
find it. But you do need a trauma kit. I've shown this one before, this is from Rhino Rescue, kind of a new company, they're on
17:13
Amazon, but what's cool about them is their stuff is very well thought out, seems to be
17:21
very well made, but it's also been certified, I believe by FDA, so it's not junk
17:29
This is something that has sterile packaging, but this is a trauma kit, so we've got a tourniquet
17:37
we've got an Israeli bandage, we have a compression gauze, and then we have a hemostatic gauze
17:48
So right there you've got the basics for treating a major wound
17:58
I think the only thing that really needs to be added to this, and I haven't gotten around
18:04
to putting this in here yet, but I need to add some shears to this, some trauma shears
18:11
Those can easily fit in the space back here. And then what's nice about this pouch is, too, and I've showed this before in another
18:20
video, so you open this up, and then you pull, and then this whole thing comes out
18:26
So it's kind of a grab and go. So this stays attached to my pack
18:30
On the outside, where I can find it, this is easily removable
18:37
So what we're going to do is we're going to put it on this side
18:42
Now I have a blowout kit, trauma kit, whatever you want to call it, right on the side of
18:47
my pack, easily identifiable, tourniquet, easily accessible. So fantastic little kit
18:57
Now we have some basic survival items. So in here we have, there's some wire, there's a Bic lighter, duct tape, there is a red light
19:06
for map reading, there's a little ferroceum rod, some fire starters, miniature fishing
19:13
kits, water purification tablets, bags to purify the water in, marker panel, there is
19:20
even a little wire saw. So a variety of items, but it's all in this waterproof bag
19:27
It goes in the front, so I can easily grab that. Some little hygiene items, wet wipes, and some little brush ups
19:37
These are from Crest, so they're just little miniature toothbrushes that have some actual
19:44
toothpaste and stuff built into them. So hygiene is really important. We'll put that in the front pocket up here
19:52
This is from Princeton Tech, this is the Nano. It's a great little light, and I like it because the first light you turn on with this, it
19:59
goes to red immediately, so there's no white light. You have to cycle through to get the white light
20:04
And there's a few things that I always carry. That is a folding saw for wood processing, but for also shelter building, building camouflage
20:15
around me if I need to do that. And the Baco, I think, is a great small lightweight saw that will get the job done
20:26
So that'll go in the main pack. I want a decent knife that is going to be very durable, but also is going to have some
20:39
size to it. This is the SE6. It's pretty much stock, except it's been stripped down of that coating
20:47
And then there's a patina on it, but it's super sharp. And then I have an aftermarket sheath for mine
20:54
This is from Knife Connection. This is their aftermarket sheath. So this goes in the pack, and then once I get to where I'm going to go, that'll go on
21:02
my belt. All right, here's the bag all loaded up. Let's check the weight
21:10
So we are right at 20 pounds for the dry weight. That's without adding water, so it's not too bad
21:17
Let's see what this bag looks like on me. Sternum strap, that's really going to help with distributing the weight
21:29
Shoulder straps are nice and wide, not overly padded. You got to think, you got to remember this was really designed to go over body armor
21:36
but for a military backpack, it's not bad. It distributes the weight pretty well
21:45
You can see how those load lifters are kind of working, pulling up the straps a little bit
21:55
So the top of this pack has a set of straps that are like this
22:03
And what these are for really are to attach this assault pack to the larger main pack
22:12
that's issued. A lot of times I will see people use these straps to strap a bedroll, which to me is
22:20
not ideal because it's sitting so high up and it's kind of floppy, just kind of doesn't
22:24
really work. But a trick that I just learned from someone else is that you take the strap, you unbuckle
22:30
it, and you pull it through the first loop on the shoulder strap, and then clip that
22:39
back in like that, down like that. And then what this is doing, it's basically creating a load lifter
22:52
So it's pulling the shoulder strap up higher and off of your shoulder a little bit more
22:58
And then of course, you can adjust this. This is, there is slack in the straps, so if you want to make that tighter and pull
23:06
that higher, you can. But there is a very quick, easy way of actually adding load lifters to the shoulder straps
23:18
All right guys, hope this helped you out in building your go bag
23:24
I think military surplus is definitely worth looking at. It's readily available, it's inexpensive, but it's tough
23:31
It's going to last. It's not going to fall apart. So definitely check these kind of packs out, and others
23:38
And then make sure you check out preparedwanderer.com, lots of great information there
23:43
Check out the Facebook group, 8.3 thousand members right now, it's growing very well
23:49
And then check out the affiliate links down below. Nutrient Survival, with a discount code for you if you're interested in some meals to
23:56
put in your pack. And then of course, the Amazon affiliate, which has some of this gear that I showed
24:02
in that store. All that helps the channel. So, going to get out of here
24:06
Thanks for watching. We'll see you next time on The Prepared Wanderer
#Outdoors
#Hiking & Camping
#Backpacks & Utility Bags