Up next in 10

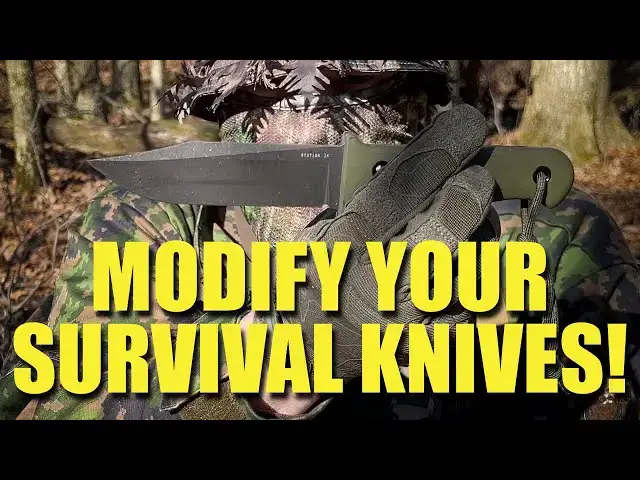
Learn how to customize and modify your bushcraft and survival knives to better suit your outdoor needs. In this video, we cover practical knife mods, upgrades, and DIY tips to improve comfort, performance, and durability in the field. Whether you’re fine-tuning a favorite blade or starting your first knife project, this guide is built for serious outdoorsmen and survival enthusiasts.
Prepared Wanderer AMAZON STORE:
https://bit.ly/3Jjs1iO
Prepared Wanderer Patches and Stickers:
https://thepreparedwanderer.bigcartel.com
Prepared Wanderer WEBSITE:
https://preparedwanderer.com
Prepared Wanderer FACEBOOK GROUP:
https://www.facebook.com/groups/1835005976546722
Prepared Wanderer INSTAGRAM:
prepared_wanderer
#prepper #bushcraft #survival
Show More Show Less View Video Transcript
0:00
In today's video, I'm going to show you
0:02
how I modify my bushcraft and survival
0:04
knives. Stick around.
0:07
[Music]
0:19
So, if you're watching this channel and
0:21
you are watching this video, obviously
0:23
you love bushcraft and survival knives.
0:26
You have a lot of gear. you have a lot
0:28
of cool stuff and you want to know how
0:30
to make it better. I am a big believer
0:34
in modifying your gear to meet your
0:36
needs and not just sticking with what a
0:38
manufacturer comes up with. A lot of
0:40
great companies out there are producing
0:42
a lot of fabulous knives that are
0:44
perfect for bushcraft survival and
0:47
prepping, but there's always ways to
0:50
modify things, make them slightly
0:52
better, and make them more personal to
0:54
fit your needs and what you do. And I
0:57
want to show you just some of the knives
0:59
that I have that I've been going through
1:02
today. I'm kind of going through my
1:03
winter preps, kind of checking, make
1:04
sure my gear is all ready to go. and I
1:07
noticed that there were a lot of my
1:09
knives have been modified and tweaked in
1:11
some small manner and I wanted to share
1:13
that with you today in this quick video.
1:15
We're going to go through them and talk
1:17
about the things that I do and then what
1:20
I ask you is to leave a comment down
1:22
below and tell me what things you do to
1:24
your knives to modify them to make them
1:27
better. So, let's just jump right into
1:28
the collection and see what I have. All
1:32
right, we got the virtual campfire
1:34
going. It's a cozy cold day here in Ohio
1:38
and I'm in my office going through my
1:40
gear and I wanted to show you guys some
1:42
of these knives that I have that um I
1:45
have modified in some way or form to
1:48
make them a little bit better and to
1:50
make them suit my needs. Now, one of the
1:53
first things that you'll probably notice
1:55
in a lot of videos that I do and knives
1:58
that I have, you'll see
2:02
this wrapping on the handle of some of
2:04
my knives. And and I have had people ask
2:07
me what that is and why I do that. And
2:10
it's like, well, if it's a good knife,
2:11
why do you need to do that? Well, knife
2:15
manufacturers,
2:16
you know, they're putting together their
2:18
knives and they're not um always able to
2:21
do handles that fit everybody's hands.
2:24
And what I have found um is that hockey
2:27
tape makes an excellent um addition to a
2:32
slim handle or a slightly smooth handle.
2:35
It gives you a little bit of grip, but
2:38
it also adds a little bit of width to
2:40
the center of the handle. And that
2:42
really uh helps me, especially if I'm
2:46
not wearing gloves. Uh this gives me a
2:49
little bit extra traction and it does
2:51
add a little bit of thickness. And of
2:52
course, you can add more tape to make it
2:54
thicker, but it's a a very quick and
2:56
easy modification to a knife that just
3:00
makes it a little bit um easier to use
3:03
in the field and gives you that
3:06
tactality
3:07
that I think is really important when
3:09
you're trying to control a blade. Now,
3:11
this knife we're looking at here, this
3:12
is from Station 9. Um, I've done a
3:15
review of some of their knives in the
3:16
past. They are a very cool company. It's
3:19
a US company. The designer is a French
3:23
uh knife designer, custom guy, makes
3:25
some really beautiful stuff. But his US
3:27
company, Station 9, designs these and
3:31
they are made um actually in China, I
3:34
believe, made overseas. But they are
3:36
fabulous knives. He does a really nice
3:39
job on the design of these and they're
3:42
put together very well and they are
3:43
tough as nails.
3:45
And this one does come with
3:48
a nice kidex sheath. And then uh a
3:51
modification I will do with a lot of my
3:53
knives is add some type of tech lock to
3:56
the back because the tech lock allows
3:59
you to
4:02
wear this knife in a different variety
4:04
of ways. So, in this one, I have it set
4:07
up so the knife is going to be carried
4:09
crossraw on my front.
4:12
But since these screw in, I can take
4:15
this off and I can flip it around the
4:18
other way. Now, I can carry this strong
4:20
side
4:21
and carry it up and down. So, another
4:24
small modification is how you wear or
4:28
set up your knives. This is another
4:30
Station 9 knife. This is their Sear. I
4:34
think it's called the Seir 8. Um, really
4:37
awesome field knife. Once again, I've
4:40
added a little bit of grip tape to the
4:42
center because the handles are just a
4:45
little bit smooth. And if you're wearing
4:47
or not wearing gloves, this really helps
4:50
because you can of course feel that with
4:53
your fingers.
4:55
Another little modification that a lot
4:58
of guys do with their knives, of course,
4:59
is add a little bit of paracord to the
5:01
end. I don't like huge lanyards. is they
5:03
do get in the way. But there is a case
5:06
to be made for
5:09
putting the paracord through your hands
5:11
or through your fingers just to give you
5:13
a little bit extra security and control.
5:16
It also is a very quick way of feeling
5:19
the knife when it's in its sheath.
5:23
As you're reaching down, you can feel
5:25
that cord and it gives you something to
5:28
kind of grab onto.
5:32
So, wrapping a handle.
5:34
I've done the same thing with this old
5:36
Cold Steel Bushman. Of course, the Cold
5:39
Steel Bushman is just a metal pipe
5:42
basically that's been hammered into this
5:45
blade,
5:47
but wrapping this thing with some
5:50
cordage. I actually did a wrap of
5:52
cordage on this very, very thin cordage.
5:55
I think it's like a uh it's a very thin
5:57
bank line. And then I wrapped this with
5:59
hockey tape. And that of course is
6:01
giving me really nice grip on this old
6:06
blade.
6:10
Other modifications to do to knives and
6:13
particularly the sheath is adding some
6:15
kind of storage option or pouch. Now
6:18
this particular pouch is sold by Station
6:21
9 and it is meant to go on their sheath.
6:25
These tabs go through the slots on the
6:27
kidex and then they slip through here.
6:29
And then you run either paracord or
6:32
bungee cord through that and lace it in.
6:35
And that makes a very secure pouch. And
6:38
that allows you to carry
6:41
basically fire making stuff, survival
6:44
gear,
6:47
kind of whatever you want to come up
6:49
with. There's some water purification
6:51
stuff in there.
6:56
Got a small diamond sharpener.
7:00
And then I've got a tin
7:05
with some fire making stuff. So adding
7:08
pouches to your knives, particularly for
7:11
survival knives, is a great idea because
7:13
it's just a way of keeping some extra
7:15
gear close. Other sheath add-ons, uh,
7:19
little neck knives are a great way to
7:22
carry some extra gear. On this little
7:24
Station 9 neck knife, I've added just
7:27
some bicycle inner tubes. And then what
7:30
I've done is there is a whistle in here.
7:34
And then on this side, if you peel back
7:36
the two, there is um
7:40
some tinder, man-made tinder. There is a
7:43
light
7:46
And then there's a mini ferromium rod
7:48
kind of stuck in the corner. So there's
7:50
a couple of emergency backup items on
7:53
the sheath with me. And then the reason
7:54
I have the light on here is that when
7:56
I'm wearing this around my neck like
7:58
this,
8:01
I can just press that light and see what
8:04
I'm doing without ever taking the knife
8:07
sheath off. And of course, once again,
8:09
we've got a wrap. And then adding this
8:13
little lanyard. This is from Lester
8:15
River Bushcraft. It is It's actually
8:18
There is um some tinder inside this,
8:20
like a man-made tinder that they've
8:22
wrapped in um heat shrink tubing. So, if
8:26
I need to cut this apart, I can start a
8:28
fire with this. So, a really neat little
8:30
item to add to your knife.
8:34
And of course, with uh neck knives, you
8:36
can add a cord to it. This is a
8:39
breakaway so I don't choke myself.
8:44
But a very easy way to modify a neck
8:47
sheath.
8:49
As we're talking about pouches, here is
8:51
another pouch system. This also comes
8:54
from Lester River Bushcraft.
8:56
This is a lace on system with bungee
8:59
cord and it does a very nice job of
9:02
staying on the sheath. Now, this knife
9:05
is from Condor. This is the Moonshiner.
9:08
Really fantastic chopping knife. But the
9:12
sheath that it came with was less than
9:14
desirable. It was a leather sheath. I
9:16
really didn't care for it. Um, didn't do
9:18
a great job of holding the knife in. So,
9:21
I went on eBay and found someone who
9:26
made a really nice kidex sheath with a
9:28
drop down belt attachment. Didn't cost
9:32
me a lot. I think it was in the $60
9:34
range, maybe 65 bucks for the for a nice
9:38
custom kidex sheath. And then I
9:40
purchased the Lester River bushcraft
9:42
pouch and put that on the front. And now
9:44
I have a really nice survival knife
9:50
on this handle. On this Condor knife did
9:52
a wrap job right here in the center with
9:54
the hockey tape, but the previous owner
9:57
did some modifications of their own and
9:59
they actually etched in some lines and I
10:02
suspect they did that for grip as well.
10:03
It goes all the way up and down the
10:05
handle. This is a knife I actually got
10:07
in a pawn shop. Um, they have also
10:09
stripped the blade, and we'll talk about
10:12
that a little bit, too. Stripping blades
10:14
and coatings. Um, I'm not a huge fan of
10:18
coated blades or knives, so a lot of
10:20
times I will strip them down. Uh, the
10:23
previous owner did that already on this
10:25
one. I cleaned it up a little bit and
10:28
then I did a uh apple cider vinegar
10:31
soaking because it is a carbon blade and
10:34
that added a little bit of a patina.
10:37
But then another excellent modification
10:39
to do to your knives is to sharpen the
10:42
spine.
10:43
Very easy thing to do if you have a
10:45
Dremel tool or a file. Put this in a
10:50
vice on your workbench and then just
10:53
work very slowly with a metal file
10:55
across keeping it uh flat as possible
10:58
and you will get a nice 90° spine. And
11:00
of course 90° spines really serve two
11:03
purposes. striking a ferro rod, but also
11:07
scraping
11:08
bark
11:10
and wood into into nice small fuzzy
11:14
material.
11:16
So, some simple modifications
11:20
to a really nice knife.
11:23
Another thing that I do a lot of times
11:25
with knives, I will add a piece of
11:27
bicycle tubing to the sheath just like
11:30
this. And um the only real purpose of
11:33
this is to add a little bit of extra
11:36
fire making material, I can take this
11:38
off and use this to start a fire because
11:40
it burns very well. Um but also then if
11:43
I have to secure something to the
11:45
sheath, I can put that in there like a
11:47
ferro rod or um whatever I want. But
11:51
it's it's a very cheap um easy thing to
11:54
add to a sheath. doesn't really impede
11:57
the sheath in any way
11:59
and it gives you a little bit of extra
12:02
something something to get a fire going.
12:04
While we're talking about coatings, um,
12:07
a lot of the Essie knives are coated
12:10
knives. Now, this one I bought um on the
12:14
secondary market and the previous owner
12:17
did a very nice job of stripping this
12:19
knife. And um I believe what they did is
12:23
they did some kind of acid etch to
12:25
retain the logos and the writing on the
12:28
blade, but that finish is gone now. And
12:31
then, you know, you just soak this with
12:33
some um apple cider vinegar to get a
12:36
patina on it and it makes for a very
12:40
nice looking knife. But for some reason
12:43
coatings to me, I I don't they they wear
12:46
off. Um, I know they protect the blade,
12:49
but to in my mind, it seems like they
12:51
slow the blade down, if that makes
12:53
sense. Maybe it doesn't. Maybe it's just
12:55
something in my head, but I really
12:57
prefer um a nice smooth blade like this.
13:02
And I think the Essies are a great
13:04
candidate for stripping off that
13:06
coating. Another sheath modification.
13:09
This is from Condor. This is the
13:11
Terasaur designed by Joe Flowers.
13:13
Fantastic
13:15
uh bushcraft knife. It is full tang
13:18
scandi ground. It already has a
13:20
sharpened spine.
13:23
Has that metal uh butt plate on it, I
13:25
guess you would call that. Uh but that
13:27
that's actually the tang coming through
13:29
the handle. Fantastic knife. Uh the
13:32
sheath is really decent. It's a nice
13:35
plastic sheath. that has a kind of a
13:38
leather or I guess that's leather, but
13:41
the sheath itself um is all open and
13:45
kind of naked right through here. And
13:46
it's a great area to add extra stuff.
13:50
So, what I've done is I've taken um
13:54
Gorilla tape and wrapped that on the
13:56
top. And then I did
13:59
bank line and whipped did a tool whip on
14:03
here. So that's a wrap.
14:06
And then at the end to finish it off, I
14:08
put more of the Gorilla tape. And now I
14:12
have extra tape. I have fire starting
14:14
material. And I have extra bank line in
14:16
my kit that if I get into an emergency,
14:20
I can pull this stuff off and I'm ready
14:23
to go. And it all stores very neatly on
14:26
the sheath.
14:28
And it also gives it a little bit of,
14:31
you know, texture for gripping.
14:34
But it's a really simple modification to
14:36
an already fantastic knife.
14:40
Other things that you can do that I
14:42
talked about with this with some of
14:43
these knives is the sheath. So, a lot of
14:45
times the stock sheets on knives are not
14:48
fantastic. Um, and there are a lot of
14:51
custom sheath makers out there. Like I
14:54
said, you can go to eBay and find some
14:55
good ones like I did for this condor.
14:58
Um, a buddy of mine, Canadian Craftsman,
15:01
is a kidex bender guy, and he's on
15:04
Facebook and Instagram, and I had him uh
15:08
do this sheath for me for my Gerber
15:11
Strong Arm that I got from Stay Ready
15:13
Outdoors. They actually did a little
15:16
laser etch on there of my logo, which is
15:19
pretty cool. Strong arm is a really
15:21
great field knife,
15:23
but the sheath that the Gerber comes
15:25
with is less than desirable. It is not
15:27
my favorite. Um, I really don't care for
15:29
it and I don't care for the attachment
15:31
system, but I like a good simple kidex
15:34
sheath and a custom kidex maker. If you
15:37
find a good one that you can work with
15:40
that will listen to you and come up with
15:43
ideas with you, um, really can make a
15:46
big difference in a knife that you
15:47
already own. And Canadian Craftsman did
15:50
a fantastic job on this. I love the
15:53
black and orange topo. And of course,
15:55
it's got the orange on the inside. And
15:58
then just adding once again one of these
16:01
tech locked style uh clips on the back
16:04
so I can wear this cross draw
16:07
makes a big difference on a knife. And
16:10
then the retention on custom kidex if
16:13
it's a good good maker that's not going
16:15
to come out. I trust that a lot. So
16:19
these are just some of the modifications
16:22
that I do to my knives. I would love to
16:24
hear what you guys do to yours. I think
16:27
there's always a lot of great ideas out
16:28
there. I'm always looking for new stuff
16:30
to do to to knives and to their sheets
16:32
to make them better. Um, I love my
16:35
knives. I like to use them, but I like
16:38
them to fit my needs and to fit my
16:41
hands. And there's so many different
16:43
things you can do with your knives to
16:44
make them better. So, hopefully I gave
16:46
you a few ideas on what you can do with
16:48
yours. If you like this kind of content,
16:50
do me a favor, hit that like button.
16:53
subscribe and leave me a comment. All
16:56
that helps me and helps the algorithm
16:58
know that I my channel's doing well. And
17:01
as always, I appreciate you guys
17:02
watching. Stay tuned for more videos. I
17:05
tried to release a new video every week.
17:07
Also, check me out on social media.
17:09
There is a Facebook group links down
17:12
below and my Amazon store, of course,
17:14
that helps me out as well. And as
17:16
always, thank you so much for watching
17:17
and we will see you next time on the
17:19
Prepared Wanderer.
#Outdoors