Up next in 10

Welcome to our latest tutorial where we dive into the world of indoor hydroponic gardening! In this video, we'll show you how to create your own seed pods, giving you the freedom to grow any plant you desire while saving money. Say goodbye to limited seed pod options and high costs!
Discover our step-by-step process for crafting your very own hydroponic seed pods. Whether you're a seasoned hydroponic enthusiast or a beginner eager to start your first indoor garden, this guide is for you. We'll cover the materials you need, the best techniques for assembly, and tips to ensure your seeds grow into healthy, vibrant plants.
By the end of this video, you'll be equipped with the knowledge to produce your seed pods, making your hydroponic garden more diverse and cost-effective. Don't forget to subscribe for more gardening tips and tricks, and share your hydroponic successes in the comments below. Let's grow together!
Check out our Easy Food Storage Plan: https://pantrypreparedness.com/food-storage-made-of-the-meals-your-family-loves/
Products Mentioned in this Video:
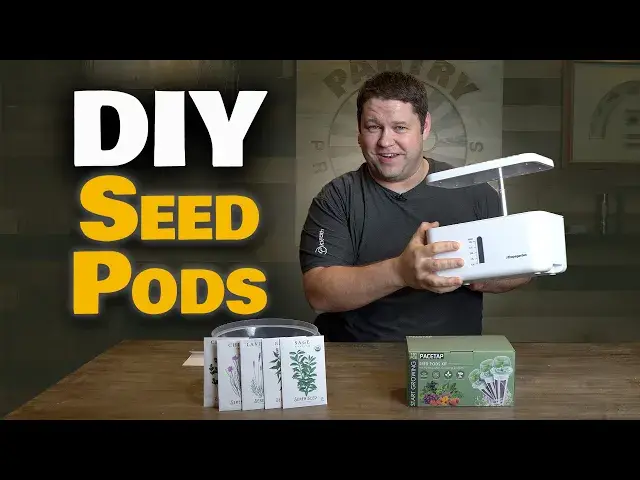
Ahopegarden Indoor Garden Hydroponics Growing System
https://amzn.to/3TzB58C
PACETAP 161 Pcs Seed Pod Kit
https://amzn.to/3ViddHG
#preparedness #readyforanything #hydroponics #diy #garden #gardening #ahopegarden #pacetap #aerogarden
Timestamps:
0:00 Intro
0:53 Cost Comparison
1:47 Pacetap Kit Unboxing
Show More Show Less View Video Transcript
0:00
All right, what is up my friends? Today we are going to be planting in this A Hope Garden
0:06
This was kind of like an inexpensive brand off of Amazon version of like an AeroGarden
0:13
and it was quite a bit cheaper and we had a lot of success. I mean I planted in four different
0:19
types of these gardens last year and I had a lot of success specifically with leafy greens
0:24
and with herbs. Not as much, I did some like cherry tomatoes and I did some little peppers
0:28
and stuff and just what you get out of it you get so little actual fruit compared to like
0:35
the effort you put in and the cost that it wasn't worth it. But leafy greens were amazing
0:39
herbs were amazing and it was awesome always having fresh basically any time of the year
0:45
And it's been months and they've been sitting empty and so I decided it was time to do some
0:51
planting again. My biggest complaint with these though is just how expensive it is to go buy
0:57
more of the little seed pods. So you know with my big tower I've got here the seed pods are like
1:04
five bucks a piece. Even with the AeroGarden which is the most similar to this, the seed
1:09
pods are over two dollars a piece. Whereas like these ones this is just kind of like a
1:17
like standard not I mean it's got a brand on it Paste Tap whoever that is right. It's just kind
1:25
of your standard sort of off-brand little cone shaped wool things, seed pods and they happen to
1:32
fit perfectly. In fact it's funny because on the back of this box the picture literally looks
1:39
exactly like this but without any branding on it. The picture of the device they're putting them
1:43
into and they fit totally perfectly. This box with 30 full setups, it's got the wool, it's got the
1:50
little cone shaped things. I'll pull some of these out. I don't know what any of these things are called
1:58
It's got these that hold the wool, it's got the rock wool. Well this isn't really rock wool
2:03
it's more like a cork. It's got little it's got stickers to label them and it's also got these
2:09
can actually go over the top so you can put your seed in and then this kind of goes over the top
2:15
and it's actually got slits in it so your plant can grow up through it. I don't know that I'll
2:20
use them but the original came with those on it. It's got covers so that if there's any spots I
2:26
don't want to use I can cover it up so it doesn't get so the water doesn't evaporate through that
2:30
hole and it's got the little lids. They're these little clear plastic cups. You're going to see all
2:36
this in a minute that you put on before the seed starts to sprout. Once it's sprouting and getting
2:41
big enough you can take that off but basically it keeps everything moist and while there's no roots
2:47
right so it keeps this whole thing moist the whole time. So it's got everything you need and
2:52
this whole thing this set was like 20 bucks. That's 75 cents a piece. It's way cheaper than the two
2:59
dollars a piece. I also just bought some stuff to do my garden. Garden is the brand G-A-R-D-Y-N
3:06
My tower that I have out there. I bought some stuff to do that at just like a fraction of the
3:10
price. We're talking like pennies per plant instead of five bucks a piece for each pod
3:15
So now my biggest complaint with these is basically going away. So today we're going to do
3:20
a little bit of planting. We actually already had some success with this. So Jake my brother he took
3:25
one of these home the AeroGarden that we have. He took it home and he used these kind of the same
3:32
sorts of things. Planted some stuff in it. He's already got some good starts going. So I'm pretty
3:38
happy to see that and frankly I don't see any difference between these and what originally
3:43
came with this. So I fully expect to get the exact same result. But today I'm going to show you
3:49
exactly what this process looks like. How to plant in these things. We're going to plant
3:53
exactly the seeds we want instead of some set that comes with these where you don't even get
3:58
to pick your plants. And I'm going to show you the best ways to do this because we've already done it
4:02
and made a lot of the mistakes that we could possibly make. So hopefully this time we get it
4:06
right. All right so here's what we're planting right now. We're going to do a little bit of
4:10
sage and basil. Just one of each of these. They produce quite a bit for a small family
4:17
You're not going to need much more than one. We're going to do a couple lavender plants
4:21
Lavender is great. It's a pretty flower but it's also does a great job of attracting bees
4:28
pollinating insects. And so it's really good to have in your garden. So we usually keep
4:32
a couple potted plants of lavender in our garden anyway outside. But this could work well like
4:40
I'm curious actually to see how well this works as like a seed starter. And then what happens if
4:46
you take one of these and just like put it in the ground after it's already started and the
4:51
roots are sticking out. I would imagine it would work just fine. So we're gonna do a couple lavender
4:55
plants and then a couple chives. Kind of same deal. We'll see how that works. Sort of like
5:04
transplant. I like transplanting but we're not like we're not going to pull the roots out of the
5:09
the cork here. And then some cilantro. So these are all things that should grow well in this kind
5:16
of situation. The cilantro will work well in here the whole time. I'm imagining the chives and
5:21
lavender probably I'm gonna transplant at some point. All right. So to get started first thing
5:26
we want to do is we want to take these. Now I mentioned they're like it's kind of like a cork
5:32
cone. It's got a little hole in the top and that's just a perfect spot to just drop a couple of seeds
5:37
into. We'll probably put a few seeds of each kind. You know some plants you're going to get
5:46
a higher percentage of the seeds that actually yield. But if we just throw a few in we're good
5:51
If we get multiple sprouts we'll pick the healthiest looking one. We'll use scissors and
5:55
just snip off the others and end up with just one. So I'm going to take these corks and we're
5:59
actually going to put them in a bowl of water. Very simple. Okay. And we're going to let them
6:05
get saturated with water. Okay. Now then we've got this is how this whole thing works. It's got
6:17
a little pump inside. It's kind of cool. It's got a little pump that's just going to help the water
6:22
sort of move and circulate. And then this just sits right on top. We can fill it easily from
6:29
this little stopper or you could just pre-fill it like this. We'll fill it after we're done here
6:36
I'm going to go ahead and I'm going to put these these little cone cage things. These go in each
6:42
of these holes and they're just there. They hold the cork in place. They're open in the bottom so
6:49
that the water that's inside here can be sucked up through that cork. And so we'll just need one
6:53
in each spot. And then once you put the seeds in we'll drop them in. So let me show you what that
6:58
looks like. So to do that we're going to start by getting some seeds ready. We'll cut this piece of
7:06
paper. It looks like somebody started making a paper airplane. It's not actually what's going on
7:10
here. Although it could be. We'll start with the sage. And you're going to see why this piece of
7:19
paper is so brilliant. Was it my brilliant idea? No actually. It was actually an idea that Jake
7:26
told me about. They were doing this because it helped so much with getting the seeds in place
7:32
Let's see if I can open this. Lost my pocket knife yesterday. Let me grab one of these
7:37
There we go. That'll work. Let's slip that open. Kind of a big knife for for this. All right so here's what we're going to do. We're just going to
7:52
put a few seeds. Oh look at that. I got way too many. What am I going to do
7:58
So what I'm going to do is actually just separate out. I only want I don't know three or four
8:04
Okay there's four. So all these extras. See look I'm pinching right between
8:11
where I want like these are all the extras back here. And I just dump them all back in
8:18
There we go. And then I have well I actually have like five or six
8:24
Right there. It's still on the paper. And then I can just take those and dump them forward
8:32
into one of these. We'll try to get a close-up on one of those a little bit later
8:37
All right now I'm just going to put that in here like I said I would show you. And one is done. We'll take one of these little caps. We'll put it on top. And again it's just
8:46
going to help water from evaporating too quickly. And it's going to help keep that seed nice and
8:50
moist the whole time. All right so Jake tells me he does want to use the little stickers which
8:55
makes sense because we do need to label what it is. Or we can just wait and figure out in a month
9:01
or so. No so I'm going to write basil on one. No sage. That was sage. I'm going to write sage
9:07
Okay and then we'll peel off the sticker. And there's a little hole in the center that we don't want
9:23
So we're going to take that out. So now you've got you've got like a hole in the middle. Okay
9:29
and we just stick that on just like so. So now not only do we have it labeled but we have that it's like partly covered
9:42
but the plants will go right up the middle. And so you're going to be able to see once they start
9:46
to sprout. There's a reason they come like that too when you buy the pods. And so I'm guessing
9:52
that there's a purpose in that. And so we're going to go ahead and go with it
9:57
All right next let's go ahead and do the basil. All right
10:11
These seeds are a bit smaller. That time I managed to not get tons of extras. So that's nice. So I'll pinch it back here a little
10:20
ways. And got them all in. And that is so brilliant. And I don't have to use they give you
10:30
the seeds. They give you the seeds. So I'm going to go ahead and do the basil
10:34
And got them all in. And that is so brilliant. And I don't have to use they give you these
10:38
little tweezer things. That's. I'm yeah I appreciate that they thought about that
10:46
But trying to like handle individual seeds with this is just such a pain. Okay we'll put that in here. We'll write basil on the next sticker
10:55
Put the sticker on. And then we're just going to go through this process six more times
11:15
It's a pretty good set of seeds. All the stuff. Because it's got everything. Even these little stickers
11:41
How do you get your brother to plant your garden? It's going to be a little serious
11:55
Then you're pretty much home free. Great idea for a video. Okay Jake what's the next project? Yeah
12:05
I need a chicken coop so. Alright this one. I don't know. Two to three seeds at most
12:15
These are huge. There we go. Cilantro. And of course I grabbed cilantro even though the next label I wrote was chives
12:34
We'll do cilantro next and then we'll do chives last. But that
12:54
The whole. Do you have the plug for this? Maybe I need to switch and be like the Property Brothers or something
13:24
Who you know. Swing the hammer for two minutes and then leave the set. Yeah
13:30
Just kidding. I don't mind doing the work. Some of us actually do work
13:36
Not all YouTubers are fake. Just most. Now we're set up with our
13:42
A Hope Garden. So next all we've got to do is. We're going to put our seeds in
13:48
We're going to put our seeds in. Next all we've got to do is plug it in
13:53
And turn it on. Oh yeah. And we'll add some water I guess
13:59
Plug it in. Power. And then you can select flowers slash fruits or vegetables
14:07
Vegetables is going to be fine. I don't know that it really is going to make that big of a difference
14:11
But it changes the color a little bit. And then the water
14:15
There's a little light on the top of this one. It just tells you when the water is running
14:20
It's like there's a lot of light in my face now. Alright
14:24
This telescopes upward. Which is cool. Because as your plants get tall you're going to need it higher
14:30
But it also helps get it out of the way. So I can pour the water in here a little more easily
14:34
Now like any good cooking channel. I have my pre-filled water ready to go
14:38
Your ingredients pre-measured for you. Alright. The pump's a little happier now
14:46
That it has water pumped. And there's a little window on the front
14:52
I'll show you in a sec. That can tell you how full it is
14:56
So it's really easy to tell when you need to add water. Alright. We're basically full
15:02
Alright. So. Little window right there on the front. We're just below the full line
15:10
Also, if you accidentally get a little bit on the top. It literally has holes
15:14
So that extra water can just like fall down in there. We'll just cap that off
15:18
We can lower this back down. Until we actually have some sprouts. And
15:24
We basically don't have to do anything. Now with this particular one
15:28
It's an inexpensive model. So I can't really like set the time on it
15:32
For like when I want the light to turn on and off everyday. It's just going to run for a set amount of time
15:36
Every single day. And then the light's going to turn off. And it bases it based on when I turned it on
15:42
So what I found that I like to do. Is we'll leave it plugged in today
15:47
And then first thing tomorrow morning. Like as early as I'm up
15:51
And want lights to be on. I'll just come over turn it off and back on
15:55
And now I've reset it. And that's when it's going to wake up
15:59
And that way like when I want to go to bed. The lights are off
16:03
It's more important if it's like in a room. Like a bedroom with you or something
16:07
Which by the way my big tower garden. Was literally in my bedroom for a while
16:11
And so. That's something that was important to us. But that one you can actually set the time on
16:17
You just. It just costs more. So. There we go. Now we're going to have some good sprouts
16:23
And then eventually some really good plants. Just inside this little cool hydroponic garden
16:27
Now one thing that we didn't cover here. Is plant food. The Hope Garden actually came with a little bit of plant food
16:33
That didn't come in this set. I'm going to do a little bit of research
16:37
On some different things that we could use. To do that ourselves
16:41
I have a feeling that you could probably just use like. Your generic Miracle-Gro plant food
16:45
And mix it in with some water. But when you're doing just the starts
16:49
You don't use the. You don't really need to use the plant food anyway
16:53
But at some point we're going to need to feed it something other than just water. So
16:57
We'll add that in next time. And I'll share an update with you once I know
17:01
Or once I'm confident that I know. What should work well for most hydroponic gardens
17:05
That way you don't have to pay a fortune. For whatever mixture
17:09
Whatever brand you bought. Whatever brand you bought is trying to sell you
17:13
I'd love to hear from you in the comments. If you have any experience with one of these
17:17
Or just have ideas of what you think might work well. I have a little over a years worth of experience using these
17:21
But that's about it. Right? So we're always and all about. Learning
17:29
And improving our processes. And we don't claim to be the world expert on everything
17:33
We just want to share what we know. And I hope you'll share what you know with us
17:37
So comment below. And we'll see what works for you. That's it for today
17:43
I hope you enjoyed this video. And I hope you found it helpful
17:47
I actually have found these to be extremely convenient. So it allows me to always have those fresh leafy greens and herbs
17:51
And you can do it year round. Eventually the plants are going to get too big
17:55
The roots are going to get too big. I mean you can cut them down
17:59
You can tear out parts of the roots and everything. But eventually the plants just kind of outlive their lifespan
18:03
You just get a new little piece of cork. And you just start again
18:07
And it's really just as easy as that. So I actually really love having a couple of these
18:11
So anyway if you love preparedness. And you like being able to be more self-reliant
18:15
That's what this channel is all about. So I hope you'll check out some of our other videos
18:19
That's what we do here
#Home & Garden
#Gardening