Up next in 10


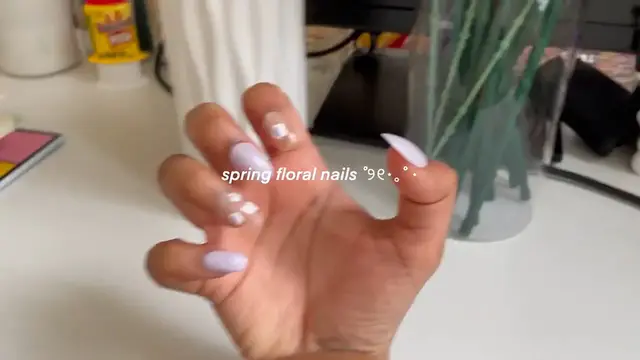
how to do spring floral nails | vegan gel polishes
//Creative Commons Attribution Licence video (Reuse allowed)
Show More Show Less View Video Transcript
0:00
Hi guys! Today I'm going to show you how I made this purple nail set using press-on nails
0:04
These nails are very springy and cute. I picked up this hobby a couple of months ago and it's still very new to me making press-on nails
0:11
but I have been trying to get better. It is very hard. But I'm going to share with you what I've learned so far
0:17
Getting right into it, I'm using these gel polishes from Nail Reserve Los Angeles
0:21
These polishes are vegan, cruelty-free, and nine-free, meaning that they removed nine of the most harmful chemicals from their formulas
0:29
Some of these including formaldehyde, toluene, formaldehyde resin, and other things that you just would not want near your nails, near your mouth, near your body in general
0:38
So the first thing that I'm doing is choosing the appropriate nail size. I got this kit, I want to say off of Teemu. It's either Teemu or Amazon
0:46
But these are supposed to be like press-on nails that are kind of shorter than the average ones you would find
0:51
because I don't like a very long nail. I am just basically measuring it against each of my fingers one by one
0:57
I'm doing it to my right hand. I'm just making sure that the nail completely covers my nail bed and that the sides of my nails are not shown
1:04
Because I want it to look as real as possible. This just takes a while to find the appropriate nail size
1:09
but I basically find them for one hand and then I choose the same ones for my opposite hand
1:14
After this, I start buffing the nails out. So how I like to do this is I buff out the bottom part of the nail
1:20
that is the part that's going to lay against my finger, and I buff it out against both sides, so both the top side and the underside
1:27
And that's just because, since this is a fake nail, I want it to rest against my nail as closely as possible
1:33
and not kind of like stick out of my nail and look like really 3D and large
1:36
So I want to make the part that's going to be against the main part of my nail as thin as possible
1:42
so it looks as real as possible. So I'm just holding each of the nails and using this glass nail file to file them down
1:48
And I'm also buffing it out at the top of the nail where it has just a little part sticking out
1:53
I'm ready to start painting. So I'm using this nail stand to make it workable so that the nails actually stay on
1:59
I'm taking these transparent nail stickers and sticking them onto the fake nail and then onto the nail stand
2:05
so that as I paint, the nails won't move. I just do that to every nail on the hand that I'm doing and I stick them on, press them down very securely
2:13
And then the first thing that I'm doing is taking the purple nail polish and doing a thin purple coat
2:18
And I feel like one coat is enough. Like these polishes are opaque enough that you only need one real coat
2:23
After using this pretty purple color, I also use the matte coat on the remaining nails
2:28
And after that, I just cure this for 99 seconds. So now that the base is done, I'm using the white nail polish and this dotting tool to make five flowered petals
2:40
The way that I'm doing this is just making five dots on the nail
2:44
It's really like not that hard and also, even if it doesn't come out perfect, it's still cute from a distance
2:49
I don't really care. I just make five dots, five little points in the shape of what I think a flower would look like
2:55
And then I use the remainder paint or since it's a liquid, I just mush it up around there so that the center gets filled as well
3:02
I'm making one big flower on my pointer finger and then three mini flowers on my ring finger
3:07
After I'm done doing that, I push it back under the curing lamp and cure it for another 99 seconds
3:12
So once the white part is cured, all I'm doing now is going back in with the dotting tool
3:16
but this time the lavender nail polish that we started with and I'm just adding a center dot in all of my flowers
3:22
Just put a little dab and that's it. And it looks like a flower and no one can tell the difference
3:26
And then again, I just put that under the lamp and cure it. This is what the nails are looking like
3:31
To actually use the press-on nails and apply them to my nail, I'm buffing out my own nails using the glass nail file
3:37
I'm doing this so that my nail is grittier and makes a good surface for the fake nail to apply to
3:42
After buffing out my nails, I'm just using an alcohol wipe to make sure that they're as clean as possible
3:47
And then using a nail sticker, I measure the nail sticker out against my nail
3:51
Then I pull on the tab to take off the plastic from the top so that it's sticky
3:55
And I press the fake nail on very firmly onto my nail and I hold it there for just a couple of seconds until I can tell that it's firmly attached
4:02
And then I just repeat that with the rest of my nails. The pointer and ring finger nails should have been matte, but you can tell that they're clear right now
4:10
And that's just because as I finished painting the nails, I decided to put one final, not matte, clear layer on them
4:16
So I got rid of the mattness, which was dumb. I regret doing that. I shouldn't have done that
4:20
But it still looks very cute. And the nails, after I applied them, were super secure
4:24
I just finished applying the rest of the nails, measuring the nail stickers against my finger and making sure that it's the correct size
4:29
And then I'm done and I have these really cute lavender nails. I very much love how these came out
4:35
That's it. I'm going to leave all of the products and supplies that I used down below
4:39
If you're interested in using them. And I'll leave the specific nail colors that I used as well
4:44
And I think that's it. Bye
Beauty & Fitness
Cosmetology & Beauty Professionals
Face & Body Care
Skin & Nail Care
Beauty Services & Spas
Crafts
Fiber & Textile Arts
Manicures & Pedicures