Up next in 10

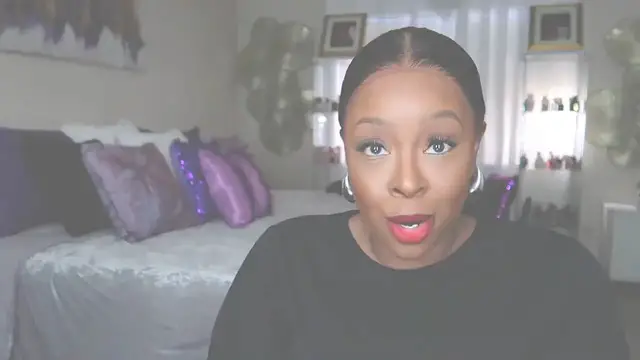
DIY INDIVIDUAL EYELASH EXTENSIONS APPLICATION! AMAZON CLUSTERS VEYES BEAUTY #veyesbeauty
Mar 15, 2024

DIY INDIVIDUAL EYELASH EXTENSIONS APPLICATION! AMAZON CLUSTERS|VEYES BEAUTY
//Creative Commons Attribution Licence video (Reuse allowed)
Show More Show Less View Video Transcript
0:00
Hey guys, Nikki here and I'm super excited about this video
0:03
I am going to show you guys how to do eyelash extensions at home
0:09
Thank you so much, V.I.'s Beauty, for sponsoring this video. So if you're interested in seeing everything that I was sent and how I did my own eyelash
0:18
extensions, please continue to watch. So guys, I'm just going to tell you right now that I am super traumatized by the eyelash
0:42
extension process. If you guys have been watching me for a long time, the last time I got eyelash extensions
0:49
my eyes were bloodshot red for an entire week. I repeat, bloodshot red, like I was in a fight
0:57
I couldn't work for a week because of course, the type of work I do requires my face and
1:02
that's when I was heavy into makeup reviews, so I couldn't work
1:07
I couldn't go outside because anytime the sun hit my eyes, it was like someone poured
1:12
alcohol in them. I literally got the girl fired, which traumatized me because I kept telling her the whole time
1:20
it's burning, it's burning, it's burning. And she just kept giving me a fan
1:25
And y'all, I have not wanted to get my lashes done since then
1:31
I was truly traumatized. So when this company reached out to me, I was like, ugh, but I love the look
1:40
I love to just wake up and just look refreshed already because you already have lashes on
1:47
I just love it. So I said, I'm going to give it a try and when I say I'm so happy I did, I'm so happy
1:53
I did. So let's just hop straight into what was sent. So let's hop straight into this beautiful packaging from V.I.'s Beauty
2:00
I was sent two different kits, the flake kit and the forest kit. One of the lash kits is just a little thicker than the other and I absolutely love this packaging
2:09
So these lashes are for beginners and experienced users. Everything is on the back, but trust me, you're not going to need this, but it is how to apply
2:17
how to remove, how to clean and store and et cetera. But they are so easy and user friendly that you're not going to even need all of that
2:25
So let's just open this pack up right here. This is the lighter or the thinner lashes right here
2:30
So let me tell you everything that come in a pack. You will get tweezers. This is what you will use to apply the lashes
2:36
Of course, there is glue in here. One is lash bond. You will brush your eyelash with that and apply the lashes and then there is the lash seal
2:45
So literally everything you need to do your lashes come in this kit. I mean everything, you don't have to go out and buy anything additional
2:52
Everything is in here and these lashes are reusable up to five times and right here is
2:57
the remover because I know that's the next question. There is the remover in here for when you want to take the lashes off and here are the
3:03
lashes up close. So we're going to move into this other one that was sent, but let me tell you a little bit
3:10
Like I say, you can reuse these lashes up to five times. They have a revolutionary air light lash, ultra light, 80% lighter than other brands
3:19
There is an exclusive ultra thin invisible band for seven day wear with no discomfort
3:27
and the bands are so fine that they are nearly invisible to the naked eye
3:31
Please note that with the forest and the flake lashes, you can use them individually or you
3:35
can mix them to make a more customized look. So now that you know what was sent and a little bit of details about the lashes, I
3:44
am going to tell you how I feel and then we're going to go into the demo
3:48
I love them. They're very inexpensive. Compare them to what you would pay someone
3:53
Very easy to put on. I was scared at first. I'm like, Oh gosh, I know I'm going to mess this up and I was like a little pro. Okay
4:04
So of course some tweaking and et cetera before the first time, super, super easy
4:10
Everything coming to keep that you would need. And I just love the refreshed look that I have
4:16
So of course I do have them on right now. I feel like I'm a little pro or whatever
4:25
And I absolutely love everything about this process. So let's just hop straight into me putting them on
4:33
All right guys, let's get into this very easy process. I will be using this book right here
4:38
I'm not going to mix and match from each book, but first I'm going to take any makeup that
4:43
I have off of my lashes and my lash line. So let's go on with the lash bun
4:47
What you're going to do is brush this on your natural lashes. And this is what we're going to use as our adhesive
4:53
This is what bun the natural lashes to the eyelash extensions. You're supposed to let it dry for 10 to 20 seconds, but I cheat with that fan
5:02
So this is what the cluster look like. The band is invisible
5:06
So we're just going to start. I am going to put my lash number or my lash map
5:12
I guess that's what it's called below. So you guys can know exactly what numbers I used in case you love or like the way that
5:19
I did mine. I will make sure that I put that below because I forgot to note it so I can't remember it
5:26
for the voiceover. But this was absolutely amazing. The clusters go under the lashes guys
5:32
You put them under the lashes, not on top and you put them one to two millimeters away
5:37
from your eyelid. Please do not put them on your waterline. Please do not
5:43
That will irritate your eyes and your lashes won't stick. There was no itching, no burning or anything
5:50
This glue is the best glue I've ever used. I didn't feel any irritation at all
5:56
No kind of burning or anything. So that's one eye right there. What do you guys think
6:01
It makes such a huge difference. So now let's seal the lashes in. After applying the bond, seal the lash on the upper and lower base
6:09
Right here, I think I only showed the lower but that's all you do
6:13
This is what makes it waterproof and prolong the amount of time you can wear the lashes
6:18
So I'm just going to do a very quick demo on the other eye. As you guys can see, I got a little bit of glue on my lid
6:24
You just let that dry and then it will just rub straight off. I'm going to do the same lash map
6:29
I think it is 18, 18, 16, 16, 16, 14, 12, 10
6:36
If my memory is good. So we're just doing the exact same thing on the other eye
6:41
Please remember that there is a remover in here for you to remove them
6:45
And pick up the lashes gently. Wear underneath the natural lash line and keep away from fire and out of the reach of kids
6:54
All right guys, so I would highly recommend these 10 out of 10, 10 out of 10
7:01
You know, it take a lot for something to get a 10 out of me, but they made a believer out of me and I think I did an awesome job for being my first time
7:08
But just wait, cause I got a lot of them left. When I'm on like my fourth, fifth, sixth time, oh baby, baby, you are not going to be able
7:16
to tell me anything. All right, y'all. So it's the next day
7:21
As you guys can see, I can comfortably wear them with my glasses
7:25
I've washed my face. Oh, these look so good. So I will make sure I leave the link to the company below
7:31
The link to the lashes I show below in a discount code. If they provide me one, you know I'm a look out with y'all and try to save that money
7:37
even more. Okay. So thank you for watching this video. Don't forget to rate, comment, and subscribe on your way out
7:44
And thank you for this awesome, awesome lash kit. Okay. Okay. I'll see y'all in my next video. Bye
Beauty & Fitness
Cosmetic Procedures
Spas & Beauty Services