Up next in 10

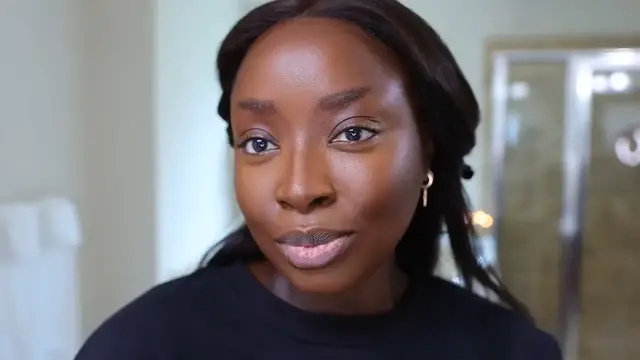
new Foundation for DARK SKIN, Testing New PRODUCTS, DETAILED makeup tutorial for beginners
Dec 13, 2023

*new* Foundation for DARK SKIN, Testing New PRODUCTS, DETAILED makeup tutorial for beginners
//Creative Commons Attribution Licence video (Reuse allowed)
Show More Show Less View Video Transcript
0:00
Today I'm going to be trying out some products that are new
0:02
Okay, that is subtly beautiful
0:12
Very natural. Oh my God, I'm underwhelmed. When you're trying something new for the first time, just don't
0:31
What up baby? Let's do some makeup. I don't have a full face of new makeup, but I've got some new stuff. Okay
0:38
And I am excited about them. One of which is going to be the L'Oreal True Match Super Blendable Foundation
0:43
I have the shade C10 Cool Deep and W10.5 Warm Deep. So let's see
0:50
You know, I like a neutral shade, but I was sent these two. So let's see if either of these work for me
0:55
Okay, wow. This is $11.19 on sale. It originally retails for $13.99
0:59
There are 47 shades. Is that accurate? 47 shades. Wow. It's supposed to lock in moisture, provide medium coverage, natural finish
1:08
adapts to any skin color and texture. Hmm. Super blendable. Let's try it out
1:13
And if you try this, comment and let me know because I'm curious. Starting off with this lip primer because that's a must. Okay
1:18
I always do skin first because it just flows better that way
1:22
This is a NARS Soft Matte. Wow. Let's put this only in the T-zone because that is the only area that I wish to mattify
1:29
And let's see how this interacts with this foundation. If you're a beginner at makeup or just have some things that you still need to learn
1:36
make sure you look at my beginner makeup playlist where I have lots of videos for you to choose from. Okay
1:42
So let's do a swatch. This is C10 Cool Deep. Ooh. I already feel like this will look beautiful on me. Ooh
1:52
This W1 is looking olive. Oh, I feel like the two of them can work
1:58
This is W10.5. They both could work for me. Which one should I use
2:03
Oh my God. Which one would you use? Oh, I got to figure this out right now
2:08
All right. I'm going to go with the C10 Cool Deep because I feel like this will be pretty and we'll
2:13
see how the look all comes together in the end. And if I feel like it's too red, then of course I'll know for next time to use the warm one
2:21
I may have taken too much. We'll find that out soon, won't we
2:25
Ha ha ha. Ooh. This is the Morphe E63 brush and cool means that's going to have a red undertone to it
2:33
And I normally like a neutral, so a mix of both. Of course I could mix foundations, but who has time for that
2:39
It needs to just work for me off rip. So here I am blending in more pouncing motions because I do want to get the most amount of
2:46
coverage out of this as possible. I do go over my eyebrows because I like to do my eyebrows differently when I have on
2:52
a full face of makeup. And if you've been here, you already know. And if you don't, now you know
2:56
You know? I'm focusing more on the middle part of my face. Then I'll make my way toward the outer part of the face
3:01
The key is to make sure that this foundation or any foundation is not caked up around the
3:06
hairline or the chin. Okay? So you of course want to have the product there, but it don't need to be sitting there
3:12
You feel me? So what's left over on the brush is what I am now bringing to the outer parts of my face
3:19
Okay, off rip, the deepness of it is stunning in a way that I like. Because you know I like to go darker and then I lighten it all up with my concealer and
3:25
the whole nine yards. So what I will do is with this concealer, this is Lancôme Tante Deau Ultra Wear in
3:30
the shade 500. This is, in my opinion, going to balance out the redness in this foundation in a great way
3:38
I do see the medium coverage of this foundation. I do feel like I can still see my skin just a smidge, nothing too wild. Right
3:45
It's not giving light coverage, definitely medium. And I like it. What do you think so far
3:49
And if you use this, comment and let me know. Now let's blend this in with this e.l.f. sponge, which I just soaked really quickly
3:55
And then I made sure to squeeze it out in just the right way. Because you still want it to be a little bit wet, but not too wet
4:00
I do a video in the Bake Up For Beginners playlist, which explains to you how to make
4:05
sure that your sponge is the way you need it to be. Right
4:09
Not soaked, not dry, just right. And here's what I mean by the highlight brightening up the whole entire face
4:15
You see how this is so light, which is what I like. I love it to be this light, right
4:19
You see how this is so light that now, once I'm done with all of this
4:23
I don't know, can you hear me? Once I'm done with all this, it really is going to brighten up the face and not make
4:29
it look so dark as it was before. And not as red as it was before
4:33
You feel me? And that's why I like to go darker with the foundation. Because once I start to lighten it up and then I bring the shadows back in, it just
4:40
all works. You know? Okay, and now to contour. This is a new product
4:44
This is the Milk Makeup Matte Bronzer in the shade Spaced. This, I have to say, is annoying because I don't know if it's just because it's too hot
4:51
or whatever, but when I take this top off, the inside comes off
4:55
So not to waste the product, I'm going to take what's inside here
4:59
Let's use my finger like so. Very deep. And then let's apply this nice deep shade
5:06
Okay, so I've got the product in place. Let's blend this out
5:10
I'm angling it or bringing it backward. Now, you can argue that I brought this down too far
5:16
So let's clean that up. Nothing else on this sponge except what was already there
5:20
That's a very stark line, but we're going to blend that in, okay
5:24
Just by doing this again to diffuse it. Let's hold this hair back and get this contour into the hairline as much as possible
5:31
But again, it doesn't need to be all caked up. We're just trying to make this look effortless and seamless
5:36
Pounce, pounce, pounce, pounce, pounce to get this blended in. This with the concealer and the foundation looks really, really good
5:44
Comment, let me know if you agree. And then I'm going to use this Sephora 57 brush to bring some of this product down the side of my nose
5:49
Leftover on the brush is the best way to go so that I'm not taking so much product, right
5:54
I do want my contour to show, but come on, we trying to avoid the line, which you might be like, uh, there's a line right there right now
6:00
I understand, okay? We are going to blend all of this out in a sec
6:04
We're not done yet, you know? You got to just trust the process. If you are a console on your nose, let me know
6:10
Because I always say that this is definitely a technique or a step in the process
6:15
that you may not want to take on as a beginner, you know
6:19
If you are advanced or intermediate, you might do this with a breeze. Like how I'm just doing it so quickly, you might be like horrified thinking, what
6:26
Slow down. So if you're a beginner and you know how to just do a little one, two, one, two
6:32
this may not be something you want to dabble with, you know, until you get more comfortable
6:36
But if and when you do decide to do this, girl, it just makes such a difference
6:40
It just, it just snatches the face in all the ways, you know
6:44
Now, we're going to take the sponge, the cleanest part of it. Not this side, because just not right now, but here
6:50
It's just a little strange way, but just this section right here, okay
6:54
And I'm going to blend the line of debarkation right between the highlight and the contour, okay
7:00
Do you see how now it is gone, all right? Same way here, twisting it, keeping the sponge that touched the concealer in the same spot
7:09
and the sponge, sponge area that touched the contour in the same spot, okay
7:13
And now we are going to turn this over and do the same here
7:18
Keeping everything right where it needs to be so that we are not transferring the contour
7:22
to the concealer, nor the concealer to the contour area. Do we see... This sun is getting on my nerves, okay
7:28
So, just ignore that. Just irritating me. Do we see that vibe? Mmm! Mmm, mmm, mmm, mmm, mmm, mmm, mmm
7:33
I do not have a different setting powder for under my eyes, so I'm going to use this
7:37
Tried and true, baby! Huda Glowish Luminous Pressed Powder. And let's make sure that the area under the eyes is not creased, okay
7:46
Taking the sponge, nothing else on it. Just going to do this to ensure that my natural wrinkles, which is natural, all right
7:54
Just make sure that they have not disrupted my concealer too much
7:58
And then now with this Sephora 99 brush, here we go. Before we rest the face, just want to get underneath there
8:07
Okay, now we're going to bring this down and continue to form that check mark
8:12
Hello? Brightening the under eye area. This might look ridiculous to you, but when the face is all done, baby, this looks so good
8:22
If you're using a luminous pressed powder or a loose powder under your eyes, let me know
8:26
And this I've just been using because it is just the Elstinkin Good Black Opal, okay
8:30
Powder foundation. The shade is Around a Clay Girl. And we're going to just set, but not just set
8:37
I'm intensifying the brightness of this other face highlight, honestly and truly
8:43
You can leave it. You don't have to use all these powders. You can just leave the skin looking satin, right
8:49
In between matte and hydrating, the in-between, the comfortable in-between. You can leave it satin if you prefer for your skin to look a little bit moist like that
8:56
And that's okay too. I really want to further intensify the highlight because why not
9:02
Huh, girl. This is how I like for my face to look. You feel me
9:06
You, of course, can take a pressed powder like I just did, and you can choose one that is not so light
9:11
That's also an option where you will still get the brightness, but not as much, okay
9:15
I like to do a lot. What I am going to do right now is I'm going to take a contour powder, okay
9:20
And I'm going to deepen up this contour, baby. And then we do the face powder
9:25
So this is the Elle Cosmetics Camo Powder Foundation. The shade is Rich 660N
9:30
And this is an LYS powder brush. I could skip this section, but what it's going to do is deepen out the contour in the most beautiful way
9:41
All right. Subtle, dramatic, comment and let me know. It's getting dramatic, but in the best way, you know
9:48
And now is where I do the powder foundation, which is my face powder
9:53
Now, this one I do have a new one of. This is the Makeup Forever HD Skin Matte Velvet
9:57
All right. And this is actually the shade 4N74, which matches the foundation in the HD skin that matches me perfectly
10:08
So this is 4N74, and this is the same. I am going to use this one now
10:12
It does come with this sponge where you can use to wipe it onto the skin the way that it's done in the promos, the videos that you've seen probably
10:18
I don't like to wipe any kind of powder foundation on my face, so I don't use this
10:22
But it comes with it in case you want a real fast way to be, like, wiping it on your face
10:27
This is the Sephora Pro Bronzer 80 brush that I just love to use with my powder foundation
10:32
I'm going to try this for the first time. This is supposed to match my skin, maybe kind of, sort of
10:39
But I'm really just trying to bring back some color, make everything look nice
10:44
This is my first time trying this. I hope it looks good. It's looking good. Thank you
10:49
I am applying this in the area where my highlight meets my contour
10:54
Okay. That's where I'm first applying it very wildly. And then now I'm going over the contour just a little, not to take it away, but to bring it all together
11:04
You feel me? And this shade is looking really good. Ooh. Now, you could use the powder foundation first and then do everything else
11:13
but that's simply not how I do my makeup. I use it to finish off the face, not to, in its entirety, give my face the coverage that it could give
11:22
if that's what you wanted. Okay, so I'm using this in the way that I like to use it
11:26
But know that there are other ways that you can use such a product
11:30
I like how this looks. Going back here some more so that my highlight under my cheek isn't too, too much
11:35
Like, I want to be there, but, you know, I can give it a little bit of decrease
11:39
I can decrease it a little bit. So, I don't know. This is the part of the face where I will add a little bit more highlight
11:45
more of the frosty highlight, right? Not the highlight that was under my eyes as a concealer, but more on the frosty realm
11:51
This is the Milk Makeup Highlighter. This is the shade Lit. So, here we are. Another twist off and take off
11:57
Okay, good. Oh, yeah, there's some moisture in here, but thankfully this one did not come up, you know, like the other one did
12:02
So, now, this I would use on my fingers. But let me just see something above my lip
12:07
Let's see. Okay, good. This is buildable because I would think that with what I just did
12:11
I would have so much on. But this is buildable. Lovely. Okay, right here, padding
12:17
Okay, very subtle. Now, I'm a little worried that I might end up doing too much
12:21
So, let me do the finger. I don't want to end up taking off my makeup. Ooh, this is creamy. Love
12:26
The warmth of the finger will help to get the product to blend more easily
12:31
Love, love, love. Okay, good. And then right here, middle of the nose to further highlight all this out
12:39
The warmth of the finger and then the second finger is clean to help blend it in
12:44
There were some other shades that were sent to me. I could definitely go with something more yellow, more golden
12:51
But this is actually pretty. This is reminding me of the Rose Ink one that I've been using
12:55
I like it. And then this is already highlighted, so no need to even go over there
12:59
That's why I love the Luminous Press Powder because it just – Look, the face is already highlighted, okay
13:04
Here's where it gets a little dicey because I don't use cream blushes. Well, this is a liquid blush, actually
13:08
This I'm sure you've seen used by many a people. This is the Charlotte Tilbury Pillow Talk Dream Pop Matte Beauty Blush Wand
13:16
Now, I remember using the Rare Beauty one, which I know was really popular on TikTok
13:21
And I don't recall what it was for me. Maybe I just wasn't comfortable. I'm squeezing this into the sink just a smidge to see what happens
13:28
because I don't want this to splash everywhere. It has this sponge. Oh, okay
13:32
You got to turn it. I didn't know that. Okay, now I'm squee– Oh, wow
13:36
That popped up very quickly. Okay, so I see the girlies just putting this on their faces, which I will not lie
13:42
it makes me very uncomfortable. I'm normally a hand and then the face kind of girl. Let me do what I know because I can't be following y'all
13:48
This is too much. Like, this is very risky to me. So, I'm putting it on the hands
13:52
I'm sure that this is going to look beautiful, but I've got to take proper precautions
13:57
Okay, that side part of the sponge. Taking, taking, taking. And let's start here and go in circles
14:04
It does sheer out. Okay, good, because it was looking really pigmented on my hand and even on the sponge
14:12
Okay, I could put this onto the face. It's got to be workable
14:16
If it's not workable, that's where applying it directly to the face is a tragic disaster
14:22
because then you'll have way too much and you won't even be able to blend it. It just looks ridiculous
14:26
Okay, that is subtly beautiful. Very natural. It's almost like I can't even see it
14:30
It's very subtle. Let's finish the other side. Oh my God, I put it directly onto the face and I think I squeezed out too much
14:37
Yo, okay. We're gonna do this. Wow. Okay, I'm gonna take off some of my sponge
14:45
Look, I'm doing different things just for you. Yeah, it is pretty sheer, but it was so wet that I worried that I just took off some makeup
14:52
Did I? Okay, let me turn it over. This side's clean. In hopes to bring this, just to blend that down a little bit
14:58
Yeah, I'm not gonna do that ever again. Putting it onto my face, it's not my ministry
15:02
That's what I mean. When you're trying something new for the first time, just don't
15:06
Okay, my hands are a huge mess right now. Definitely remember to twist it shut to the off section and then put the cap on
15:12
I did not do that and the cap was a mess, okay? I think that this looks subtly beautiful
15:16
I feel like there's more here than here, but honestly and truly, I wanna stop right here
15:20
because this is already enough for me, but hmm, pretty. I just need to get used to it
15:26
Now, let me deepen my contour just a smidge so that this back area looks like more of a gradient
15:34
See how it's medium? You can still see some blemishes right here on my cheeks, which I don't like
15:38
I like for that all to be covered, so okay. And by medium, I'm referring to the foundation
15:44
Okay, for eyeshadow, I do have this new palette from Milani. This is the 110 Whiskey Business Gilded Mini Palette, all right
15:52
But before that, let's prime the eyelid with this P. Louise base. This is the shade Rumor 02
15:56
And I did my brows and I highlighted underneath my brows, which is important
16:01
I'm gonna put this on the back of my hand because a teeny bit of this goes a long way
16:06
And then to spread it all over my eye, first of all, spreading it on my finger here
16:10
Let's just put some on the finger and just move this along. Let's do that
16:14
My nails are long, so sometimes this can just be so messy. But you know what, Ashley
16:18
No, that just worked. I normally try to use a brush to do this, but listen, that just worked
16:22
Hold on, we're getting there quickly, okay? Use the finger. Look how it just warms up and gets the job done, okay
16:28
I normally do the brush because my fingernails get in the way, but it's been a while since I've used the P. Louise base and it blended very easily
16:34
So here we go. More on this side than the other, but it's really fine
16:38
We don't have names for these shades, so I'm gonna just use an assortment, starting off with these two here
16:44
And let's see how that builds up. Get this orange color up in here with the brown to deepen it a little bit
16:50
Let's see if we can get another drugstore situation going, right? Taking that orange-brown type color and then the brown-brown type color
16:59
like the true brown. Let's go right up in here, baby. This is the Sigma E61 brush
17:04
Now, I won't lie, I wish that this were warmer. Like, it's not giving me, I don't know if it's not warm enough
17:09
if it's not pigmented enough. I don't know what it is because I did base the eye
17:13
It just looks very neutral, almost invisible. Now, this is not coming out the way I would like for it to come out
17:19
However, it'll work for someone. It'll work for you if you're a beginner, if you're not sure of really how to do this
17:24
if you don't want it to look too loud and pronounced, then this will work for you because it's not giving loud and pronounced
17:30
which is what I like, right? That's what I prefer on my eyelids. So this will work for you if that's what you prefer, okay
17:36
And now all over the eyelid, let's use one of the lighter colors
17:40
Let's go really light so it can show. Let's go here because these two will end up, this is white, obviously
17:45
This will end up looking white. Let's start here and see how light that shade actually turns out
17:50
I normally would use a flat, fluffy brush, but I ain't got one in front of me
17:54
so we just using a straight-up fluffy brush. It'll do the job because this is a real simple, soft look, you know
18:01
This is looking more gray, so this is more cool. Again, it's just subtle
18:06
I'm not wowed. I'm just like, okay, it's giving very subtle. And the drugstore eyeshadow palettes aren't all like this
18:13
I'm underwhelmed, but if you just need to practice and don't want it to be so pigmented right off the rip
18:20
you will enjoy this. I'm gonna deepen this crease with the other brown, which was more cool
18:25
So here's an illustration, again, of why I don't like cool-toned eyeshadows to just overtake my whole eye
18:30
because if you look at this, it's giving gray, right? Cool, gray, ashy
18:34
That does not flatter my skin tone. It might for you, but it just doesn't for me. And this is why I always start off with that reddish-brown shade in my crease
18:41
and then I build it in to blend into whatever shade I'm using in the crease
18:45
because I want it to be warm, sunset vibes. You see this
18:49
This is giving more of the moon. And you might think that this is gorge
18:53
Like, let's say I had on a gray outfit, a gray dress, gray top, whatever. Yeah, I suppose, but I would never
18:58
But let's finish the look with some eyeliner, mascara, and let's discuss the lip
19:02
Let's use the L'Oreal Telescopic Carbon Black, right? This is the TikTok viral one
19:08
I bought it after that whole situation went down. You feel me? Here we are
19:12
We're gonna get up close and personal. Ooh, it's looking good thus far. I have an eyeliner, obviously, because I'm finishing my face
19:17
but who am I saying that? Is this the one? This wand looks different
19:21
Maybe I picked up the wrong one. This looks gorge so far. If you've tried this mascara, let me know
19:25
What's annoying is this wand. I don't know if that's supposed to be like that
19:29
This is what makes it great, but it's annoying. Because getting it in, see how flimsy it is
19:33
It doesn't go in well. It's annoying to push in. The wand is flimsy and irritating
19:40
So anyway, but, you know, the mascara looks good. All right, so comment, let me know what you think about this
19:45
If you have tried it, I would love to know. You know my tried and true lashes are these ones from AliExpress
19:50
I always link them below. All the products are linked below. So make sure you take a look at that link in case you want to buy these lashes
19:56
All right, we're near the finish line. I did the Lawless One and Done Mascara on the bottom lashes
20:00
That's my tried and true, right? And I want to use this MAC Cosmetics Locked Kiss Ink
20:04
This is the shade Gutsy. Now this is very, very bright. So let's line the lips first with this Rare Beauty Kind Words Lip Liner in the color Strong
20:14
This is giving MAC chestnut vibes, you know? Something brown to warm up the lips
20:20
Basically giving the lip a contour, you know? And then the shade goes in the middle
20:25
And I have not tried this out, so this one's also new. You could stop there
20:32
Let's build this up. I want this to spread more on the lips. It feels lightweight, not caked up, not strange in any way
20:41
Here's the finished look. If you loved it, like it, would change anything, comment and let me know
20:46
Like I mentioned, all products are listed below. I'm linking two. Pick one to choose from to watch another video
20:52
I'll see you next time. Bye. Bye
Beauty & Fitness
Cosmetology & Beauty Professionals
Face & Body Care
Make-Up & Cosmetics
Hobbies & Leisure
Clean Beauty