0:00
Hello friends welcome to Solid Works
0:02
tutorial and in this tutorial we will
0:04
learn the shell command in solid works
0:08
for this we will create very simple part
0:10
and understand the shell feature in
0:12
solid works you can also visit my
0:15
website Mac nexus.com and you can visit
0:19
this solid works tutorials tab where I
0:22
have written so many tutorials on uh
0:26
solid works where you can follow the
0:28
step by step guide to model the
0:32
parts if you like my method of teaching
0:35
then you can also support me on kofi.com
0:38
you can buy me a cup of coffee your
0:42
small support will help these channels
0:44
to grow and it will motivate me to
0:47
create more awesome content on solid
0:49
works so let's come back to our
0:53
tutorial for this I will select the top
0:57
plane click on the sketch and I will
1:10
profile now I will give the
1:14
dimension but before I will select these
1:17
two lines and give the equal constraint
1:21
now I select the smart
1:24
Dimension and give it a distance of 100
1:37
150 and I will select this one and this
1:41
one and give the equal
1:45
constraint now I will come out of the
1:48
sketch switch to isometric by pressing
1:52
the control and 7 now I select my
1:56
sketch click on extrude boss and base
2:01
and uh here I will give the height of uh
2:14
100 now say okay so this is the very
2:18
simple shape now we will understand the
2:21
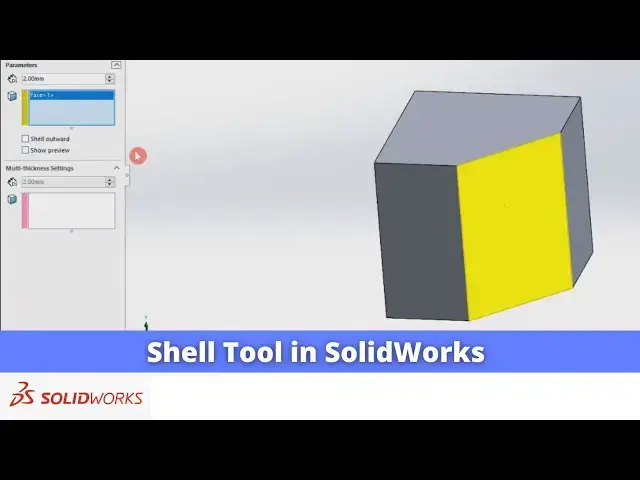
commands for this we will click on the
2:24
shell tool and here we have to select
2:27
the face and here we will Define find
2:31
distance or we can say the
2:34
thickness so first I will select this
2:37
face and I will keep my thickness 2
2:42
mm and here is a option of a shell
2:45
outward if you want to Shell outward but
2:51
inwards I will click on okay so you can
2:54
see that uh my part is got hello of 2 mm
2:59
thickness if you want to check go to
3:03
evaluate click on the measure select
3:07
interface and outer face then you will
3:11
see here the distance is of 2
3:15
mm now if I go to the Shell tool and
3:18
click on edit and if I click on shell
3:22
outwards then it will
3:24
add the thickness of 2 mm to the outward
3:30
if I check the distance of my top and
3:38
one4 our Extrusion was 100 mm now it is4
3:42
because it has shell outwards so that 2
3:46
mm thickness added at a top and bottom
3:49
and all the faces of this
3:52
part now I will again edit to the Shelf
3:56
tool and remove this shell outwards now
3:59
now here we have selected only one phas
4:03
let's select another phas and click on
4:08
okay so you can see that
4:13
face has been deleted and shell is added
4:17
and if I again click on the shell
4:20
features and select this face then all
4:27
removed you can select or deselect any
4:32
phas if you want to deselect any phas
4:36
then click on it and click on delete and
4:42
okay so this is how to use the shell
4:46
commands in solid works thank you for
4:49
watching and thank you for your valuable