Up next in 10

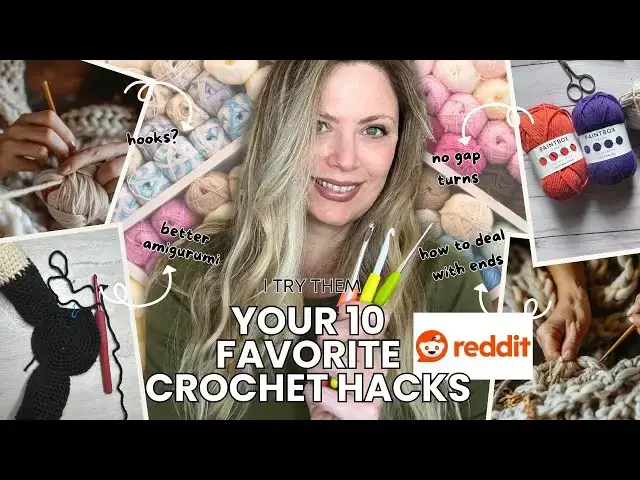
Want to make your crochet projects easier, faster, and neater? I rounded up the top 10 crochet hacks that real crocheters on Reddit swear by — and tested them myself. From how to use leftover yarn scraps and invisible joins to clever storage ideas and time-saving tricks, these tips are total game-changers for every skill level.
Whether you’re a beginner learning the ropes or an experienced maker looking to simplify your process, you’ll find at least one “aha!” moment in this video.
✨ Watch through to the end for my personal bonus hack that's saved me hours on weaving in ends.
Videos mentioned in this video:
With Alex (yarn under crochet method for amigurumi): https://youtu.be/KEmoG0Z6ON4?si=2hlCkvWJ4lZ3jHFN
Using yarn glue to tack down your ends: https://youtu.be/ietIZW7V1xU
The best crochet finishing tool: https://youtu.be/SlE8Csx1uIQ
Alternatives to Poly fil: https://youtu.be/3Cbpfma63oo
Red crochet hook: https://amzn.to/4hmakOZ
Buy me a coffee: Ko-fi.com/livechilllife
Subscribe to the newsletter for monthly discounts, tips and free patterns: https://livechilllife.com/
Try my project tracker for free: https://livechilllife.com/crochet-and-knit/project-tracker-page-for-crochet-and-knit-patterns/
My books:https://livechilllife.com/shop-my-books/
My vintage recipe cooking channel: https://www.youtube.com/@100yearoldrecipes
My Etsy shop: https://livechilllife.etsy.com
#CrochetHacks #CrochetTips #CrochetCommunity #CrochetAndCalm #CrochetIdeas #CraftHacks #RedditFinds #YarnLovers #CrochetLife #CrochetBeginner #CrochetProjects #CrochetTricks
Show More Show Less View Video Transcript
0:00
Hello friends. So, I somehow ended up on Reddit and I ended up down a rabbit
0:05
hole, you know, as you do. It was a thread on your favorite crochet hacks.
0:11
So, members of our community were posting their favorite hack and it was pretty interesting to be honest. I began
0:18
to see a common theme of several tips being repeated over and over again. So,
0:25
I gathered those together and I want to talk about them in this video. And something I found kind of I don't know
0:33
interesting is there were comments from people who have been crocheting for decades and some little simple tweak
0:41
that maybe you and I already use and don't think anything of it. They just now figured it out. So I thought that
0:47
you might find one, two, maybe all of these helpful for you to make your crochet experience better on a
0:55
day-to-day basis as you're working. Uh, I've have a couple that I think can be
1:01
improved upon. So, maybe if you already do this, I can give you some tips how to do it a little bit better. If there's
1:07
anything I haven't tried, I'd like to try it on camera and see what I think. And of course, you know, I'm going to
1:13
ask you if you have a hack, tell the class in the comments. We would love to hear it so that we all are having our
1:19
best experience possible crocheting. Let's get started. [Music]
1:39
Okay, the waist not want knot. This kind of plays into a video I've I've done quite some time ago, but several people
1:44
mentioned this and this is not my ends bag, but they save their snipped ends
1:50
and use them to stuff their amigurroomi. And a tip to get a more even stuff is to
1:56
trim your ends so that they're one no more than two inches long
2:01
uh so that you have better shaping ability. Um that polyfill,
2:08
you know, use what you want. I'm not telling anyone how to stuff their amigroomi or whatever it is you're
2:13
stuffing, but it irritates my eyes when those fibers go flying around, even when
2:18
I have my eyelasses on. And um I don't know that it's so much cost prohibitive,
2:24
but I don't love it. I don't like how it feels. It feels a little scratchy to me. So, there are other alternatives. Uh
2:30
pure cotton is one, and I like that for pillows. And um I use this is I have
2:37
long-haired cats who get have to be brushed a lot. Um if you're new to me, I So, they're ragd doll cats. And this is
2:44
hair. They're clean. They don't go outside. I don't use, you know, the business end and uh I use this to stuff.
2:52
However, because pet hair, you know, we we crochet with wool, that's animal hair, alpaca, all of that. There's
3:00
nothing wrong with using animal hair. And in fact, one of my uh friends who works as a vette,
3:06
she told me that there's some countries like Siberia where they actually pay for these long hair cat hair because it is
3:13
so warm. Uh, so that's another option. I also use
3:18
paper shreds. Um, I've got a paper shredder. It makes nice crinkly paper. So, my junk mail goes right in there and
3:25
I stuff it. Now, another tip that kind of goes with this that was also in the thread. A woman mentioned that she uses
3:32
cheap uh nylons, like the kneeh's. Do you remember when we used to wear
3:38
nylons on the regular? Now they're just That was like my first job out of school. Um, I worked in a department
3:44
store in the hosery department and now there's no hosery departments. I have all these old uh kneeh's and and
3:50
stockings and whatnot. And you can use that for things like this because you don't want cat hair just loose
3:56
everywhere in case you have to take it out and wash it for some reason. It's already contained either in I do use
4:03
plastic bags or a nylon for your shaking.
4:08
So that is the lace knot want tip. Save your yarn scraps, your little something
4:14
you might use for a small project, throw it into a bag. If it's a yarn you hate, I have a yarn that I absolutely despise,
4:21
but I got it on clearance. I tried working with it several times. I'm not naming names. That would be great
4:28
chopped up and used to stuff a pillow or something. So, okay, that was another
4:33
tip.
4:39
So the next one we're going to look at is the chain and turn. So that can often look
4:47
it can give kind of this loosey goosey gappy look. It doesn't look clean.
4:53
I I don't really use those. Uh you'll see in in patterns that say like this is
4:59
a double crochet work. Chain three counts as a double crochet. I I would
5:05
never do that unless it's for kind of a lacy open work floral
5:10
um style stitch where you've got these big open spaces.
5:16
That to me would be fine. But look here. So we have these chain three, skip the first stitch because this counted as a
5:23
stitch and then you have this weird gap there. You know that's that's just not
5:30
attractive, right? So instead we do the stacked. Now it is you may see a term
5:38
it's misused if it says standing
5:43
uh stitch that is a different stitch. You can, you know, call it whatever you want, but formally it is the the
5:52
standing stitch is when, let's get this brown yarn again, is when you completely
5:59
start a new yarn with this stitch. So, you would
6:04
make a slip knot.
6:10
This row is done. and bring in your yarn and
6:15
start working your stitch. So, you attach it and then
6:21
you start just, you know, working across. It's uh for a specific technique,
6:29
so it's not um your pattern will tell you if you need to do it this way.
6:35
That's not what this turn chain is all about.
6:41
All right. So, there's no chaining. You just work right
6:47
into your stitch. Okay. There's single crochet. Now, for
6:53
double crochet, you're going to go back into the stitch, that leg on the inside,
7:01
furthest away from the outside. Go into the front of that loop. Bring up two loops on hook. And there you have your
7:08
height for your double crochet with no gap, right? Because you worked into that first stitch.
7:17
See how nice and clean that looks? No gap. And then if you have a single crochet,
7:23
you would just work it. There's just there's no turn chain. Now for half double crochet, what I do, I do do a
7:29
chain one. However, you always want to be careful if you do
7:36
it that way. I have that in quite a few of my patterns. I do a chain one does not count as a
7:43
stitch. It's for height. And work my half double crochet.
7:51
You work a few
8:00
and then let me come back around. Chain one, turn.
8:07
There's my chain one. So, I'm going to come back. And I'm doing this because I want to show you what happens when you
8:13
come back to the end of the row.
8:20
You're going to see that little slant. You want to make sure you work into that
8:31
and that will keep your rows straight. See, I have a nice straight edge
8:36
because I picked up that slanty chain one turn.
8:43
So half double crochet, I do it a little bit differently to keep my edge straight. So you've got your stacked
8:51
for the single crochet and double crochet and then the chain one turn for the half double crochet, but there's no
8:57
gaps. Straight edge height is consistent. So play around with those and you can
9:04
start using those for your next project.
9:13
Next tip is an easier way to thread your yarn through your tapestry needles. Now,
9:18
not everyone has a larger eye, and there's even bigger ones than this. So, I want to work with the more standard
9:24
eye size. Okay. Now, normally what I do is I fold my yarn over, pinch it tight,
9:32
and put it through like that. However, the tip in um Reddit
9:40
is to use scotch tape. So, let's see how that works. I'm going to take a piece of scotch tape
9:48
and fold it over
9:54
like this. Pinch it tight so that it's really slim and push it through the
9:59
needle. Beautiful. Okay, that's a great tip.
10:07
From here, snip your yarn or snip your tape off and start weaving
10:14
in your ends or attaching whatnot, whatever it is you're doing with your
10:19
tapestry needle detail work.
10:28
Right. Our next tip is when you put your work down for whatever, you know, going
10:35
to make dinner, pick the kids up, it's time for bed,
10:40
why whyever you're stopping, right? I I definitely feel like
10:47
I thought everybody did this, but how many people said this in the thread
10:52
shocked me. I don't know what people were doing before this. All right, you
10:58
stop. They say put a stitch marker in your open stitch, wherever you're stopping to hold the project in place so
11:07
it doesn't unravel. Those of you that have not been doing this, what are you doing when you put your project down so
11:13
that it does not unravel? Do you leave your hook in it and wrap it up? Um,
11:20
what else would you do is what I'm wondering. What? Maybe it's a better
11:26
technique than this. Uh, but what what else are people doing to keep their project from unraveling
11:33
when they step away from the project? I'm extremely curious to know. So, if
11:38
you're not doing this, this is an excellent tip. I have to say it's probably the best one in the bunch
11:44
because it's very easily to have the cat or the dog grab the yarn and it just it
11:49
your whole thing unravels. You don't know what row you left off on. that that could be incredibly frustrating, but
11:55
I've always done this. So, uh that's the next tip.
12:07
Right. Now our next tip is the
12:13
the turning be turning counterclockwise before chaining
12:21
for your row. So you'll see in your pattern or you'll be used to here I already did it. Just habit we're used to
12:28
chain one turn, chain two, turn, that kind of thing. This maker says to turn counterclockwise first. Okay. So, I did
12:37
that and then chain
12:44
and begin your work. And she says that that makes a cleaner
12:52
edge, which I can see that being the case, but let's see how it works in reality.
13:01
I wonder here. Let's try it.
13:06
Turn. Okay. So, here's my work. Turn counter clockwise.
13:13
Here's my hook.
13:19
Then do my stitch
13:24
cuz we're not chaining one. We already we did that earlier. We're not doing these uh turn chains anymore. We're
13:31
doing our stacked stitches. That was a single crochet. And because
13:36
this is a double crochet project, I'm going to do one more
13:43
stitch so that my height is lined up with my double crochet stitches.
13:53
I can see that little edge there. Looks smooth.
14:03
A couple more.
14:11
So there's my little counterclockwise turn. Yeah,
14:22
I like that tip.
14:36
Now, the next two tips are about hooks, which is important because this is the
14:42
tool of our trade, so to speak, right? The yarn that we use and the hooks that
14:47
we use because crochet means to hook, right? So, the hook is everything. Much
14:53
like with cooking, your knives, it makes a difference. And like I always say with knives, I have a cooking background, so
14:59
I often um compare things to cooking or food. Uh because again, that's something
15:06
else we do with our hands. And to me, it's a creative outlet. Um so like with knives, when people say,
15:13
"What's the best knife?" It's kind of somewhat how I liken hook. So, the best
15:19
knife to use and the best hook, you want to be thinking how it feels in your hand. So, for instance, me, I'm a tall
15:26
woman. I've got long hands and skinny hands. So, the way I feel uh when I use
15:32
a hook or how it feels in my hand, how I hold it, my method, all of that will
15:37
make a difference. Uh if I have grip issues, that's all of these things go
15:43
into play. So there's not a what's the best hook. We want to be thinking about
15:49
how it feels in our hand. And then the other thing of course is the metal. So if you have let me we won't use that one
15:56
right now. These are more of common size hooks that many of us use. So the 4mm to
16:01
the six 6 and 12 mm for most projects.
16:07
The metal makes a difference. So, if you
16:13
have nice hooks now, you know what I'm talking about. If you're still working with value hooks, of course, we all have
16:20
different budgets. There's no shame in value hooks. They still work just fine.
16:25
But what you're going to feel, and I can feel just by touching it, this was a value set. These are very old, but
16:31
there's some sizes in here because I don't have them in my, you know, like nicer hook sets. I still use them and
16:39
they're kind of like it feels jerky and there's more tension in the arm because
16:45
it does not glide across the yarn as smoothly. And just touching this, I can
16:51
feel kind of the tackiness. This is these are like my the ones my
16:56
grandmother used. I can't even get a grip on these. I don't know how she did that, but I don't think um in her age
17:03
that there was a lot of choice. Uh, many of these makers in the in the
17:10
forum, their comment was that they got nicer hooks. Many cited that they liked
17:15
the Clover Armor hooks. Those are not my first choice, but again, this they love
17:21
those hooks. You see me using the Aimo quite a bit, but the for me the best
17:27
hook I've used are the red ones. This uh these are like the Bentley of crochet
17:33
hooks, the so silky. And you also can work much faster with a smoother hook
17:39
because you're not pulling so much. I I whipped through uh my if you've seen my
17:44
purple poncho, I'll put a picture up. I made that in three weeks using a smooth
17:49
hook with yarn that splits like crazy because the smooth hook helped me do it
17:56
so much more quickly. Now then for the larger hooks, I do like the plastic because you're generally
18:02
going to be using the bulky yarn and that already is going to give you a lot of tension in the wrist and the arm and
18:09
plastic really moves through things very quickly. Now on the subject of grip,
18:14
there were other comments about that. Uh specifically the tennis ball trick. I do
18:21
not have a tennis ball, but they work holes in either end and put the tennis ball on the hook for people with grip,
18:28
hand strength type of issues. Another one commented that they like to use the
18:35
tensor bandage to make a the right thickness for the hand to comfortably
18:41
hold the hook. So you can modify your hooks even more than what these handles
18:46
are if you have grip issues, especially if you've, you know, if you've got
18:52
arthritis, if you're dealing with carpal tunnel, you know, just whatever it takes to make it comfortable for you to hold
18:59
your hook. So you can customize it the way you like it. The Furls hooks, you may be wondering about these. These are,
19:04
I think, the most expensive hooks that I'm aware of. These are nice for my size
19:10
hand. However, and I've only used this particular furls,
19:16
the tip here, if you'll look really closely, and I have a video on this compared,
19:22
look what I'm showing you here is right here. The tip, do you see how sharp that
19:28
is? And it's more uh uh rounded here. Same
19:34
with these others. They don't have that like almost a spiky sharp tip.
19:40
This is great for digging into stitches. Okay, I do like that about this. I don't
19:46
necessarily find it as comfortable and I've see a lot of people say that these drop and break, which is heartbreaking
19:53
when you've spent, you know, $30 or so on a hook. I don't know what they're
19:58
going for, but these are going to be more expensive. Even this Bentley of crochet hooks, as I call it, these are
20:04
going to run, you know, $10ish dollars. So, with Christmas coming, if you want a whole new set, this set runs, I think
20:11
about $70 for a set of these. Um, this set's going to be closer to a hundred if
20:16
you get all of them. And it the size ranges aren't quite as expensive as they are with the tulip. And then, of course,
20:23
Clover Armor Classic. Lots of people like those. Now, you can just buy one in
20:28
your most used size, test it out, and see if you want to commit to an entire
20:34
set. So, that's how I would um have a
20:39
conversation about hooks. There's a lot to take into consideration, but once you get the right ones, oh my gosh, it really does make a difference. So, I do
20:46
agree with that comment in the threads. Did you know I designed project
20:53
trackers, large print and regular print for small, medium, and large size
20:58
projects? The link is in the description to get your own, or you can try it for
21:04
free. There's a download on my website, link in description.
21:18
Now, the next tip is amigarroomi stitches. And the makers are saying that
21:25
yarning under instead of yarning over makes a nicer stitch. And I admit I am
21:32
not your maker. If you're looking for amigarroomi patterns, I've got I don't know, maybe two or three, but uh that's
21:40
not my I focus more on garments and home decor.
21:45
I know lots of you love to make these little cuties, though. So, what I've done here, I'm going to try this stitch.
21:51
And I feel like that yarn under creates the crissross shape.
21:58
So, I don't know. Um, I've made just some regular single crochet working in
22:03
the round. This is 12 stitches. And I'm going to This is the traditional yarn over single crochet. So now instead of
22:11
yarning over like this, you yarn under and Whoops.
22:18
Going stitch. Yarn under. Bring up your loop and pull through. Go in. Yarn
22:27
under. Bring up your loop. Pull through. So, let me work 12 of these.
22:36
See how they look?
22:51
You know, now that I'm doing this, let me finish this round before I is it the yarn under from up here. I'm going over.
22:59
Should I be yarn? Let's see. Go in,
23:05
pull up my loop as usual, then yarn under and pull through.
23:12
Is that
23:18
okay? I don't know how helpful I'm being with this tip. Let me see if these
23:23
stitches look I mean I do see a little bit of a difference.
23:31
All right, I'm just going to stop because I'll be wasting your time as some fiddling around. There's another
23:36
creator here you see in the thumbnail with Alex and she demonstrates this technique. Now, I was doing it correctly
23:43
at first and I got in my head a little bit because it's new to me and
23:48
overthought it and messed up what I was doing. And she's actually using a
23:53
similar color yarn. So, you can see her finished stitches have that beautiful clean kind of X look that I was talking
24:00
about at the start of this tip. So, I will link her video in the description
24:06
if you'd like to see her do it correctly and try it for yourself if you enjoy
24:12
making amigurroomi. Now, we'll go on to our next tip.
24:17
All right, so a very popular comment was the crocheting over
24:23
the tails as you go, which you know that's great. We all have
24:29
to deal with ends as best we can. It's I've seen a few people say that they
24:34
enjoy that kind of tedious process. It depends how your brain works, right? Who who enjoys it and who doesn't. The
24:41
problem with crocheting over the ends as you go is uh there's two things that I
24:48
would caution against. One is, let me demonstrate.
24:56
Uh let me pull up. If you're working with two colors, this is also going to really show itself. Let me do it the
25:03
correct way of changing color at the end of a row,
25:09
but uh this would be true of whatever
25:14
uh project you're making. Can't find my words today. All right, pull in.
25:21
All right, so now I have this tail to deal with. And then this would be a tail to to deal with, right?
25:31
Pull it up. I'm going to chain one. Turn. All right. So, let's put a tail here. Let's say I'm going to be working
25:36
under it as I go. Tighten everything up. And let me start crocheting.
25:43
Do a few stitches and we'll see what happens. Why this is potentially an
25:50
issue.
26:08
All right. So, one issue is it looks it doesn't look nice. See, you can see that
26:14
line going straight across. That also means it's not terribly secure
26:22
because only going one direction, it can find its way out. Especially with items
26:27
that are going to get a lot of wear and tear like garments, blankets, things
26:33
like that. If it's, you know, a pillow and it just kind of sits there, that's a different story. However, it still looks
26:40
meh, right? Uh, it also can disrupt the look of the stitch. For instance, with
26:46
my winter's embrace blanket, crocheting under there really looks
26:52
obvious and it disrupts the beautiful texture. So, what to do? This is what I do. I'm not telling any anyone what to
26:59
do. I'm just trying to give you some tips here that maybe you will find useful in the future. That's the point
27:05
of this video. Okay. So, still I'm going to work the tail as I go,
27:13
but I'm going to make it more secure and less unsightly. All right. So, there's my chain one. So,
27:19
I'm going to go in, work my stitch. Now,
27:24
it's a little more tedious, but you're still working it as you go. So, I go in with my hook. I bring the tail under. I
27:31
kind of wrap it around the stitch, and then it comes back up. Work my stitch.
27:40
Pull this
27:45
again. Come under. Pull it around.
27:53
Work my stitch. So I do this oh four or five times.
28:01
Let me do it again and then we'll take a look at the other
28:07
side and see what's happening visually.
28:13
And I do this in a lot of my videos, but if you haven't made any of my patterns or it's a pattern behind a pay wall, you
28:18
wouldn't have seen this. All right, so let's look on the other side. What's
28:24
going on with the tail? You see where it's been wrapped through? So, I didn't wrap it in that first
28:29
stitch. So you can see the line, but had I brought it under and through before I
28:34
worked that stitch, it would look like these. You can't even see it yet. It's still secure.
28:40
I can snip it and no more tail to worry about. So that's
28:47
my recommendation to make this hack uh a little bit better. See it there? All
28:53
wrapped through. And then I didn't wrap it here so we could see it.
28:59
Just a little tweak to a popular tip.
29:07
All right. Now, our next tip is u a maker says that she uses a latch hook
29:14
instead of a tapestry needle to weave in her ends. And I have a video, another
29:20
tip for you. I like that tip, but I don't have a latch hook handy. um doesn't mean I couldn't get one, but I
29:26
have other methods that I like to use. One of which is um I have a whole video on this, your 2 millimeter hook, because
29:33
you can really easily navigate weaving in ends, especially if you have
29:39
very short ends for whatever reason, you cut it too short, you know, you're
29:45
really went down to the wire, just pull that end through. It gives really good detail work. And then also I use uh yarn
29:53
glue, which also I have a video on. I'll link all of these. And just tack it down into place so that you don't have any
29:58
peekaboo ends when you're done. So, another ends management tip in this
30:06
collection of 10 tips video. Thank you for watching. If you found this video
30:11
helpful, please give it a like and tell me in the comments what your favorite tip is or what your tip is that was not
30:18
mentioned in here so we can all learn something new together. I'll see you
30:24
again next time.
Hobbies & Leisure
Crafts
Fiber & Textile Arts