Up next in 10

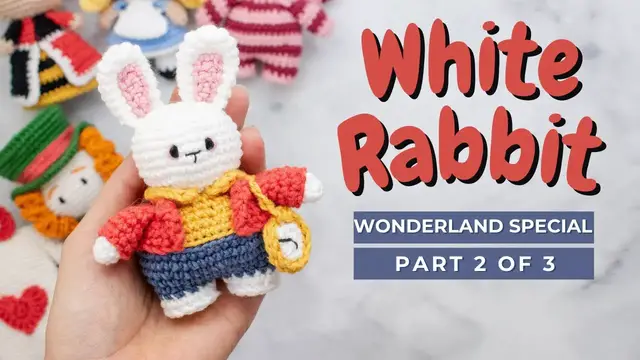
The White Rabbit crochet pattern! The white rabbit amigurumi pattern is super easy and has beautiful details! This stuffed animal is one of the six patterns from the Wonderland collection! Have fun!
FOR PART 1: https://youtu.be/EjzaVkKmZjQ
FOR PART 3: https://youtu.be/-ollVfRv46Q
Chapters:
00:00 Attaching the collar
06:00 Head
13:15 Ears
You can find the complete White Rabbit crochet written pattern free on my website here:
https://littlecrochetfarm.com/white-rabbit-crochet-free-amigurumi-pattern/
For a low cost (4 USD) and printable pattern, you can find it here:
Ravelry: https://www.ravelry.com/patterns/library/white-rabbit-amigurumi-2
Etsy: https://www.etsy.com/listing/1221055232/white-rabbit-amigurumi-pattern-crochet
If this video was helpful to you, consider supporting my channel by doing one of these little actions below:
★ You can like this video, or
★ You can share it with your friends on social media, or
Show More Show Less View Video Transcript
0:00
Great, now this is the time to add the color that we worked in the beginning of this video, remember
0:06
So now you will grab this detail and we will sew it together, not sew it, we will crochet together
0:15
in this position, okay? So find the two central stitches here and mark them with some stitch
0:24
marker or some piece of different color yarn, which is my case, what I'm gonna do
0:31
I tell you this because maybe your stitch from the beginning of the round can be in a different
0:37
position. So it's the best if you find the central two stitches. So here I add the stitch marker in
0:47
the first central stitch, this one over here. So I know that is these two, these two stitches, right
0:55
And the finished stitch over here. So now I count how many stitches I have from that first position
1:06
until the second one because we want it to remain like this, right? So that is the position we want
1:13
So this is stitches we will crochet together once we are on that side of the work
1:19
So one, two, three, four, five, six. So here we have, this is the first stitch that I need to crochet together
1:30
Okay. So just mark here. So I know where is it. I hope this was clear for you because we want the color, the front color to be in the front
1:40
of the toy. right? So that is the position we want. So we need to start crocheting in this part of the collar
1:49
okay? So I will work slip stitch crocheting both of them together, okay? I told you before I went a
2:00
bit over the top with these patterns. They are advanced, but good you'll learn something here
2:06
Okay, so this is the second one. Just remember to mark the stitches
2:13
It's very easy if you add the stitch marker where you should crochet together the color
2:20
Okay, so I'm on my second one here. And I will work this slow and together with you, so we are sure to work everything nice
2:32
together and you know how it's done. Okay, so for the next one here
2:44
Alright, that's super good. So you can see it like this. The neck of the bunny has 18 stitches, right
2:57
The collar that you work in the beginning of the video have 16 stitches
3:04
So the two remaining stitches you have from difference between the neck and the collar
3:10
it will be the two central stitches in front of the bunny. Okay
3:16
So here I'm almost arriving here in the center. Great
3:28
And it's getting easier. You see as we go making the slip stitch, the collar will settling and it's less confusing
3:38
Great, so now I will remove this stitch marker and here so we don't work crocheting together
3:52
with the collar. done the stitches for this side. So one and two slip stitch without anything. Okay. And look at
4:03
this very nice effect this color. I'm very happy. Now we will continue working the round, but we
4:11
need to bring it back. You know, let me just put this stitch marker here. This is the beginning of
4:16
my round, so I will not remove this stitch marker here, okay
4:21
So, um, I will leave this for now because that will continue being the beginning of my rounds
4:28
Okay. Now let's start working the collar from this front part to the end and finishing the round
4:37
Okay? So this is the first stitch here. You just need to find the way and to look the stitches and find your stitches
4:49
But I did a poll in the community tab here on the YouTube channel And I asked if you guys know how to locate and count your stitches And 85 of you answered that you know where the stitches are
5:05
So I believe finding the stitches here will not be a problem in the color for you
5:10
But if it is, leave me a comment in the box below with your questions
5:15
And I will clarify as much as I can here. Super good
5:21
So we are almost done with this round. And this, I have to say, this is the most complicated part of this pattern here
5:29
Is to add this color in a very nice way. Ah, look where I am
5:36
I arrived here. Is this my last stitch? No, it's not. Oh, it is
5:43
It is my last stitch. You see? That's why it's good. Never remove your stitch marker
5:48
Here we go, my last slip stitch here. Aha! But now we have a color change, because now we are back working with white
6:02
Okay, so we'll change here now on my last slip stitch to the white color
6:11
Super good, but now let's just fasten this off cut and tight a very tight knot here
6:17
It will help us out to work this next round. Here we can just give a simple knot because this will be facing..
6:26
That's not good. Let me insert this needle back again. This will be facing inside of the toy
6:32
So just give very simple and very effective. Knot here. Super good. Okay
6:41
Now you see it's tight and it's firm and we can work
6:45
very nice here our stitch, our round. Super good, I will just hide this inside
6:52
so it's not confusing here for us but look at this it's a very good result
6:58
right? So it's worth the trouble to adding the color here. I hope it's not too
7:03
complicated for you. Okay now we are working in this round over here. You see
7:10
we have a slip stitch on it so here we will work only in the front loop of the
7:17
stitch that we work with the slip stitches for the collar okay so you will
7:22
work only in the front loop two single crochet one increase okay repeat six
7:30
times and you should have 24 stitches at the end of this round all right so you
7:37
adjust the front loop. So two single crochet I have it here and now I will
7:44
work my increases. Super good! Look at this, this is very cute. I will continue
7:54
working this round and it may be a little bit awkward to grab your white
8:00
rabbit right now but try to figure it out what it's more comfortable for your
8:05
hand that can help and speed up the process. Super good! So now we can see
8:12
here the head is starting to grow and we will work here once again. You can see
8:19
this round inside of the head from the slip stitch and we'll work here for
8:24
round 19 again with increases. So you work 3 single crochet, 1 increase, repeat
8:31
six times and you should have a total of 30 stitches at the end of this round
8:36
Alright, so let's go in here. Now it is starting to get easy again. So 3 single
8:42
crochet, very nice, and 1 increase. Super good! So you repeat this 1 2 3 and
8:54
and increase all the way until the end. Great! It's looking very nice this shape. Now we'll work
9:02
again one more round with increases. For round 20 you will work 4 single crochet, 1 increase
9:09
repeat 6 times and you should have 36 stitches at the end of this round
9:14
Super good. And now my first increase. One and two
9:26
All right. One, two, three, four. And the increase, it's over here. Great
9:34
Look at this, it's looking very nice. Now I'll add here my stitch marker
9:40
And let's move on here for the rounds. Now we arrive the size of the head we want and we will work here a couple of repetitions in this round So for round 21 to 25 you will work just 36 single crochet
9:56
Okay. So here, once again, it's a piece of cake. Work your repetitions here and I will come back once we start the decreases
10:05
All right. Enjoy your single crochet. Super good. We have it here already our face
10:14
Now for round number 26 we start with the decreases. Okay? So for this round you will work 4 single crochet, 1 decrease, repeat 6 times and you should have
10:26
30 stitches at the end of the round. Count how many stitches you have. Always
10:32
It's very important. Okay, my first repetition is done. all the way around and let's move on for round 27. So here you will work 3
10:48
single crochet, 1 decrease, repeat 6 times and you should have 24 stitches at
10:54
the end of this round. So 3 single crochet here and now my decrease. Super
11:04
good. Moving on for the next round you will work two single crochet one decrease
11:12
repeat six times and you should have 18 stitches at the end of this round. Okay
11:18
We are almost done with this body. That's great. Now let's move on and it will
11:29
catch you up at the end. Once you finish with round 28 you will stop for adding
11:35
stuffing material a little bit and once you're done adding stuffing material we
11:41
will work round 29. So this is the last round for this bunny body. Here you will
11:48
work one single crochet, one decrease, repeat six times and you should have 12
11:53
stitches at the end of this round. One single crochet here and one decrease
12:02
Okay, move on. One single crochet and one decrease and so on all the way until the
12:08
end. Once you're done, let's fasten this off. So cut this thread, leave a tail for
12:16
sewing and here I will add this tail in my tapestry needle and for now we will
12:24
work here only in the front loop. So introduce your needle here only in the
12:30
first loop of the stitch. First loop, first loop, always the first loop. Okay, so
12:41
let's work here all the way until the end. So we'll grab 12 first loop here that
12:45
we have and once you have all the stitches inside then you pull it very
12:51
tight and you will close this circle okay and once again we will wave in this
12:59
tail inside the first round of the stitches here and then you hide the
13:06
remaining tail inside of the toy super good so this is looking very nice body
13:14
all right moving on now we will start working the ears of this bunny okay so
13:20
one more time we'll start here with a magic ring or a magic circle and you will
13:27
work inside this magic ring six single crochet okay so this you know already
13:33
this process we work this in the beginning of this video so this is three
13:38
four, five and six. Okay, close this tight and let's move on for the next round
13:49
Here you will work six increases once again. So you'll work two single crochet
13:56
inside each stitch. At the end of the round you should have 12 stitches. Let's
14:04
work here real quick. My second repetition and I will move on a bit fast forward
14:16
All right this is great let me just double secure the beginning of my tail
14:20
like I always like to do and now we'll give some length here the size of these
14:27
bunny ears okay so for round number three to seven you will work 12 single
14:33
crochet So here once again it very simple and easy Work all your repetitions here all of your rounds and I will catch you up for the instructions for the next round Super good We have some sides here right So we work a
14:51
decrease for round number eight. Four single crochet, one decrease, repeat two
14:57
times only and you should have 10 stitches here at the end of this round
15:01
So the first repetition here work with you. This is my first decrease
15:10
Super good! And now I'll work here very fast the second repetition. That's very
15:19
nice! Look at this! Super good! Flatten now your bunny ears because we will work
15:25
together the sides closing the ears, okay? So you have ten single crochet in
15:32
total, right? When you fold it you have five in one side, five in the other and
15:37
you will crochet the sides together like this. The first stitch is a bit tough to
15:44
take because they are very close to each other, of course, it's the first and the
15:48
last, but after that it's completely fine. You see this second one
15:54
it's already together. It's very easy to crochet. So here let's work. This is my
15:59
second stitch, the third, super good, four, and one more. The last one, stitch number
16:16
five. Super good. So we are done with this. Look at this flatten a little bit
16:23
and like this one let me just cut this tail leave here for sewing later and now
16:31
we will work a detail so we can you know make it this pattern a little bit a
16:38
little bit better so with the light pink you'll chain six and here we go with the
16:47
details again 1 2 3 4 5 and 6 okay so you skip two stitches from the hook those
16:58
two chains and for the first round you work row right you're working rows here
17:05
two double crochet so I did my first double crochet here and now my second
17:12
double crochet all right and then we'll do one half double crochet here and one
17:25
single crochet in the last chain that's it that's it very simple right okay so
17:39
let me cut this yarn with a tail for sewing. I will add this in my tapestry
17:45
needle just to wave this inside. We don't need this beginning of this tail, right
17:53
Super good. That's it. Just a little bit. Just to hide, we will sew this now in the
18:00
ears so this will not be showing. Great! So we have the detail of inside the ear
18:08
ready. Again, I add in my tapestry needle this leftover here of this tail for
18:15
sewing. Now we'll just bring this to the front, to the first stitch just over here
18:22
and we will sew it in the central part. Look at this, super cute! Okay, so the
18:29
first stitch will be here in the central part of this ear, right? We have five
18:35
stitches, so on the stitch number three it's where you will start. Okay now we
18:42
bring this, you see this little dot will be seen from the back, from the behind
18:47
but that's it, because now on you will crochet taking just the surface here of
18:52
the ear, okay? And take stitch by stitch and start sewing one stitch from the ear
19:03
one stitch from the detail. Very easy! This is super easy to do. It's just a
19:10
little bit more work for you. Alright, I will move this fast. There is nothing new
19:16
here. One stitch from the ear, one stitch from the detail. And once you're done, you
19:26
fasten this off. You hide this remaining tail inside and flatten this ear a bit
#Arts & Entertainment
#Drawing & Coloring
#Crafts
#Fiber & Textile Arts