Up next in 10

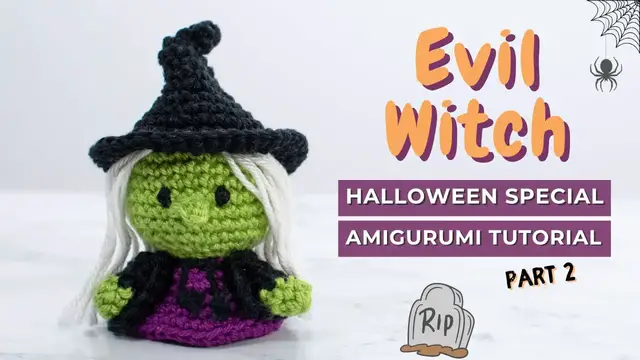
Evil Witch Halloween mini amigurumi crochet tutorial - How to crochet an amigurumi Witch. PART 2
Sep 7, 2023
Evil Witch mini amigurumi free pattern! Follow this step-by-step video tutorial and have your beautiful crochet Halloween Witch done! In this Suitable for amigurumi beginners!
Pick it up from where you stopped:
00:00 Arms
03:49 Hat
13:13 Hair
15:16 Assembly
18:54 Embroidering the eyes
FOR PART 1: https://youtu.be/k0KLq7GcMtE
You can find the free written pattern here
https://littlecrochetfarm.com/evil-witch-mini-amigurumi-free-pattern/
For a ad-free and printable pattern, you can find it here:
Ravelry: https://www.ravelry.com/patterns/library/evil-witch
Etsy: https://www.etsy.com/listing/1544518140/evil-witch-mini-amigurumi-pattern-mini
If this video was helpful to you, consider supporting my channel by doing one of these little actions below:
★ You can like this video, or
Show More Show Less View Video Transcript
0:00
Super good. Now let's move on here and start working the arms of this evil witch
0:08
So once again we'll start with a magic ring. And you will work 6 single crochet inside the magic ring
0:16
It's very simple here how you will work the arms and very fast also
0:22
and because it's a very small detail let's work here together and kind of
0:29
slow so let's work here the six single crochet inside the magic ring one two
0:34
three four five six great let's close this magic ring all right and here now
0:44
for the second round you will work six single crochet again okay so six
0:51
single crochet on top of the previous six single crochet. I want to work here
0:56
together with you because it's a small detail but you know it's very simple
1:02
Look it here, just work the six single crochet and once you're done the shape
1:13
will be looking like this. Now we will change the yarn okay to the black and you
1:23
will work for round three and four six single crochet but I will fast stop here
1:30
all right because I want to show you one thing now we can cut this green we don't
1:36
it anymore. Alright I will give it a knot here in the greens and in the black and
1:45
everything so everything is very nice and tight. Let's do the same thing with
1:55
the black thread. This will be facing inside of the toy so I'm not worried how
2:03
pretty it's looking like and I want to show you here that when you work small
2:09
pieces they are curling to the outside of the toy so you're probably facing
2:14
with the wrong side facing out okay so let's cut this thread we didn't this is
2:23
not confused here this is what I want to show you see it's on top of it so the
2:28
wrong sides facing out so we just organize these stitches here we make the
2:36
right side to be out and you can see that the shape also had changed when you
2:43
organize the stitches and you continue working the next rounds only with six
2:49
single crochet you can now follow the pattern here and you will just work the
2:54
single crochet and I will catch you up here once you finish the round number
2:58
four super good now for round number five you will work three single crochet so
3:07
here you go you have six single crochet right you have six single crochet you
3:13
will fold it in half and you have three in one side three on the other side and
3:17
and you work those sides together, okay? So this is my first stitch
3:24
The first might be a little bit tricky because they are very close to each other
3:28
the first stitch and the last one, but then the other two are very easy
3:34
And now we have this tiny little hand, look at this. We can cut the yarn
3:39
leaving here a bit of space for sewing. All right. And we make another one
3:48
Ta-da! I have one here ready. Super good. Now let's move on here and work the hat
3:57
This hat is very nice. I like the shape of this hat
4:02
We will start again with a magic ring. And you will work 6 single crochet inside a magic ring
4:10
Okay? You already know how it's done. You have done this a couple of times
4:15
so I trust by this time magic ring is a piece of cake for you
4:21
and let's work here the six single crochet before moving on for the next round
4:29
remember if you have any questions leave them in the comment box below
4:35
and one wait one two three four five six and all the information you need it's in the written pattern
4:44
right on the website the link it's in the description and also in the first
4:49
comment of this toy of this video for around two and three you will work again
4:57
six single crochet inside each stitch one single crochet inside each stitch so
5:06
six single crochet only for the next two rounds okay remember to organize your
5:12
stitches is a small detail, it can be curled, so once again here I'm showing you that you
5:19
may need to make sure that the right side is facing out and the wrong side is facing in, okay
5:26
So continue working here the round two and three and I'll catch you up here for the round number
5:33
four, okay? So you can add here a stitch marker if you need. I like to count on head when the
5:42
details are small. So for the round number four here you'll work six increases and you'll have a
5:48
total of 12 stitches. Okay here it's basic you already know how it's done. So work a round
5:55
and this should be looking like this All right so you work once again two rounds with 12 single crochet Alright so once again you will work two rounds here without the increase for this time the detail is a bit bigger and i will start adding my stitch marker okay so here
6:20
you can stop work your two rounds and i will catch you up for the next round great once you complete
6:32
round six this is how it should be looking like and we'll use the beginning of yarn that you start
6:40
working here for the hat or if this yarn is not long enough just add attached one yarn we will
6:48
work now the uneven shape of the hat and this is very simple how it's done you just grab one stitch
6:57
from the top of the hat and you pull it down two rounds under the stitch that you bring the yarn
7:07
outside and then you pull this tight until you see the tip of the hat going down all right this is
7:16
how it should be looking and once you have the tape going now you'll just fasten off like you
7:23
give it a knot inside so the shape remain. And that's it, it's very simple. Here the idea is to
7:30
make the hat have this uneven look and like very used hat. So you just make it some uneven shape
7:40
and grab and give it a lot of knots with some pieces of yarn. You don't need to necessarily do
7:46
the way that I'm doing here. For the round number seven you work here, one single crochet, one
7:52
increase, repeat six times and you should have 18 stitches and once you're done with round number
7:59
seven for round number eight you will work 18 single crochet so just single crochet here without
8:05
increase and decrease. We will work again another uneven shape for the hat forward a little bit more
8:14
in front but just for you to have an idea of how we are working here the hat of the witch okay
8:23
once you complete round eight for the round nine you will work two single crochet one increase
8:28
repeat six times and you should have 24 stitches at the end of this round so you can see here one
8:35
two single crochet and here is the increase we repeat all the way around and once you reach at
8:41
the end for round number 10 you will work on 24 single crochet okay all right and I will catch
8:47
you up for the next step okay so this is how you should be looking like and now we will stop here
8:55
again to make on the other side of the hat the same shape here that we did on top so you're gonna
9:03
grab a piece of black yarn like I have it here on a tapestry needle. You will introduce this
9:10
yarn inside one of the stitch on the side and you will work the same way you did for the tip of the
9:18
hat. Okay and here's even easier like you can use this technique also for the first part but since
9:26
I have already some leftover of the yarn from the beginning of the detail I did
9:32
not I just use that so here you count two rounds going down bring the yarn to
9:42
the wrong side of the hat and now you will just kind of pull it tight these
9:49
two lines and give it a simple knot. Alright, you can see it here and once you
10:00
pull it you see you'll have these two shapes going to pull in the stitches
10:06
together. You just give a simple knot and cut the remaining and let's continue for
10:12
the round number 11. Here you will work three single crochet, one increase, repeat
10:18
six times and you should have a total of 30 stitches at the end of this round so
10:24
as always here let's work the first repetition together okay so as you can
10:34
see it here one two three and the increase okay repeat all the way around
10:38
and once you finish round 11 you work round 12 with 30 single crochet all
10:44
right so work your rounds here and I will catch you up alright so once you're
10:50
done this is how it's looking like you know let's work let's continue working
11:01
here we will work only in the front loop of the stitch okay so here you have the
11:07
full stitch back loop over here front loop over here all right so you'll grab
11:15
only the front loop so for the round 13 you'll work one single crochet one
11:22
increase repeat 15 times and you should have 45 stitches at the end of this
11:27
round and remember that here you were working only grabbing the front loop of
11:34
the stitch okay so it's hurt work here a couple of repetitions together front
11:45
loop only if you have any questions leave them in a comment box below I
11:51
will be happy to help you all right once you finish we will work now for
11:59
round number 14, 45 single crochet okay super easy you can stop the video here
12:06
work you around and I will catch you up once you're done
12:16
super good so we have it here the hat of our evil witch You can cut this yarn You leave a bit of room for sewing later
12:27
And you'll fasten off this hat. Okay, so I'll skip one stitch. I'll introduce my needle on the stitch next to it
12:40
And then I grab only the back loop of the last stitch from the round
12:49
And then that's it, we have our fastening off. Now you can just make sure that you have some nice and tight knot over here
13:03
with this leftover yarn we will sew this hat later on on the witch hat okay
13:12
super good now let's move on here we will work the hair of this witch so with
13:19
white yarn I'm working with some kind of off-white here all the information you
13:25
need it's in the written pattern in the description of this video you will chain
13:30
11 okay so let's move fast here chain 11 and you cut the yarn that's it so you
13:41
pull it this yarn and you will be left over once you pull this yarn with 10 10
13:49
chains okay I will just secure these chains over here on my table because
13:58
what we are going to do for the hair here is that we want a hair that it's not full so it's
14:04
she has a bit of lack of hair all right so that is the effect that we are searching for so we'll
14:13
cut here a couple of yarn so we have ten chains right so you will work here with ten pieces of
14:22
yarn. The exact size is in the written pattern, you can check that out, and you
14:28
will just introduce this yarn here in one side of the chain, okay? That's it. Very
14:39
simple. This is what you're going to do. You will introduce 10 of this hair
14:44
strings in one side and 10 on the other side of the chain, okay? I will catch up
14:50
for the other side of the chain. So here as you can see I add 10 strings of hair
14:56
in one side. Now we will work on the other side. If you don't want your witch
15:03
to be with some lack of hair you can just add more strings over here, but I
15:10
like that she is not with full hair. Okay? So that's it, very simple. Alright, now
15:18
let's assembly this evil witch so we can see here find the backside of the witch
15:26
and for the cape you make sure that you have the slip stitches facing outside
15:33
okay not facing inside so we will introduce the cape around her neck so
15:40
just make sure that you have the back in the center and this is what we are
15:49
searching for. What we are going to do here is simple, we will just give a knot
15:54
here in front with these two remaining yarn that we purposely left and we will
16:02
cut this remaining tail. That's it. I cut this with leaving little bits of yarn
16:12
under, so we have this effect of the cape that's optional to you, and I see that
16:19
it's moving so just make sure to give a simple stitch once I'm sewing the
16:25
hands okay so now let's just use here a sewing needle the tapestry needle
16:35
whichever needle you're using and you have three stitches right only from the
16:40
head from the hand to sew on the cape so that's very basic super simple so you
16:50
sew it the hand, the arm right in the cape and you'll grab the slip stitches
16:58
that you left facing the outside of the cape. Alright? So you will sew the three
17:02
stitches from the arm with the three stitches from the cape. Very simple, super
17:11
fast, that's how you should do and I will catch you up once I finish the other one
17:16
As you can see it here, I gave two small stitch to hold up the front, the
17:25
remaining front part of the leftover yarn from the cape. And this is how I like to
17:33
secure the yarn, alright? You bring it outside inside the same stitch, give a
17:39
simple knot and then you hide it inside. This will make sure that the arms are
17:43
tied together and will not unravel, okay? Now we will sew the hair, you can see it
17:52
here, we will put the chain stitches in the central part of the head. Let's
18:00
organize this very well. Let's add this string in the sewing needle and what I'm
18:10
going to do here is very simple. I'll just bring this yarn in the central part
18:15
here of the head, okay? And sew this... only the chain stitches here we will sew in
18:23
the central part of her head If you want to know the exact position that I start sewing in which round I sewing the hair you can check out the written pattern in the description of this video as well as in the first comment here under the video alright
18:44
So bring this yarn over here and that's it. Just make sure to sew it in the central part also
18:54
Now, if you follow me here, you know already that I like to embroider the eyes of my toys
19:04
And how I do this, I will be showing you here. I just take a thread, black thread, and I make a couple of straight lines with the size of one stitch
19:16
And these straight lines, once you repeat this movement a couple of times, it will become round like an eye
19:22
and you can choose like how big, how many, how large you want, and the shape you want
19:29
It's just a matter of how many repetitions you do, okay? But if you're working with safety eyes or with plastic eyes
19:36
you can find the exact position I'm embroidering in the written pattern
19:42
So you can substitute the embroidery for the plastic eyes, all right
19:46
Here I'm just showing you how I like to make the eyes
19:52
and as you can see, it's just a matter of many repetitions
19:57
and you go leading where the thread is going with your finger here
20:07
So you work a couple of repetitions and once you figure out the shape that looks nice for you
20:14
you move on for the second one, okay? And just make sure to tighten this thread
20:22
Okay, now for the nose, what we are going to do here is we will introduce the green yarn
20:30
in the central stitch between the eyes, okay? So this is how I like to do, I just bring it here, chain one, two, three, four, okay
20:51
Then you skip the first stitch and you start crocheting the second stitch from the hook
20:58
one slip stitch, over here one single crochet and on the last chain you work
21:18
I'll just pull this yarn you can you can fasten that yarn with the pin so it will
21:26
not be moving and on the last chain here we will work half double crochet okay
21:32
this is how I like to work so we don't need to sew it this we will just need to
21:38
fasten off and how you do this is you will bring this yarn with a tapestry
21:44
needle or with a sewing needle, we will bring this yarn outside to one stitch. So
21:49
let me just put this yarn here to the back of the head and you will do the
22:00
same thing with the other yarn, remaining yarn, with the beginning thread. Okay
22:10
let's take this one and you will bring it behind and that's how you will work
22:15
the nose. You can also work this separately and then sew it instead of
22:21
crocheting together, you know? So we'll just work the chains and then one slip
22:27
stitch, one single crochet, one half double crochet and then you sew it later
22:32
I just like to work it like this because it's fast. Once you're done with the
22:37
nose now it's time to wet the hat okay and we will sew the hat all around her hair her head
22:46
and here just make sure to organize the hair on the back you know so you spread a little bit the
22:53
strings all right before you sew it here i'll just work a couple of stitches sewing this hat around
23:02
with you and after that you can sew it yourself. So here you make sure that you will sew the hat
23:10
and the head together on the part where the hat just flattened out. So two rounds before the edge
23:21
is where you're gonna sew with the hat and the head. Okay let's just organize here a bit the hair
23:27
because once you sew the hat, of course, the hair will not be moving too much
23:33
So just make sure that you spread the hair evenly on the back
23:38
before you continue sewing the hat. Okay? So I'll just leave it up here
23:45
Also, another thing that I do here is I don't sew the hat in every single stitch from the round
23:53
I just sew it a couple of them, but a good couple of them
23:57
Not like four stitches, but rather like some 10 or 20 of them
24:03
All right. And this is how it should be looking like. And your reach is done
24:09
Look at this. Let's organize this back. I hope you enjoyed this pattern
24:15
If you'd like more Halloween amigurumi patterns, take a look in the channel
24:19
There is a bunch of them. I will see you for the next week. Bye
24:27
Thank you
#Arts & Entertainment
#Online Media
#Fiber & Textile Arts
#Action Figures