Up next in 10

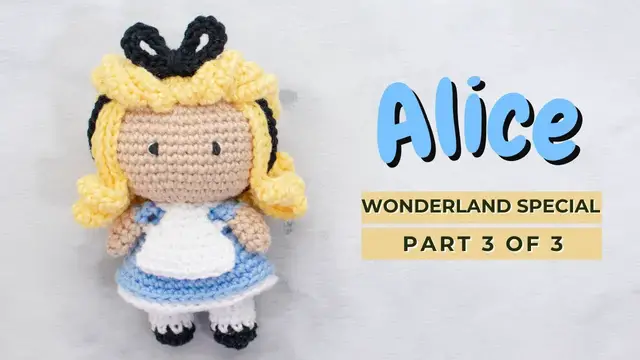
Alice crochet amigurumi doll pattern. How to crochet a doll video tutorial PART 3
Nov 4, 2022
Alice doll crochet pattern! Complete video tutorial of Alice amigurumi pattern, easy to follow and with written instructions. This crochet doll is one of the six patterns from the Wonderland collection! Have fun!
FOR PART 1: https://youtu.be/3QSBrWCUQd8
FOR PART 2: https://youtu.be/eh0U9mJY2vY
Chapters:
00:00 Alice hair
04:41 Alice pinafore
10:26 Hairband
14:44 Embroidering the face
You can find the complete Alice crochet written pattern free on my website here:
https://littlecrochetfarm.com/alice-amigurumi-crochet-doll-free-pattern
For a low cost (4 USD) and printable pattern, you can find it here:
Ravelry: https://www.ravelry.com/patterns/library/alice-in-wonderland-amigurumi-10
Etsy: https://www.etsy.com/listing/1235695233/alice-in-wonderland-doll-amigurumi
If this video was helpful to you, consider supporting my channel by doing one of these little actions below:
★ You can like this video, or
Show More Show Less View Video Transcript
0:00
Alright, now we'll start working the hair of Alice. So here you will work six
0:07
single crochet in the magic ring and in my case I'm working in yellow because we
0:12
want this color for the hair of her. So you can work on any color that you decide
0:17
And you work here, yes, six single crochet inside this magic ring. So by now
0:25
you must be already very nice and trained with your magic ring. Okay, so here we have
0:36
1, 2, 3, 4, 5, 6. So pull this yarn tight and let's work the second round here of
0:46
this hair. For the second round you'll work six increases and you should have
0:52
12 stitches at the end of this round. Okay, so work six increases here, which means you will crochet
1:00
two single crochet inside each stitch and you should have 12 stitches at the end of this round
1:09
All right, let's move fast forward here, you already know how to do these things
1:16
and remember to double secure the beginning of this tail, just to make sure
1:23
this stitch will be very nice and closed, the magic ring. Add your stitch marker
1:30
and move on for round number three. Here you will work one single crochet, one
1:36
increase, repeat six times and you should have 18 stitches at the end of this
1:41
round. All right? That's great. Now moving on for round number four. Here you will
1:51
work five single... Round number four you will work two single crochet one
1:57
increase and repeat six times. You should have 24 stitches at the end of this
2:02
round, okay? Super good. So here one, two and the increase over here. Work all the
2:12
way around and this is how it should be looking like. Now we start working the
2:18
hair pieces of Alice. So here let's work together the first and second
2:25
repetition you will chain 20 chains okay so let me continue moving here 20
2:35
chains you will skip the two chains from the hook and you will start working with
2:40
half double crochet okay so work 18 half double crochet you will make one half
2:47
double crochet on each of the chains. Alright? So let's go here, half double crochets, yarn over
2:59
inside the chain, yarn over inside all the loops from the needle. So work all the way until the end
3:10
Once you work all your 18 half double crochet, you will join with a single crochet
3:17
okay so you have 24 stitches right so you will make this 24 times awesome no
3:27
so once again you chain 20 chains you work 20 chains here is keep two chains
3:35
from the hook so that will leave you with 18 chains work 18 half double
3:41
crocheted connect with a single crochet and once you're done you'll have all of
3:46
this 24 hair pieces hair strings here you can see this is my ending I will cut
3:55
here with a lot of room I believe a long tail here because we will need it for
4:01
sewing this later so let me just pull this yarn through here all right and
4:10
And then I will bring this yarn to the back of this hair
4:16
So from the wrong side in here. On the last stitch you just pull this yarn
4:28
to the back over here. Alright, and that's it. This is what we want
4:36
Later we will grab this. Okay, so you can set aside for now
4:40
Super good. Now we'll start working the detail of her dress. So it's what is this vest, like what she will be wearing on top of it, this white detail here
4:54
It's very fast to work. So you'll chain four, okay? So once you chain four, you will again skip one
5:03
stitch and you will start crocheting again on the third loop of the stitch over here okay So row we are working in rows this time not in rounds so you work row 1 and 2
5:16
3 single crochet, okay? And at the end of the rows you chain 1 and turn
5:22
all right so here we have three super good now you chain one and turn great so for the second
5:37
row here again we will work three single crochet let me go fast chain one turn and for the third
5:45
row here, you will work three increases, okay? So you'll work two single crochet
5:52
inside each stitch over here and you should have six stitches at the end
5:57
all right? Super good. And again once you arrive at the end of this chain
6:09
or two, three, five, six. Great. Chain one, turn. For the fourth row, you'll work one increase
6:18
for a single crochet, one increase, and you should have eight stitches at the end of this round here
6:27
So let's continue working here together. Okay now arrive on the last stitch over here and we will work our increase
6:40
1 and 2, chain 1, okay you can see it here nicely, chain 1, turn and for rows number 5 and 6 you
6:53
will work eight single crochet, okay? And that's it. Just eight single crochet. So
7:01
work your repetitions here and I will catch you up once you're finished. Great
7:09
Now we have this tiny detail... oops, I bumped into my camera here. Camera is
7:17
between my arms, it's a bit awkward to shoot. Okay, so now let's continue here for this detail
7:25
We want to add here in the central part and on the top part a couple of chains
7:30
so we can tie this in her dress later on, okay? So while I'm fastening this off, I fasten this
7:39
with a long tail, bring to the, bring this tail to the central part of this detail
7:47
and I'll pull this yarn here because we want to chain, to do a couple of chains
7:51
So here you will chain 14, okay? These chains are just to tight this detail in her dress later on
8:09
Okay, it's a bit smaller but it's a bit small but enough
8:16
All right, and like this one you tied again the yarn and you just make 14 stitches
8:25
Okay, it's very easy, you just add the chains here later. Okay, now look at this
8:33
I grab what? strings of hair here. I don't know why I chose seven. It could be as many as you want. And then
8:41
I add pins. I fasten every hair details with pins on top and on the string because I want to sew
8:50
this very nice. Okay, she's looking like a bird with this. We will organize it later with the bow
8:56
and it will be very nice. But for now, what we want is to sew this piece of hair on top of her
9:04
head. Okay, this can take some time so go slow, don't rush yourself. Give a couple of stitches here
9:14
and you will see every place that I fasten the pin here I will add one tiny stitch. This is what
9:24
I'm gonna do. So in this circle maybe I'll add here on top of her head a couple more of stitches
9:31
just make sure that this hair piece is very nice and tight and then later on I
9:38
will start removing the spins that I fastened the every piece of hair here and
9:44
I will give just one tiny tiny stitch on the head and on this hair okay just make
9:53
sure that it's nice and tight it doesn't matter how many of them you do it's just
9:59
matter of how nice and tight are your stitches, okay? Just this front part of
10:05
the face is the ones that I'm gonna leave without tightening. And here you can see
10:11
it already you see all of this piece of the hair strings are nice and tight just remaining this fringe this little bird Anyways we will deal with that later Now we start
10:26
working the bow on her hair okay of her hair so here you'll chain 25. Alright so
10:35
work your chains here we are almost done with this doll it's just some final
10:41
details now missing. Great, once you finish this chain you will start
10:49
crocheting on the first chain of this foundation chain. How many times I need
10:54
to say chain here? Okay, so you will work 25 back loop slip stitch. So just work in
11:02
the loop of the chain here. Very easy, okay? Work 25 loops slip stitch here. It
11:12
doesn't mean there doesn't need to be back loop or front loop, it's just the
11:16
chain and you work slip stitches, okay? Make sure that your slip stitch is not
11:22
super tight because we tend to make a tight tension and this is how it should
11:27
looking like, you can cut this thread leaving a bit of room here and we'll just
11:34
set this on the side for now. Alright, just let's hit, let's just leave it here
11:41
Okay, now let's work here again with chains but this time you will chain 65
11:48
65, very nice. Have time, have your time counting, have some fun over there
11:55
counting 65 stitches. I told you already if you are in the community tab here on
12:01
youtube channel I went a bit over the top with those toys. It was very much a
12:07
lot of work here. Okay, so you will work again with the slip stitch. So just grab
12:14
the chains of this foundation chains and I will say chain one more time and you
12:20
work slip stitch. Once you have all of the slip stitch work, you can cut this yarn
12:27
off, you can pull this yarn off and you can fasten this off. In my case I'll give
12:36
just a simple knot here and later on I will wave in this inside and cut this
12:43
thread. Because we will leave this as it is and use it the size of this chain of
12:49
this hair piece here later on. Okay, you can just wave this in. I don't need to
12:58
show you this, right? Wave it in, cut the remaining tail and now you remember that
13:04
circle that we set on the side. This one, okay, this one we can wave in and cut it
13:12
So let me just fast go through this. Alright, and now what we're gonna happen here is, let me just leave this off
13:25
Fold this in half like this with, you see, with the starting one with this remaining tail in the central part
13:34
So, find nicely the central part here and start tightening these two together with this tail that you left over here
13:46
all right look at this this looks nice for me so go slow and give it very nice
13:51
and tight shape here it's look very cute so I better work a couple of more
13:59
repetitions here so this ball will be looking super nice and then you tight a
14:06
nice knot so if everything will remain on its place okay look at this so easy
14:15
right? perfect, great! now let's just quickly find here the central position
14:21
which is here. You need to count stitches right? You can just fold it in half and
14:27
check what is it. You saw that the bow on the piece of a black piece. Now let's just
14:35
organize this here very fast but first I will embroider these eyes. I like to
14:43
embroider the eyes of my toys. If you're using safety eyes, you can check in the written pattern
14:49
the exact position, which row and how many, which round and how many stitches between them. But here
14:56
I'll just quick show you how I embroider the eyes of my toys. All right. So with this embroidery
15:04
thread, the black one, you introduce here inside of the toy and you leave a bit of room here
15:13
Ok leave this outside because we will use it later to just secure and tight knots from the beginning and the ending so this everything on the eyes will remain on its place Okay And here you start working repetitions here on the eye
15:36
All right, I almost missed. Okay, make sure that this will stay there
15:43
Okay, that we can tie the knot later. Anyways, here you'll start working a lot of straight lines
15:50
straight lines, straight lines, straight lines until becomes a round eye. You'll
15:57
see here with a couple of repetitions, it needs to do a lot of repetitions but it
16:01
looks nice at the end. So work all of your repetitions here from these eyes
16:08
You will see here I'm moving fast forward because it's literally many
16:14
repetitions so we'll need a lot of time here to work together in a slow motion
16:19
but you can reduce the speed of this video on YouTube. Okay, you see this looks nice to me
16:27
I will embroider the other one and look very nice. So you see this, this is where I bring the
16:34
beginning and the ending of the embroidery thread and then I tied a knot and then I hide it inside
16:40
the doll nothing will remove this eye okay and I will do now I will give some light to this eye
16:50
so this is totally black you can leave it like this but I like to add this I would like to add
16:58
this nice light to her eyes so with this white yarn I would just make a line here around in the
17:07
outside of her eyes. Okay? So let's work here on one side and on the other. And
17:14
like the eye itself, we'll just leave some room to the outside with the tail
17:20
here and then we'll tie it a knot so this can be nice and secure. Okay? So
17:28
we'll fast forward here, work on the other side. Okay? And then you give a knot
17:36
over here and you hide it inside. Okay, now let's start adding the final details
17:46
and this doll is almost done. So here before we finish with her hair, let us
17:54
just move a little bit here. You can tie a simple knot here, alright? See on the
18:01
front side, see everything is on its right, it's place, tight the knot on the top and in her waist
18:09
And that's it! Look at this, very nice! And this is removable, this is great because this is removable
18:15
and the hair ball is also removable, so that's very cute to work with. Okay, so now let's just
18:23
organize here a bit where we would like these hair strings to be and organize
18:31
this for the bow, okay? So find the central position here for the bow, if you
18:37
want to put the bow a bit on the side you can, so you just change the position
18:41
of the the hair here in the front of her face, so this is really optional to you
18:48
you can go slowly and you can play around where do you want her bow to be
18:53
But I think it's very nice and iconic if we tie this bow in the central part
18:58
So this is optional to you. You just pull it back here between the hair strings
19:04
that you sew and you tie it a knot, okay? So you can remove and everything. So this
19:10
looks very nice. Let us just organize her a little bit. And what you're gonna do
19:16
here is just to tie several small, tied like some small stitches here in this
19:27
hair strings that is in front of her. So here what I'm gonna do is I will
19:32
organize and fasten with pins and later on you can just substitute the pins with
19:39
little of stitches, okay? So for this video not to be very long, you can do this
19:44
by yourself. You don't need me to show you this how it's done. Alright, you can
19:49
tie stitches here, substituting here those pins where you fasten this off. So
19:55
you groom her hair and see what it's nicer, where it looks nicer to you. And
19:59
that's it guys! I hope you enjoyed this pattern. I hope you had a lot of fun
20:04
crocheting your Alice. If you liked this video consider subscribing to my channel
20:08
channel and give me a like and I will see you on the next time. Bye
#Arts & Entertainment
#Online Media
#Hair Care
#Fiber & Textile Arts
#Costumes