0:08
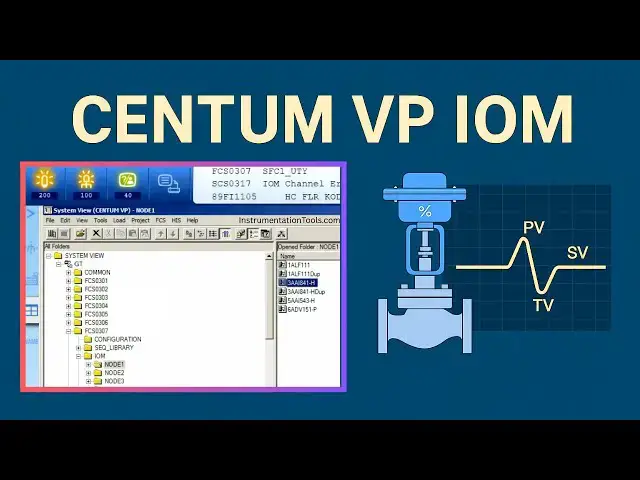
Open your system view software and go to
0:13
uh respect to FCS. I know that my
0:17
control wall 88 PV 11101 is connected in
0:25
You can get this details from your IBO
0:28
list. Go to OM and select node one and
0:32
select the third card. It is where my
0:34
control valve is connected.
0:42
and here you can see the available
0:46
These are the instruments connected in
0:48
this card. This is our required tag 88
0:54
and it is connected in 10th channel. See
0:58
the last two digits it is 1 zero. That
1:01
means this control wall is connected in
1:05
10th channel of this IO card. This is
1:08
analog input, analog output card. First
1:12
eight are analog inputs. Next eight are
1:15
analog outputs. Here you can see the 4
1:18
to 20 millia signal range. And this is
1:20
the required tag. Right? Remember the
1:24
channel number 1 0 10. Now go to hot
1:29
variables. On the right side you can see
1:32
and on the left side we have analog
1:34
data. Click on the right side.
1:40
This is the hot variables. Here we have
1:42
to define the respect to hot variables.
1:46
And remember the channel number is very
1:50
And enter the required channel number.
1:58
if you are going to use all variables in
2:00
a card, then better assign in a proper
2:05
Okay. Now 10 and select the required hot
2:10
variable. We have four variables, right?
2:14
If you remember in our PRM,
2:18
we selected volume traveled. that means
2:21
volume feedback signal in secondary
2:23
variable SV. So we have to select the
2:27
respect to variable here.
2:30
Okay, I will select SV secondary
2:36
You have to map both sides engineering
2:39
system and your field instrument in this
2:42
case wall positioner both must have same
2:46
variable and I will give this comment 88
2:50
PV 1101 feedback and then I will write
2:55
the tag name here. This is just for
3:03
and I will copy this M tag and I have to
3:07
enter the label. This label is
3:09
important. We have to configure this
3:11
accordingly. Percentage percentage W
3:16
and then I will give the same tag. This
3:27
I will copy the label also for the uh
3:33
and then we have to do the download. Go
3:35
to file and select download and click
3:42
So this uh basic IO configuration is
3:47
completed. Next we have to do the
3:50
function block programming so that we
3:54
can get the face plate that I will
3:56
discuss in the next video.
3:59
Thank you. I will meet you in the next
4:03
video and please uh like our videos,
4:07
share our courses with your colleagues
4:10
and friends, supporters. Thank you. I
4:14
will meet you in the next video.