Up next in 10

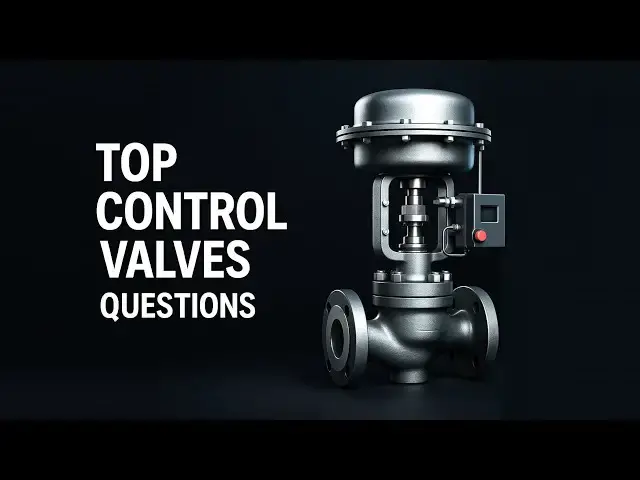
Top control valves interview questions and answers to help you ace your next interview. Learn about types, applications, and common issues.
COURSE JOIN LINK: https://email.instrumentationtools.com/w/urFXb0892wl1t6qbECRysLpA/lGXXKggb25s3nMr69wMPkg/OtnnsrbrXaWjpWRrJZgo3w
Tags:
control valves interview questions, interview answers, valve types, valve applications, valve sizing, actuator types, troubleshooting, industrial valves, process control, ball valve, globe valve, butterfly valve, diaphragm valve, check valve, pressure relief valve, flow control, fluid dynamics, engineering interview, job preparation, technical interview, industrial automation, control systems, valve maintenance, career guide, valve design, valve materials, fluid power, pipeline engineering, P&ID diagrams, flow coefficient (Cv), valve characteristics, safety valves, shutoff valves, process industry, oil and gas, chemical engineering, manufacturing jobs, mechanical engineering, control valve principles, instrumentation, pneumatic actuators, electric actuators, hydraulic actuators, valve installation, valve selection, valve inspection, valve repair, valve standards, ANSI, ASME, API standards
Show More Show Less View Video Transcript
0:30
The first asked control val question is
0:32
what is choke flow in control valve. So
0:34
let us look into that. If you have to
0:36
understand this concept, we can say that
0:37
if we have a valve and we keep the
0:39
upstream pressure as 24 bar. So we keep
0:41
a constant upstream pressure and the
0:44
valve opening is kept constant. For
0:45
example, let's say 50 percentage and we
0:48
keep increasing or decreasing the
0:50
downstream pressure like example 20 bar,
0:52
19 bar, 18 bar and we try to plot a
0:55
graph we'll be getting a linear
0:57
characteristics. Eventually it could
0:59
happen that you reach to a point where
1:01
the pressure difference is not allowing
1:03
the flow to increase. And this point is
1:06
called as the delp choked. And this is
1:08
against the ideal characteristics where
1:10
the flow should increase. And this
1:12
phenomenon is called as choke flow. The
1:15
next most asked question in interview is
1:18
what is balanced and an unbalanced
1:21
stream. So let us look into that. Let us
1:23
take this example of an unbalanced
1:25
valve. So here's your cage plug-in seat
1:27
assembly. The flow is going from the
1:28
inlet to the outlet. And here you have
1:31
the force P1 which is acting from the
1:32
fluid. On the other side there is force
1:34
P2 from the actuator. Let us understand
1:37
this amazingly with an example of a
1:39
seessaw. So here imagine you have your
1:42
plug and the seesaw has from one side
1:45
the pressure which is P1 or the force
1:47
which is acting from the fluid. On the
1:49
other side what is there to balance it?
1:51
The answer to it is nothing else except
1:53
the force of the actuator. But let us
1:56
see a balanced design. Now in a balanced
1:58
design one of the most amazing thing is
2:00
the simple hole. What it does is when
2:03
the flow is flowing it will also go to
2:05
the opposite side of it. So here let's
2:07
imagine this is the force P1 acting and
2:09
here this force P2 acting. So if you
2:12
take the same example of seessaw on one
2:14
side is the fluid force acting P1 but on
2:17
the other side approximately the same
2:19
force which is P2 is acting on the trim.
2:22
Now what happens here is actuator has to
2:24
put very little force in order to move
2:26
the plug assembly. The third most asked
2:29
interview question is what are the
2:31
failure modes in control valve. So
2:33
without further delay let's look into
2:34
that. So in order to understand these
2:37
failure modes let us try to dissect each
2:40
and every failure symbol. So if you see
2:43
here for example FC stands for fail
2:46
close. So if the flow of air is stopped
2:49
or there is some electrical issue the
2:51
fail close would be the valve's default
2:53
action. So the valve will get into its
2:56
closed state. Similarly, FO stands for
2:58
fail open. So basically, in any loss of
3:01
air or in terms of any electrical issue,
3:03
the valve is going to go in its open
3:06
state. Similarly, fail lock. So whatever
3:09
is its last position, it will stay
3:11
locked in that position. It will not
3:13
move. Either if it is in the halfway
3:15
position, it will remain in the halfway
3:17
position. This is achieved sometimes by
3:19
a check valve. Now FLDO stands for fail
3:23
last drift open. Remember this is
3:26
different from fail lock. Why? Because
3:29
in fail last position it will just
3:31
remain wherever it was and eventually
3:34
with the help of flow it will drift to
3:37
its open position. Similarly flc stands
3:40
for fail last drift close. Here the
3:42
valve is going to remain again in
3:44
whatever last position when the air
3:46
supply was cut off and then it will
3:48
drift to its closed position eventually.
3:50
the flow will try to push it in such a
3:52
way that it leads the plug into its
3:54
closed position. The most common type of
3:58
failure modes that have been used in
4:00
control wall is either FC or an FO. A
4:02
fail close valve and a fail open valve.
4:05
Remember this information is very
4:07
important while designing a control
4:09
valve. So when you find it on PN ID, you
4:11
can maybe you know mention in the
4:12
remarks column of the index etc. But
4:15
please make sure to capture this
4:17
information because this is very
4:18
important for sizing and for
4:21
understanding a control valve.
4:24
Meet Warren and Elon. Warren has been
4:28
giving a lot of interviews lately in a
4:31
variety of different companies but the
4:33
output of all of them is the same.
4:35
Rejection, rejection, and rejection. On
4:39
the other hand, we have Elon. Elon has
4:41
already cleared the interviews and he's
4:44
got four job offers from various
4:46
multinational companies. So let us try
4:48
to learn what is the secret from him. So
4:50
he says that giving an answer is very
4:54
easy but giving a convincing answer is
4:59
difficult. A lot of interviews the
5:02
interviewer is not interested to get a
5:04
mugged up answer. What they're
5:06
interested is are the fundamentals and
5:09
the concepts clear of the candidate and
5:12
one of the most important topic for an
5:14
interviewer is control valves. So in
5:17
this video we'll try to learn what is
5:19
the logic behind the questions that are
5:21
asked and especially what is the
5:25
definition after that. So you can give a
5:28
combination of the logic plus the
5:30
definition together so that your answer
5:32
is more convincing. The first question
5:35
which is one of the most asked question
5:37
is what is CV in a control valve. So we
5:41
look at the concept first and then the
5:43
definition. So let's get into it. The
5:45
first thing is that whether you have a
5:47
temperature control valve, pressure
5:49
level or flow control valve. Actually
5:52
they're nothing but a simple control
5:54
valve which has only one basic function
5:58
which is to control the flow within the
6:02
valve. Now how does CV help in that is
6:05
in the most simple terms we can say that
6:09
CV is nothing but a tool so that you can
6:13
compare flow capacity from any valve
6:16
throughout the world. But let us dig
6:18
into this concept in such a way that
6:20
we'll remember this concept forever. As
6:23
we had initially discussed imagine that
6:25
for valve A and for valve B we have a
6:29
different flow rate. Valve A has a flow
6:31
rate of 10 gpm and valve B has a flow
6:34
rate of 5 GPM. Here as we had said we
6:37
cannot say that this means that valve A
6:39
has the higher flow capacity. Why?
6:42
Because there could be the case that
6:44
both the valves are made of the exact
6:46
same construction same size but the
6:49
pressure drop across the first valve is
6:51
15 PSI while the pressure drop across
6:54
the second valve is just 1 PSI. So we
6:56
know that as you increase the pressure
6:59
drop across the valve the flow through
7:02
the valve increases. So this flow
7:05
increases just because of pressure drop
7:07
and not because of the valve size. So
7:10
here if we want to compare two valves
7:13
flow capacity we have to keep them under
7:15
the same pressure. So let us take a
7:18
standard of 1 psi as pressure between
7:20
the two valves. again. Now what I do is
7:24
I'll measure the flow between the two
7:26
valves. But here I see the flow between
7:28
the first valve was 10 gpm and the flow
7:31
with the second valve was 4 gpm. Why?
7:35
There could be the case that for the
7:36
first valve the fluid was water and for
7:40
the other valve the fluid was honey. Now
7:42
we all know in such cases that honey is
7:45
very dense. So it will have a lower flow
7:47
rate as compared to water. So even
7:49
though the valves are made of same
7:51
construction, we have to also ensure
7:54
that the liquid between them is the same
7:56
if you want to compare the flow capacity
7:58
between two walls. So let us select
8:01
water because water is one of the most
8:03
available substance and very easy to be
8:06
found at any site or at any vendor
8:08
location. Now let's keep water for both
8:11
the valves. I've kept the same pressure
8:13
drop. I have kept the same liquid.
8:15
Ideally I should get the flow rate to be
8:17
same but for this valve I get 10 gpm as
8:20
the flow rate and for this valve which
8:22
is valve B I'm getting 12 gpm. Now what
8:26
is the issue here? There's another
8:28
parameter which comes into play which is
8:30
the temperature. So both water being the
8:34
same fluid might have different
8:35
temperatures. So first may be at 60°
8:38
Fahrenheit and the other one might be at
8:41
150° F. So we know as the temperature
8:43
increases there's again a difference in
8:45
flow rate. So we will have to maintain a
8:48
constant temperature as well. So we'll
8:51
select 60° F. A lot of people ask that
8:55
in CV definition why 60° Fahrenheit is
8:58
specially taken. The answer is because
9:00
the specific gravity of water is 1 at
9:02
60° Fahrenheit. So this will help
9:05
greatly when we are doing CV
9:07
calculations. So we'll have three
9:09
standard parameters which is the PSI
9:11
drop is 1 psi, the water is the fluid
9:14
which is taken and the temperature 60°
9:16
Fahrenheit. That being the case, we can
9:19
say the definition of CV is as follows.
9:22
CV is the number of US gallons of water
9:26
that can flow through a valve with one
9:29
psi pressure drop at 60° Fahrenheit for
9:34
1 minute. So this is the definition of
9:36
CV. Also, I want to share one more thing
9:38
that I produce a new video every
9:40
Saturday. So, if you want to learn
9:42
something new every Saturday, please
9:44
click on the bell icon and subscribe so
9:47
that you can learn a new video. The most
9:49
asked question, the all-time favorite of
9:52
any interviewer which has been asked in
9:55
the last three decades is what is
9:58
cavitation, flashing and choke flow. So
10:01
use the graph which will be shown now so
10:04
that you can give a more convincing
10:05
answer and that would help in your
10:07
explanation. So imagine this is your
10:10
valve put in a line. Now with the flow
10:12
there is some restriction put. So you're
10:14
going to have a DP or a differential
10:15
pressure created to it. So the upstream
10:18
pressure is P1 and the downstream
10:19
pressure is P2. Now imagine that this is
10:21
your vapor pressure curve. So what
10:23
happens when the fluid is going to be at
10:25
this particular uh region? the fluid is
10:29
going to change from liquid state to
10:31
vapor state and this stage is called as
10:35
the point where the liquid changes to
10:37
vapor phase. Now at the exact opposite
10:40
side if you notice the the vapor is
10:43
going to turn back into liquid state.
10:46
Here what is going to happen is the the
10:48
bubbles are going to burst to come back
10:51
to liquid state which is called as
10:52
popping which has very high velocities
10:56
that can damage the valve and the piping
10:59
downstream. This entire phenomenon is
11:02
called as cavitation.
11:04
Now we look into the next case which is
11:07
when there is flow to the valve but what
11:09
happens is the pressure downstream does
11:11
not recover. This happens when the
11:14
pressure downstream is still below the
11:16
vapor pressure curve. This phenomenon
11:18
here makes the liquid to still stay in
11:21
the vapor pressure phase in the
11:23
downstream. And this phenomenon is
11:24
called as flashing. What happens here is
11:27
imagine that this is your valve and this
11:29
is your pressure drop happening. We are
11:30
very sure with the concept that if we
11:32
increase DP there is going to be an
11:34
increase in flow. But we keep increasing
11:36
DP at a point of time flow will not
11:39
increase. This point is called as choked
11:42
flow. For this third question, now the
11:44
interviewer is looking for thought
11:46
process and usually this question is
11:48
asked which is usually can be used for
11:50
variety of instruments that is material
11:53
selection. So we look into packing
11:55
material selection as an example but you
11:57
can use this concepts of the pressure,
11:59
temperature, chemical compatibility etc
12:02
which is to be used while an engineer
12:04
comes towards selection of the material.
12:06
So let's get into it. The first thing is
12:09
imagine this is water and here's our
12:11
boat placed into it. The first thing is
12:13
you need an engine to run the boat and
12:15
there has to be a rod that has to be
12:18
penetrated through the boat and here
12:20
would be a propeller which would help
12:22
the boat to go forward. Now here's an
12:24
interesting thing. If you look at this
12:26
point, water can enter through this
12:29
location into your boat. And if the
12:32
water enters, you know what's going to
12:33
happen, right? The boat is going to
12:35
sink. So for this concept what will we
12:37
do? We add something called as a
12:39
stuffing box. Now stuffing box as the
12:42
name suggests is basically you're
12:43
stuffing something inside so that the
12:46
water cannot penetrate through this
12:48
barrier and come inside the boat. Sounds
12:51
very simple right? And the first thing
12:53
is the more we stuff the more safe we
12:55
are that the water will not enter inside
12:58
the engine or the boat. But if you see
13:02
here, if you're putting a lot of
13:04
pressure, what is the adverse effect
13:06
that can happen? So if it's very tight,
13:09
then there is no movement that the
13:11
propeller has so much friction that it
13:13
might not be able to move. Okay? So we
13:16
might keep it loose, right? But if we
13:18
keep it very loose, the other issue is
13:20
that the fluid will enter the engine. So
13:23
this is another issue. This same concept
13:26
also applies for a control valve. Here
13:28
let's take the same example of boat and
13:31
now let's put a control valve. So both
13:33
these places require a packing here.
13:36
Same is for control valve. But for a
13:39
boat the concept is still little simple
13:41
because the liquid is finally what?
13:43
Water. Even if little bit enters what's
13:45
the issue? But the control valve has to
13:48
go through a lot of services corrosive
13:50
erosive toxic etc. So it's not that easy
13:54
as it looks like. Okay. Now you would
13:56
ask me let's get to the basics. So for a
13:59
simple control well what are the basic
14:01
packing materials that we use? Usually
14:03
these two materials are one of the most
14:06
used materials. The first one being is
14:08
PTFE and the second one being is
14:10
graphite. These are actual pictures of
14:12
how a PTFE and graphite looks like. So
14:14
if you see the picture one PTA is around
14:17
something you could say whitish
14:19
complexion and graphite is shiny
14:22
blackish in color which is also
14:24
sometimes referred to as flexible
14:26
graphite. Now with respect to chemical
14:29
compatibility PTFE is the most
14:32
compatible with almost majority of the
14:35
services. But then why do we have
14:37
graphite? Because of temperature
14:39
limitation. So PTFE usually as a thumb
14:41
rule you can say suggest up to 200°C
14:45
while graphite can go up to 600°C.
14:49
However, for graphite also you need to
14:51
ensure from the material certificate
14:53
what is the maximum limit. But as a
14:55
thumb rule you can consider this also
14:57
notice that is it compatible with the
15:00
service. Now is it only these two
15:03
factors nothing else is required for
15:04
packing. Let us look at an interesting
15:07
case. Now imagine that you have a valve
15:09
put in a line and there is a site person
15:12
who inspecting the valve. Now the valve
15:14
has slight leakage. Okay, it's very
15:16
slight but theage point is maybe H2S
15:19
which is leaking or maybe some very
15:21
toxic service or lethal service. There
15:23
are certain services which if the
15:25
operator or the plant person just
15:27
inhales for a few seconds they could
15:29
die. It's that grievious. Also if you
15:33
have for example a 100 valves in a plant
15:35
or 500 valves which are continuously
15:38
emitting these toxic gases in the
15:39
environment then even that's very
15:41
harmful right so you have something
15:43
called as fugitive emissions where the
15:45
authorities give you a certain limit
15:47
beyond which your valve should not be
15:49
allowing leakage but how do you ensure
15:52
that you are able to meet such criterias
15:55
engineers have come up with some very
15:57
interesting concept in order to meet
16:00
such stringent criterias. as let's look
16:02
at the first one which is called as live
16:05
load packing. Now this concept we'll try
16:07
to understand with an hypothetical valve
16:09
example. So here's my packing material
16:12
which is put in the valve. Now the valve
16:14
in normal operation will keep on
16:15
operating throttling the valve and the
16:18
flow through it. But if you notice
16:21
eventually the packing is going to get
16:23
worn out and maybe it's not able to
16:25
provide that much pressure. So engineers
16:27
came up with a spring which is usually
16:30
used and that creates a positive
16:32
pressure on the packing material. If you
16:36
want to see an actual real life example,
16:37
see here the white thing is nothing but
16:40
your packing which seems to be PTFE as
16:42
we said it's white in color and you can
16:44
see a spring assembly also. So it kind
16:47
of puts a positive pressure to keep the
16:49
packing in place. Interesting. Right now
16:53
this is not it. Still there could be
16:55
certain issues like the spring has
16:56
failed or the spring is itself the
16:58
tension is reduced. Do we have another
17:00
amazing way? Yes, we do have it. Let's
17:03
look at the next amazing. The next
17:04
amazing way is something called as
17:06
bellow seal. This is a level up even the
17:09
life loading. But how does it work?
17:11
Let's see. Here's your standard packing
17:13
which is available. Now here are your
17:14
bellows and here's something called as a
17:16
leak detection port. We'll look into it
17:18
at the later part of it. But right now
17:20
let's first focus on the bellow. Bellow
17:22
is an uninterrupted tube and if you see
17:25
it has no place for the leaks to be
17:27
developed. Also the bellows are
17:29
extremely flexible. So neither there is
17:33
any leakage chance nor is going to
17:35
create any friction because it's
17:36
completely flexible. The only one issue
17:39
is what if the bellow ruptures. So for
17:42
that case here at the leak detection
17:43
point we can put a pressure transmitter.
17:45
So anytime the bellows fail there's a
17:47
rupture the pressure at this chamber is
17:49
going to increase and we can get an
17:51
alarm but the leakage is greatly reduced
17:54
by bellow seals.
17:57
[Music]