Up next in 10

The video titled "How To Receive Money From Shopify (2024)" provides a comprehensive guide to setting up and managing payment processing on Shopify, ensuring that business owners can seamlessly receive funds from online sales. It covers key steps for configuring payment gateways, understanding payout schedules, and managing financial transactions. The video also discusses different payment methods available on Shopify, such as Shopify Payments, PayPal, and third-party options, along with tips for ensuring secure and reliable transactions. Viewers will learn how to track payments, address common issues, and optimize their Shopify settings to ensure smooth cash flow. Whether you're new to e-commerce or a seasoned Shopify user, this video offers valuable insights into effectively receiving money from your online store.
Show More Show Less View Video Transcript
0:00
how to receive money from Shopify. Hi guys, welcome back to another video and in this video
0:04
I'm going to be showing you how you can receive money from Shopify. So having said that, let's
0:09
just jump into the video. So there are two ways or a couple of ways that you can receive money from
0:15
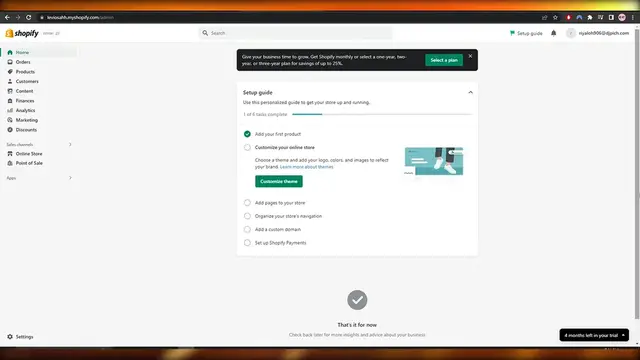
Shopify. So first thing first, what you're going to do is you're going to go over here into settings
0:20
you're going to click over here and over here you will see you have plans, user permissions
0:26
payout, payments and checkout, right? You need to go into payments and over here you need to
0:32
set up payments now. So as you can see, we have Shopify payments right here and we also have
0:38
PayPal and Amazon and some other providers as well and a manual option like bank deposit
0:44
money order or cash on delivery. It depends on you which one you choose. Now when you set up
0:50
Shopify payments, it's actually very simple. You just need to enter in your details, your address
0:55
and your phone number and that's pretty much it. Then you click on next and then you get these
0:58
options right here. Then what you need to do is just simply click on complete account setup, right
1:04
You click on complete account setup and you will have this option right here where you have to
1:09
submit your information about your business, right? Then you will have to secure your account with a
1:14
two-step authentication and then you have to add in your banking information. Pretty simple. So
1:20
click on submit details and it's going to open up right here and you got to fill out this form
1:25
It's a very simple and standard form. You don't have to worry about that. Over here you add in
1:30
the business type. If it's an individual or sole proprietor, you could go with that or a corporation
1:36
or LLC or partnership. It depends on you and if you choose options, you're going to see that some
1:42
of the options, you know, change. Like for example, if you go into corporations, right? And partnership
1:50
and LLC, as you can see, social security number, but it doesn't change by a lot, right? So enter in
1:58
your employer identification number, EIN or SSN, social security number, nine digits, it depends
2:04
on you and add in your personal details like your first name, last name, job title, date of birth
2:11
and then your street address right here. This is just an address that I pulled off the internet
2:16
and then add in the last four digits of your social security number and then you have additional
2:23
owners right here. I am the only owner or add another owner or a director. It depends on you
2:28
As I said before, if you choose different options, you're going to have different options as well
2:33
So let's say if you have individual or sole proprietor, then that is gone. Now you have
2:39
a product details, right? Now you select the industry and what type of product you sell
2:44
what type of industry your products falls into. So retail, we'll go with retail and then you add in
2:51
the business subcategory over here. We have a bunch of different options. You know, you could
2:56
go with that. You could go with the clothing and accessories, computers, chemical allied
3:01
products, cameras, and stuff like that. We'll go with clothing and accessory and then just add in
3:05
a description of product or services. Once you've added that, you add in the statement descriptor
3:11
and your phone number as well. And then you just simply click on a complete account setup
3:16
Very simple, nothing too crazy. Now, if you are going to be using Shopify payments, you have to
3:22
keep in mind that Shopify will charge you right here. As you can see, if you are using a third
3:28
party, right? If you're using a third party payment provider, there will be additional fee of 2%
3:35
1% or 5%, right? But there are no basic fees for stores using Shopify payments. So keep that in
3:43
mind. Although they do take a payment, but I'm not really sure. However, there is a commission right
3:49
here. So if you come over here, as you can see, become a Shopify partner, you can earn 20
3:56
commission as well. So keep that in mind. This is a yearly thing. So yeah, if you're going to be using
4:02
Shopify payments, then depending upon the plan that you've chosen for your Shopify account
4:08
you're going to get charged for 2%, 1% or 0.5%. And once you have submitted your details, you will
4:16
then need to add a two-step verification or authentication. You simply click on turn on
4:21
two-step. It's going to take you over here where you log in to your account once again, and then
4:26
you add in a security key. So you can only use SMS delivery if your account is email is verified
4:34
If not, it's all good. My account is not verified. So I'm just going to skip this. And of course
4:39
once you've done that, you should be good to go. And over here, it's also written that credit card
4:44
rates are as low as 2.4% plus 3 cents, but there are no transaction fees. There will be a few on
4:51
the credit card, but yeah. Now, if you want to use a third party one, like a PayPal or Amazon
4:58
you can as well by clicking on manage. You come over here into payment sections and PayPal Express
5:05
checkout, and you just simply go ahead and complete the setup. So by clicking on complete setup
5:12
you just simply create an account or log in into PayPal account using the email that you have
5:19
created. So this is a temporary email or a fake email that I use to create this account. And I
5:24
will be using this email to log into PayPal and to complete my account setup. And once it's done
5:31
I should be able to get payments through PayPal. There is however, another option such as Amazon
5:39
provider. This is also very similar to PayPal. And as you can see, there are no transaction fees
5:44
However, there will be some fees. It's not like Shopify is not going to charge you anything. And
5:52
same with the PayPal, you're going to have to log into the merchant registration account. You choose
5:58
the location that you are. You create an Amazon pay account or log into your existing Amazon
6:04
account and link it with your Shopify account and you are good to go. And then you can, of course
6:11
take payments through Amazon as well. And also if you don't like all of these options
6:16
or for some reason you can't finish them, there is also another option called manual payment method
6:23
However, you'll need to approve their orders before it can be fulfilled. And I'm pretty sure
6:28
there is no fee on it. So you don't have to worry about that. So over here, you can create custom
6:35
payment method as well. You click over here, you add in the custom payment details. You can add in
6:41
the additional details and payment instructions as well. Like you can add it or say underneath
6:47
a product where people say like where people would buy your product, you could add a prompt where you
6:52
would say that send the payment to this account or on this number or on this email, attach the
7:01
proof of payment and you will receive the product. So you could go with that, but it's a bit hectic
7:08
in my opinion. You also have bank deposit options. So if you click on bank deposit, you add in the
7:13
bank details and payment instructions as well. Very simple. And then you have money order as well
7:20
Again, add in the details that you want to add and click on activate money order and you should be
7:26
good to go. There's also cash on delivery. So that's also a preferable option. In most countries
7:33
cash on delivery is, you know, considered the better option since it's more safety of the
7:39
product. You go to the person, he gives you the money, then you hand over the product. So there's
7:44
no scamming or anything like that. And they can see whether the product is intact or not. And if it's
7:50
you know, in a good condition, it's not wrecked or anything, they won't have to return it. So
7:56
it's all good, but it does take a while. So it depends on you, which option you want. Now
8:02
since my account has been created using the United States version, I have different options
8:08
If you create an account outside the US, then you will have more options. You will also have
8:13
a two checkout account and many, many other third party payment options or payment processors
8:19
that are not available in the US. So keep that in mind as well. The setup process for them is
8:25
also very similar. You just add in the details that they ask, like your banking details, address
8:31
phone numbers and stuff like that. And you should be good to go. So generally speaking, this is how
8:36
you set up payments. And this is how you would receive money from Shopify. Now, if you have any
8:40
questions, let me know in the comment sections down below, and I'll be sure to answer them as
8:44
soon as possible. So, and if you found this video helpful and educational, then be sure to hit the
8:48
like button, subscribe to the channel and turn on post notifications. And I will catch you guys in
8:52
the next video. And until then, take care and goodbye
#Business Operations
#Affiliate Programs
#Consumer Resources
#Business Formation
#Mobile Payments & Digital Wallets
#Identity Theft Protection