Up next in 10


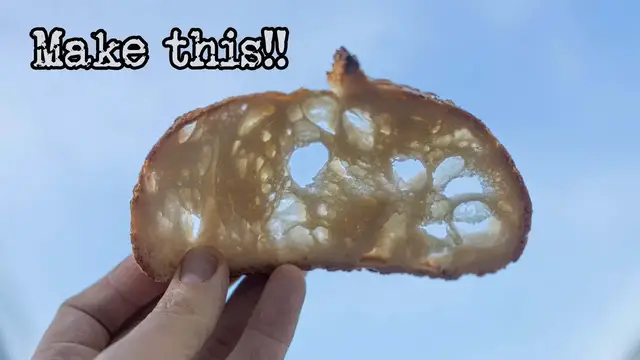
Looking for that Instagrammable open crumb? This is my recipe for open crumb sourdough bread. Made as simple and understandable as possible.
Buy Foodgeek Merch: https://fdgk.net/buy-merch
Patreon: https://fdgk.net/patreon
Buy the t-shirt: https://fdgk.net/buy-qr-code-tshirt
The recipe:
https://fdgk.net/open-crumb-sourdough-bread-recipe
Adlinks!
In this video:
Buy medium bowl: https://fdgk.net/buy-rosti-bowl-4-liters
Buy medium bowl lid: https://fdgk.net/buy-rosti-bowl-4-liters-lid
Cambro Container 6 qt/6 liter: https://fdgk.net/buy-cambro-container-6-qt
Brød & Taylor Proofer: https://fdgk.net/buy-brod-and-taylor-proofer
Spray Bottle: https://fdgk.net/buy-spray-bottle
Oval Proofing Baskets: https://fdgk.net/buy-oval-proofing-baskets
Walnut Lame: https://fdgk.net/buy-walnut-lame
Razor blades: https://fdgk.net/buy-razor-blades
Challenger Bread Pan: https://fdgk.net/buy-challenger-bread-pan
Show More Show Less View Video Transcript
0:00
Today I'm going to show you how to make an open crumb sourdough bread
0:03
It's easier than you think. I'll give you all the details. Hi, I'm Sune and I'm a food geek
0:20
Happy New Year and welcome back to my channel. Or if you're new, just plain a welcome
0:27
I hope you had an amazing Christmas and a wonderful New Year's. celebration. Today I'm going to show you how to make an open crumb sourdough bread
0:36
This is not a beginner's recipe. If you're looking for that, I recommend having a look at my
0:41
master recipe. I've spent a better part of one and a half years making experiments that led me
0:48
to making that recipe. The link is in the card above. So during 2021, I did a lot of experimenting
0:56
on what makes open crumb possible. Flowers, more or less protein, fermentation, shaping
1:02
and many more things were tested. Some things didn't really make any difference at all
1:07
like lower or higher inoculation, final proof, or the amount of protein. And that brings us to
1:13
what is important for open crumb in order of importance. One, fermentation. Fermenting your dough
1:21
just right is one of the most important factors. About 50% growth
1:26
during bulk seems to be really good. Two, flour. The flour that you use is very important
1:35
I can't specifically tell you which brands are used, but low extraction, medium-high gluten
1:40
seems to be a good place to start. That basically means bread flour, but there's such a
1:46
huge difference between the different breadflowers. If you're in the States, I hear that King Arthur's
1:51
unbleached breadflower can give really good results. I've yet to try to
1:56
I tried myself though. 3. Hydration. Not high hydration, but the right hydration for your flour
2:04
4. Shaping. The more gentle you shape, the more wild the crumb will be
2:10
Conversely, the more violent you are with the dough, the more uniform the crumb will be
2:16
So it's all about striking a balance. I'd say start out really gentle to see what you can get
2:22
If you're new to this channel, I bake a lot of sour
2:26
bread and I make delicious food from all over the world. If you want to see more of this content
2:32
please join me by subscribing and ringing the bell so you won't miss any future videos
2:38
So for the flour that I'm using in this recipe, which is Caputo, Manitoba, Oral, 80% hydration is perfect
2:44
for open crumb. So I will be presenting the recipe for you with 80% hydration, but it's important
2:50
that your dough has the same consistency that you see in the video and it needs to have enough gluten
2:55
to really hold the dough together. That being said, I got really nice results
2:59
with both high extraction super strong flour and also low protein cake flour
3:03
But then again, having the right hydration is paramount to getting open crumb
3:08
The rest of the formula for this bread follows my master recipe, so 20% inoculation and 2% salt
3:15
If you'd like to support the channel, please consider becoming a member at Patreon
3:19
You can also buy some merch or use the links in the description for tools and ingredients
3:25
Those were the words. This is the recipe. There's a link in the description for the recipe on my website
3:32
To a medium bowl add, 700 grams of bread flour. 14 grams of salt
3:47
Mix it together with your hands. then add 140 grams of starter
3:59
And now it's time to add the water. The number that I'm going to give you in a second is for 80% hydration
4:07
If you want to change the formula but keep the overall weight you can do that in my bread calculator Load up the formula Note the total weight
4:18
Press the hydration button. Type in the desired new hydration. Press the total button to scale the formula
4:28
Type the weight. Well-la. Simple, huh? Add 546 grams of water. Then mix the dough with your hands until it comes together in a shaggy mess
4:45
Make sure that every bit of flour is wet. Then leave the dough to rest covered for an hour to develop the gluten
5:19
Then perform three sets of stretch and folds based out by 30 minutes
5:23
The first set. Cover and let the dough rest for 30 minutes
5:45
The second set. Cover the bowl and leave it for 30 minutes
6:02
And the third set. After that's done, pull a window pane to make sure the gluten is properly developed
6:25
If it tears, you might have a flour with low gluten and it can affect the final result
6:30
Put the dough in a see-through container with relatively straight sides. I use this one from Canbro
6:35
This will help you monitor the growth and get the perfect fermentation
6:45
Level the top of the dough. Then mark where the top is on the container and where the dough will have grown 50%
7:12
Then put it somewhere warm to proof. I'm using a broadened tailor proofer set to 30 degrees Celsius, 86 degrees Fahrenheit
7:24
Proof until it's grown by 50%. Expect it to take in the ballpark of three hours in the proofer, but don't get hung up on that time
7:32
If you're not using a proofer, it can take vast. If your ambient temperature is above 30 degrees Celsius, then that's a whole other set of problems
7:42
I'd lower the inoculation to slow down the fermentation to battle this
7:47
Once the dough has grown 50%, it's time to pre-shape. Pre-shape using a coil fold to be as gentle as possible
8:05
Once they pre let them rest on the kitchen counter for 20 minutes
8:34
Then it's time to final shape. For open crumb, you should go for a batard or a cigar-shaped loaf
9:52
One stirs shaped, put them in banatons dusted with rice flour
10:22
Then put them in the fridge to let them retard for at least eight hours, but up to 48 hours
10:32
Note that your fridge needs to be set really cold for this to work
10:36
Then when you're ready to bake, heat your oven to 260 degrees Celsius, 500 degrees Fahrenheit
10:42
with a baking steel or baking stone inside. If you can turn off the fan on your oven, you should do so
10:48
I'm going to show you two different ways to bake. One using a Dutch oven, the other one steaming the oven
10:55
If you're using a Dutch oven, you should add that to the oven while it's heating. If you're steaming, you should add a ceramic or metal pan at the bottom big enough to hold a rolled up towel and a small pan filled with lava stones
11:08
Also, if you want to use the steaming method, you should be aware that not all ovens are sealed
11:15
If your oven isn't sealed, all that amazing steam will just fly out of the oven and not help your bread's oven
11:21
In that case, your only option is to use a Dutch oven or some other way of covering the bread during baking
11:28
First, let's see the Dutch oven method, which you probably do all the time
11:34
Grab a dough from the fridge, dust the bottom with rice flour
11:44
Flip the dough onto a peel. I add rice flour on the top of the loaf
11:55
It's purely cosmetic. Then score the dough. Add the dough
12:15
Add the dough to the Dutch oven, put the lid on, close the oven, and then turn off the oven
12:26
Let the bread bake for 20 minutes, then remove the lid. Wow look at the oven spring Turn the oven back on using the fan and set the temperature to 230 degrees Celsius 450 degrees Fahrenheit
12:46
Bake for another 30 minutes. Remove the bread and let it cool on a wire rack
12:57
All right, let's look at the steaming method. About 10 minutes before you're going to bake
13:03
Add a rolled up towel to the bigger pan in the oven. Pour over an entire kettle of boiling water
13:11
Make sure all of the towel gets soaked. Close the oven and let the steam saturate the oven
13:21
Boil some more water that you're going to need for the smaller pan. You need about 2.5 deciliters or a cup of water
13:28
Prepare the dough the same way as the other method. Open the oven a bit carefully to not let too much steam out
13:50
Then add the bread on top of the baking steel. Grab the boiling water
13:58
Pour it over the lava stones and quickly close. the oven. Then turn off the oven and bake for 20 minutes. Then remove the steaming pan
14:18
Close the oven. Turn on the oven again using the fan to 230 degrees Celsius, 450
14:24
degrees Fahrenheit and bake for another 30 minutes. Then take the bread out of the oven
14:33
and let it cool on a wire rack. All right, now for the big moment, the Crumb Rebeal
15:33
Oh, that's a really nice crumb, don't you think? But looks aren't worth anything without substance
15:42
And substance in bread is taste. Taste is paramount. In my experience, the more you're willing to pay for your flour
15:50
the better tasting bread you will get. I don't know what the bread prices are where you live
15:55
but I can bake a loaf of bread with the most expensive flour, and it's still three or four times cheaper than buying a quality bread
16:02
from a bakery. Don't get me started on commercially made bread. That stuff is usually awful
16:10
So are you going to try making your own open crumb bread? Let me know in the comments. I'd at least
16:16
recommend that you do a hydration experiment with the flowers that you're trying out. Start out with
16:21
the hydration that gives a pretty stiff dough and then make three more breads where you increase the
16:26
hydration with 5% for each bread. That'll hone in where you need to be with the flour that you
16:32
I hope you learned something today. See you next time
#Food & Drink
#Cooking & Recipes
#Food
#Baked Goods
#Hobbies & Leisure
#Bakeries