Up next in 10

This tutorial was contributed by creator Softoni! Subscribe to their channel: https://www.youtube.com/@softonimotion
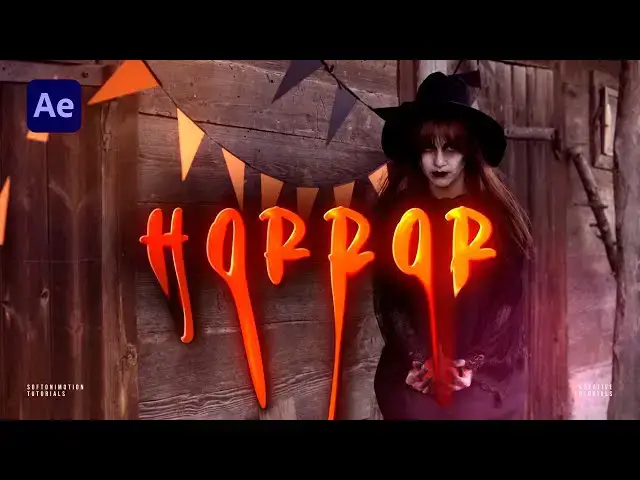
Here's more from the creator: 'Hello guys! In this Adobe After Effects tutorial we'll be creating this spooky looking text effect, perfect for your halloween projects and so many more! It's created all in After Effects, no plugins required and is procedural and really easy to adapt!
Whether you're a beginner or an experienced After Effects user, this tutorial is for you. I'll guide you through the process of creating a stunning visual from scratch, using various techniques and effects in After Effects.
Subscribe now and let's get started!'
View Softoni's store here: https://filtergrade.com/vendor/softoni/
View all After Effects Templates on FilterGrade: https://filtergrade.com/product-category/after-effects-templates/
This tutorial was originally posted here: https://www.youtube.com/watch?v=p32fnk0Gp3U
- - - - - - - - - - - - - - - - - - - -
Follow FilterGrade!
Instagram - https://www.instagram.com/filtergrade/
TikTok - https://www.tiktok.com/@filtergrade_
Show More Show Less View Video Transcript
0:00
hello guys soft Tony here and in today's
0:03
tutorial we will be creating this spooky
0:05
and scary text animation right here in
0:07
After Effects without using any third
0:09
party plugins before we get started
0:12
please subscribe to my channel if you
0:13
haven't already hit the like button and
0:15
turn on the notification Bell so you
0:17
don't miss any of my upcoming video
0:20
tutorials so let's dive into the after
0:22
effects and start creating this
0:24
fantastic text animation
0:28
[Music]
0:38
okay we're here in After Effects and as
0:40
you can see I have already created my
0:42
new composition this is going to be
0:44
final 90/20 x 1080 and I have already
0:47
imported this media o1 I will leave the
0:50
link of this footage in description okay
0:52
and first let's create our text layer
0:54
hit control+ D or go on this little icon
0:58
I'm using this night Halloween want I
1:00
will also leave the link in the
1:02
description for the text size it's about
1:04
250 also hit here on this FX bold option
1:08
and hit here on this uh composition
1:11
window and I will type our text hello wi
1:15
of course you can type your own text and
1:17
let's first animate this Halloween text
1:19
open up this Little Triangle and then
1:21
open up this text option find here
1:24
animate and find here opacity for the
1:27
opacity let's lower down to zero okay
1:29
open up this range selector 1 and let's
1:32
animate offset option set up the first
1:34
key frame here at zero frames like this
1:37
go to around 5 seconds or so okay and
1:40
let's go here to around 100 for the
1:44
first key frame instead of zero let's
1:46
type here minus 100 okay now open up
1:49
this Advanced option and instead of
1:51
square shape change here to ramp up for
1:54
is high and is low type
1:56
66 okay if you want to randomize order
1:59
of this animation you can type here on
2:02
option and now as you can see we have
2:05
this kind of Animation okay for the next
2:08
step let's also add tracking close this
2:11
animator one go here again on this
2:13
animate option find here tracking and as
2:16
you can see now we have this animator
2:18
two this is really important go here at
2:20
zero frames for the tracking amount set
2:23
up the first key frame here and then go
2:25
to around 10 seconds but before that
2:27
make sure that our text is set to Center
2:30
here in paragraph option if you can find
2:32
paragraph and align option just go
2:34
window and you will find align and
2:37
paragraph options here okay go to around
2:40
10 seconds and here for the tracking I
2:43
will go to around 60 according your text
2:46
size now as you can see our text is
2:49
going here from the center to the left
2:51
and to the right side because of our
2:54
tracking effect okay this is looking
2:57
cool to me and now it's time to add add
3:00
our effects here in the final scene
3:02
first effect that we're going to use is
3:04
ramp effect go here in the effects and
3:06
pres it and if you can't find effects
3:07
and preset option just go window and you
3:10
will find effects and preset here find
3:12
ramp effect drag and drop onto the hello
3:14
wind text okay and for the first color
3:17
let's go upper left corner and for the
3:20
end of the ramp lower right corner
3:22
according your text size okay for the
3:24
first color let's type here this hexa
3:27
code
3:28
78140 this type of orange color and for
3:31
the second color let's type
3:34
ff6 C 0 0 this is looking cool to me
3:38
this second shade of orange color and
3:41
then hit okay our next effect that we're
3:43
going to import here is CC plastic okay
3:47
drag and drop onto our text and open up
3:50
this surface bump option and for the
3:52
softness let's type here 40 and for the
3:55
height let's go somewhere around 10 and
3:58
now as you can see in our final we have
4:00
this cool plastic look of our hello text
4:03
okay our next effect that we're going to
4:05
add is CC class effect also drag and
4:09
drop onto the Halloween text and let's
4:11
open up this surface option for the
4:13
softness let's type 45 for the second
4:16
option height go to around 25 and for
4:20
the displacement somewhere around 90
4:23
okay our next effect is going to be
4:25
bevel Alpha okay Dragon drop also on the
4:29
h in text and Here Also let's play
4:32
around with the options for the edge
4:33
thickness let's go around
4:36
3.90 something like this and for the
4:38
light intensity
4:40
0.5 okay let's close this bevel Alpha
4:43
for now and let's add another effect
4:45
this is going to be glow for now drag
4:47
and drop also on our text and for the
4:50
glow threshold go to around 80 for the
4:52
glow radius let's type
4:55
185 okay and for the glow intensity 0 5
5:00
okay you can also play around with all
5:02
of those options but this here
5:04
parameters are looking cool to me you
5:07
can also add drop shadow but this is
5:09
optional I will also add it to show you
5:12
drop shadow okay drag and drop onto
5:14
Halloween text okay and for distance go
5:18
somewhere around 10 also softness and
5:20
then duplicate this drop shadow once for
5:23
better seeing this drop shadow effect I
5:25
will just turn off this media 01 this is
5:28
with and this is without drop shadow
5:31
effect okay and our next effect that
5:33
we're going to add here is CC smar
5:36
effect find here CC smear effect okay
5:39
and just drag and drop onto the
5:41
Halloween text and basically you can
5:43
play around here with the smear text go
5:45
to around maybe 2 seconds and readjust
5:48
from and two option go here somewhere
5:51
and this second option go somewhere
5:53
around here okay and now let's animate
5:57
set up the first key frame here to
5:59
around 2 seconds for reach and type here
6:01
zero and then go to around maybe four or
6:04
5 seconds and let's type here 900 and
6:07
now as you can see we have also
6:09
animation of this age Le here on our
6:13
Halloween text okay you can also
6:15
duplicate this mere effect once hit
6:17
control+ D hit you to show all of the
6:20
key frames use J and K on your keyboard
6:23
hit J for this C is Mir O2 readjust from
6:26
and two options I will do fromom
6:30
and two somewhere around here okay hit
6:33
zero as you can see our animation is
6:36
looking awesome you can also duplicate
6:39
this once again as many times as you
6:41
want hit control+ D hit J and K on your
6:44
keyboard again you can also readjust key
6:47
frames something like this okay I will
6:52
do for this C is Mir Tre somewhere
6:54
around here from and to okay hit zero
6:59
and in our finals our Halloween text is
7:03
looking
7:05
awesome now it's time to precompose this
7:08
hallowen text I will close this CS Mir
7:10
effect for now go right click precompose
7:13
let's call this just hello win okay for
7:17
this new composition hit okay and also
7:20
what you can do next is to add more glow
7:22
effects go in the effect and pres it
7:24
find glow again double click or drag and
7:26
drop on this new composition and here
7:28
basically you can play around with the
7:30
options or the glow threshold maybe to
7:32
around 50 if you want to see brighter
7:35
parts of this animation of this text and
7:37
for the glow radius you can also play
7:39
around I will go to around maybe 90 and
7:42
for the glow intensity lower it down to
7:45
maybe 0.5 or so this is with and this is
7:49
without this glow effect and it's up to
7:52
you how you're going to use this cool
7:55
effect for the end you can also add
7:57
curves here or light effects if you want
8:00
go right click to create adjustment
8:02
layer okay this is going to be curves
8:05
you can also add noise if you want but
8:07
first we will add curves Dragon job onto
8:10
the scene and here you can play around
8:12
with the darker and brighter parts of
8:15
our Ln text and this is looking cool to
8:19
me all right guys that was everything
8:20
for today's tutorial I hope you learned
8:23
something new like always this was cool
8:25
technique to create this hallowen text
8:27
if you haven't subscribed to my channel
8:29
please hit that subscribe button also
8:31
turn on the notification Bell so you
8:33
never miss any of my upcoming video
8:35
tutorials if you found this video
8:37
helpful hit that like button also don't
8:40
forget to subscribe and share leave me a
8:42
comment Down Below in the comment
8:43
section and until next time stay
8:46
creative and bye-bye
8:50
[Music]
#Arts & Entertainment
#Online Media