Up next in 10

This tutorial was contributed by creator Softoni! Subscribe to their channel: https://www.youtube.com/@softonimotion
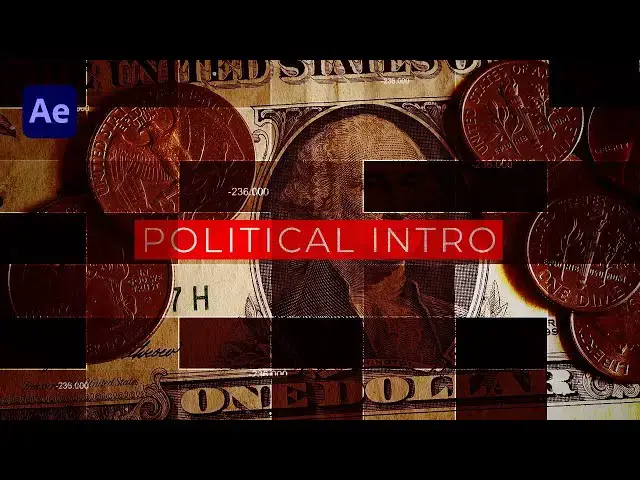
Here's more from the creator: 'Hey everyone, in this after effects tutorial I will show you how to create awesome intro - slideshow in After Effects without using any plugins. This technique is a cool way to make your videos looking even better and to impress your audience. Very easy to make, just follow my steps!'
View Softoni's store here: https://filtergrade.com/vendor/softoni/
View all After Effects Templates on FilterGrade: https://filtergrade.com/product-category/after-effects-templates/
- - - - - - - - - - - - - - - - - - - -
Follow FilterGrade!
Instagram - https://www.instagram.com/filtergrade/
TikTok - https://www.tiktok.com/@filtergrade_
Facebook - https://www.facebook.com/filtergrade
Twitter - https://twitter.com/filtergrade
Pinterest - https://www.pinterest.com/filtergrade/
Newsletter - https://filtergrade.com/filtergrade-newsletter/
- - - - - - - - - - - - - - - - - - - -
Show More Show Less View Video Transcript
0:00
hello guys of Tony here welcome to
0:03
another video tutorial and in this
0:05
lesson we're going to create this really
0:07
cool political intro so stay with me
0:10
until the end of this video also I want
0:12
to thank you for watching this one also
0:14
if you haven't subscribed to my Channel
0:16
please hit that subscribe button and
0:18
also turn on the Bell icon so you can
0:20
always get a notification whenever I
0:22
post a new clip okay let's jump into
0:25
After Effects without any further Ado
0:27
and get started
0:31
thanks
0:35
[Music]
0:40
all right for here in After Effects and
0:43
without any further Ado let's create our
0:45
project first of all we will create this
0:47
in 4k for the start we'll create three
0:50
composition first one will be slide 01
0:54
38 40 21 60 uh frame rates 30 frames per
0:58
second and duration it's okay to leave
1:01
it maybe a 20 second uh also create a
1:04
new composition we will rename it media
1:07
01 hit OK and our third composition will
1:11
be mat Camp hit OK and now it's time to
1:15
create our mat uh you can close this
1:18
slide or one and media or one for now
1:21
for this map composition go right click
1:24
and then create a new solid also 4K hit
1:28
OK Go here in effects and preset and if
1:31
you can find this one go to window and
1:33
hit here and effects and press it find
1:36
here
1:37
fractal noise drag and drop onto our
1:41
solid you can hit enter to rename it I
1:43
will just type F's and for fractal noise
1:45
and it's time to make a few adjustments
1:48
here in fractal noise for this fractal
1:50
type leave it to basic noise type go to
1:53
block contrast also leave it to 100 and
1:57
we will animate our brightness setup our
2:00
first keyframe
2:01
type here minus 110 go to around 2
2:06
seconds and type here zero also hit U on
2:11
your keyboard choose all of our
2:13
keyframes hit F9 go to graph editor as
2:17
you can see curve like so go right click
2:20
and then hit here edit speed graph and
2:22
draw a line like like so now when we hit
2:26
0 we have something like this okay also
2:29
it's time to lower our complexity from
2:31
six to one also open up this transform
2:35
and for the scale and check this unit
2:38
for uniform scaling scale Bitcoin to
2:41
around 830
2:43
scale height maybe to around
2:46
470 and also readjust it here in offset
2:51
turbulence like so
2:54
now this is looking really cool and now
2:56
when we hit zero we you can see uh this
2:59
really cool uh blocky animation okay
3:02
also what we can do is to hit alt on our
3:06
Evolution and type here expression time
3:09
asterisk 100 and now when we hit zero as
3:14
you can see we have this uh moving block
3:17
animation okay our next step is to
3:20
pre-compose our fractal noise layer go
3:22
right click pre-compose I will also
3:25
rename it f and and just make sure to
3:28
move all attributes here into the new
3:30
composition hit OK and then we will
3:33
duplicate this fractal nice comp go here
3:36
and then edit duplicate and go here in
3:40
effects and preset and find here
3:43
effect find edges drag and drop onto our
3:47
first fractal noise and for this option
3:52
check here invert and for the blending
3:54
mode mode find here screen if you can't
3:57
find blending mode just hit here toggle
4:00
switches and nodes and now as you can
4:02
see we have also these beautiful lines
4:04
here in our fractal noise matte
4:07
composition and when we hit zero this is
4:10
looking really cool
4:12
okay now it's time to import our matte
4:16
composition into our slide 01 open up
4:19
this slide 01 and drag and drop our
4:22
matte composition here in our slide 01
4:25
also import our media composition and we
4:30
have forgotten to import our media here
4:31
in our media or one I have already my
4:34
footage from pixels.com this is free
4:36
footage of course you can download it or
4:40
import your own media just drag and drop
4:42
our media hearing media account and as
4:45
you can see now we have something like
4:47
this here in our slide composition now
4:51
it's time to uh also for the track map
4:54
go here Luma just find Here track match
4:58
also toggle switches and modes and now
5:00
as you as you can see we have this
5:02
really cool animation
5:04
what we can do next is to grab all of
5:07
our two comps hit Control Plus CD or go
5:10
edit and then duplicate and now we have
5:13
something like this also import this
5:17
matte composition once again and for the
5:20
blending mode find here overlay and now
5:23
this is looking really awesome here in
5:26
our finals okay
5:28
our next step is to create a text here
5:31
in our slide 01 and uh before that just
5:35
here choose title and action save for
5:38
better sync our text and for better
5:41
drawing later and now we'll right click
5:43
here in our slide 01 find here a solid
5:47
and for solid name I will just type text
5:51
background
5:52
also width and height 4K hit OK and now
5:57
just turn off the visibility of this
5:59
layer again hit here hit Q on your
6:03
keyboard or go here on this rectangle
6:06
tool and just draw a line here on our
6:10
text background layer like so
6:13
from this first line to the second line
6:16
like here and now you can turn off this
6:20
solid turn on the solid layer and as you
6:23
can see we have our background also we
6:25
will import our fill effect drag and
6:28
drop onto our text background and you
6:32
can also change here colors but I will
6:35
leave this red color for now uh also now
6:38
it's time to create our text here
6:41
Control Plus D or go here on this
6:43
horizontal type tool and for the font
6:47
I'm using this Montserrat regular font
6:50
size
6:51
210 and type here I'll just type random
6:55
text political
6:57
intro and make sure to align it to the
7:01
center go here find a line if you can't
7:04
find it just go window and find it here
7:07
uh hit this political intro and align it
7:10
to the center okay now it's time to add
7:14
a little bit of tracking go here open up
7:17
this animate Tab and then find here
7:19
tracking and for the tracking move it to
7:22
around maybe
7:23
20 or so you can also hit here on text
7:28
background then hit V just double click
7:31
on this mask move it around here
7:33
according your needs or here like so
7:38
according your text size
7:41
and now we have this political intro
7:44
here in our finals and it's time to also
7:47
animate this political intro text go
7:51
here again on our effects and preset and
7:55
find here a random
7:58
random Fade up and drag and drop here on
8:02
our political intro just make sure that
8:04
our playhead is on zero seconds uh drag
8:08
and drop here on political intro and now
8:11
as you can see we have our text like so
8:13
w to show all of our keyframes and
8:18
reposition our second keyframe here to
8:21
around three seconds
8:24
and now when we hit zero we have this
8:28
kind of Animation also what we can do is
8:31
to grab this text background and also
8:33
political intro then right click code
8:36
here to pre-compose and make sure to
8:38
move all attributes into the new
8:40
composition and I will just type random
8:43
text text plus
8:45
BG like so and then hit OK and also what
8:50
we can do is to import an another here
8:54
our math composition and for the
8:57
blending mode just for the the trackmet
9:01
just choose here also Luna and R in our
9:04
finals now we have something like this
9:07
also you can choose again this text plus
9:10
background and matte composition and
9:12
control plus d duplicated once again and
9:16
as you can see we have this really cool
9:18
animation okay
9:21
our next step is to create our color
9:24
correction go right click find here
9:27
adjustment layer I will just rename it
9:31
fail and just go here also in a factory
9:35
preset type fill effect drag and drop
9:38
onto our fill adjustment layer for the
9:41
first color find here maybe gray color
9:44
and for blending modes uh choose here we
9:48
will light hit t for opacity and
9:52
I'll lower it down to maybe around 30
9:54
percent also hit control plus b field 2
9:58
for the blending mode uh find here
10:01
overlay also hit these uh maybe play
10:05
around with the uh percentage maybe to
10:08
around 70 and also change the color from
10:12
this gray color to maybe dark dark
10:16
red and now in our slide or one in our
10:20
finals this is looking really cool and
10:24
creative
10:29
also for our last step you can create
10:32
numbers uh also we will create a new
10:34
composition go here to create a new comp
10:37
we'll rename it to numbers
10:41
hit OK and then also go uh here in our
10:45
numbers comp right click and choose here
10:48
a solid layer also rename it through
10:51
numbers hit OK and find here also in the
10:56
facts and preset
10:58
drag and drop onto our solid layer and
11:01
now as you can see we have this red
11:03
numbers for decimals and for the fill
11:07
color change it to White and you can
11:09
also animate according your needs for
11:12
the value uh choose random numbers I
11:15
will do maybe two minus
11:18
320 for the setup our first keyframe go
11:22
to around maybe 10 seconds or so and
11:25
readjust it here according your needs
11:28
you can also play around with the size
11:30
and now when we hit zero as you can see
11:33
our numbers are animated also go here on
11:37
our solid layer hit Ctrl D readjust it
11:41
here our numbers comp like so you can
11:46
also play around with the scale
11:48
but we will do it later
11:51
hit s just reposition and readjust it
11:56
according your needs
11:58
like so
12:02
and now it's time to drag our numbers
12:05
composition here in our slide 01 just
12:09
drag and drop below our adjustment
12:12
layers and now we can animate uh the
12:15
opacity of our number composition go to
12:18
around maybe two seconds hit t for
12:21
opacity set up our first keyframe here
12:24
on this little stopwatch and go to
12:27
around maybe half a second or so until
12:30
uh when our animation begins and lower
12:34
our opacity to maybe zero percent and
12:37
now when we hit zero on our keyboard you
12:41
can see the tower numbers are following
12:43
our media and our met here in our slide
12:47
or one composition also what we can do
12:50
is to change blending modes if you want
12:52
here from normal maybe to Overlay and
12:55
now we have this those subtle numbers
12:58
and this is looking really cool also in
13:01
every moment you can double click here
13:03
and reposition your numbers play around
13:07
until you are satisfied with the with
13:09
the result hit s for scaling again
13:13
and uh in our finals now this is looking
13:16
really cool to me maybe this one to move
13:20
it around here and when we hit zero this
13:25
is looking really cool also what you can
13:27
do is to duplicate this numbers comp
13:30
once again to see our numbers uh even
13:34
better
13:36
and this is looking really really cool
13:38
to me
13:40
all right guys for the final step you
13:43
can import light leaks effect or also
13:46
lens flare vignette or so you can play
13:49
around to get results that you want I
13:52
have shown you this really cool
13:53
technique just play around until you're
13:55
satisfied I hope you like this video If
13:59
you like this one please see that also
14:01
like button uh if you haven't subscribed
14:04
to my Channel please hit that subscribe
14:06
button also take a look on my profile on
14:09
my channel for even more great tutorials
14:12
and until next time stay creative and
14:15
bye bye
14:17
thank you
14:18
[Music]
#Politics