Up next in 10

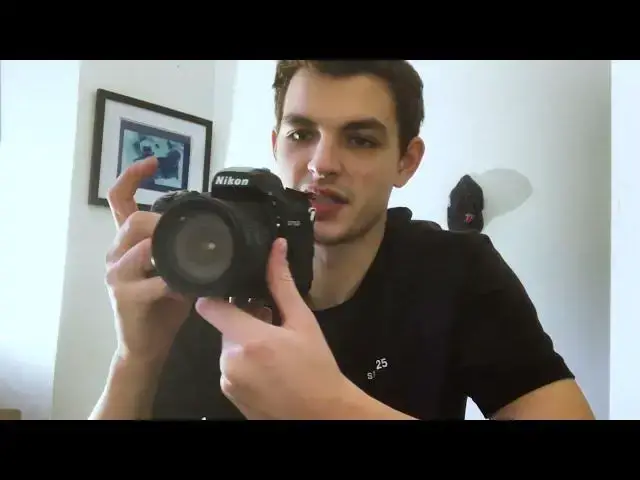
Learn about the different shutter release modes and how to switch and change between them on the Nikon D750. When shooting in different environments and situations, it's helpful to know the different shutter release modes so that you can shoot in the most effective and efficient manner!
S - Standard shutter mode
CL - Continuous Low shutter mode
CH - Continuous High shutter mode
Q - Quiet shutter mode
QC - Quiet Continuous shutter mode
Timer - Self Timer shutter mode
MUP - Mirror Up shutter release mode
Buy the Nikon camera here: https://adorama.rfvk.net/6eMnPE (affiliate link)
Buy the Nikkor 18-70mm Lens here: https://adorama.rfvk.net/QydANa (affiliate link)
---
Check out trending presets and LUTs on FilterGrade: https://filtergrade.com/trending/
---
See a demo and quick tutorial for using the Nikon D750 in the video above from Matt Moloney. If you need more help installing your LUTs, check out these tutorials:
- How to Install LUTs in Adobe Premiere Pro: https://www.youtube.com/watch?v=MxwnEMYSBbs
- How to Install LUTs in Davinci Resolve: https://www.youtube.com/watch?v=GUS2D-8CXec
Show More Show Less View Video Transcript
0:00
hey everyone it's Matt here again from
0:01
Filter grade and today I just wanted to
0:03
talk a little bit about the various
0:05
different shutter release modes on the
0:08
Nikon d750 it's just something that's
0:10
helpful when you're shooting in
0:11
different situations something that I
0:14
really I used to never even know about I
0:15
would just always be shooting in single
0:17
single shutter release mode um which is
0:20
the I think the most standard and most
0:22
basic but after shooting in various
0:25
different settings and working with
0:26
different photographers and creative
0:27
teams I started to understand that
0:30
there's actually different shutter
0:31
release modes for different scenarios
0:33
that can really benefit the way that
0:35
you're shooting um so let's just go
0:37
ahead and get into it the way that
0:38
you're even going to find your shutter
0:40
release
0:41
modes based on the camera are right here
0:44
so on this ring you have all these
0:46
different settings but if you look
0:49
closely at the side right here you can
0:53
see all these different little letters q
0:55
c
0:56
q c s all these different um little
1:00
modes that before I just genuinely I
1:03
never even knew about so today to show
1:05
you how to change them what you're going
1:07
to do is Click down on this little
1:10
button right here and as you're doing
1:13
that that's when you can spin the rest
1:16
of the wheel so that you can be changing
1:19
the shutter mode so it's a little bit of
1:22
a two-step mechanism if you're not
1:23
holding it down it won't actually move
1:25
so make sure you hold again hold this
1:28
little button right here
1:31
down as you're doing
1:34
that then go ahead and twist on this on
1:39
the bottom ring not on this top ring
1:41
where m a SP all those modes are but
1:44
along the bottom ring right there give
1:47
you a little bit of a
1:50
better this button
1:55
here and
1:58
then rotate that bottom ring so we'll
2:00
start with s and I'll go all the way
2:03
around the ring so you can get a little
2:04
bit of a better understanding s is just
2:07
the simple single frame um standard
2:11
shooting mode when you shoot like this
2:13
it's going to be you shoot one time if
2:15
you hold it down you don't continue
2:17
shooting you just get one one single
2:20
frame um the next mode Let's go ahead
2:24
and switch it to CL this is continuous
2:28
loud
2:32
so let's go ahead and switch it to the
2:34
next
2:35
mode put that back
2:37
[Music]
2:39
down this is a little bit difficult but
2:42
so yeah click on this button again
2:44
switch this mode and now we're on CL as
2:47
you can see CL is for continuous low
2:50
speed but if you want to be shooting um
2:54
multiple frames while holding down the
2:55
shutter you
2:57
can click on it and and as you can see
3:00
it just continues shooting this is
3:02
what's called continuous low speed so if
3:04
you're shooting some some moving objects
3:07
sometimes this is really helpful because
3:09
then you can just continue with the
3:11
holding down as you're following them as
3:13
opposed
3:14
to pressing it individually time that's
3:18
why I think it's good to know about
3:20
these because before I would just always
3:21
be shooting in in single frame mode
3:24
going 1 2 3 4 whereas if you're using
3:28
different settings it's honestly really
3:29
helpful because you can just use it for
3:33
whatever necessity or whatever reason
3:35
that you're shooting for so if you're
3:37
shooting when in single frame mode
3:39
that's probably better if you're
3:40
shooting portraits or still lifs or
3:42
anything that's just not moving and then
3:44
once you move on to the continuous one
3:47
it helps a lot so that while you're
3:49
moving
3:50
around you can follow your subject and
3:52
continue shooting without having to
3:54
worry about continuously pressing the
3:56
shutter um so the next one I'll go ahead
4:00
and switch it again go ahead and hold
4:02
down again on the button and then slide
4:06
forward now we're
4:08
at CH if you can it's a little bit
4:11
blurry but as you can see we're at CH so
4:13
this is continuous highp speed again
4:16
it's another continuous for movement
4:18
type of
4:19
shooting but it shoots a lot faster so
4:22
this is something that if you're
4:24
shooting in in um fine raw images
4:27
especially if you're using fine jpeg and
4:30
fine raw fine raw where you're shooting
4:32
both types of file formats at one time
4:35
your your card might fill up fast but
4:37
it's really helpful especially if you're
4:38
shooting sports or um people walking or
4:42
running it's really beneficial
4:45
cuz as you can see in here it's it's
4:48
continuously shooting really really fast
4:51
which is super helpful so the next one
4:55
is going to
4:56
be the Q setting
5:05
as you can see it's oh it's so blurry
5:09
but okay so I'm going to hold the button
5:13
down and switch it to Q so the next one
5:17
on here is quiet shutter mode this is if
5:20
you're I guess if you're using it for
5:22
street photography or in
5:26
a some some type of an area where you
5:28
don't want the shut better to be making
5:30
too much noise for yourself um it's
5:34
still relatively loud in my opinion it
5:37
could be like much more silent compared
5:40
to some other camera shutters but at the
5:42
same time it is a little bit more silent
5:45
than if you're using the continuous
5:46
regular or the standard mode so just
5:49
something to think about not too much of
5:51
a difference here but it is just a
5:53
little bit quieter and the same goes for
5:56
the next setting as you can see QC
6:00
this is actually for quiet
6:03
continuous again still relatively loud
6:06
as you can hear it I'm sure but it's
6:08
just another mode of of shooting and
6:11
super helpful for when you need it so
6:13
let's move on to the next one um right
6:16
after QC you can see there's a little
6:18
timer and this is actually going to be
6:22
the self timer mode so if you want to
6:25
have anything for self-portraits or for
6:29
um
6:30
anything on a tripod whether you're
6:32
using group shots or you just want to
6:34
have something where you prop the camera
6:37
up and you don't actually have to be
6:38
behind it to shoot what it's going to do
6:41
is you press the shutter after it you're
6:43
going to see the light go off and then I
6:46
think it's 10 seconds might be like 8 to
6:48
10 seconds after a little
6:51
while it takes a frame it only shoots
6:53
one at a time which is okay especially
6:56
if you're just doing your your your um
6:58
your imag on a timer you shouldn't need
7:01
more than one I guess and if you do that
7:03
way you can come back open up your your
7:06
menu and see the the preview of the
7:09
image and readjust your composition and
7:12
everything like that and then when
7:13
you're ready to shoot another one go
7:15
ahead get it back on your tripod press
7:17
the shutter and watch the light as you
7:19
can see it speeds up at first and then
7:21
it slows down a little right before it's
7:23
about to shoot and
7:25
then it holds right before it's about to
7:28
shoot it holds on so that you can kind
7:30
of um mentally time out when the photo
7:34
is actually going to be
7:35
shot and the last mode that we actually
7:38
have on the list of shutter release
7:41
modes if I'm I'm going to go ahead and
7:43
click and switch it last time this is
7:46
the last one on the list and it's m as
7:49
you can see this stands for Mirror up
7:51
position this is to avoid any camera
7:53
shake for long exposures such as for
7:56
when you're doing nighttime photography
7:58
or when when you're doing uh as Astro
8:02
photography it's really beneficial and I
8:08
think as you can hear it just stays open
8:12
the whole time that you click it so it
8:14
can
8:15
be um used for much longer exposures
8:19
that's why it's more predominantly used
8:21
at night time and especially while
8:23
you're using a tripod or a
8:25
monopod um because really you're in
8:28
control of when the actual camera will
8:32
open and close its shutter so this is a
8:37
lot of times even if you're using it for
8:39
certain type of portraiture shoots you
8:41
might have the little bit where you're
8:43
dragging out your image and you're
8:45
you're going to want to play with the
8:47
shutter release mode for the mup as well
8:49
as your shutter speed so that you can
8:51
kind of get a nice motion blur or motion
8:54
Distortion that you're looking
8:57
for so that you can get a nice motion
9:00
Distortion but realistically it's just
9:03
for me it's just really beneficial to
9:05
know the different types of shutter
9:07
release mode so that you can kind of
9:09
play around with them regardless of what
9:12
situation you're in there's been times
9:13
when I was shooting self-portraits and I
9:17
knew that okay nobody's here to shoot
9:19
them for me or even if there are and I
9:21
want to shoot them by myself I have the
9:23
timer if I need to if I'm shooting at
9:25
night time and I have my my tripod then
9:28
I can always use the mirror up mode and
9:30
really do the own calculations in my
9:33
head to to better understand of when I
9:35
want to open and close the shutter
9:37
there's even been times at I remember
9:40
when I first started using quiet
9:42
continuous mode I was at Fashion Week
9:44
because a I didn't want my camera to be
9:46
too loud making all this noise and and
9:49
attracting all this attention but I also
9:51
knew there's people walking by me very
9:53
fastly and I don't want to be sitting
9:55
here just continuously pressing the
9:58
button so I remember vividly when I
10:02
learned this from another photographer
10:05
that was actually standing near by me in
10:06
the booth at Fashion Week and basically
10:09
he was saying like oh yeah you can you
10:11
don't have to just you know continually
10:13
press like as people are going by
10:15
there's different modes cuz he as well
10:17
he had an icon and he showed me the
10:19
different release modes at the time and
10:21
then from then on kind of when I knew
10:23
that I would be in a high-paced
10:24
situation like that whether it was for
10:26
fashion or for athletics or for really
10:29
just any movement type of type of
10:31
photography I just knew okay put your
10:33
camera in
10:35
QC and just continue following people so
10:39
it's always helpful to know the
10:41
different shutter release modes even if
10:43
you're not continuously bouncing back
10:45
and forth between them now now that I
10:47
know the difference between all of them
10:49
I really don't switch often unless once
10:52
I get to set I know I'm going to be
10:54
shooting something different or once I
10:55
get out to the field I'm know I'm going
10:57
to be shooting different make one little
10:59
Quick Fix quick adjustment and then from
11:02
there just move forward and really just
11:04
go about shooting how I normally would
11:06
but with the knowledge that I'm using
11:08
the correct um adjustments and tools for
11:11
my camera so if you have any questions
11:13
feel free to leave them Below in the
11:14
comments it's pretty self-explanatory
11:17
once you figure it out but I will say it
11:18
is really beneficial to actually know
11:20
this um this this just adjustment tool
11:25
because before before you know about it
11:27
you might not even realize like that you
11:29
have that as an option so I appreciate
11:31
you checking out this little quick
11:33
demonstration if you have any questions
11:35
feel free to leave them in the comments
11:36
but other than that have a great day
11:38
peace
11:57
out
11:58
[Music]