Up next in 10



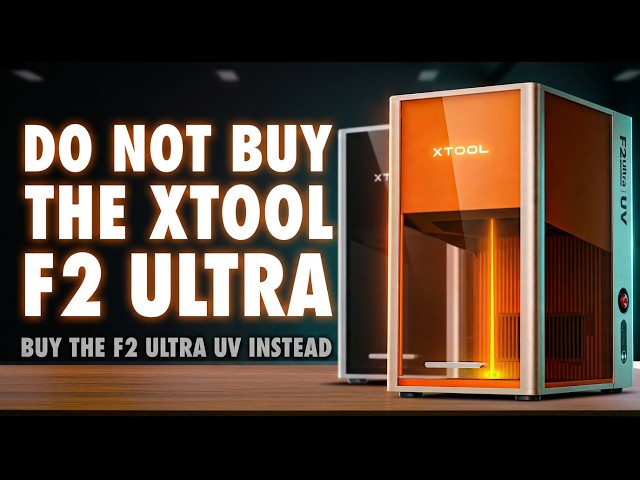
🔥🔥 Buy the xTool F2 Ultra UV here - https://geni.us/xToolF2UltraUVFH
or the xTool F2 Ultra - https://geni.us/xToolF2Ultra
💷 Get £80 off £999+ with code Faux80
💷 Get £150 off £2999+ with code Faux150
*NEW TO LASERS?* Watch this Safety Video - https://youtu.be/rd6rCU8ZMhY
If you’ve been looking at the xTool F2 Ultra UV and wondering what it actually means in real-world use, this video is for you. UV lasers get talked about like some kind of magic upgrade - colder, cleaner, more precise - but very few reviews stop to ask where that promise holds up, where it breaks down, and who this machine is actually for once the novelty wears off.
The F2 Ultra UV sits in a strange space. On paper, it looks like the most versatile laser xTool has ever made, combining UV capability with an enclosed, safety-focused design and the company’s increasingly polished software ecosystem. But versatility always comes with trade-offs, and the real question is whether those trade-offs matter for the kinds of projects you actually want to make.
In this review, I take a grounded, practical look at how the F2 Ultra UV fits into real workflows. How different does it actually feel compared to diode and IR lasers? What changes when you move from cutting-focused machines to something that’s clearly more about marking, surface detail, and precision? And how much does speed really matter once you start working at a much finer focal scale?
A lot of people are curious about UV lasers because of inner crystal engraving, glass marking, plastics, coated metals, and ultra-fine detail work that other laser types simply can’t touch. But that raises some obvious follow-up questions. How reliable is the setup? How accurate is the camera system in practice? Does the software genuinely make things easier, or does it just hide complexity until something goes wrong? And if you’re coming from tools like LightBurn, is the xTool workflow actually an upgrade or just a different kind of limitation?
There’s also the buying decision itself. If you’re choosing between the standard F2 Ultra, the F2 Ultra UV, or even something like the F1 Ultra, what are you really giving up and what are you gaining? Is UV worth the slower processing times? Does the smaller focal point change the kinds of projects you should realistically attempt? And if your goal is making things to sell, rather than just experimenting, which of these machines actually makes sense long-term?
This video doesn’t assume you’re a laser expert, but it also doesn’t treat you like a beginner who just wants marketing highlights. It’s built around practical use, real projects, and the kinds of frustrations and surprises that only show up once you’ve spent serious time with the machine. If you’re trying to work out whether the xTool F2 Ultra UV fits your needs, your space, and your expectations - not just whether it looks impressive on a spec sheet - this should help you make a more informed call.
––––––––––––––––––––––––––––––––––––––––––
🔥 Top Tools & Resources – Resin Printer Enclosures: https://geni.us/ResinPrinterEnclosures
| WARGAMER Resin (best for miniatures): https://yesthats3dprinted.com/pages/wargamer?ref=FauxHammer
| 3D Printer Cleaning Mat: https://geni.us/3DPrinterCleaningMat
🎁 Loot Studios – Sci-Fi Pack: https://geni.us/LootStudiosSciFi
| Fantasy Pack: https://geni.us/LootStudiosFantasy
| Freebies: https://geni.us/LootStudiosFreebies
🎨 Community – Discord: https://discord.gg/dPexM9SeN4
| Facebook Group: https://www.facebook.com/groups/3dprintedminiatures
| Instagram: https://www.instagram.com/fauxhammerblog/
| Website: https://www.fauxhammer.com/
––––––––––––––––––––––––––––––––––––––––––
📦 Clicking product links before buying supports the channel at no extra cost. 🙌 Thanks for watching — FauxHammer Out.
Show More Show Less View Video Transcript
0:00
It's pretty easy to tell when I like a
0:01
product more than most because you'll
0:03
have seen me create far more projects on
0:05
it than I really need to. And it's
0:08
because I'm having just so much fun.
0:11
Now, this is my second X tool product
0:13
I've ever had hands-on with, and I've
0:15
already gushed about how amazing the
0:17
workflow is compared to any other laser
0:20
on the market. But with the X Tool F2
0:22
Ultra UV, a mouthful of a name that may
0:25
have been better with a whole new letter
0:26
designation because, well, it's so
0:29
different to the other F whatever
0:31
devices, I've decided to take a more
0:33
critical look at what this promises
0:35
versus what it delivers in practical
0:37
terms, so you don't end up buying the
0:40
wrong F2 Ultra and regretting it.
0:42
Because yes, whilst this is definitely
0:44
the most versatile laser in X-Tools
0:47
lineup, there are some drawbacks to be
0:49
aware of. Let's crack on. Hi, I'm Ross
0:52
and this is Faux Hammer Videos. So,
0:55
right up front, I'm still new to lasers.
0:57
I've only been in this space for about a
0:59
year and boy has it been a year of
1:01
learning. But I'm saying this up front
1:03
so you have a perspective to relate to.
1:06
Some things I need may not matter to
1:08
you, but I like to cover as much as I
1:10
can so that everyone goes into buying
1:12
something of this expense being at least
1:15
informed. So, let's start with unboxing.
1:17
There's no doubt this is a premium
1:19
product. From the second you crack it
1:21
open, you see effort, even down to the
1:24
slightly darker graphite infused EPS
1:26
foam rather than the cheapest possible
1:29
polyyreene cubes. Straps hold everything
1:32
secure. Even once you open it, you can
1:34
see a steel bracket holding the body
1:36
firm in order to protect the mechanics
1:38
during shipping. Now, I could repeat the
1:41
word premium 50 times in this review,
1:43
and even then, it' still only scratch
1:45
the surface of just how good this is.
1:48
And if you've seen any other laser on
1:50
the market, honestly, this puts them to
1:53
shame. But if you think I'm here to just
1:55
kiss its ass, well, check out some of my
1:57
other laser reviews. I call things like
1:59
I see them, and this has a few elements
2:02
I'm not keen on, such as, look, I know
2:05
it's a personal thing, but I don't like
2:07
the look. Now, the orange windows are
2:09
chosen because they're best to block out
2:11
UV light, but then the whole chassis has
2:13
this tinted aluminum finish. It's almost
2:16
bronze, but it's more rose gold. I'd
2:19
have preferred they'd left the natural
2:20
aluminium of the standard F2 Ultra, as
2:23
this cooler color would have made the
2:25
orange pop more. And well, I like
2:27
orange, but it's more because then it
2:30
would match the existing X tool
2:32
accessories that I already have. I know
2:34
it's minor stuff, but it bothers me. it
2:37
may bother some of you. Now, on the
2:38
back, you've got ports for power, the
2:40
foot pedal accessory, various other
2:43
accessories, the security USB, the
2:45
external screen, and a hose inlet for X
2:48
tools fire safety set. There's also a
2:51
large outlet for smoke and other debris.
2:53
And I love the upgrade here over the F1
2:55
line because now you can easily pop this
2:58
out and even remove the grill from
3:00
inside the unit for much easier
3:03
cleaning. And if you do ever need to
3:05
replace this, it's now a simple
3:07
component swap of the fan module. Now,
3:09
you've got two ports on the side. One's
3:11
a USBC connector for whatever computer
3:14
you plug this into, and the other's for
3:16
USB thumb drives if for some reason you
3:19
don't want to use the built-in Wi-Fi
3:21
connection. Now, for a product of this
3:23
price, I've got to say, I would have
3:24
liked to have seen Ethernet somewhere,
3:26
especially since it's such a pro
3:28
machine. Now, control-wise, these are
3:30
all on the right side. You now have a
3:32
power button on the bottom, but you've
3:34
also now got the addition of a reset
3:35
button above the ports. Now, you need to
3:38
press this and wait for a safety check
3:40
indicator to turn green before you can
3:42
actually power up the unit. And I've
3:44
noticed on a few other reviews of people
3:46
using this. This actually seems to be a
3:48
new addition from some of the earlier
3:50
models. And we've also got the very
3:52
obvious emergency stop button, which is
3:54
a full power shutdown. But now this time
3:57
this is slightly recessed into the frame
4:00
on the F2. And it is marginally more
4:03
difficult to just slam and press first
4:05
time than it was on the F1. So whilst
4:07
this is a bit more aesthetically
4:09
pleasing in terms of the profile of the
4:11
machine, I I still don't like it over
4:14
the very easy to press button from the
4:16
F1. Now there are two other ports. This
4:19
time inside the machine behind a rubber
4:21
flap where you can connect accessories
4:23
like the rotary tool. Now, with this
4:25
being inside the machine, you can now
4:27
close the lid once you've got things
4:29
like the rotary tool attached, but I do
4:32
worry about the slightly increased risk
4:34
of sort and debris getting in here over
4:36
time. Now, speaking of control, the main
4:38
controls are on the external screen.
4:40
This is a touchscreen UI where you can
4:42
start jobs loaded from the USB or load
4:45
the last historical job. There's even a
4:47
button for framing. Now, you do get a
4:49
readout during jobs of time remaining,
4:51
and it's got four main physical buttons.
4:53
move the body up and down to get the
4:55
correct focal distance from your
4:56
engravable object. And that's just based
4:59
on marrying up the red and blue dots as
5:01
normal. And as I just mentioned, there's
5:02
a button for framing. And this will
5:04
frame the last instruction you sent to
5:07
the machine. The big bar along the
5:09
bottom is just start, pause, and hold it
5:11
to stop. Now, with all these functions
5:13
here, I do think it would be handy to
5:15
have an autofocus built in right onto
5:18
the UI. to say this is an external
5:20
screen with my experience in 3D
5:23
printers. I I do think there's more
5:24
features they could put on this UI and
5:27
for the technology that this is I it
5:29
does feel a little underutilized. Now,
5:32
you'll go through this as part of setup
5:34
and the final part of setup is camera
5:36
calibration which automatically boots up
5:38
when you add the machine to the software
5:40
for the first time. And this is a simple
5:42
case of taping down a calibration card,
5:44
engraving two marks, and then telling
5:46
the camera in the software so it knows
5:49
exactly where the crosses in those marks
5:51
are. But that being said, camera
5:53
alignment still isn't perfect on this.
5:56
It hasn't been for pretty much any laser
5:58
I've ever tested. This will get you
6:00
close, not deadon. Depending on the
6:02
height of certain objects, there's going
6:03
to be an element of optical distortion.
6:06
So this needs to be considered as a
6:08
handy assistant to manual framing rather
6:11
than millimeter or micron perfect
6:13
placement directly from the camera. And
6:16
that camera can also do handy things
6:18
like detect X tools own materials using
6:20
QR codes and automatically set a
6:23
material profile in the software. And
6:26
speaking of software, when it comes to
6:28
using these machines, this is where
6:30
Xtool shines so much brighter than any
6:33
other laser brand by far. For years,
6:36
consumer lasers have been limited to
6:37
softwares like LightBurn and Laser GBL.
6:41
But Xtool have made software that is so
6:43
much more userfriendly that LightBurn is
6:46
getting left in the dust. These machines
6:48
aren't even compatible with LightBurn.
6:50
And I know a lot of people are going to
6:52
be complaining about this. There are a
6:54
lot of experienced users who will be
6:56
upset having spent so many years
6:58
invested in that software. But more and
7:01
more I do see people saying no, this is
7:05
the way forward. Xtool software is built
7:08
around your objectives. Pick a design,
7:10
pick a material or object that you want
7:12
that design on. And when it's your first
7:14
time using a certain processing method,
7:17
be that flat engraving, rotary
7:19
engraving, or something else, the
7:22
software will actually walk you through
7:24
the process with a live tutorial. so you
7:27
can get familiar with it before applying
7:29
it in the way you want. LightBurn gives
7:32
you access to a ton more settings, but
7:34
you will have to play around with its
7:36
dozens of features and processes,
7:38
wasting various materials until you
7:41
finally get your desired result. With
7:43
Xtool, you pick the result you're going
7:45
for and the software walks you through
7:47
the steps to achieve it. And this is
7:50
also bearing in mind we're now using
7:52
XTool Studio rather than Xtool Creative
7:55
Space that I used only a few months ago
7:57
in my F1 Ultra review. So consider that
8:00
Xool have made a whole new software in
8:03
the time that no other manufacturer has
8:06
even come close to matching the features
8:08
of their first. So yeah, it's incredible
8:11
before you even consider the amount of
8:14
official user guides online along with
8:16
their platform of materials, AI tools,
8:18
and just how popular the brand is. And
8:21
that popularity means you'll get things
8:23
like 3D printed jigs along with a bigger
8:26
community offering support. Now, moving
8:28
on. Before I talk about performance,
8:30
just a couple of included accessories
8:32
that need a mention. Now, for crystal
8:34
engravings, there's an extra pack of
8:36
accessories as this type of job requires
8:38
its own lens and a riser. Now, the
8:41
physical limit of inner engravings is
8:43
70x 70x 150 mm. And the genius add-on
8:48
for this task is the inner engraving
8:50
riser. Now, all the other UV brands I've
8:53
tested have offered different types of
8:55
riser, but what's clever about this one
8:57
is you only need to align your crystal
8:59
within the grid on top and either enter
9:01
the starting coordinates or distance on
9:04
this sidemounted ruler along with the
9:06
crystal dimensions to make sure
9:08
everything is aligned. This has worked
9:11
perfectly for me every single time. Now,
9:14
the other included accessory is a
9:15
cutting plate to prevent heat buildup
9:17
from the underside of any material that
9:19
you're cutting, but this is a cooler
9:22
laser anyway, which is better explained
9:24
as we come on to performance. Now,
9:26
before we start, it's important to know
9:27
the maximum working area or engraving
9:30
area of this machine is 200x 200 mm. And
9:33
this is larger than any of the other UV
9:36
lasers on the market that I've had my
9:38
hands on. And it is worth knowing that
9:40
this can be extended widthways using the
9:42
X tool conveyor tool, which I need to do
9:45
a separate video on, but I've already
9:47
covered more in my F1 Ultra video. One
9:49
thing I do need to mention because I
9:51
found out after I used it, is this
9:53
normally bolts onto the Ultra machines
9:55
using a clamp at the front. Now, if
9:57
you've already got an X tool conveyor,
10:00
then you will need a new clamp for the
10:02
F2 variant. So, you can actually contact
10:05
Xtool and they've said to me they will
10:07
send them out to you. And it seems like
10:09
they mean free of charge if you've
10:11
already made the investment cuz it is
10:13
just a little bracket. I'm still waiting
10:15
on mine. Without this, the front edge of
10:17
the conveyor rises up. So, some of your
10:19
designs on it, like these coasters I
10:21
made, end up slightly fading out across
10:23
the design from top to bottom because it
10:26
was at a different focal point. So, oh
10:28
well, now I know and so do you. Anyway,
10:31
look, we can cover all the details, but
10:33
I think the best way to look at the F2
10:35
Ultra UV over the normal F2 Ultra is
10:38
that this one is more versatile when it
10:41
comes to the variety of materials it's
10:43
compatible with, but this is definitely
10:46
more of a marking laser than a cutter
10:49
laser, which I suppose for this type of
10:51
laser makes more sense anyway. But even
10:53
then, look, the point is this type of
10:56
marking laser suits this form factor
10:58
perfectly. And whilst it's limited in a
11:01
couple of areas, which I'll come on to,
11:03
it may actually make you desire the
11:05
normal F2 Ultra or even the F1 Ultra.
11:08
So, first up, this is what it is. You'll
11:11
see UV lasers described as cold lasers,
11:14
and that's mostly marketing crap.
11:17
They're not cold, not even close. The
11:19
interaction point still reaches extreme
11:22
temperatures. It has to in order to make
11:24
any impact on the materials you're using
11:26
it. What is different is how the energy
11:29
is delivered. UV lasers use higher
11:32
energy photons and a much smaller focal
11:34
point. So the energy is actually dumped
11:36
into a tiny surface layer instead of
11:39
heating up a large area. The result
11:42
isn't no heat. It's less area affected
11:45
and far less heat transferred into the
11:48
surrounding material compared to diode
11:50
or IR machines. Now, if that's boring
11:53
nerdy talk, what this practically means
11:56
is it reduces scorching when working cuz
11:59
the beam is smaller and there's less
12:02
energy in that smaller point. And this
12:04
is where the trade-off is because that
12:06
focus point is smaller than it typically
12:08
would be with diode or IR lasers. This
12:11
gives you the ability to produce
12:13
incredibly fine and intricate detail
12:16
with text as small as one point or 350
12:20
microns appearing clearly. You can go
12:23
smaller, but even at one point it's
12:25
difficult to see with a macro lens. So,
12:28
do you need smaller? I was able to
12:30
achieve incredibly intricate detail. I
12:33
cut out a detailed map in basic paper
12:35
and internet points to anyone who can
12:37
tell where this map's from. But yeah, I
12:40
went off on a tangent there. Back to the
12:41
trade-off. Because of that smaller focal
12:43
point, when it comes to marking on this
12:45
versus something like the F2 Ultra, F1
12:48
Ultra, or any other infrared or diode
12:51
laser out there, the UV lasers are
12:54
significantly slower. And you might want
12:56
me to go through examples, but I'm not
12:58
going to cover every single one that all
12:59
of you want to watch without making an
13:02
incredibly boring video. So you can see
13:04
how much slower it would be yourself by
13:06
just importing your designs into their
13:08
software and comparing how long a job
13:11
would take on any material across the
13:13
different machines. That is a handy test
13:15
worth doing that many people still don't
13:17
think about and it is going to help you
13:19
make a buying decision. And the other
13:21
thing with that weaker energy and the
13:23
smaller focal point that matters for
13:26
depth too. So whilst depth engravings
13:28
are possible with UV lasers on materials
13:31
like wood and soft metals, it is going
13:34
to take you much longer with a UV laser.
13:36
So if that's something you want to focus
13:38
on, then that is exactly why something
13:40
like the F2 would be the more ideal
13:43
machine. There'll be links for both of
13:44
these down in the description, but
13:46
something to consider before you go in.
13:48
The point is the smaller focal point
13:50
lens means you need significantly more
13:52
lines to cover the same area. That's the
13:55
trade-off for versatility. Now, the
13:57
other side of this versatility coin,
13:59
though, comes from the fact that UV
14:01
lasers can mark materials or even mark
14:03
in ways that IR and diode lasers like
14:06
the normal F2 couldn't even dream of.
14:09
And I think it's obvious that the
14:11
standout feature of UV lasers is inner
14:14
crystal engraving. Be it K9 quality
14:16
crystals or glassware, you can easily
14:18
mark on or even inside surfaces to
14:22
deliver incredibly detailed designs on
14:25
materials that, as I said, diode and IR
14:27
lasers can't even touch. Me, I was
14:30
finally able to finish a project I
14:31
started for another review where I made
14:34
a crystal engraving of my dad, who I
14:36
lost nearly 20 years ago. Other lasers
14:39
software just choked on the data size.
14:42
Here, I just loaded up what I'd already
14:44
built as an STL file for that project
14:46
and clicked go. Perfect result, first
14:49
try. Now, Xtool does have some AI
14:52
software for generating this same style
14:54
of image, but I just don't think it does
14:57
it as well as what I've done here using
15:00
a third party software solution.
15:02
Everything using the X tool AI solution
15:05
feels a bit potatoey. And I've got to be
15:07
honest, I'm pretty confident this is the
15:10
most desirable feature of UV machines
15:13
because all I had to do was send a photo
15:15
of this crystal to my mom and I already
15:18
had about six people in her friend group
15:20
ask me if I could do more for them and
15:22
their family members. So, if you're
15:24
looking at one of these lasers to make
15:26
money, I think this is going to be a bit
15:28
of a cha-ching right here. Now, I'm
15:30
going to do a follow-up video showing
15:32
how I did this. And it's still a bit
15:34
work in progress at the moment. But
15:36
please subscribe so you don't miss that.
15:39
But yeah, as we come to a close, you can
15:41
mark so much stuff with this. And I do
15:44
think this is the laser to go for for
15:46
most people who want versatility, but
15:49
you do have to be aware that because the
15:52
laser point is so small and the
15:54
penetration depth is so narrow,
15:56
everything here is going to take longer
15:58
than it would with a more powerful diode
16:00
or IR machine. So I will give you a few
16:03
examples like just to cut the perimeter
16:05
of the 200 mm square work area out of 3
16:08
mm ply took about 2 1/2 minutes. Depth
16:11
engraving this dragon design into wood
16:13
took about 3 hours to do just 30 passes.
16:16
And when it comes to engraving things
16:18
like brass coins, this 40 mm one here
16:21
took 256 passes and that took just shy
16:25
of 3 hours and wasn't very deep at all
16:28
when compared to what my F1 Ultra can
16:30
do. But I've got to be honest, the
16:32
design was incredibly sharp. Now, I also
16:34
applied a Christmas design to a 200x200
16:37
sheet of printed PLA, and I've got to be
16:40
honest, marking plastics with this is
16:42
incredible. But that at 3,400 mm a
16:45
second still took 45 minutes. So, there
16:48
you go. There's some real examples of
16:50
the side of UV lasers that we have to
16:52
accept. If your focus is more on larger
16:55
objects, depth engraving or cutting, as
16:58
I said, you might be better off with a
17:00
normal F2 Ultra. Now, unfortunately, we
17:03
can't have both, but I am glad I have
17:05
this. I think the inner crystal
17:07
engravings are going to absolutely fly,
17:10
and I just love making them. And I love
17:13
the fact that I can now look at my dad
17:15
again and smile at him every day. Yeah,
17:18
I've I've got to take that as a win for
17:20
this project. That bit's for me. and
17:23
it's a happy thing. Anyway, for you,
17:26
where does this leave the F2 Ultra UV?
17:28
It leaves it in a very different
17:30
position to most lasers on the market
17:32
because this isn't just a machine you
17:34
buy and wrestle with. It sits inside a
17:36
broader ecosystem that actually changes
17:39
how you use it dayto-day. And that's
17:41
what makes this brand completely stand
17:44
out from honestly, I don't understand
17:48
why anybody is buying from anybody else.
17:51
I don't I genuinely don't. Like if
17:53
you're going to get a laser nowadays,
17:56
I'm I'm going to I'm going to coin this
17:58
term just get an X tool. Hashtag.
18:00
Honestly, it is so much further ahead
18:03
than the competition here. You're not
18:05
just handed hardware and wished good
18:07
luck. There's structure, guided
18:09
processes, sensible defaults, clear
18:11
learning paths, and a community that
18:14
exists because people aren't constantly
18:17
firefighting basic problems or the lack
18:20
of a knowledge base for simple
18:21
functions. This software goes beyond
18:24
expectations. It just works and it shows
18:27
you how to do it. And that ecosystem you
18:30
get means you spend less time fighting
18:33
settings, less time trolling through
18:35
forums for half answers, less time
18:37
fixing problems that shouldn't even
18:39
exist in the first place, and more time
18:41
actually making stuff. And that's why
18:44
I've also reached the point where I'm
18:46
now turning down thousands of pounds
18:48
worth of laser hardware to review every
18:51
week. Not because those machines are
18:53
unusable, and not because I don't want
18:55
free stuff. Oh, and thanks X tool for
18:58
sending me this one in exchange for the
19:00
review. But I don't want them because
19:02
I'm not interested in wasting my time or
19:05
yours covering another brand that's
19:07
taken familiar components, put them in a
19:10
different box, and quietly made getting
19:12
it to work your responsibility.
19:15
This is not a laser you buy for speed,
19:17
deep cuts, or brute force material
19:19
removal. If that's what you want, get
19:21
the standard F2 Ultra or something like
19:23
the F1 Ultra. that's going to make far
19:26
more sense. But if what you care about
19:28
is precision, surface quality, and
19:30
working with materials and applications
19:32
that diode and IR lasers simply can't
19:35
touch, this is where the F2 Ultra UV
19:38
stands apart. So, as the thumbnail said,
19:41
don't get that one, get this one, or
19:43
don't get this one, get that one. I
19:45
suppose the point is know the difference
19:47
and buy the right one. The UV beam
19:50
delivers genuinely impressive detail.
19:53
Ultra fine text, crisp line work, clean
19:55
marking on plastics, glass, coated
19:58
metals, and inner crystal engraving.
20:00
It's slower, yes, but that's because
20:02
it's operating at a completely different
20:04
scale, not because it's lacking power or
20:07
capability. Slow is smooth and smooth is
20:10
fast. And that's where the value really
20:12
sits. Being able to take on work that
20:15
simply isn't practical on other laser
20:17
types opens up a different class of
20:19
projects entirely. Not faster projects,
20:22
arguably better ones. So, no, this isn't
20:26
the right laser for everyone. But if
20:28
what you care about is detail, finish,
20:30
and making things that genuinely stand
20:32
out, the X Tool F2 Ultra UV earns its
20:36
place. I just wish it had a simpler name
20:39
that completely separated it from the
20:40
other X tool machines. If you did find
20:43
this video helpful, please consider
20:45
using our affiliate link in the
20:46
description before making a purchase of
20:48
this or any other X tool products, even
20:51
if that's materials. Any click on that
20:53
link before making a purchase nets me a
20:55
commission and that's how I run the
20:57
channel. If you want me to keep making
20:59
honest reviews of videos, and heck, you
21:01
might think this one is too praising,
21:03
honestly. Go check my other reviews.
21:05
This is the truth. I love this.
21:08
genuinely ask around if you think I'm
21:11
BSing you. But yeah, this seriously X
21:15
tool. It's X tool. I don't even know why
21:17
I'm bothered. The only reason I make
21:18
other laser reviews, I'm not This isn't
21:20
even on my script. The only reason I
21:22
make other laser reviews right now is so
21:25
that I can spread my versatility to
21:28
show, hey, this is the breadth of what
21:31
I've tested and I know what I'm talking
21:33
about. But honestly, like until brands
21:36
start taking this seriously and actually
21:38
up the game on software to bring us
21:41
nearer to this level, especially since
21:43
Lightburn seems to have I don't know
21:45
completely given up even trying. I I
21:48
genuinely I feel like I'm wasting my
21:50
time. I'm I hope somebody does compete,
21:53
but yeah, they're nowhere near here yet.
21:55
Anyway, that's enough of a rant from me.
21:57
I I hope you can appreciate that just
21:59
off the cuff honesty. Again, if this was
22:02
helpful, please use our affiliate link.
22:04
Massive thanks to our members. Thanks to
22:06
you for watching. And until next time,
22:08
I'm tired. I'm hot. It's nearly New
22:10
Year's Eve. I can't think of a good
22:12
movie quote. Put your favorite movie
22:13
quote in the comments. Until next time,
22:16
happy new year, which which is not going
22:19
to be relevant on this video by the time
22:21
it comes out. Anyway, see you next time.
22:23
Fammer out.
#Arts & Entertainment