Up next in 10


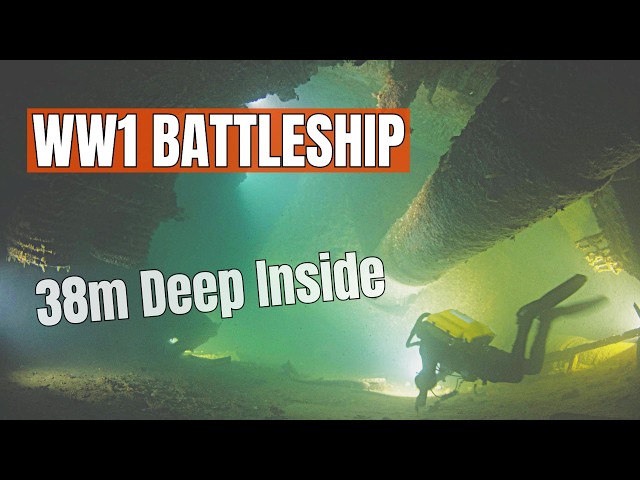
A Jutland veteran, scuttled by her own crew and now lying upside down at 36m in Scapa Flow. In this video we dive the SMS Kronprinz Wilhelm – a capsized König‑class battleship – and provide a wreck dive guide through the safest route to her guns, casemates and stern.
WHAT YOU'LL SEE:
• Aft turrets with massive 305mm gun barrels pointing into the seabed
• Port side casement guns with 150mm secondary armament still in their embrasures
• Armored spotting top where fire control calculations were made during battle of Jutland
• Anchor chain wrapped around forward guns from the moment of capsizing
• Penetration deep inside the hull
WRECK DETAILS:
Ship: SMS Kronprinz Wilhelm, König-class battleship
Launched: 1914, German Imperial Navy
Battle History: Fought at Jutland, May 31st 1916 - the largest naval battle of WWI
Scuttled: June 21st 1919, Operation Regenbogen
Current Depth: 38 meters to seabed
Condition: Upside down, excellent preservation
Displacement: 26,000 tons
DIVE REQUIREMENTS:
40m diving certification required. Strong buoyancy control essential. Appropriate lighting mandatory. Dive within your training and experience limits.
Show More Show Less View Video Transcript
0:00
Lying upside down on the seabed of
0:02
Scapper Flow is one of the most iconic
0:05
battleship dives in the world. The SMS
0:08
Crom Prince Vilhelm with a maximum depth
0:11
of 38 m and the shallowest parts at only
0:15
12. It's also a great depth for
0:17
recreational divers. This 175 m long
0:21
German battleship was scuttled by her
0:24
own crew on the 21st of June 1919. And
0:28
today she offers divers an extraordinary
0:31
journey through naval history. In this
0:33
video I'll guide you through the
0:35
sections every diver should explore on
0:37
this magnificent wreck. From her massive
0:40
aft turrets to the famous gun run along
0:43
her port side where you can see seven
0:47
150 mm guns. We'll visit the incredible
0:51
armored spotting top from where lookouts
0:54
observed gunfire during the battle of
0:56
Jutland. There's also the incredible
0:59
sight of one of the forward guns which
1:01
has been ripped out of its turret by the
1:03
anchor chain when the battleship turned
1:05
turtle and sank. We'll also visit the
1:08
stern which has been extensively
1:10
remodeled by explosives during the
1:12
salvage operations and see the two
1:15
massive rudders that dominate the hull.
1:18
I'll also take you inside for a brief
1:21
taste of what it's like to penetrate
1:23
this incredible wreck. Even this though
1:26
is only going to scratch the surface of
1:28
what there is to do. But hopefully it
1:31
will give you a taste for why people
1:32
come back and dive it year after year.
1:36
So let's start off with those aft
1:38
turrets which in many ways are the
1:40
poster boy for diving in Scappa and the
1:43
bits that pretty much everybody wants to
1:45
see. We're descending the shot line to
1:47
38 m, the deepest point of the wreck.
1:51
And this is where most dive boats tie in
1:53
because they know everybody wants to see
1:55
those aft turrets.
1:57
What you're looking at now are turrets D
1:59
and E. Each originally mounted two 305
2:04
mm guns. That's over 12 ines of naval
2:08
firepower. And because the ship lies
2:10
upside down, these massive gun barrels
2:13
are now pointing down into the seabed.
2:16
Most of the barrels themselves are
2:18
partially buried into silt, but you can
2:20
still make out their enormous diameter.
2:23
The crews for these guns were protected
2:26
in two massive turrets, each of which
2:28
boasts 30 cm of frontal armor, thick
2:32
enough to withstand direct hits from
2:34
enemy battleships. Now, because you're
2:37
swimming beneath the wreck, buoyancy
2:39
control is absolutely critical here. One
2:42
careless fin kick and you'll stir up a
2:45
silk cloud that will ruin visibility for
2:47
everyone. Stay neutral, move slowly,
2:51
keep your fins up.
2:52
But take the time to understand the
2:54
scale of these things. They are truly
2:56
immense.
2:58
Think what that was like, not only for
3:00
the people who built them, but also on
3:03
the other wrecks, the similar wrecks to
3:05
this in Scapplow that were salvaged.
3:08
Just think of what it takes to do that.
3:10
It's it was an unbelievable achievement,
3:12
especially when you consider most of it
3:14
was done in the 1930s.
3:17
Also, of course, you have to think that
3:19
these guns fired at the Battle of
3:21
Jutland. They were used in anger and
3:24
they are unchanged since that moment in
3:27
time. Truly a piece of history and
3:30
really easy to see why everybody wants
3:33
to come and see this this part of the
3:35
wreck. Even little details like this.
3:39
You can see above us here is the deck.
3:41
And we're now beneath one of the
3:43
turrets. That hatch there that's been
3:46
illuminated by Bob. That is where shell
3:48
cases would have been thrown out of the
3:50
turret once they' been fired. As we look
3:54
down the side, you can see the size of
3:56
the turret. The divers give it scale.
3:58
It's amazing to think that 80 men would
4:01
have been responsible for each turret.
4:04
Incredible number. The next part is just
4:07
as good in my opinion because we're
4:10
going to travel along the port side
4:12
where we're going to see the secondary
4:14
arament that the ship bristles with.
4:16
These are the Casemate guns, the famous
4:19
gun. The Crump Prince Vilhelm carried
4:22
140
4:24
mm secondary guns, seven on each side.
4:28
Now, because she's lying slightly tilted
4:30
over to her starboard side, the ones on
4:33
the port side are perfectly positioned
4:35
for exploration and photography.
4:37
Personally, I think they're incredibly
4:39
photogenic. This one hanging from the
4:42
ceiling is a really good example. You
4:45
can also see it's covered in life. It's
4:48
uh an incredibly beautiful, beautiful
4:50
thing. Although, you have to remember
4:53
its original purpose whenever you look
4:55
at something like this. Each gun is
4:57
contained in a heavily armored
4:59
compartment. And these would guns were
5:02
designed to defend against torpedo boats
5:04
and destroyers at closer ranges than the
5:07
main battery could engage.
5:09
What's really interesting about the guns
5:11
is that to access them, you've got to
5:13
travel over and under bits of the ship
5:17
that have fallen down from above. Now,
5:19
the reason it's fallen down from above
5:21
is because the main armor belt was
5:24
situated below or now above the ship,
5:28
and that was salvaged. The reason it was
5:31
salvaged is because it's got the famous
5:33
uh subatomic steel on it. So, really
5:36
high quality, really valuable steel that
5:39
was created before the first nuclear
5:41
explosions. So, isn't contaminated like
5:44
every piece of steel that has been made
5:46
since. that makes it useful for certain
5:49
very sensitive applications. Albeit, I
5:52
don't think there's a huge demand for it
5:54
and it's no longer possible to get it
5:56
from Scapper Flow because all salvage on
5:59
Scapper Rex is now prohibited by UK law.
6:03
Commercial salvage did take place though
6:05
all the way from the 1930s through to
6:07
the 1970s.
6:09
They blew off the armor plates and then
6:12
would pick them up from the seabed. But
6:14
in the process of blowing them off, they
6:16
also created a huge amount of much less
6:19
valuable debris, and that's what
6:22
restricts access to the guns. That's the
6:24
stuff that you've got to go over and
6:25
under. Some of them are more accessible
6:28
than others. Some of them are easier to
6:30
spot, and it definitely helps if you've
6:32
had somebody who's dived it before to
6:34
show you the way. Trust me, they're all
6:37
there, though. It's just a case of
6:39
finding them. Following the gun run
6:41
forward takes us nicely to one of the
6:43
most distinctive features of any
6:46
Scapperflow battleship, the armored
6:48
spotting top. And there it is. But
6:51
before we get to the top itself, look at
6:53
this. The armored access tube. This is a
6:56
vertical steel tube that allowed crew
6:59
members to climb from the main deck up
7:01
to the spotting position. And the reason
7:03
it's armored is critical because the men
7:06
using it were exposing themselves to all
7:08
sorts of potential injury, but mainly
7:11
from enemy shell splinters. Once they
7:14
reached the top, they were performing
7:16
one of the most vital jobs in naval
7:18
warfare, spotting the fall of shot. And
7:21
this is where the history happened. The
7:23
Crown Prince Wilhelm fought at the
7:25
Battle of Jutland on the 31st of May
7:28
1916, the largest naval battle of World
7:32
War I. And the men stationed up here in
7:35
this spotting top were the eyes of the
7:37
ship and saw firsthand this incredible
7:40
naval conflict. Their job was to observe
7:44
where the ship's massive 305 mm guns
7:48
shells were landing, where they were
7:50
falling short, over or on target, and
7:53
relay corrections back to the gunnery
7:55
officers below. Without accurate
7:57
spotting, those huge guns were firing
8:00
blind, and the shells were wasted. At
8:03
Jutland, the Crom Prince Vilhelm was
8:05
part of the third battle squadron. It
8:08
engaged British battle cruisers at range
8:10
exceeding 18,000 m. That's over 11 mi.
8:15
At those distances, accuracy was super
8:18
important, and that meant spotting the
8:20
fall of shot was everything.
8:23
Can you imagine being up here during
8:25
that battle? The concussion from your
8:27
own guns firing. Enemy shells landing
8:30
around the ship. Trying to track shell
8:33
splashes through smoke and spray while
8:36
calling down corrections through voice
8:38
pipes. The crown prince survived the
8:41
battle of Jutland with only minor
8:43
damage. Testimony to the skill of her
8:45
crew and the quality of her armor. But
8:48
it wasn't enough to stop it ending up at
8:50
the bottom of the sea. And what we're
8:52
going to see next is absolute tangible
8:55
evidence of the trauma of the sinking
8:58
because there's something absolutely
9:00
extraordinary on the alpha turret, the
9:03
very forward turret that you have to see
9:05
to believe. This is evidence of
9:08
something that happened during the
9:10
actual sinking that's been frozen in
9:12
place for over a century. Look at this.
9:16
The anchor chain wrapped completely
9:18
around one of the 305 mm gun barrels.
9:21
And this happened on the 21st of June
9:24
1919.
9:26
As the battleship rolled and capsized,
9:28
her massive anchor chains. Each link
9:31
wing several kilograms came loose and
9:34
fell across the deck. The gun barrel
9:37
caught the chain as the ship went over
9:39
and it's been wrapped around it ever
9:40
since. The forces involved are
9:43
absolutely mind-boggling. The ship
9:45
weighed over 26,000 tons. When it rolled
9:48
onto its side, everything that wasn't
9:50
secured started moving. Equipment,
9:53
anchor chains, ships, boats, the whole
9:55
lot. This chain found the gun barrel in
9:58
those final chaotic moments. What makes
10:01
this so powerful is that it was
10:02
completely accidental. Nobody tried to
10:05
allow this to happen. It's just a
10:08
snapshot of the exact moment that the
10:09
warship died. The anchor chain that was
10:12
meant to hold it in place to keep it
10:14
steady in harbor became part of the
10:17
final story and a really important
10:20
visual reminder of the way it ended.
10:24
Now thinking about these turrets, each
10:26
of them weighed over 600 tons and
10:29
required a crew of 80 men, gun layers,
10:32
loaders, rammers, magazine handlers, all
10:36
working in precision. At Jutland, the
10:39
Crown Prince Wilhelm engaged Brit
10:41
British battle cruisers and her gunnery
10:43
was accurate, contributing to the
10:46
devastating f firepower that sank the
10:49
perhaps poorly named HMS Invincible.
10:53
The rate of fire was around two rounds
10:55
per minute per gun when the crew was
10:57
well drilled. This means that the ship
11:00
could throw 10 405 kg shells every 60
11:04
seconds at targets over the horizon.
11:08
These guns fired their last shots in
11:10
anger at Jutland in 1916.
11:14
3 years later, wrapped in their own
11:16
anchor chain, they were silenced forever
11:19
when the battleship settled to the
11:20
bottom of Scappa Flow. Now, the bit of
11:23
video that you're seeing at the moment
11:25
shows the breach of the 305 mm gun that
11:29
has the anchor chain wrapped around it,
11:31
it's been illuminated by the diver you
11:33
can see on the right. We've also just
11:35
seen the shell loading and handling
11:37
mechanism on the left hand side. And
11:40
that's one of the great things about
11:41
this gun because it was ripped out and
11:44
the roof was ripped out. You can
11:46
actually see inside it and get to the
11:48
brereech. It's a fantastic thing to be
11:51
able to do. Although you're always aware
11:53
that directly above is the remains of a
11:56
massive battleship.
11:58
What we're going to do now though is
11:59
head to the stern. It's shallower than
12:01
the bits that we've seen so far. It's
12:04
also extremely unlikely that you would
12:06
go there from the forward turrets. More
12:08
likely you'd either do it on a second
12:10
dive or before or after a visit to those
12:14
off turrets.
12:15
As you'd expect, the stern is where the
12:18
ship's steering mechanism is located. It
12:21
would also have had large amounts of the
12:23
engine components and that's why this
12:25
was a favorite area for salvers. What
12:28
they would do is they would drop down
12:30
onto the ship and they would blow holes
12:32
in the hull until they found things that
12:35
were of interest. They would then expand
12:37
those holes, recover the things and move
12:40
on to the next part of the ship where
12:41
they would thought they could find
12:42
something else valuable. That means that
12:45
large parts of the stern area not only
12:48
are extensively damaged due to
12:50
explosives, but stuff that is valuable,
12:52
such as the massive bronze propellers,
12:55
are long gone. Also, large quantities of
12:58
the engine components are missing as
13:00
well. Although if you search around
13:01
inside, you can see plenty of evidence
13:04
of the three sets of Parson's turbines
13:07
that drove the crown prince providing
13:11
43,000 shaft horsepower, which was
13:14
enough to ensure that the 26,000 ton
13:16
battleship was able to reach speeds of
13:19
up to 20 knots, fast enough to keep pace
13:21
with the high seas fleet. You can also
13:24
see the rudders, which are a skew due to
13:27
the explosives. These were essential at
13:29
Jutland as rapid course changes and
13:32
evasive action helped her avoid serious
13:34
damage whilst concurrently engaging the
13:37
British battle cruisers. Because it's
13:39
shallower, has more light, and there's a
13:42
greater current flow over the top of it.
13:44
This area is also a haven of life, so if
13:47
that's your thing, there's plenty of
13:49
stuff to see. That's not really my
13:52
thing, though. But what I do like to do
13:54
is go inside Rex. And the size and the
13:57
scale of the crop prints mean that there
13:59
is a huge amount of potential to do
14:02
that. As always with any wreck
14:04
penetration, it needs to be done
14:06
properly. You need appropriate training.
14:08
You need to carry out reconnaissance.
14:11
You need to lay lines and all that kind
14:13
of stuff. But for those of you who have
14:15
those qualification for people who like
14:18
to do it, it is absolutely incredible.
14:20
The ability to get inside a wreck of
14:22
this scale, to move around, to see the
14:25
different compartments, to see the
14:27
evidence of the vast amount of stuff
14:29
that would have been inside there. Well,
14:31
it's it's just incredible. And for the
14:33
people who come back year after year,
14:36
this is what an awful lot of them like
14:37
to do. Get inside, swim around, explore
14:41
new places, find new things. And because
14:44
the wrecks are decaying and changing
14:47
continuously, that means new areas open
14:49
up all the time. In this video, you can
14:52
see that I've entered through a small
14:54
hatch. It's about halfway up the wreck
14:58
on the port side and I'm heading towards
15:00
the bow. You can see that somebody has
15:03
already laid line and that was done on
15:05
the previous day. The divers that you
15:07
saw at the beginning of the video showed
15:08
me where this is and you can see that
15:10
I'm now inside it. I'm completely inside
15:14
the wreck. Above me is just the hull.
15:17
Below me, you can see there's large
15:19
amounts of stuff has collapsed down onto
15:21
the seabed. It's absolutely amazing.
15:24
There's so much room in here. And as you
15:26
can see, all sorts of uh bits and
15:28
pieces. The this whole section was just
15:32
full of interesting things. As you can
15:34
see, there's also a whole load of room.
15:37
My estimate is I traveled probably 50 or
15:40
60 m inside the wreck moving from stern
15:44
or from the stern direction to the bow
15:46
section and then there was a big exit
15:50
big opportunity to drop out of the wreck
15:53
that took me very close to where the two
15:55
forward guns are located.
15:57
Now, I'm sure I don't need to tell you
15:59
that this is great fun and really
16:02
exciting and the kind of thing I think
16:05
that many of us when we learned to dive
16:07
dreamt that we would be doing. So, I
16:10
never went through this door, but
16:12
there's definitely somewhere I'd like to
16:14
go and have a look next time. And that's
16:16
the thing with a wreck of this sort of
16:18
size. There's always going to be
16:19
something else you'd like to do, another
16:21
place that you'd like to go to or a bit
16:24
that you've been that you'd like to go
16:25
back and check again. And certainly I
16:28
did three dives on the Cro Princeville
16:30
helm on my last trip to Scapper and it's
16:33
only really wetted my appetite. I'm
16:36
pretty certain I could spend an entire
16:38
uh week-l long trip up there going on it
16:40
and just going inside and going further
16:42
and finding more things. It's it's that
16:45
kind of wreck. Unfortunately, nothing
16:49
can last forever and this dive is one of
16:51
them. So that's the end of the line
16:53
there. That's the tie off point of the
16:55
bit of string. And the way out is just
16:57
down the slope to the right hand side
16:59
there. And that's where I head to get
17:01
out of the wreck and return to the
17:03
surface. Ascending from a wreck like
17:06
this is always an opportunity to review
17:09
what you've just done and also to think
17:12
about the wreck itself. The Crump
17:14
Princeville helm in many ways, many
17:17
people's opinion, the best diving
17:19
scapper flow. It's certainly a ship with
17:22
an unbelievable history. It participated
17:26
at the Battle of Jutland on the 31st of
17:28
May, 1916.
17:30
It was the largest naval battle of World
17:33
War I and the greatest battleship on
17:35
battleship engagement that's ever taken
17:38
place. The Crown Prince Vilhelm fired
17:41
her massive 305 mm guns at British
17:45
battleships. She took hits. She
17:47
survived. But 3 years later, she was
17:50
sent to the bottom rather than let her
17:52
fall into British hands. That anchor
17:55
chain wrapped around the forward gun.
17:57
That moment of chaos as she rolled and
17:59
capsized. The turrets pointing into
18:01
sand. The spotting top where range
18:04
calculations were made. The casement
18:07
guns that defended against torpedo
18:09
boats. All still there. This is amazing
18:12
diving.
18:14
It's deep enough to require planning and
18:16
skill, but shallow enough that you get a
18:18
reasonable amount of time down there to
18:21
explore to understand exactly what
18:23
you're seeing. This video is just being
18:26
a taster, but I hope it's given you an
18:28
appetite for this wreck, the SMS
18:31
Princehelm,
18:33
Koigass battleship, Jutland veteran,
18:36
scuttled warship, and now arguably
18:40
Scapperflow's most impressive dive site.
18:43
Thank you for joining with me. I'm Dom
18:45
Robinson, deep wreck diver. As always,
18:49
I'll see you on the next wreck.