Up next in 10


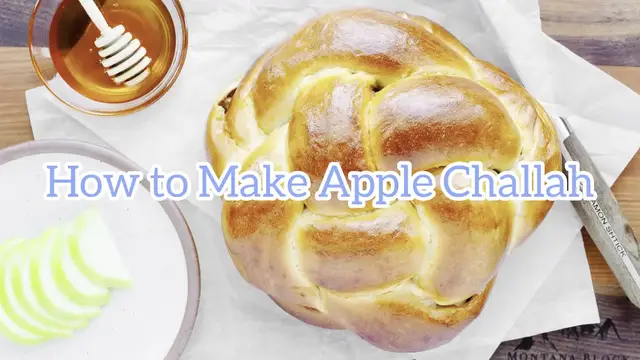
Apple challah is ideal for Rosh Hashanah and the Jewish high holidays. This apple honey challah involves roasting the apples with honey before stuffing them into the challah strands. The apples really shine in this eggy, sweet challah.
Show More Show Less View Video Transcript
0:00
Hi, I'm going to show you how to make the most delicious apple challah
0:05
Start by kneading together the challah dough. You know that it's achieved its full kneading
0:11
once it passes the windowpane test as shown here. Taking a small piece of dough
0:16
it stretches without ripping and it's translucent. While the dough is rising
0:22
prepare the apple filling. You're going to slice up the apples into about a quarter of an inch
0:27
squares. Mix it together with the cornstarch, the honey, and the vanilla bean paste. If you don't
0:34
have vanilla bean paste, you can simply use vanilla extract. I like using some variety of
0:42
apples here, some sweet, some tart. In this batch, I used two Granny Smith and about one and three
0:48
quarters Honeycrisp. I really went by the weight once I cut the apples up to make sure they were
0:56
between 500 and 530 grams total. Once the apple mixture is all combined
1:10
spread it on one layer onto a parchment-lined baking sheet. You want to make sure it's not overcrowded
1:16
so that it really is just on one layer of the baking sheet. Bake for about 25 minutes
1:21
just until a fork inserted into the apple pieces goes in very easily. You do not want to overcook the apples
1:29
Allow to cool completely. After the first bulk rise, which should take about three hours
1:41
you want to weigh the dough and divide it in two so that you can get two loaves of apple challah
1:47
Once you've divided the dough into two, put one half aside, covered in plastic wrap
1:54
until you're ready to use it. To make a four-strand round challah, divide half of all that dough, which you
2:15
now have into four. It's best to divide it using a scale so that all four
2:23
portions are equal in weight. This will ensure a more consistent result in the
2:30
final baked loaf I normally shape these into balls and then flatten the balls into ovals to form the long strands But here I just taking a shortcut and making long strands as I start
3:05
Because I've been working with the dough, the gluten needs to rest a little bit
3:13
So it's a good idea to rotate between the strands rolling them out
3:17
Once it seems like they're all really pulling back, cover them with plastic wrap and let
3:22
them sit for 5 to 10 minutes. After the 5 to 10 minute rest, it's easier to roll them into a longer strand
3:31
Once you have them to the length you want, roll each strand out and flatten it into a
3:37
long oval or a rectangle. You are going to put the prepared apples into each strand, being careful not to let the
3:46
apples hit the edges of the strands. The reason for that is that once the apples hit the strands, it's harder for the dough
3:54
to attach to itself. I find it easiest to use a spoon and just place the apples in the center
4:02
Be careful not to overfill the strands. If, as you're folding up the strand with the dough, like I'm doing right here, you find
4:10
too much apple inside, just take some of it out. To close the strand, pinch the seams together really well
4:20
As you're doing that, push out any ear so that you can avoid having too many ear gaps
4:24
in the final baked loaf. Gently roll it against the tabletop or the countertop to get rid of the
4:33
crease. If it starts to open up, try to just close the crease again by pinching. To form a four-strand
4:41
round braid, just follow what I'm doing here, setting each of the four together in a crisscross fashion
4:48
You can see here that one of my seams started to open so I just went and
4:56
again pinched on the seams to try to close it. So you want to make sure that the center is all
5:08
centered from all the strands and then create like a hashtag with one going over one side and one going over the other Once you have one over and one under throughout you gonna start anywhere So I start in the bottom part
5:26
and just take one strand and move it over the one immediately next to it
5:32
In other words, I'm starting with the bottom two, then to the left I'm going to the next
5:49
two, then the top two, and then the last two. And then I go back the other way, going counterclockwise, just putting one over the other
6:01
And then I go clockwise one more time
6:31
simply meet the ends so that they can tuck in right under the loaf
6:49
Now you have some of those ends sticking out, just tuck them right under and hide them
6:54
That will push the loaf up so that the center four braids will really shine through
7:01
Place the braided loaf onto a parchment lined baking sheet and allow it to rise at least
7:27
an hour. With my second loaf here, I simply just rolled it out into a long oval and then I filled
7:35
in all of the apple filling, pinched up the seams and rolled it up like a turban
7:40
This is the shape that we see very often in Jewish bakeries
7:44
It's very quick and easy to do. I don't think it's as pretty, but it's certainly a viable option
7:59
Thank you
8:26
Thank you
8:56
Thank you
9:26
Thank you
9:56
Thank you
10:26
When you bake these, the baking time will vary depending on how high and how big your loaves are
10:32
So it's best to use a thermometer to make sure you reach at least 190 degrees at the very center of the loaf
10:39
Once it's done, let it cool, slice, and enjoy
#Cooking & Recipes
#Cooking & Recipes