Up next in 10



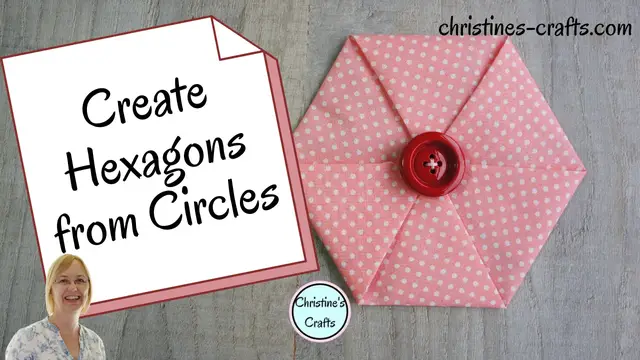
These fabric hexagons are really quick and easy to make. You can use them in lots of different projects. How about a cute little brooch, or a bag covered with them. Layer them up for more textured interest. You could decorate your cushion covers or pillowcases. Get creative and cover your world in hexagons!
Show More Show Less View Video Transcript
0:00
Hi, today I'm going to show you how to make some nice fabric hexagons, great for many projects
0:05
You can put them on cushion covers, pillows, bags, you can even make brooches out of them
0:11
Really simple, no specialist equipment needed. So let's get started. I'm Christine of christinescrafts.com
0:18
So first of all what are you going to need? You're going to need something to mark your fabric with, something round
0:24
This is just your template. So the larger your template, the larger your hexagon will be
0:29
I'm using a dinner plate which is 10 inches across. You'll need some scissors, a button, you'll need your fabric and you'll either need some
0:38
glue or some sewing supplies and of course an iron. So to start with we're just going to turn our fabric over, place our template, in my
0:49
place a dinner plate, place down and draw around it. All you're trying to do at the moment is get a circle of fabric
0:56
So this 10 inch plate will make a hexagon that has sides that are 3 inches long and it's
1:01
about 5 inches across between the flat faces. So just go as big or small as you want
1:08
Experiment, make different ones, layer them up, get creative. So cut out your circle and then over to the ironing board We need to find the centre So fold your circle exactly in half and give it a little press And then fold that in half again
1:33
Okay, you can see you've got that line. Fold it in half again
1:39
And this is going to allow us to find the centre. Okay, where those two lines cross
1:46
that is the centre of our circle, which is really important. We're going to need that
1:53
Okay, make sure your centre's clear and then turn your circle over. You're going to be working on
1:59
the back. So take one side of your circle and fold it up until it just touches the centre of the
2:06
circle and press. Now be careful not to do what I just did, which is burn your finger
2:12
So get that one nice and firmly pressed. And then it doesn't matter which way you go
2:19
but choose one corner and that's the way you're going to keep going
2:23
Take that end and get that point folded up to the centre
2:28
Make sure it's all lying nice and smoothly. And press that. And that's the other side of your hexagon in place
2:38
Turn the same way Take the next point and fold that up to the centre And you start to see your hexagon appearing
2:51
Turn again, take that point right up to the centre. With these, it's all about accuracy
2:58
Make sure you get right to the centre every time, not too far, not too short
3:03
And then you're going to come round at the end, you're going to have one point left. And you'll see that mine's not perfect
3:08
I've not been accurate enough So I'm just going to fold that extra little bit under
3:13
But yours should just fit perfectly Take your time You don't need to rush because nobody's filming you Okay
3:20
And that's it You've made your hexagon And then it's all about securing it
3:25
We need to hold those points down And it's entirely up to you how you do it
3:31
You can do it with a multi-purpose glue Or a fabric glue
3:36
But I'm going to sew it Now I choose to sew it because I think it fixes it better
3:40
And depending on your project It may hold better if you have to wash your project
3:45
So you'll see here that all I'm going to do Is catch all the little points
3:51
And I'm just going straight through to the back Coming back through
3:55
Catching every point in All that matters is that you catch every point
4:01
I not going to use it in any sort of project Where I be able to see the back of this hexagon So I just ending up with a load of little stitches in the back Then I going to cover those stitches by applying a button to the middle You could apply a bead you could apply buttons you could sew
4:17
another hexagon on the middle. You could sew something completely different on the middle
4:21
a plique patch on the middle, it's entirely up to you. Be as creative as you see fit
4:29
But these do look rather sweet with a button on the middle
4:32
And that's all there is to it. You can then choose exactly what you want to do with your hexagon
4:37
And I'm going to show you a few things I've done with mine
4:42
So the one that I'm stitching at the moment has not gone on a project yet and it's quite
4:45
a big hexagon. But I have made small ones into brooches and one thing I recommend if you're going to make
4:52
a brooch is you can put some interfacing on it and make it a little bit stiffer
4:57
You can also attach them to bags. I've made a nice bag with several on and because I was
5:03
putting them on a bag I decided to layer them up. So on the right here you'll see I've got
5:07
several layers of hexagons and buttons and on the left is a brooch
5:12
So good luck with making your hexagons and I hope you make some great projects out of
5:16
them. Please feel free to comment below and let me know what you make
5:20
Thank you for watching. If you like my videos please subscribe below and hit the bell so
5:25
you'll see them all and give me a thumbs up it really helps the channel
#Arts & Entertainment
#Hobbies & Leisure
#Crafts
#Fiber & Textile Arts