Up next in 10

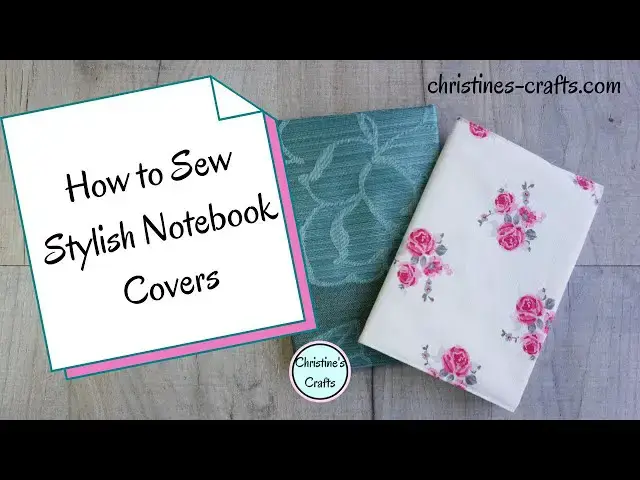
SUPER SIMPLE STYLISH SLIP ON NOTEBOOK COVER DIY - A full Tutorial for How To Sew
Jul 25, 2024

This video will show you exactly how to make a slip on fabric cover for your notebook, journal or diary. Select a fabric that matches your personality or use up some fabric pieces. Perhaps match up to your other home items!
Really easy to make and suitable for all including beginners. Make them for yourself and all your friends. When your notebook is full slide the cover off and move it onto your next notebook.
If you enjoy crafting my blog is also full of great ideas and tutorials. Plus if you subscribe you gain access to my free resource library, which includes a home crafts e-book, planners and much more, and get to hear about my latest projects first. Take a look at https://christines-crafts.com/
Enjoy watching and sewing your own notebook covers. Please leave me a 'thumbs up' if you enjoyed this video and subscribe so that you get to see all my videos as they are posted.
You can also find me across social media. To see all my information and ideas find me at https://linktr.ee/Christines_Crafts.
If you are thinking of opening an Etsy store then use this link and get 40 free listings https://etsy.me/32xoPdg
Show More Show Less View Video Transcript
0:00
Hi, in this video I'm going to show you how to make a super duper fabric notebook cover
0:05
Really easy to make, can slip on and off so you can transfer it from one notebook to another
0:10
and you can make it this afternoon in an hour. So, I'm Christine of christinescrafts.com and this channel is dedicated to crafting
0:18
on a budget. So first of all, what are you going to need to make one of these
0:22
You're going to need your notebook that you want to cover. As you can see I've got a notebook here that I've already started to use but it's not
0:29
very exciting. You're going to need some fabric to cover it with
0:33
Now you can use all the same fabric or you can select a fabric and then use a different
0:37
one for the lining which is what I'm going to do. I've just got a plain fabric for my lining
0:43
So you need to decide on the size of pieces you're going to cut out
0:47
So measure the height of your notebook and make a note of that measurement, the height
0:53
of your notebook. And then open out your notebook and measure the width of your notebook when it's open
1:04
And those are the two important measurements you're going to need to be able to cut out your fabric to the right size
1:12
So you need to make sure that you've got those measurements accurately and that you've got
1:17
a piece of fabric that is big enough to cover your notebook and then another piece that's
1:23
a size quite a lot bigger so that you can make the pockets for the inside
1:29
So out of your main fabric you're going to cut a piece that is the width of your notebook
1:35
plus 1.75 inches and the height of your notebook plus 1.25 inches
1:45
And that will be big enough for the outer piece. Now out of your lining fabric you need to cut a piece that is the height of your notebook
1:52
plus 1.25 inches and the width of your notebook plus four times the pocket width you want
1:59
Now I've done my pockets two inches wide but you can make them as wide as you like
2:04
But that needs to be the width of the notebook plus four times your pockets
2:10
We're now going to place those two pieces of fabric together with right sides facing
2:16
So make sure your right sides are facing and bring two of the short edges together
2:24
Just line up those shorter edges and pin or clip them together
2:31
It doesn't matter what you use so long as it's going to hold them together while you
2:35
sew along that seam. Just making sure it's held. And then we're going to repeat this process for the other short edges
2:47
So we're making a tube. Don't worry about the fact the lining is a lot wider than the main fabric
2:55
That's fine. So pin or clip along this seam as well
3:06
And then you should have formed a tube out of your fabric
3:11
A short wide tube in my case because of the size of the notebook. But you will have formed a tube
3:18
And now you just need to sew those seams. Obviously like most projects you can hand sew it if you need to but it's quite a big
3:27
project for hand sewing so I recommend running it on the machine
3:32
Start at one end, take a few stitches, do a bit of a reverse to make sure nothing unravels
3:39
and then run along. You'll see that for my seam allowance I'm just running the edge of the sewing foot along
3:45
the edge of the fabric and that works out quite nicely. Keep yourself going straight all the way along and when you get to the other end you're going
3:59
to do exactly what you did at the beginning. Just do a little reverse just to make sure your stitches don't unravel later
4:11
And then once you've cut that, taken off your threads, simply repeat for the other seam
4:16
that you'd already pinned. So you will now have a tube with your pieces of fabric
4:25
And then you need to think about sewing those together. So we're keeping those right sides together, we haven't turned it out and we're going to
4:33
lie it flat so that the outer fabric's on the top and we're going to try and make sure
4:39
it's in the middle. So the lining fabric at either side needs to have the same measurement
4:44
So for me that's two inches. So check that you've got exactly your measurement, for me two inches, at either side
4:53
You want it exactly in the middle. Once you're happy with it, pin it in place
5:00
I'm putting my seams out to the edge. You could press them flat or you could pin them in, it doesn't matter
5:11
I'm choosing to pin mine out towards the lining fabric. Once you're happy with that, turn it around and repeat the process
5:21
I advise you not to assume that it's going to be right at the other end just because
5:25
it's right on the side you've done. Always check again. You'll see I've just had to do a little bit of adjustment with mine because they weren't
5:33
quite right. And just keep measuring, keep checking. Once you're happy, pin those
5:46
And then along one of those seams you're going to sew all the way along
5:51
So just put your pins in or your clips on all the way
5:55
But on one side you need to leave a gap to be able to turn this the right way out when
6:02
you've finished. So I'm going to mark it on that side with a big pin in the middle and I know not to
6:07
sew it on that pin. You can mark it however you like but make sure you do leave that hole
6:14
So on one side, a little bit of reverse and just run all the way along
6:19
Again I'm running that foot along the edge and that's a simple seam
6:24
When it comes to the other side, decide where you're keeping a hole in the middle and start
6:30
your seam next to it. Make sure you do a bit of reverse so it doesn't pull undone and work your way all the way
6:39
along until you get to the other end. Little bit of a reverse
6:47
Clipping off those extra threads. And then repeat the process making sure you leave a hole big enough to turn the whole
6:56
lot through. So you'll see I'm just checking there. Look where that other seam started
7:03
Make sure I've left a nice big gap. And then again, sew a nice little seam with your backing at either end so it doesn't unravel
7:13
Now before you turn it out, I recommend that at the very least you clip the corners so
7:18
that it sits nicely. Don't cut any stitches, just cut nice and closely
7:25
And if along your seams there are any bits that you think need tidying up a bit, just
7:29
snip them off now. And then use your hole to turn the whole thing the right way out
7:37
Just work it through. Push your fingers into the corners. And then to make sure you get a good corner, use a nice blunt object like a chopstick and
7:48
gently poke out the corners. And you should now have a basic cover
7:56
Now you can press it, and I strongly advise it, and then you're going to topstitch all
8:00
the way round. This makes a nice finish and also sews up that hole that you left
8:06
And so no one will ever know you left the hole. So choose somewhere to start
8:11
I do recommend on one of the side bits, which is going to be in your pocket, so it will
8:15
not be on the outside of the notebook. And topstitch all the way round
8:21
I've chosen to do my topstitch really near the edge. And you'll see I had a bit of trouble
8:26
So at one corner I had to take off my threads, tidy up the ends, and start again
8:32
Don't worry about it. What matters is that you end up with a nice tidy topstitch that just finishes your cover off
8:40
At every corner, just lift your foot, turn through 90 degrees, get a nice sharp corner
8:46
And keep going until you're back to where you started. And once you're back to where you started, just do a little reverse, just so it doesn't unravel
8:57
And now we're going to form those pockets. So turn the whole thing over, so you're now looking at the lining, and get your notebook
9:04
back and place it on the middle of your fabric. And you can see, if I just fold that over and at the other side, how it's going to look
9:16
What you need to do now is make sure you turn the same amount over at both sides and that
9:22
the book fits in. So because you can measure against the book, you've got a little bit of wriggle room here
9:28
If you didn't quite get your measurements right, you've still got time to put it right
9:32
Now you'll notice my measurements have set it up so that a little bit of the outer fabric
9:37
comes round to the pocket, and I'm comfortable with that. I think that's the best way round to be
9:41
It means there's no way the lining will show on the other side
9:46
So pin them really close to the edge. You're going to sew them really close to the edge, unless you were very generous with your
9:52
measurements, in which case you might need to come in a little bit
9:56
Because what you want is the front of the notebook to just, and I do mean just, fit in
10:04
And the same at the back. You want the back cover to just fit in
10:10
So pin the back pocket the same as you've pinned the front pocket
10:17
Just a reminder to make sure you check that your two pockets are the same
10:23
You want a nice symmetrical set of pockets. And check that your book's going to fit in there
10:31
Nice snug fit you want, but not so snug you can't get the book in
10:36
And then you're just going to sew really close to the edge along that pocket
10:41
A little bit of reverse at the front and the end of your seam
10:46
But just make sure you're right on the edge, and that's how the measurements I gave you
10:52
will mean you need to sew it right on the edge. Just work your way along and sew it
11:00
You can see I'm taking it slow. If you've got a thick bit of fabric you sometimes need to do a little bit of hand turning of
11:05
the wheel. Don't worry, just persevere and keep going. And then you will complete the edge of one pocket
11:16
And then just repeat for all four seams so that you complete your two pockets
11:23
So I get to the end, a little bit of a reverse, and finish off that pocket
11:33
And then cut off your thread so it's nice and tidy, and repeat for the others
11:38
So once you've got all four you've now got a cover. And all that's left to do is to put your notebook in
11:44
So just feed the front in carefully, slide it in, and then the same with the back
11:55
Just get that to go in there. And that's it. Job done, you've covered your notebook perfectly
12:02
And because it's a slip-on cover you can take it off later when your notebook's full and
12:06
apply it to your new notebook. So I hope you've enjoyed making your notebook today, your notebook cover
12:13
And I hope you'll enjoy using it, or whoever you gift it to will enjoy your notebook
12:18
They're great for covering diaries too, which is what I've done here as well
12:22
So thank you for watching. Please give me a thumbs up below if you've enjoyed this video, and leave me any comments
12:28
And subscribe to the channel so you can see all my videos as they come out
12:31
Thanks again. Enjoy your notebook cover
#Hobbies & Leisure
#Crafts
#Fiber & Textile Arts
#Fiber & Textile Arts