0:01
Welcome to day 12 of the 30 mixed media
0:04
card challenge. So, all the videos cover
0:07
cards that can be made using the
0:09
crafting supplies you've got at home.
0:10
You'll find them in the description
0:12
below on the screen just on my channel.
0:15
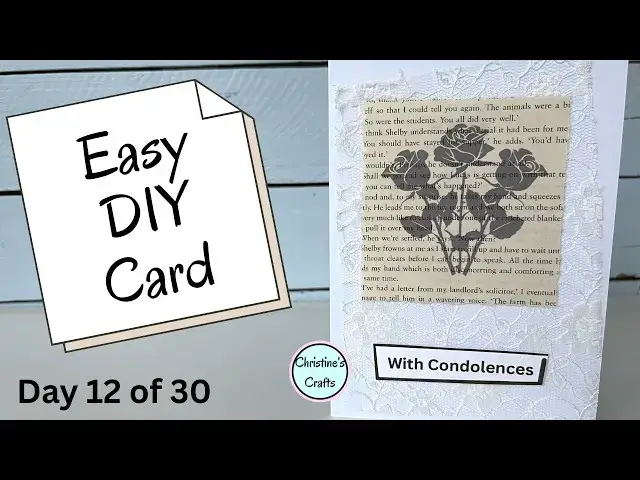
And today, we're going to make this card
0:17
here. So, let's get started.
0:21
I'm just using an ordinary piece of card
0:22
folded in half or a card blank if you
0:25
like to buy them. And I'm just going to
0:27
stick some lace on. So, you could use
0:29
any lace you want. Just cut it to about
0:31
the size of the card. I mean, if you
0:32
like to do it precisely, please do. I've
0:35
just cut mine approximately. I think it
0:36
gives a nice effect. And I'm just going
0:38
to glue it on with an ordinary glue
0:40
stick. You could use a PVA based glue,
0:43
any glue you've got really, but a glue
0:44
stick is quite nice to use because I
0:46
don't have to wait hours for it to dry.
0:49
And just press your lace on. Now,
0:52
obviously, you could cover half the
0:53
card, all the card. I'm choosing to
0:55
cover pretty much the whole of the
0:57
front. And then I've printed this onto a
1:00
book page. Now, if you want the things
1:02
that I've got for you to print on, I've
1:04
got a few different ones. Just click the
1:06
link on the description below or on the
1:07
screen and you'll go to my website and
1:10
then it'll give you access to the
1:11
resource area just for your email
1:13
address. And don't worry, you can
1:14
unsubscribe at any time. But obviously,
1:17
you could print off anything on a book
1:18
page that you find on the internet. So,
1:20
do feel free to get creative. And then
1:23
I'm just cutting it down by tearing the
1:26
edges off. And I'm using a metal ruler
1:28
to do that. It's really effective.
1:31
You can just place your ruler where you
1:32
want to cut and then pull the paper off.
1:36
And you get a really nice torn edge,
1:38
which is a nice effect. If you want to
1:40
cut them neatly, feel free. Depends what
1:42
effect you're going for. And you can see
1:43
it's just a little bit not gone
1:45
perfectly. I'll just take that off. And
1:47
then I'm just going to stick that down.
1:50
Now, what you could do is use some sort
1:52
of foam pads to raise it up, but I'm
1:53
just going to stick it down flat using
1:55
my glue stick. Keep it simple.
1:58
Um, and again, I'm just going to eyeball
2:00
where to put this. You can, if you like,
2:03
measure, if you want to be absolutely
2:05
precise getting it in the center, but
2:08
I'm just going to look at it and put it
2:14
And then I'm going to make sure that
2:15
sticks down. Obviously, I'm sticking to
2:17
the lace and to the card underneath.
2:19
sort of. So, if you've got a really
2:21
thick lace, you'll only be sticking to
2:22
the lace, so just make sure. Now, I'm
2:25
going to use this greeting. Now, I'm
2:26
using with condolences, but this is off
2:29
a sheet, well, I think there's two
2:31
sheets of greetings that you can get for
2:33
free. Again, you'll be able to access
2:35
these if you just visit my website and
2:37
sign up, link on the screen in the
2:39
description below. And I'm going to
2:40
stick this one on with some foam pads
2:42
just to give it a bit more of a 3D
2:44
effect. And then that will be it. Now,
2:47
if you've enjoyed this card, please give
2:49
me a thumbs up so it spreads to more
2:51
people. And on the screen, you'll be
2:53
able to see um the whole playlist of
2:55
these videos to make the whole set of 30