0:00
Hi, welcome to day 10 of the mixed media
0:04
card challenge. 30 mixed media cards
0:06
using craft supplies you've probably got
0:08
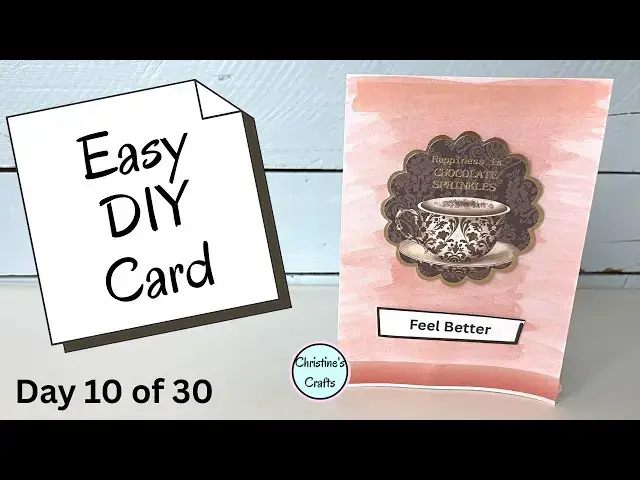
at home. So today's card is this one
0:12
here. And if you want to find all the
0:14
others, you'll find them in the
0:15
description below on the screen and join
0:18
us for them all. Let's get started. I'm
0:22
just using an ordinary card blank or you
0:24
can just use a folded piece of card.
0:25
It's entirely up to you. And these are
0:28
just basic watercolor paints. Nothing
0:30
special, nothing fancy. If your children
0:32
have them, you can use those. It's no
0:33
different. Don't worry. And I'm just
0:36
coloring it in. Just making a
0:37
background. Now, the more water you
0:39
apply, the softer the background will
0:41
be. The less water you apply, the more
0:43
solid the color. You could also,
0:45
obviously, just do half of it. Just do a
0:48
diagonal line. You could do what you
0:50
like, but just using watercolors for a
0:52
background on a card is so easy and
0:55
gives you lots of flexibility obviously
0:57
because you can get lots of different
0:58
colors. You could even mix colors and
1:00
then all you're going to do is leave
1:04
and then it's time to add on anything
1:07
else you want. So all I'm going to do to
1:10
start with is think about my
1:12
embellishments. So I've got this lovely
1:14
circular thing to add and also a little
1:17
greeting. feel better. Um, and that's
1:20
one of the greetings you can download
1:21
for free from my website. A link on the
1:23
screen and in the description below. And
1:25
I'm also going to use some of this washi
1:27
tape. Washi tape is fabulous. Dead
1:30
cheap. You can use it in loads of
1:32
different projects, not just cards. And
1:34
as you can see, you can get all the
1:35
different colors. So, I'm putting one at
1:37
the top that pretty much matches the
1:38
background and one at the bottom that's
1:41
a bit darker and has a gradient on it.
1:44
Now, you can cut these perfectly to fit.
1:45
You can tear them like I have. It
1:47
depends on the effect you're going for.
1:50
And then all I'm going to do is attach
1:53
my embellishments. Now, I like to use
1:56
the little foam pads that just raise
1:58
them up nicely. It just gives a lovely
2:01
3D effect, but obviously you don't have
2:03
to. You could just glue these on and be
2:05
done. Um, but I do like the effect. So,
2:08
you can see on a little greeting like
2:10
that, I've just put three on.
2:13
And another thing I do is eyeball it. If
2:16
you're really worried about getting in
2:17
the middle of your card, then feel free
2:19
to measure it and mark it. But I tend to
2:21
just stick them on. And you'll notice on
2:23
a larger embellishment, I'm putting a
2:24
few more pads on. There's no rules. You
2:27
just do what you like. If you're
2:28
enjoying this video and you want other
2:30
people to make cards, please can you
2:32
give me a thumbs up cuz that really does
2:34
help it spread to other people. And then
2:37
once this is on, for me, this card is
2:39
finished, but you could add some stamps,
2:42
you could draw on it, anything you
2:44
wanted. So, I hope you've enjoyed it and
2:46
you're going to make your own cards.
2:48
Super simple, super easy, but everyone