Up next in 10


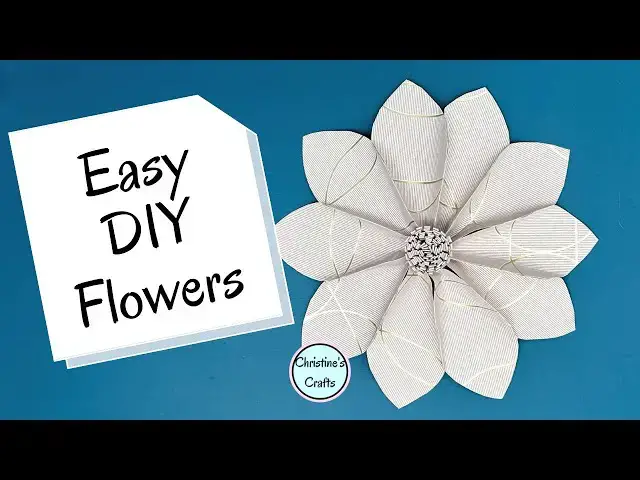
Join me as we create some gorgeous displays for your home! This video shows you how to take leftover wallpaper samples and turn them into a beautiful decorative flower using simple crafting tools. It's a fun paper craft and a great way to add some diy home decor to your space. Learn how to make a paper flower with this easy tutorial!
As an Amazon Associate I earn from qualifying purchases
--------------------------------------------
HOW TO ACCESS THE FREE TEMPLATE:
Simply visit my website at https://christines-crafts.com/enjoy-the-craft-gardening-resource-library/ and sign up to my regular newsletter.
You can unsubscribe at any time
--------------------------------------------
Enquiries: [email protected]
--------------------------------------------
➡️ Want to see loads of written tutorials too? If yes, click here: https://christines-crafts.com/
🆓 Access my entire resource library for free: https://christines-crafts.com/enjoy-the-craft-gardening-resource-library/
--------------------------------------------
Show More Show Less View Video Transcript
0:00
In this video, I'm going to show you how
0:02
to take all those bits of wallpaper,
0:04
turn them into gorgeous displays.
0:07
Those samples from the DIY shop, turn
0:09
them into something you'll love. Let's
0:11
get started.
0:13
To start with, you need to make all the
0:15
separate little pieces for your flower.
0:17
So, there is a free template which you
0:20
can download, but if not, you know, if
0:22
you want to go it your own way, you can
0:24
just make your own petal shape. But as
0:26
you'll see, there's a circular disc
0:28
which is going to go at the back of the
0:29
flower. And you need to cut out your
0:32
petals. Now, you can enlarge these. You
0:34
can make them smaller. You can make them
0:35
any size you like. There's just a
0:36
standard size on the template. And then
0:38
you'd make them bigger or smaller. And
0:40
then you'll also need to cut out the
0:42
parts for the center, which I'll talk
0:43
about in a little while. So, all I've
0:46
done here is cut out the templates. Now,
0:48
if you can print them off on thin card
0:51
and then they'll be easier to draw
0:53
around. I didn't here. I've just used
0:55
paper, but if you use thin card, they do
0:57
make a much better template. So then
1:00
you're going to take your paper. Now, as
1:01
you saw, I've got wallpaper, and I've
1:03
turned it over onto the back. And then
1:05
you're just going to do as many petals
1:07
as you want. Now, I've made them with
1:10
eight, 10, or 12 petals. But there are
1:14
no rules. You can make them with as many
1:16
or as few petals as you like. The only
1:19
word of warning, the fewer petals you've
1:22
got, the harder it is to get it to glue
1:23
all the way around and stay there, cuz
1:25
obviously they're having to stretch out
1:28
somewhat. So, as you can see, I'm just
1:30
working out the best way of getting them
1:31
on to use as little wallpaper as
1:33
possible. However, if you're using a
1:36
paper with a pattern that you want to
1:38
make sure you get a certain thing on the
1:40
petal, then you're probably going to
1:42
draw around your petals on the right
1:44
side of your paper so that you can line
1:46
them up perfectly. For example, if
1:48
you've got little flowers or birds or
1:51
something and you want them to radiate
1:53
out from the center of your flower. And
1:55
you'll see I'm just drawing around one
1:57
of those small circles.
2:00
The size of that circle really doesn't
2:02
matter. I've not made it very big, but
2:05
you could. I mean, you could draw around
2:07
a small plate if you wanted. So long as
2:08
it doesn't protrude beyond the petals
2:11
and you can't see it from the front, it
2:13
really doesn't matter about the size of
2:15
that circle. So, just keep going until
2:18
you've got enough petals. I think I've
2:21
doing 10 here. Yeah, we'll go for 10.
2:25
Um, and just keep going.
2:29
Once you're happy you've drawn them all
2:30
and they all fit and you've got what you
2:32
want, it's time to just cut them all
2:34
out. So, at the moment, I'm just cutting
2:38
out the petals and the circle for the
2:42
back.
2:43
I won't make you watch me cut them all
2:45
out. I mean, that is quite a dull video.
2:49
So, just cut them all out. And then, as
2:52
if by magic, you will have a selection
2:56
of petals and the little circle for the
2:59
back.
3:01
And then we're going to need the paper
3:04
for the center. So, what you want is a
3:06
strip of paper. Now, my measurements are
3:09
the width of the wallpaper, which is 22
3:11
in and 2 in. So, the strip is 22 in by 2
3:16
in, but they are no means crucial
3:18
measurements.
3:20
If you want your center of your flower
3:22
to protrude further, you'd make it
3:24
wider. If you want it to protrude less,
3:27
then you'd make it a narrower strip. If
3:30
you want it to be a fatter center, a
3:32
longer strip. And if you want it to be a
3:34
smaller center, then a shorter strip.
3:38
And I keep stressing throughout this
3:40
video, this is about creativity and you
3:42
making it how you want. And I think this
3:44
is a great project for expressing your
3:46
own creativity by your selection of
3:47
paper sizes, positioning of them. At the
3:51
end of the video, I will show you some
3:53
different combinations and things I've
3:54
done with them just to give you some
3:56
ideas. But really, just go and go crazy
3:58
and do what you want with them. So now
4:00
we've got everything. We've got the
4:02
strip for the center, the petals, and
4:04
the circle for the back.
4:07
So, let's take that strip of paper and
4:10
fold it in half. So, you're going to
4:12
fold it in half with your pretty paper
4:14
on the outside
4:17
and just work your way across.
4:20
What I do recommend is that you make it
4:23
a good fold.
4:25
What do I mean by that? Once you've
4:27
folded it all the way along and you're
4:30
happy with it, just run something along
4:32
it to make sure it makes a crisp fold.
4:35
So, I'm going to use something called a
4:37
bon tool.
4:39
We call it that. Maybe it's called
4:40
something else in other places, but you
4:42
could use your fingernail, the back of a
4:44
ruler, back of your scissors even, just
4:47
something to smooth it down. So, you've
4:49
got that folded strip.
4:52
And then take your scissors and on the
4:54
folded side, you're going to cut down
4:56
the strip. So you're going to just down
4:58
I mean across it. And you're just going
5:00
to repeat that all the way along
5:03
just to make those little narrow strips.
5:06
But make sure you don't cut all the way
5:07
through because we need to keep it
5:10
together
5:12
so that we can roll it later. So just
5:15
work your way all the way along.
5:16
Obviously, the wider the strips you
5:19
make, the wider the detail will be. The
5:23
narrower, the more detail there'll be on
5:25
your your center. And then that will be
5:28
ready to make your center in a little
5:30
while.
5:31
So, put that to one side and we'll do
5:35
something with the petals. Now, because
5:37
mine's wallpaper, you'll see that
5:39
they're curling the wrong way and that's
5:42
just cuz the way the wallpaper was
5:43
rolled. So, if you've got the same
5:45
problem, just roll them the other way
5:49
because we want them to naturally curl
5:51
forwards to make those pretty petals.
5:54
But you can see I'm just curling. I'm
5:56
not folding. It's just to help it go the
5:59
way I want it to.
6:02
Once you're happy there,
6:04
at least flat and hopefully curling a
6:07
little bit,
6:09
you're going to take each one and cut
6:12
some off the long pointy end. Now, I'm
6:15
trying to put them all together to do it
6:16
in one go.
6:19
And you don't have to cut any off, so
6:21
I'd watch the whole video through before
6:23
you start cutting any bits off. I just
6:25
find it makes it easier to put the
6:26
petals together. And because I'm going
6:28
to cut some off the center anyway, I
6:30
don't mind doing it now. And then where
6:33
you've cut that end off or you've got
6:34
the long point, just nip it together and
6:37
form a little fold, but only at that
6:39
end. You're not running it all the way
6:40
along the petal.
6:42
You'll see just a a nip at one end.
6:46
And then I'm just letting them down.
6:50
It's just going to help when we're
6:52
trying to make it stay in at the center
6:55
of the the flower. Could
7:00
you do them all together, you wouldn't
7:01
get that nice little fold in the bottom.
7:04
So, I do recommend doing them all
7:06
separately.
7:09
And it's time to start gluing. So, I'm
7:12
using something called a cool melt glue
7:14
gun, which is basically a hot melt glue
7:16
gun, but operates at a lower
7:17
temperature. So, you have to have
7:18
different glue sticks. And you're going
7:20
to take each petal in turn, apply a
7:23
little glue along the widest part of the
7:26
petal on the wrong side and glue another
7:29
one to it. Now, if any glue pokes
7:31
through, just be careful not to burn
7:33
yourself. Mine isn't that hot, so I'm
7:35
okay just to pull it straight off. But
7:37
if it is hot, just leave it there and
7:39
then pull it off when it's cooled. And
7:41
you can see they've just stuck together.
7:43
Just on the widest part, not all the way
7:45
along. There's no need. Just on that
7:47
widest part. So again, a little bit of
7:50
glue and stick the next one on.
7:56
It won't surprise you to learn you're
7:57
doing them all the same. And you're just
7:59
going to keep working your way along,
8:02
but you will see how that flower is
8:04
starting to form
8:08
even when you've only got three or four
8:10
together.
8:12
So just keep adding them on.
8:16
Now, what you can do, of course, is keep
8:19
forming it round and deciding how many
8:21
petals. You don't have to use all the
8:22
petals you cut out. If you decide you
8:24
want to use fewer,
8:27
but now I'm keeping going.
8:32
Now, if you're not using hot melt glue,
8:34
you're going to have to keep waiting for
8:35
the glue to dry. Probably once you've
8:37
got them all glued, don't try and form
8:39
it into a flower. Just let the glue dry.
8:43
And you're going to see in a minute,
8:44
even if you're using hot mel glue, it's
8:46
worth being a little bit cautious. So
8:49
once you've got all your petals together
8:50
and you know it's going to reach round
8:52
and look fabulous,
8:54
little bit of glue on that last one and
8:57
join the petals up.
9:00
If you do this too early
9:02
or if you do this and then flatten it
9:04
down too early, you might have a problem
9:07
like I'm about to show you. So at this
9:10
point, just leave it all to dry. walk
9:12
away. Make sure it's all set or dried
9:16
and then come back to try and turn it
9:18
into a flower because if you do it too
9:20
soon,
9:22
that can happen.
9:24
So, because you don't want that, just
9:26
give it a little bit of time.
9:30
And then once you're confident it's all
9:31
going to stay glued together, it's time
9:34
to come back to it.
9:40
Because once you've got your flower
9:42
formed,
9:44
you see there's a little cut there.
9:45
We've no seen that I just waited for a
9:47
while. You can flatten it down to make
9:49
your flower. And this is where you'll
9:50
see whether you've got a gap in the
9:52
middle, whether the petals are pushing
9:54
up against each other. What have you
9:56
made in the center? And partly that
9:58
depends on how many petals you've you've
10:00
glued. So you can see mine are a little
10:02
bit close together in the middle. I want
10:04
a gap. So, if at this point you haven't
10:07
got a gap and you want a gap,
10:10
it's time to just cut a little bit more
10:11
off. So, just take your time and be
10:14
careful by bringing all those petals
10:16
together.
10:19
You see, I'm not completely confident
10:21
there. I mean, I could leave it like
10:22
that and not have a center,
10:26
and that would be great. And in fact,
10:28
later on, I'm going to show you one
10:29
where I didn't put a center in, and you
10:31
can see what you think. But assuming you
10:34
want to put a center in your flower at
10:36
this point, you can just cut a little
10:38
bit more off those petals.
10:42
There's no measurement here. Just cut a
10:44
little bit. Put it back down flat to see
10:47
if you've cut enough off.
10:49
And then you can always cut a little bit
10:51
more. You can never put it back on, but
10:52
you can always cut a little bit more
10:54
off. So you can see I've got a gap there
10:55
now. Proper little hole in the middle.
10:58
That's going to be big enough, I think.
11:00
So, I'm just going to turn my attention
11:02
back to that center and make that
11:06
center. So, you remember we've folded
11:08
it. We've cut the little cuts into it.
11:11
Now, it's time to roll it. Now, as you
11:13
roll it, it will try to ride up one
11:18
surface over the other. So, if you want
11:20
to, you can glue it closed, but just a
11:23
word of warning, you only want to glue
11:25
it closed along that open edge, the edge
11:28
with the fold. You don't want to be
11:29
gluing that or you'll end up with
11:31
nothing that looks like a center. It'll
11:33
just be like a block. So, if you do
11:35
decide to glue it, just do it just along
11:38
that edge. But, as you can see, I'm just
11:39
using my thumb to keep pushing it back
11:42
in and making sure it all lines up
11:45
perfectly. So, just keep rolling and
11:47
keep it nice and tight.
11:50
And that'll form this lovely center.
11:54
Just keep rolling. And obviously when
11:56
you get to the end, we're going to have
11:58
to glue it closed. And you can just push
12:01
the edges. Make sure it's all lined up
12:03
perfectly.
12:05
And then glue it closed.
12:09
Just hold it. Make sure it's glued
12:11
before you let go. And that's your
12:13
flower center all ready.
12:19
Oh, nearly stuck it down. So remember
12:22
that circle we cut out right at the
12:24
beginning? That's what we're going to
12:26
glue the flower down to. So, just make
12:28
sure you're completely happy, check your
12:31
flower center actually fits.
12:35
And if you're happy with it all, it's
12:37
time to glue. If you're not happy, maybe
12:40
you need to trim a bit more.
12:43
Maybe decide not to put the center in.
12:45
But just make sure you're happy before
12:47
you do the next step, which is cover
12:50
your circle in glue
12:53
and stick the petals to it.
12:57
And you have to move quite quickly when
13:00
you're using the hot melt glue and there
13:03
are no second chances. But it doesn't
13:05
matter if that circle isn't exactly in
13:07
the center. And then you're going to put
13:10
that center into the little hole that
13:12
you've got. Now, if that doesn't stick
13:15
down properly, which mine didn't,
13:17
because there's not really enough glue
13:19
to hold that down, you've got the chance
13:21
to glue it again, but what you want is
13:24
to make sure the gap's big enough for it
13:26
to go into. And then also, you can press
13:30
the edges out so that they spllay out of
13:32
the center to form a bit more detail for
13:36
that center. So, as you can see, I'm
13:38
just going to splod a load more glue and
13:40
glue that in. And just hold on to it.
13:43
make sure it sticks down properly.
13:45
It's worth just taking that time and
13:47
depending on your glue, you might be
13:48
holding it for a little while. Um, but
13:51
it's worth it because then you've got a
13:53
completed flower which you can then do
13:56
with whatever you want.
14:00
So, here's where I've put three
14:02
together, different sizes. They've all
14:04
got centers, and I think they look
14:06
lovely on that blue wall. Um, and here's
14:09
one with no center, which I promised
14:12
you.
14:13
And as you can see, just as gorgeous,
14:15
just a little bit different.
14:18
And then I've just positioned one on its
14:20
own. You really do only need one to make
14:23
an impact on a wall, but the more the
14:26
merrier.
#Crafts
#Crafts
#Home & Interior Decor