Up next in 10

How to Make a Heart Corner Bookmark Video
Oct 23, 2025

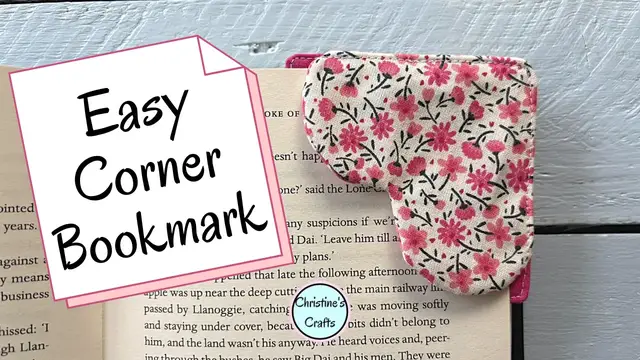
In this video, I will show you how to make a simple diy bookmark using beginners sewing techniques! This diy project will teach you how to create a heart corner bookmark. Great for anyone you love at any time of year but perfect for a reader at Valentine's Day!
Free Printable Template available here - https://christines-crafts.com/easy-to-sew-a-heart-corner-bookmark-with-free-template/
Show More Show Less View Video Transcript
0:00
In this video, you'll learn how to make one of these cute heart corner bookmarks
0:04
They really are just so sweet. At the end, I'll show you several different ones that I've done
0:08
so you can get some different ideas for different people, different holidays. But for now, let's get started
0:15
We're going to need some scrap fabric, some interfacing, and also the template
0:21
Now it's free and you can get it from my website, Christie's Crafts. There's a link on the description below and there's a link on the screen
0:27
but the square is about four inches if that gives you an idea. So you're interfacing whatever you've
0:34
got. I've used a medium weight but if you've only got a lightweight that'd be absolutely fine. And
0:39
then you want your fabric scraps. I'm using two different designs, one for the square and one for
0:45
the heart. So the first thing you're going to do is once you've got your templates you're going to
0:50
cut out two of your squares and two of your hearts. Now when you see your template you'll see it's a
0:57
little bit better than mine. It does say cut two in fabric and cut one in interfacing. But I was
1:04
doing this before I decided I needed a bit more information on it for you. So you can see I'm just
1:11
pinning them on. I've doubled over the fabric so that I get two. It doesn't matter. You can do them
1:16
completely separately, especially if you're dealing with scraps. What I would say is with your heart
1:21
if you want a certain part of your design, like I wanted one of the fairies in the middle of the
1:26
heart, you'll have to position it carefully so that you get what you want. Alternatively, of course
1:33
you could use plain fabric and then you could be embroidering a design on it or drawing on it with
1:39
fabric paints. Whatever you want to do, you can get creative. I'm just showing you the basics so
1:45
that you can get started. So you can see I've got my hearts, I've got my squares and I need the
1:50
interfacing square and the interfacing heart. Now we're only cutting out one from the interfacing
1:58
which is why I edited the template and you can see I'm using old scraps and I'm just using them up
2:06
You can even use small bits of interfacing and put several together to make the space
2:13
to make the shape that you need. It really doesn't matter. You can see, just get that
2:20
I'm trying to get rid of bits that are still attached. So, yeah, if you like my little pin cushion in the corner
2:29
there is a video on this channel showing you how to make one. Try and guess what it's made of
2:35
So I will put a link in the description below for that and on the screen if I remember
2:42
So I think we've got everything now to get started. We got our two squares of fabric our two hearts made of fabric and one square and one heart from interfacing So the first thing you need to do is get that interfacing onto one of the squares and one of the hearts
3:00
It doesn't matter which heart you choose or which square, but be very, very careful to make sure you get the glue onto the wrong side of your fabric
3:09
There'll be a really shiny side and that's the glue side. and then just apply a bit of heat. I always say have the heat low and then increase it until it
3:19
sticks. You don't want it so hot you end up with a mess on the bottom of your iron. I also use this
3:24
ironing pad and this iron just for crafts so that if I get any glue on them I don't get it onto my
3:30
clothes. So they're ready now for us to start assembling. So take your two hearts and put one
3:39
on top of the other and make sure the right sides are facing which means all we can see are the wrong
3:45
sides on the outside and you're going to pin around the outside. Now all you actually have to sew
3:51
is the curved edge and some distance along the straight edges and sometimes that's what I do
3:59
and sometimes I do what I'm going to do in this video which is sew it to make a proper heart
4:05
and we've got that pinned the wrong way around we'll just swap that it's entirely up to you but
4:11
you do need to sew all the curved bit and a little bit onto the straight now if you want to leave the
4:17
point at the other end not sewn you can do but if you're going to do it like I'm doing just make
4:23
sure you leave a big enough space to turn it out because I'm going to sew the point and round and
4:30
just leave a gap. So then whichever you're doing, it's over to the sewing machine
4:36
So you're going to do a little bit forward, reverse so that you definitely secure that seam
4:42
and then go forward. Now, because I'm going around the point, I will put the needle in
4:48
turn the heart and set off. And I'm going to go all the way up this side. Now, when you're on the
4:54
curved edges, and everybody's going to be doing this, take it really slowly and just slowly
5:02
turn the heart so that you get a nice curve. If you have to keep putting the needle in and
5:09
lifting the foot, you end up with a jerky edge and you want a nice smooth curve
5:14
And you're going to go right the way around the first curve of your heart until you get down to
5:21
the point, you can see you had to lift the foot there, but you just want to try and avoid it as
5:25
much as you can. Once you get to the point, you do want to put your needle in, lift your foot and
5:32
turn the heart so that you can go nice and tidy up round the other curve And you just keep going
5:46
I've got to say, I sped this up slightly, just for you. So you really do need to go very slowly
5:52
Now remember, we're leaving a space to turn out. So however you're doing this, you're going to put a little bit of a reverse
5:59
and then forward again, just to secure that end. and then cut your threads and we'll have a heart. Now before you think about turning it out
6:14
you want to snip all those curved edges. Now be very careful not to clip into your stitches
6:21
you don't want it all coming apart, but if you don't clip you won't get a very good curve when
6:26
you do turn it out. So just slowly and steadily clip and if you have sewn the point cut the point
6:34
off again not too close to your stitches and then whatever you've done you need to turn that heart
6:40
out and focus on those curved edges because we want them turning out making nice pretty curves
6:49
a nice heart shape now i recommend a chopstick absolutely perfect for this but i'm just using
6:55
the back of my scissors today be very careful if you're using scissors you don't want the point of
7:01
your scissors poking through your seam. So just take it steady and get that heart. And ideally at
7:08
this point fold in that little seam and press it. If you don't press it don't worry I haven't done
7:17
when I've made this one but ideally you do want to and get those seams done. So you can see I've
7:23
just gone back in to get it nice and flat. Then take one of your squares, it doesn't matter which
7:29
one and place that heart onto that square so that the corner of the square has got the point of the
7:36
heart in it. So as you can see if you haven't sewn those sides they'll just be there in that new seam
7:41
now. Then take your other square and place it on top with the right side down. So you're making a
7:47
sandwich so on the outside of this sandwich you've just got the wrong side of the squares
7:52
and do pin all the way around. You don't want anything to be able to move while you're sewing
7:59
it. Now I keep referring to the sewing machine. Obviously you can sew these by hand. It's just a
8:03
lot quicker on the machine. Throughout I've used about a quarter of an inch seam allowance and that
8:11
worked nicely. Obviously if you do it bigger you just can have a smaller bookmark at the end
8:16
and you can see I'm going to leave a space on that side where there is no heart
8:22
So just like before we going to do a bit of a reverse at the beginning Every corner pop your needle in lift the foot and turn so you get a good corner and just work your way all the way around So I hope you enjoying this and that you going to make yours
8:37
and if you are could you give it a thumbs up so it spreads to more people please and if you want
8:42
to see more of my tutorials you could subscribe to the channel and you'll get notified
8:48
So I'm coming round to that last side and I am just going a little way. Now you'll notice I've
8:56
sewn round all the corners so I get my nice tidy corners. I'm just leaving a gap on one side
9:04
Clip the corners off carefully. Don't let you catch any of your stitches. And if on any of the
9:11
sides you've got some extra bits or it's a little bit of a wide seam, you can trim it off
9:16
it'll just make it a better finish when you get there and then you've left that hole it's time to
9:23
turn it all through and this time you're turning quite a bit through that hole don't worry just
9:30
take your time and then you need to pull the heart so that it sits on the right side of your squares
9:37
you'll see if you've got a design on one or the other you just need to go the right way now I've
9:43
got a fairy in the middle on one side so I'm just making sure it goes on that side of the square
9:49
Again you want to poke those corners out. Now how well you poke them out, how good your corners are
9:57
really it's up to you. This is your bookmark. If you're happy with them then they're good enough
10:02
If you want to get really sharp corners you might have to spend a little bit of time on this
10:07
just to get them worked through. And you can see you're getting that bookmark
10:14
So fold those raw edges in and now we're going to pin
10:18
but we're not just going to pin the little bit that's open. We're going to pin all the way around the bookmark
10:25
You might need to spend a little bit of time just making sure it has turned properly
10:29
Again, a pressing would have done wonders here. And we're going to sew all the way around
10:36
and this is a double whammy. Not only will it close up the hole that you've left but you will
10:41
also get a lovely top stitch all the way around. Now I recommend your top stitch with a slightly
10:48
bigger stitch. I forgot to film it but you can see what I've done there. I've just done it near
10:54
to the edge. So I promised to show you some others I'd made. So you can see there's a nice Halloween
10:59
one there. There's a dark coloured one there perhaps for somebody who's not really into the
11:04
pinks that I've made and you can just use them on any of your books so I hope you're going to go
11:11
forth and make loads for whatever event you've got or as gifts and thank you for watching this video
#Crafts
#Fiber & Textile Arts