Up next in 10


Join me for 30 days of mixed media card making! In this video, learn how to make a nature themed card using leaves or flowers. This tutorial teaches you how to make a handmade card that anyone would love to receive using supplies you probably already have.
As an Amazon Associate I earn from qualifying purchases
--------------------------------------------
HOW TO ACCESS THE FREE PRINTABLES:
Simply visit my website at https://christines-crafts.com/enjoy-the-craft-gardening-resource-library/ and sign up to my regular newsletter.
You can unsubscribe at any time
--------------------------------------------
Resources you will need:
Card or card blank - https://amzlink.to/az0U0dahg7ZUO
Leaves or Flowers
Hammer - https://amzlink.to/az0SENKdxXBqV
Piece of scrap wood
Quality Paper such as watercolour paper - https://amzlink.to/az0x4TBQglDcZ
Washi tape or masking tape - https://amzlink.to/az0EOgLpxOo5t
Glue - https://amzlink.to/az0ab8UUcr2Ls
Sticky pads - https://amzlink.to/az0guIJcXnNwj
Show More Show Less View Video Transcript
0:00
Hi, and welcome to 30 mixed media cards
0:03
in 30 days. I hope you're joining me for
0:06
all of them, but if this is your first
0:08
one, please feel free to join us. You
0:09
can find all the others on my channel,
0:12
on the screen, in the description below.
0:13
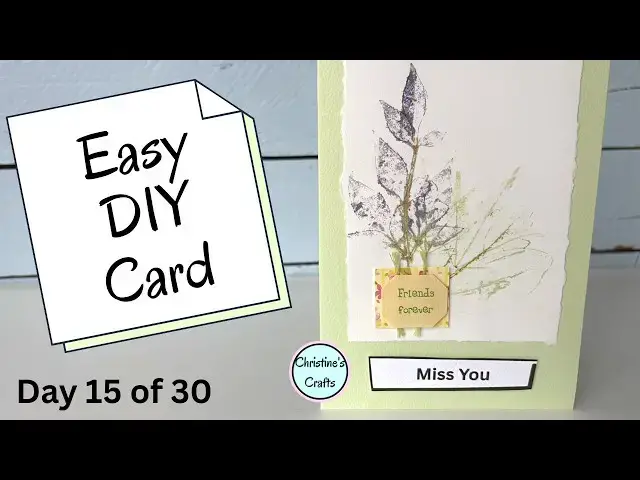
You know the score. Today, we're going
0:16
to make this card here. We're going to
0:18
use a technique called flower pounding,
0:20
or as you can see here, I've used
0:21
leaves. And let's get started. You're
0:25
going to need some card to actually act
0:26
as your card. So, you just need a piece
0:28
of card that you can fold in half. Now,
0:31
I'm making a standard 7 by 4 in card. It
0:35
doesn't matter what size you make. And
0:38
you'll see that mine's green just
0:39
because I want that effect. But you
0:40
could do it on white. But what does
0:42
matter is the paper that you're going to
0:44
do your pounding onto. And I'm using
0:48
some watercolor paper so that it's got a
0:50
bit more absorbency. And what you'll see
0:52
there is a piece of wood to hammer onto.
0:54
A little hammer. And it's ideal if
0:58
you've got a bigger piece of wood, but I
0:59
just haven't at the moment, so I'm going
1:01
to do it on there. And then you want
1:03
your flowers or your leaves. Oh, the
1:05
sun's come out to make sure we get no
1:07
nice continuity on this video. Oh, gone
1:10
again. We must be in the northwest of
1:12
England. That's about how long it lasts.
1:14
So, just get your flowers and your
1:16
leaves and arrange them how you want.
1:20
Um, you can consider any pattern you
1:22
like and you can break your leaves up,
1:24
break your flowers up, just use odd
1:25
petals.
1:27
This is the real creativity. You can do
1:31
exactly what you like. All I'm showing
1:33
you is the technique. But you can see I
1:36
don't mind if some of them overlap. It
1:38
really doesn't matter. I'm choosing
1:40
quite a natural arrangement by putting
1:42
them all with their stems in the same
1:45
corner, but you don't have to. In the
1:48
same way as I've used a red leaf and
1:50
some green leaves just to give that bit
1:53
of variety, that bit of extra color, you
1:56
could add flowers on as well. But once
1:58
you've got your arrangement, you want to
2:00
tape it in place. Now, be careful. We've
2:03
got to lift this tape. So, I'm using
2:05
washi tape because it peels off easily.
2:07
You could use masking tape like you use
2:09
for your decorating.
2:11
Just something that's going to peel off.
2:13
And you need as much tape as you
2:16
confidently think you can do this and
2:18
they'll all stay in place. So you can
2:21
see because of my design, I'm going up
2:24
that longer section as well.
2:27
And I really do think that'll hold it in
2:29
place. So then you want that design on
2:32
your piece of wood. Trust me, a hammer
2:34
can do a lot of damage to your table or
2:36
your desk. Don't ask me how I know. So
2:39
make sure you've got a piece of wood
2:41
under there to hammer onto. And I tend
2:43
to put a piece of kitchen paper, kitchen
2:46
roll, between my hammer and my leaves,
2:50
just because I don't want any of the
2:52
color coming up onto the hammer and then
2:54
me applying that to another part of the
2:56
page. That's all. And as you can see,
2:59
I'm pounding it. We're not talking great
3:02
big swinging the hammer above your head.
3:05
Just lots and lots of hammering. And
3:08
because I've got a small piece of wood,
3:09
I'll just keep moving it around. And
3:12
just go over and over and over because
3:14
what you're doing is forcing the liquid
3:17
out of your flower, your leaves, and
3:20
it's taking the color with it. And you
3:22
can check, has it gone or not, just by
3:25
peeling a little bit of tape back. Now,
3:28
I apologize for it jumping about a bit,
3:29
but as you can imagine, I'm hammering.
3:32
So, it is just making everything jump a
3:35
little bit, including the camera. So, I
3:38
apologize for that. But just keep
3:40
pounding away. I've sped this up. So,
3:44
don't be surprised if it takes you a
3:45
little while to get that color to
3:48
transfer. And this really varies by
3:51
flower and leaf. So, a little bit of
3:53
experimentation goes a long way here.
3:57
So, you see things rolling around on my
3:59
desk. Let's have a look. Oh, I'm still
4:02
not getting that green. You can see the
4:04
red's coming out really well, but some
4:06
of these green leaves are not so keen to
4:09
give up their color. So, just do them a
4:12
little bit more.
4:14
Let's have a look. If you're enjoying
4:17
this video, could you give me a thumbs
4:18
up below so it spreads to more people?
4:21
as I think a lot of people would enjoy
4:23
this and I think the beauty of it is how
4:25
creative you can be because it's your
4:27
own design every time.
4:30
Now that is coming out beautifully. So I
4:33
think I'm going to go for it. So I'm
4:35
going to peel all this tape off. But as
4:39
you can see I'm doing it very slowly and
4:41
very carefully. I don't want to damage
4:43
the front of my paper.
4:45
Now, as I said, I've used watercolor
4:47
paper and I ripped it to the size I
4:49
wanted, just so I got that nice rustic
4:51
edge. Again, you could have nice crisp
4:54
edges. Um, and it could be some sort of
4:56
blotting paper you use. Any sort of
4:58
paper that's got a little bit of uh heft
5:01
to it that can take the liquid a little
5:03
bit better. A fab copier paper didn't
5:05
really work very well when I tried this
5:07
before. Now, I'm not happy that that's
5:09
got quite enough on it. So, I'm just
5:12
going to add another leaf and go again.
5:14
And that's really important that this
5:15
isn't a onestep process. You can repeat
5:18
as many times as you like to end up with
5:21
the design you want. And if a leaf turns
5:24
out to be a little bit disappointing or
5:26
a flower, just do another one. Do
5:28
something different. Add to it. Just
5:31
keep going till you're happy. You can
5:33
see I'm just peeling back the edge of
5:34
that flower to make sure it has
5:38
imprinted. Yes, that's better.
5:42
Now, I'm happy with that. What you could
5:45
do is get a marker pen, a fine line, and
5:48
go over elements and highlight them. I
5:50
have done that before, but I'm happy
5:53
with mine as it is. I'm going very much
5:55
for that natural look. And I think
5:57
you'll see when I put it onto the green
5:59
card, the green in the design is picked
6:03
up in the green of the card. So, I'm
6:06
happy with that. And I'm just going to
6:08
stick it down flat. You could use
6:10
double-sided tape. You could use the
6:12
little sticky pads to raise it up. I'm
6:15
using my trusty glue stick and just
6:18
sticking it down flat. I'm going to get
6:21
the 3D effect using my greeting
6:25
and maybe some addition to this picture.
6:31
So, I'm just going to stick that not
6:32
putting it in the middle. I'm putting it
6:34
in the top section so that I can get
6:37
that greeting underneath. So, let's just
6:40
get that firmly down first.
6:46
So, I'm going with my greeting miss you
6:49
and I'm sticking it on with these little
6:51
sticky pads that I'm sure you've seen
6:53
before. And it just raises it up and
6:56
gives it a little bit of a stronger
6:58
effect. But if you haven't got them, you
7:01
can just stick it down flat. There's
7:02
nothing wrong with that at all. Equally,
7:05
you could take an ink pad and go around
7:07
the edge of this card to add a bit of
7:08
detail. I don't think I'm going to. I
7:11
don't think it needs it, but you could
7:12
do. So, let's get that greeting on.
7:18
I could stop there, but I'm wondering if
7:21
it's just lacking a little something.
7:22
So, I'm going to look in my supplies and
7:25
add a little card topper that I've got.
7:27
So, you could stick anything on here.
7:29
Now, you'll see it's got a little pad,
7:31
but it's it's an old supply. So, I'm
7:34
going to add some glue because the
7:35
little sticky pad has lost its back and
7:37
it's not sticky anymore. It's just been
7:39
sitting somewhere for far too long.
7:42
So, if you have elements like that, just
7:46
use glue. You don't need to throw them
7:47
away, reuse, and crack on. So, now I'm
7:52
happy with that card and I hope you've
7:53
enjoyed flower pounding and are going to
7:56
have a good go at it on your card. So,
8:00
enjoy.
#Online Media
#Visual Art & Design
#Crafts
#Crafts