Up next in 10



C# Corner - Community of Software and Data Developers
https://www.c-sharpcorner.com
Show More Show Less View Video Transcript
0:30
Hello everyone, good morning, good afternoon, good evening. As you can see I'm wearing a jacket
0:45
it's pretty cool here where I am right now. Firstly, thank you for joining C-Shop Connect
0:51
Global Meet. I think we were not able to connect for the last two months because of the pandemic
0:56
and stuff happening, especially in India. And I hope everyone of you are safe
1:01
Everyone is doing well. It's really bad in India. And we're all trying to support
1:06
I guess if you go to the Sishapana page, there is a donate button
1:11
Complete transparency, whatever money you're donating will be going towards the charity
1:17
So please like, and it doesn't matter who you're donating or who am I doing the charity
1:22
It can be anyone like, like anything around you. people, your people you're working with, people are required help
1:30
If they require help, just go towards that person. I think if you help someone, a couple of people, they might help someone in the future
1:38
And I think there's a very interesting thing. The thing is, like, for example, we don't trust people, okay
1:43
Or we will be like, no, this person is going to take my money and do something else with
1:49
that money. We don't realize that, okay, that guy takes your money, if he takes 100 rupees, for example
1:55
he might like take 5 rupees for his other maintenance cost but 95 still goes to something
2:01
and now there's so much transparency between the NGOs and between the people who are working
2:07
they just put in LHS equal to RHS it's like that, like whatever you give
2:12
it just goes to the person who requires it so just go ahead, donate
2:16
we don't ask you to donate like a million rupees just do a donation of some hundred, two hundred
2:23
a minimum burger price. Somebody might get a burger. Two people might get some small burgers
2:29
or packages instead of that. It's very important now to be with each other
2:34
especially we as humans, we need to be really together. That will help us to grow, right
2:41
So let's go with the show. My son, Manfred, I'm from Philadelphia, Pennsylvania
2:47
C Sharp Corner MVP. Logging to C Sharp Corner to know more
2:51
What do we do? What are the learning aspects for all of you here
2:56
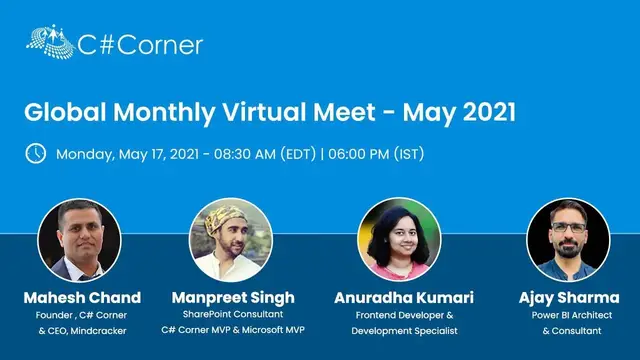
So today we have a couple of speakers with us, Anuranda Kumari and Ajay Sharma
3:01
Ajay Sharma will be the one starting with us on sensitivity labels in Power BI
3:06
Hey, Ajay. How are you, Manfred? Let me switch on my camera
3:13
I'm looking at here. I have two monitors, so please don't mind if you look me
3:19
I'm looking somewhere else. Thank you very much. Thank you so much for inviting me
3:25
I think it's my second or third time with you. And it's always been a pleasure being here
3:32
Thank you, Ajay. And you are working hard with your presentation and you bring out something new technology every time
3:38
So why not? Let's have you here. Thank you so much. So I always try to bring something new
3:45
something related to the Power BI. And I know that a lot of guys are working on this
3:51
this technology and it's booming a lot. So I just tried to teach them by my YouTube channel
3:57
I receive a lot of queries about different topics and I always feel, yes, I'm there to help you guys
4:04
And recently I completed one D800 series like certification for Power BI
4:09
and I received all of them response. So many guys completed that
4:13
and you know that nothing better than that can be with you
4:17
if somebody is learning from you. So I hope so. Today's topic is going to enlighten you a lot in your day-to-day life
4:24
and you can secure your data. All right, Ajit, and the stage is all yours
4:30
Okay, great. So, guys, I'm going to switch off my camera because of the Internet issue
4:37
Otherwise, bandwidth is going to be a lot over here. So, I apologize for that in advance
4:43
So, let me start sharing my screen with you. Okay. Here we go, my screen one
4:56
So, guys, let me know once you can see my screen. Okay, here it is
5:03
So, guys, let's start it. Today's topic is sensitivity levels in Power BI
5:10
In Power BI, we have data classification and data protection matrices. So we always try to secure and save our data
5:19
and there are multiple ways to do that, and sensitivity label is one of them
5:24
Apart from the sensitivity label, there are a couple of other methods as well
5:29
like enforcing the government's policies even when public content is exported, or monitor and protect user activity
5:37
on sensitivity data in real time. And one more, that is empowering security administrator
5:44
who use data protection reports and security investigation capabilities with Microsoft Cloud App Security to enhance organizational oversight
5:53
Maybe in my upcoming videos or whenever I'm coming over here on this platform
6:01
I can talk about the other aspects as well. But today's topic is completely on sensitivity levels
6:07
Let's get started. A brief about myself. Well, I have more than 10 years of work experience
6:16
I have completed some certifications. I am the founder of BI Consulting Pro, which is my channel
6:22
and it's completely free, of course. Nothing you need to charge, but I assure you
6:27
if you are going to go over there, you can learn a lot of new things in Power BI
6:31
In fact, if you are looking for some crash course or something, so please do check that out
6:36
and I hope so that's going to be helpful for you. My specialties are in Power BI, MSBI stack
6:43
then Azure, Dex, et cetera. That's just brief about me. If you would like to know more about me, you can either go to my channel or you can connect with me on my LinkedIn
6:54
So I'll provide you my link as well later. Now, for today's topic, I will try to keep it brief
7:01
I won't go into too much detail because sensitivity levels are kind of a big topic if we are going to talk about that
7:08
But I'm sure after today's session, you would be very much clear about the sensitivity levels, how to create them, how to apply them, what are these
7:17
and why they are going to be helpful for you. In today's video, we are going to talk about first
7:24
what are sensitivity labels in Power BI Then we are going to discuss about the licensing requirements for sensitivity labels After that we will go by enabling
7:35
sensitivity labels in Power BI. Then we are going to discuss about how to
7:41
create a sensitivity label in Power BI. This one is going to be very important
7:46
If you are Office 365 admin, and then you can create yourself too
7:52
But even if you are not able to create it, you will at least get to know how your admin is going to create them into your organization or
8:00
even for your personal use if you want to try them you can do that and lastly we are going to
8:06
discuss how to apply sensitivity labels in power bi so these are today's agenda and we are going
8:13
to discuss each of them step by step now the very first topic comes what are the sensitivity labels
8:22
in Power BI. Well, guys, Microsoft Information Protection Sensitivity Labels provides a simple way for your users
8:31
to classify critical content in Power BI without compromising productivity or the ability
8:37
to collaborate. We all know that data is the one thing that we need to secure at any cost
8:44
If your data is not secure, that means you are going to be in a big problem
8:51
or you can say you're going to loss your whole business. So that should be the utmost priority for any organization
8:58
and definitely it is. But still, we need to know how to secure our data
9:02
So sensitivity labels is one of the methods under the data protection in Power BI
9:08
So we are going to learn about it, how it's going to be useful for you and what you can do
9:14
Sensitivity labels can be applied on your data set, dashboards, and data flows
9:19
but we are going to see eventually how to do that. Plus, you can also use
9:24
those sensitivity labels inside your Power BI desktop application. I'm sure you guys are working on Power BI
9:30
and you have quite extensive knowledge. Maybe this is going to be a refreshment for you
9:34
but for those who are new over here or who are new in Power BI
9:39
it's going to be a game changer for them. When data is exported from Power BI to Excel file
9:46
PowerPoint, or PDF file, Power BI automatically applies the sensitivity label on the exported file and protects it according to the labels
9:55
file encryption settings. This way, your sensitivity data remains protected no matter where it is
10:02
So no unauthorized user can use your file or can get the data from that file
10:08
unless until they have the access for that, or you are going to authorize them
10:12
So that's how they're going to protect your data. As I just explained to you where we can apply them
10:20
so we can apply those sensitivity labels for reports, dashboards, data flows
10:26
Plus, now we have in preview feature, we can apply directly sensitivity labels since the beginning when we are going to
10:34
start building or creating our reports in the Power BI desktop. That's how we can use them and we can start building our reports on the top of that
10:45
so that from the beginning we are making sure that we are securing our data
10:52
Now, there are a couple of things that you should always note
10:55
The very first is that in order for the data protection metrics report to be successfully generated
11:02
there is a data protection metrics. Basically, I'm going to come to that part later
11:07
But you should also remember that in order to generate that metrics, basically, where you can see
11:12
what are the sensitivity labels that are applicable for your organization or the admin has created
11:18
Those information protection must be enabled into your tenant. In order to access the Cloud App security information
11:26
this is another way to apply the sensitivity labels or the data protection method
11:32
Your organization must have the appropriate Cloud App security license. For the sensitivity labels
11:39
they are only going to work once you have either created them and
11:43
or you have enabled them plus you have certain requirements that's gonna meet over there
11:50
That means there are certain licensing requirements and others which I'm just gonna discuss with you
11:57
So question comes, how do they work in Power BI? So there are basically three things
12:04
you should remember in this case. First is customizable, then clear text and persistent
12:09
So these are the three different steps that how they work. When you apply a sensitivity label to a Power BI dashboard report, data sets, or data flows
12:19
it's similar to apply a tag on that resource that has the following benefits
12:23
That means it should be customizable, it should be easy to understand, and it should be purpose-time
12:29
Customizable means you can create categories for different labels of sensitivity content in your organization
12:35
such as personal, public, general, confidential, or highly confidential, so that everyone can get to know, okay, whether we can share this data to public or like your
12:46
management data, or if it's finance data that would be highly confidential, you cannot share
12:51
with unauthorized users. Now, second one is the clear text. Since the label isn't clear text
12:58
that means in plain English, it's easy for users to understand how to treat the content
13:04
according to a sensitivity label guideline. So you can send the description, the tooltip, etc. into this one
13:12
While we are going to create a sensitivity label, there you would get to know how you can give a particular description
13:18
to your sensitivity label as well as its name. So it's very easy to understand for everyone
13:24
even for the business users in a plain layman language. Lastly, persistent
13:29
If we talk about the persistent, After sensitivity level has been applied to content
13:35
it accompanies that content when it exported to either Excel, PowerPoint or PDF files
13:42
So basically whenever you are going to yze or open those particular files
13:47
it's going to always be there after once you're going to apply. If you don't want to apply, then again
13:52
you have to do certain settings into your PowerGate service or PowerGate desktop and then only you can remove it
13:58
That's how it's going to work like simple, customizable, clear text, and persistent
14:05
Now, we're going to talk about some other important considerations while you are working on the sensitivity labels in Power BI
14:15
Always make sure that sensitivity labels does not affect access to the content within Power BI
14:21
That means, suppose you are logging in on the Power BI service
14:25
and on Power BI service, you are viewing a report or something. There, the access is not going to
14:31
restrict by the sensitivity label. These are basically when you are trying to get
14:35
the data out of Power BI service or you are going to send your .pbx file to someone else
14:41
Then only these are going to work. Otherwise, if you want to restrict the data access to
14:45
someone, then you have to apply either RLS or OLS. RLS is your role level security and OLS is your object level security So those kinds of securities you need to apply to your data if you want to restrict that kind of access like somebody logging into Power BI service and they want to view certain data
15:09
and it should appear according to their role or the level of access that we have granted
15:14
for them. While the labels are visible, any associated encryption settings, that means the settings
15:23
that you configured in Microsoft 365 Security Center or the Microsoft 365 Compliance Center are not applied
15:32
They are applied only to the data that is exported as I just mentioned to you
15:38
So sensitivity labels and file encryptions are not applied to any CSV file
15:43
So please try to disable the export in CSV file if you want to use those sensitivity labels
15:50
Maybe in future it's gonna come because a lot of ideas are coming on the Microsoft Power BI community
15:57
People want that to happen in CSV as well. Most of people prefer to work with the CSV file
16:02
So as of now, the day we are discussing this, still it's not applicable for CSV files
16:09
So please always make sure that you stick with this point and try to disable or ask your admin to disable the export in CSV
16:18
Other than that, like your PowerPoint, your PDF, or your excel file they are gonna work very well so try to remember this time i hope so this is
16:27
gonna work for you okay now we are gonna work on the licensing and requirements it's very important
16:36
so as we know that if we are working on power bay we need the power bay pro license or premium
16:42
per user or premium if we are working in an organization but in order to apply the sensitivity
16:48
label or to create them, we also need a licensing requirement. So let's see what are the licensing and other requirements
16:54
that we are going to use for sensitivity labels. OK, the very first is that you need Azure Information
17:05
Protection Premium P1 or Premium P2 license. So if you guys need more information about that
17:12
either you can directly Google or I can also provide you the link in the description later so that you can go to those links
17:18
and can see what is premium P1 or P2 license, but this is what it takes
17:23
So generally, it's around like for me, I'm in Singapore. It's going to cost me around two to three bucks per month
17:31
So that's going to be more than enough, but definitely there are other tiers as well
17:36
that you can go for the upper versions. Depends on your requirement. And secondly, you must have a Power BI Pro or premium per user license
17:45
So this is much for that. Lastly, before enabling sensitivity label on your tenant
17:51
make sure that sensitivity labels have been defined and published for relevant users and groups
17:57
I'm going to show you how we are going to create and going to publish them unless until you want to create
18:03
them into your 365 compliance center, they are not going to appear automatically
18:08
The global admin or the 365 admin, they need to create them and enable them as well as
18:16
publish them. Then only you can apply those sensitivity labels into your Power BI report
18:20
dashboard, data flows, etc. Now question comes how to create sensitivity labels in Power BI
18:29
For that I need to give you a demo and I hope so that demo is gonna be
18:34
easy to understand and if you guys have any questions you can ask me. So I'm gonna go on my
18:41
Let me see where is my window. Okay. So I'm using my virtual machine over here just to use this Power BI desktop over here
18:54
And what we are going to do now, we are going to create first the sensitivity labels
19:01
And those you can create only in our 365 Compliance Center. And how you can access that
19:07
access that suppose you have the license of Office 365, and you have all the applicable permissions that you can create them
19:18
Come to this Power BI service account over here, and you will see view account
19:23
Either you can go from there or you can directly login on Microsoft 365 admin
19:29
I'm going to show you from here itself because it's going to be quite easy
19:33
Once you will click on this, I'm sorry yes so once you're gonna click on this you will see something like this
19:51
so what you can do you can click on this uh your left hand side top corner and here is the admin
19:58
so click over here now you will see there's a billing so first of all as i mentioned to you previously you should
20:13
have this azure p1 or p2 for the sensitivity labels so you can purchase it from here so you
20:20
will go to the purchase service and here you can search it so here i'll just say azure
20:26
and here you see this Azure Information Protection P1. So this is what I have, and you can see it's just saying $2 per month
20:37
So it's in USD $2 per month. So it depends on your region or the country
20:42
You can see how much it's going to cost you. Otherwise, there are two more
20:47
Here's Azure Active Directory Premium P2 and this one. So you can see which one is best for you
20:52
But for this one, it's going to work, and it you can see over here it's saying you own this because i have already this license and that's
21:00
why i'm working on that otherwise if you need some other licenses as well like powerbear or something
21:05
you can search from here and you can get your licenses over here so you will get a lot of
21:13
different items over here so you can choose but let's move forward this is not the topic that we
21:19
are going to discuss over here what we are going to do over here there is a button over there or
21:24
tab you can say which is saying show all click on this on your left hand side panel and you have to
21:30
come down so generally under security and compliance both are the places where you can create your
21:37
sensitivity level but i don't have that kind of plan that i can go with the compliance so what i
21:44
can do i can come under security i'll i'm gonna click over here as soon as you will click over
21:51
here, it's going to open a new window. Once you are here, just wait for some time
21:57
You can see now I'm in Office 365 Security and Compliance. You will get a lot of information and documentation here
22:05
If you would like to read, please do and go ahead. Now what I'm going to do, I'll come under classification
22:12
and here you can see retention levels and sensitivity levels. What we are going to do over here
22:17
we are going to create a sensitivity level. So I'm going to click on this one
22:23
It going to show me all my sensitivity labels that I have created so far So you can see any user highly confidential confidential XYZ PUZ something And if I don want anyone I want to delete it
22:37
So I can come here. I see this XYZ. I can delete it over here
22:43
Or if you want to edit it, you can edit. You want to publish it, you can do the same
22:47
So let me just edit it. So now I have these sensitivity labels
23:02
What I'm going to do, I'm going to create a fresh one. So I'm going to say create a sensitivity label
23:08
And here, as I mentioned to you, it's customizable. You can customize it and it's clear text
23:14
So you can easily mention the name or the tag that you want to
23:18
It's asking me enter a friendly name. Over here I'm going to say C-sharp corner, let's see
23:27
And display name, that also you can say the same or different depends on your requirement
23:33
It's just a demo, so it's not going to matter much for me. Over here we have to provide the description for the user
23:39
Suppose anybody is logging or using it and then they find, okay, there's a sensitivity
23:44
label, they should know what it's saying or what is the meaning of that
23:49
So over here, I'm gonna say highly confidential. Please don't share data outside your organization
24:12
So let me see this one. Now you can also provide over here
24:17
description for admin so if admin is there you have created the sensitivity label so you can
24:24
mention them for financial data that's it that's all you need to do so it's up to you what you're going to provide over here
24:37
click next you can apply files and emails and as you preview asset if you don't want to you
24:43
You can not, I don't have access for this one groups and sites. So I'm not going to do that
24:48
And it's clearly not highlighted as well. So I cannot touch it
24:52
Now, next here you can make it. You want it to encrypt files and emails
24:57
and mark the content file. So I'm going to go with the first encryption
25:03
And here is asking me, assign permissions now or let users decide
25:07
So I'm going to say assign permissions now. Second one is a user access to content expires
25:15
So when it should get expired, you can say a specific day, the number of days or never
25:21
So I'm gonna say a number of days after and here we can provide up to 100 days
25:25
So I'm gonna say 90 days. Now, last one is over here, allow offline access
25:31
So somebody is working offline. So are you gonna allow them access or not
25:35
I'll say never. And lastly, what we are gonna do over here
25:40
assign permissions to a specific users and group. So of course, whenever you are creating any sensitivity label
25:46
you need to assign those to a particular group or to the whole organization
25:50
That you can do over here. Click on this one, and it's going to ask you
25:54
So you can say add users or groups over here. And click here, and I'll select all
26:00
These are the different accounts that I have created. I'm going to say all
26:04
But if you want to do some domains as well, you can just click over here
26:08
you can select mentioning like I say bi consulting pro dot com something like that so you can add it
26:17
over here too now click save and click next now it asks you auto labeling for files and emails
26:28
whether you want automatically label it whenever you are applying a sensitivity label or there or
26:33
not so i can say yes but it's again depends on you whether you want it or not so these are the
26:40
simple descriptions or simple rules that you can define over here so now it's saying when content
26:46
matches these conditions so over here you can mention when it should do so apply automatically
26:53
recommend that users apply the label you can also kind of add the conditions like passport number or
27:02
something in your country like that so if you would like to you can do that but i'm not gonna
27:07
go over there i'm just gonna create a simple one and let's click next groups and sites click next
27:16
this is gonna be your complete description auto enabling group settings site settings name etc
27:22
and create the label just wait for some time it's submitting it's going to take a while maybe one minute or it's
27:35
done now if you would like to publish this one you have to click over here and then there are
27:43
certain other links as well if you would like to do that but we are going to work over here
27:47
on the publish this label so click on this and here you will see choose sensitivity labels to
27:54
publish now we have to click on it choose sensitivity labels all the sensitivity labels
27:58
are gonna appear here so we just created this one she corner one so let's do this and now we have
28:08
to click next here again the user groups that you would like to i have included all
28:15
Now this is the most important one which is saying your policy. So you should know which one you are
28:22
going to apply this label to. Apply this label by default to documents and email. It's in none. I'll
28:27
say this one because this is the one which we have selected this label and here you can select these
28:33
options according to your own requirement. I'm going to select this users must provide justification
28:38
to remove a label or lower classification level requires the users to apply close on this one and
28:45
provide users with the link so just select this and here you can provide a link where they can go and
28:51
see which label when to apply or what are the different conditions are there so let's remove
28:56
this as of now here you can provide the name and description of the policy again i'm gonna say
29:03
a sharp c label policy and here i'm just going to say xyz next you need to review this if you are okay just submit
29:25
so this is how you can create a sensitivity label just click done and here you can see
29:32
It has been created with all the five IEAs, five emails and the different things
29:39
Now it's saying something over here, your organization has not turned on the ability
29:44
to process content in offline, office online files that have encrypted sensitivity labels applied and are stored
29:52
in OneDrive and SharePoint. You can turn on here, but note that additional
29:56
configuration is required for multi-geo government. So it's a new one. feature provided by the Microsoft
30:02
If you would like to go with that, you can go. Right now, we don't really need it
30:06
so we are not going to use it. Now we're going to go back over here in my Power BI service
30:13
Let me refresh my browser. Generally, it takes up to 15 minutes
30:17
but let's see if we are doing it non-peak hours, so probably it's going to be there
30:24
Let me go to my demo workspace now. Let me take you first on this PPT where we were
30:32
We just created the sensitivity label. Now what we are going to do
30:37
the second task is how to enable sensitivity labels in Power BI
30:41
Right now, we just have sensitivity level. We didn't enable anything into Power BI admin portal so that we can apply
30:50
Let's check how to do that. So again, we have to go back into my window where I have
30:58
So we can go to Parve Admin Portal from this gear icon
31:03
So click on this Admin Portal. And here you will find this tenant settings on your left hand side panel
31:10
So it's I think fifth number from the top. Come over here and you have to come under Information Protection
31:17
Under Information Protection, you have different options. where it's saying the very first allow users to apply sensitivity labels for power b content
31:26
you have to enable it if not so i have already enabled it so it's working but there are certain
31:33
other settings as well like for the entire organization or specific security group so you
31:38
can do that suppose you want to only apply for one or two groups this uh sensitivity level you want
31:43
them to apply this and you don't want the entire organization to work on this so that's also
31:48
option over here and if you want to exempt someone from that group that's one also you can apply over
31:54
here but right now i'm not going to touch it i'm just going to cancel this it's already there
32:00
second option over here is apply sensitivity label from data source to their data in power
32:06
via which is in preview it's a new feature if you would like to go with that you can go that just
32:11
enable it and here say apply so it it's going to take around 15 minutes again so it's going to be
32:17
there. Now that's the only thing which we have to do, but if you would like to check automatically
32:22
apply sensitivity level to time-scene content and other things, it's up to you. Right now it's not
32:27
gonna bother us into our today's demo which we are gonna do over here. I'm gonna come here into
32:34
my demo and there are the different files over here. These are the different Power BI reports and
32:40
dashboards that I've created so far. You can see the name and blah blah blah like type on a
32:46
refresh next web press endorsement where you can see it's certified or not maybe i can come with
32:52
another session where i can um lecture about what are the different endorsements methods how you can
32:59
make it certified what is the golden data sets and other things but let's focus this on sensitivity
33:05
label so here you see there are the different sensitivity labels apply like confidential
33:12
or you can say highly confidential, any user like public, anyone can access this highly confidential
33:18
What I'm going to do, I'm going to apply a newly created sensitivity label on this RLS versus OLS
33:25
So right now, what we have done so far, we have just enabled the sensitivity label and we have created
33:33
Now this is the part where we are going to apply sensitivity label
33:37
The same thing I'm going to do right now. Let me show you how to do that
33:42
So, whenever you see like your report data set or data flows, you will find these three
33:52
dots over here. Now click on this, go to the settings. And once you will go to the settings, you will see there's a panel on your right hand
34:01
side where you see the endorsement, persistent filters, and go down. And once you will go down, you will see this sensitivity label over here
34:12
Right now, this one has nothing, but we can apply. So you can see that this new sensitivity label that we created is there
34:20
It's tooltip is also appearing, highly confidential. Please do not share data outside your organization
34:27
Click on this, apply and save it. Now you can see this sensitivity label has been applied over here
34:35
In fact, once you hover on this I icon information, you will get description about it
34:40
which we provided while creating the sensitivity level. So till then, we have applied our sensitivity level
34:49
We have created, we have also enabling all the permissions that we require in Power BI service
34:57
Now, what I'm going to do, I'm going to see how does it
35:01
work when I'm trying to get the content out of this file
35:05
So go there, yze in Excel. So it's the simplest way to be honest to do that
35:11
But if you are exporting your PPT or PDF, etc, then also it's one of our except CSV
35:19
So yze in Excel, it's gonna download a file. Click on this one
35:25
But over here, you should remember that in only if you're in a kind of login
35:30
with the different email address, then you are going to get some kind of login window
35:39
where you have to enter your username and password. But since I'm the admin I have created
35:44
and my Excel file is also logged in over there, so it's not going to affect it
35:49
So here it's saying protected view. Be careful from the internet. Can scan virus
35:54
Just say enable it. So now it's a security warning over here
36:00
Enable content. and this model is gonna appear here because I am already logged in
36:11
I'll show you one more file, let's get login. So now you can see I have my data model
36:16
Now what I'm gonna do, I'm gonna show you one more file where I created the highly confidential one
36:22
You can see this one and it's a gateway testing report. So let's take this one too
36:28
It's gonna give you all the descriptions and everything. Double click on this
36:33
Let it get open. So over here, you can see your sensitivity label over here is working
36:42
It's saying highly confidential. Confidential data, please do not share with any unauthorized user
36:48
So we have to look at the permission over here. Since I'm the admin, I'm the author of this, so I have all the permissions and once you
36:56
will click, you will see all these. But if you are not, like any other user outside your organization or someone is opening this
37:02
file it's gonna ask them to login your user id and password and only then you can do it but since you
37:09
can see i have all the permissions so i'll just click ok i'm gonna say enable editing and say
37:16
enable content i don't need to see permission again so it's gonna take again a while and you
37:21
will see your data set or your all the data over here which you can drag and drop and work on this power pivot so it there you can bring you can do the things you want so let say this one
37:41
your currency name and let's say some of the fact sales amount
37:53
let's say text amount only okay sales amount
38:05
and here you go the field are moving cannot replace in that area i'm not
38:10
i think so it should be in this area for sure in the values field but let's forget it that's
38:17
not even the focus for today but moral of the story now you have the your data set you can access
38:23
the data you can work on it but if you are an unauthorized user you cannot work on it at all
38:29
so that's how it is now look let's go back to this one uh file so we have seen how we have
38:37
applied the sensitivity labels and how it's working now let's talk about the protection
38:43
matrix. So protection matrix is another way to have a look what kind of reports, dashboard, and
38:50
data flows are using, what kind of sensitivity labels they are using. So in order to access this
38:56
one I'm gonna show you in a while. So you can see on the screenshot as well if you would like to but
39:03
I'm gonna show you in my portal itself. Let me go back in my portal here. Let's come here
39:13
and we are here. So you have to again go to the admin portal
39:20
click on this gearing icon, then admin portal. And here you will see protection metrics
39:26
If it's taking a bit of time, just understand that you are coming and there's no cache memory
39:30
So it can take a bit of the time. And here, if your organization has cloud app security
39:37
or license already, you can go and check that. But if I click, I don't have
39:41
So it's gonna say you don't have any license. So it's not gonna work
39:46
It's gonna ask you to purchase, let it be. So here you will see your sensitivity labels
39:53
in your organization today, dashboards. Then you have reports, data flows and data sets
39:59
So on data sets, I have total three data sets and how much percentage is there
40:04
So it's gonna say sensitivity none. Over here, you will say sensitivity is highly confidential
40:10
You can see last 30 days or last 90 days as well
40:14
So all the information you will get it over here. Basically, it's gonna give you a dashboard
40:18
where you can see, okay, what are the different sensitivity levels are there
40:23
Like you can see on this legend, any user confidential, highly confidential or none
40:30
So that's how you can get it. Okay, let's move forward. Now, you should note, while working on this, when a new report and dashboards are created
40:45
in the Power BI service, they automatically inherit the sensitivity label previously applied
40:51
on parent data set of reports. But that means this inheritance, which is in preview right now
40:59
So whenever you created a dataset previously, suppose it's your golden dataset, which you
41:04
you are going to use for other reports to create. And that has already a sensitivity label
41:08
So whenever you are going to create a new report on the top of that, so it's going to inherit the same
41:13
And same applies for the reports. You can embed Power BI reports, dashboards, and visuals
41:19
in business applications, such as Microsoft Teams and SharePoint, or in an organization's website
41:26
When you embed as visual report or dashboard that has a sensitivity label applied to it
41:32
The sensitivity label will be visible in the embedded view as well
41:37
And the label and its protection will persist when data is exported to Excel
41:41
So in case of embedded as well, if you are already applied it
41:46
it's going to work same as it's going to work on your Power BI service
41:51
Thirdly, sensitivity labels are only supported for tenants in global public clouds
41:56
It's not going to applicable on the private or hybrid cloud. So they are the different cloud services
42:02
if you are aware about. And they are not supported for the 10-inch cloud
42:07
such as your national cloud, like US has its own national cloud
42:11
and other countries as well have, but they use them for their different purposes
42:16
Sensitivity labels can be viewed on reports and dashboards in the Power BI mobile apps
42:21
So now once you will log in on your Power BI mobile app, you will see there are the sensitivity labels
42:26
you can see in front of your reports or dashboards that you've created. And that icon will indicate to you whether it's highly confidential, public, or internal use
42:35
So that's how you can get all those information over there. So, guys, that's it for today
42:42
I have for you, I'll check your questions. And with that, I'll say thank you so much
42:50
And if you would like to connect with me, YouTube channel, please, this is the address
42:55
And this is a website where you can go and put your queries as well
43:00
So I'll welcome you all the questions now you can ask me. Hi, thanks man. As always a wonderful topic about sensitive labels. I just had a question before we go
43:15
Labels when you talk about does it label out PHI data also
43:22
I'm sorry, I didn't get your voice. I'm sorry. Does it label the PHI data in any way? For example, the information which I don't want
43:33
it to be public, can it just label and align them? Okay, so basically whatever data we have, and if we have created the sensitive labels
43:48
already by the global admin into your company or organization, then definitely we can label
43:53
them. So it's not going to depend on what kind of data you have. It depends on where you are
43:59
applying that sensitivity label, whether you are applying on your data flow or, I would say
44:03
data sets or the reports. So that's the moral point to concern rather than the data classification
44:09
Data classification, that's why we are applying these sensitivity labels over there for those
44:14
data classification so that no one can use that kind of sensitive data. But yes, as I mentioned
44:21
in the you know beginning if you want to um login if your user is talking in the power base service
44:27
where they are viewing your data or like embedded and you want to restrict them to view certain data
44:32
then you have to work on the rls or ols not on the sensitive data it's gonna work only once you're
44:38
getting out of the debt uh out of the power base service that data or in another words when you are
44:45
going to share your file with someone. Like suppose you downloaded yze in Excel and now you want to share with some other user
44:54
Or in other words let say another example is there It a preview feature in Power BI Xcode but you created a report and generally it happens I seen in organization people even share their PowerGate Xcode file
45:06
like .pbx file to other users, and they don't want unauthorized users to use it
45:12
That's the very first concern of us whenever we are sharing any code or something that
45:17
nobody else can see who are not authorized to look at into this one
45:22
In that case, they are going to be helpful. All right. Okay. Yeah, that's a good one. So I don't see any questions here in the chat
45:31
I think people are well satisfied with what you presented. Cool. So feel free to touch with me guys. You can contact me as I mentioned you on this
45:40
website or my YouTube channel, or even you can contact me through if you would like to
45:45
So I'm always available to resolve your queries. And once again, thank you so much for having
45:51
me here it's not just this presentation you can connect with me at any point of time
45:56
thank you thank you so much for having coming up here and presenting it's really really amazing
46:01
thank you thank you so much all right everyone uh we had ajay with us and now we will be being
46:09
joined by anuradha kumari who will be talking about decoding web accessibility to auditing so
46:17
So hi, Anandam. Hey, hi, Manthit. And hi, everyone. Thanks a lot for having me here today
46:25
So how are you? Thank you for joining. I'm doing well. How about you? Yeah, I'm doing good
46:31
And I hope everyone is doing good as well. Yeah, let's hope for everyone now
46:36
So Anandam, your stage is all yours. Okay, so I will try to share my screen
46:42
Let me know once it's visible. Anuradha Kumari, MD, Okay, awesome
46:58
So yes, hi everyone. My name is Anuradha Kumari and today I will be presenting on the topic, Decoding Web Accessibility
47:06
Through Audit. Okay. So a little bit of introduction about myself. I'm working as a development specialist at MediaOcean
47:16
Pune, India. And I'm also a media developer expert with Cloudinary. I'm an accessibility advocate
47:24
I really love talking about accessibility. If you would like, you can connect with me on LinkedIn
47:29
or Twitter. I have provided the IDs in the slides itself. So the topics which we are going to cover today
47:37
So we will first start with introduction to accessibility. we will see what accessibility is, what is importance
47:44
And then we will see what are the different ways and tips to audit accessibility for our applications
47:52
So let's get started. Accessibility or it also has a neuronym called A11Y
47:59
which is like A and Y and 11 means the number of letters
48:03
between the letter A and letter Y. So we will use it interchangeably, accessibility or alley
48:13
So it means that making the resources and services usable by everyone
48:18
regardless of their disability, ability, or the circumstances they are in. So why should we care about accessibility, right
48:28
So we create applications, websites, we create this for everyone. So why are we talking about accessibility in particular
48:34
this is because we build for the users or we build because we want users to use our websites
48:41
products applications right so and when we build for them we really can't know at all times that
48:49
what our users are going through or what are the different ways they are going to use our
48:54
websites or applications in so there are different assistive technologies so like
49:00
there is a screen reader, there is a braille reader. So there are these different types of
49:05
technologies which help disabled people to navigate through the web and different things
49:12
So they could be using different types of technology and devices to use our websites
49:16
and application. So we need to make sure that whatever we are creating, that is being accessible
49:23
to those technologies as well, so that the users are able to understand and navigate through our
49:29
websites properly. And the most important thing, so we need to care about accessibility is because
49:36
we are the one who are making the web inaccessible. So when web was created, it was accessible by
49:43
default. But as it evolved, we did not pay attention to all the guidelines and all the
49:49
proper ways in which we should build a websites and applications. And hence, we are leading to
49:54
creation of a very inaccessible web. So it is our responsibility to make web accessible
50:01
So as per WHO, World Health Organization, 15% of world population and that computes to around 1
50:08
billion people around the world. So they live with some form of disability. It's a huge number
50:14
and those people, they also need to access the web just like we do, right? So there are different
50:22
types of disabilities uh they are categorized into like visual uh when you have some disabilities
50:30
with visual thing like total blind or color blind partial blind or some some issues with your sight
50:37
right then auditory motor uh disabilities cognitive disabilities people uh some people might be
50:44
dyslexic right you would have heard the term so there are different types of neurological disorders
50:49
which users could be going through. Then when we talk about accessibility, it does mean that
50:57
we are trying to build our websites and applications for all of the people who are
51:03
disabled. So we want to make it accessible to disabled people and beyond. So accessibility
51:09
covers disabilities and it also covers more scenarios than that. Like the user might be
51:16
having some technical issues so they might be accessing our website on a very slow connection
51:21
so does it really work for them as well or they might be using a different device size like mobiles
51:28
or ipad so is our website or application is it responsive enough that they can understand those
51:35
things on those smaller devices as well then there could be different situations right so
51:41
So let's say we are creating videos or audios and the user is in noisy environment, so in
51:48
a noisy place, so they won't be able to hear it properly. So if there are something like closed captions or audio descriptions, then it will be helpful
51:57
for them. Then, or if the user is in a brighter environment, so let's say I'm trying to access something
52:04
on my mobile in a bright light. So if the contrast is not good, I might not able to understand
52:10
or read the content of that website. And then there are some disabilities which come with
52:18
progression like aging. So let's say my eyesight is totally fine today
52:23
But as my age proceeds I might suffer from some sort of partial blindness or I might not be able to see properly So in those cases will I be able to access those website and application in a nice way
52:40
So these are some of the things which we need to take care of and think about whenever we are creating something
52:47
So in a nutshell, accessibility benefits everyone. and so for accessibility there is this official website from w3c and there are principles so
52:59
wakag means web content accessibility guidelines so there are multiple guidelines on how to create
53:06
any component or any website so that it is accessible by everyone and those are divided
53:12
into four different principles they are acronymed as poor so let's see what's the full form and how
53:19
they really help. So for here, P stands for perceivable. So perceivable means that, so whatever
53:28
is there on that website or application, is it perceived by the user by any of their senses
53:35
So either through sight, through touch, through hearing, or any type of senses, they should be
53:40
able to perceive what is that on their website or application then o o stands for operable
53:49
operable means now that i have perceived that okay let's say there's a button on my website
53:54
so are they able to go to that button and operate it so for example uh when i'm using mouse i can go
54:03
to that button and click on it right what if i cannot see so mouse is of no use to me right
54:09
so in that case so for a blind person or they might be using a keyboard and a screen reader
54:16
combination so where the screen reader reads out the content to the user and user can navigate
54:22
through all different you know content on the website via keyboard so can I reach to that
54:29
button and like trigger the action on it using my keyboard so that is what is meant by operable
54:37
So like are all the things, are all the like operations on my websites and application
54:44
are they operable by everyone, regardless of which technology they are using
54:50
Then you, you means understandable. So whatever content there is on that website, is it understandable by people
54:59
So for example, let's see, there is a form and there are multiple inputs in that
55:05
So let's say 10 inputs there. now if there is no label in those inputs and if I am using my keyboard and screen reader to like
55:14
maybe a type in it and there is no label in it so how will I understand what do I input in all of
55:20
these so one might be for name age email date of birth etc so I need to understand as a user I need
55:28
to understand what I need to fill in those input boxes enable to you know so that I can fill it
55:35
properly so that I can fill that form properly, right? So this is what is meant by understandable
55:40
Then we have robust. So robust means that technology is evolving every day or there are
55:47
new things coming in. So robust means whatever we are creating, so that content, that website
55:54
application, that must remain accessible to the user agents, the browsers, the technologies
56:01
is irrespective of their evolution. So I mean, it should not, to today have five buttons, they are working properly
56:08
And if someone upgrades their Chrome version, those buttons should not stop working
56:13
I mean, they should still be accessible, right? So this is what it meant by robust
56:20
So, okay. So we saw in an Excel what accessibility is and what is importance
56:27
and how can we think about accessibility. So whenever we are creating anything, we can think about that core acronym
56:34
So we can think that whatever I'm creating, does it really check all those fields
56:40
I mean, check all those principles. If yes, then it's very good
56:44
So we are going to see today some of the ways in which we can audit for accessibility
56:50
So there are different ways. The first way is, of course, using a keyboard, like I mentioned before
56:56
So just open up any website that you are building, any application, and then you can start using keyboard to see if it's accessible or not
57:06
We are going to see specific points in future slides. Then screen readers
57:11
So by default, every device you have will have a built-in screen reader as well, as well as there are some screen reader softwares as well, which you can install to test for your websites using the screen readers
57:26
Then there are multiple browser extensions, browser tools, which we can use to test for the accessibility of those websites
57:35
Also, there is automation. So there are multiple automation tools and methods which we can use to test the accessibility of our website
57:46
So let's see the first one, which is using keyboards. So whenever we are using keyboards, so what can we test
57:54
So every way which we are going to see, they might have different topics that we can test for using that way
58:04
And they are not like separate topics. They might even overlap. So some of the topics will overlap, which we can test via different types of tools, right
58:17
So the first thing which we are going to see today is using keyboards
58:21
So what can we test? So what do you expect to test when you are using keyboard
58:25
So the first thing is all the interactive elements on our website
58:31
So what are the interactive elements? There could be buttons, anchor links, then drop downs, all these input kind of things
58:38
which the user can operate on. So these interactive elements, they must be reachable by a keyboard as well
58:46
So when you just use keyboard like tab, tab. So tab is the key which can be used to navigate to every interactive element
58:55
And if you want to go back, you can use shift and tab combination to go back to all the interactive elements
59:02
So test for it. Then after it is reachable. So let's say what do you mean by reachable is that you can also see the focus ring there
59:11
So we will see that in our example as well. So first thing is that are they reachable
59:18
And then now that we are on that button, can we really act on it
59:23
So how do you act on it when you are using a keyboard? So for keyboard, there are different rules
59:29
So you can use enter. So if it's a button link, these things, you can use either enter or a spacebar
59:35
You can press either of these keys to trigger the action on it
59:40
So there are some other inputs as well, like radios and this. They get triggered on press of spacebar
59:45
So these are different types of keys which we need to understand
59:50
and be aware of which can trigger all these different actions. Then the focus rings
59:58
So whenever we are tabbing on it, We are going through all buttons and anchors, links, these things
1:00:03
So do we know really on which element we are on currently
1:00:08
So that is focus ring. Then, yeah, skip to main and navigation link
1:00:13
We will see this again through example. So, and then is navigation in order
1:00:18
So whenever we are navigating, so there is a big website, there are multiple links
1:00:23
So it should not happen. Then when I'm doing tab, tab, it shows me it goes in header
1:00:28
then it directly jumps to footer and then it jumps back to some content so it should not like jump
1:00:35
to and fro between different random or you know sections it should go in in a sequence so either
1:00:42
horizontal sequence or a vertical sequence depending upon what is the current component
1:00:48
so but the order should be maintained then there could be some other manual checks when we are
1:00:54
doing manual check for accessibility, we can also check for color contrast. Color contrast now means
1:00:59
that the difference in color between your background and foreground. So for example, here
1:01:05
black is the foreground color and white is the background color. So this is quite visible
1:01:10
color contrast world. So if I would have used something called light gray, it might not be
1:01:14
visible. So we can also check it. When we see it, we can really check for color contrast as well
1:01:20
There are tools also to check for it. Then if we are creating any form of audio, we should be adding
1:01:27
a transcript for it so that a person who cannot hear, they are still able to understand it when
1:01:33
they read the transcripts. Same for videos. And then also the important keys, like I talked about
1:01:42
tab, shift tab, enter space, then there are arrow keys. So if let's say there is a slide show
1:01:48
So you should be able to use arrow keys left and right to go to the previous slide and the next slide
1:01:54
Then there is escape key. So if there's a model open or any pop-up open, so you can press escape key and then that model should get closed
1:02:03
So these are some of the important keys which users use in their daily life. So these are the most important and most used keys
1:02:10
So we should be aware of the functionalities of these so that we can test it properly
1:02:15
So let's see an example. uh yeah so i have chose amazon.com so it is accessible it's not that bad so there are good
1:02:28
things here so that's why i chose it to show you uh so the first thing i'm going to do so i will be
1:02:33
using directly my uh keyboard okay so i want to uh by default you search in that search bar and
1:02:42
then you go to any website so we can press tab to move to a different sections of this website so
1:02:48
So I press tab. So the first thing which you saw here is a skip to main content
1:02:53
So this is what I had in my slide, right? So what I want to do here, I want to trigger it and see what really happens when I click skip to main content
1:03:02
So I press enter. So if you saw it just skipped all this above part
1:03:08
So this all got skipped. And now if I press tab, it is going somewhere here
1:03:13
So although this is really a glitch in access, I mean, this is not accessible because I'm trying to press tab and I don't know where that focus ring is. Focus ring, I will show you what it is. But I have pressed five times tab here. But do you really understand where I am currently? So I mean, I'm just using a keyboard. So can you really understand? Even I don't understand where I am. So where is my current control right now
1:03:42
So I will keep on pressing tab until I see something. So I press tab
1:03:47
Okay. So now you see here, I hope this font is good
1:03:51
Otherwise, I will make it a little more bigger. Yeah. So if you see here now, so this was a link and you see a blue square types around it
1:04:01
This is called focus ring. This is like focus. So this means that this is my current active element
1:04:07
And if I press enter or space bar, this action is going to get triggered
1:04:11
and this also gives us the feedback visual feedback as well that where we are on this website
1:04:18
so i press tab again now again if you see uh i don't know where i am but i press tab again and
1:04:24
it goes to explore now so actually previously it was here this is also a link but since the focus
1:04:29
ring is not there i'm not able to understand i press tab again again the focus is gone i don't
1:04:34
know where i am i press tab again so here i am so this is what i mean when i say so when you
1:04:40
use tab and start testing you will understand that okay what is the issue and how can we fix
1:04:47
that so this is like uh there is something called outline in css so most of the websites what uh
1:04:54
like you know what the wrong thing that they do is that they go ahead and say that outline none
1:05:02
on their body level so what it does that it removes the outline outline on all the interactive
1:05:08
elements and when you press tab these focus rings are just not available let me show you what i mean
1:05:14
so i have also flipka.com open this is another website uh this is pretty much famous in india
1:05:21
so uh here what i am trying to do i will press tab here so in in amazon if you saw now if i don't
1:05:30
skip and i try to go you see there's a very nice clean or focus ring around it yellow color it was
1:05:35
also highlighting because I can really see where I am currently right so it's properly visible that
1:05:42
okay I am on the sign in I am on the returns at the order now if I do the same thing with flip card
1:05:48
I'm pressing tab right tab tab again now for this one it came because this is an input so
1:05:55
you know the focus came in for input now again that focus is gone so I'm really not sure I press
1:06:03
six seven eight times uh tab now and it's it's not showing so this is example of a very uh
1:06:09
highly inaccessible thing i would say so uh yes so we saw about uh focus rings we saw about how
1:06:17
they should be like you know accessible when we are using tabs and they should also like trigger
1:06:23
so if i go to let's say here i press enter so it should take me somewhere so it just took me to the
1:06:31
cart website right or cart page and so it's navigating me it's even navigating me to properly
1:06:37
so this is a very nice example okay so so we saw some of the examples of how we can test for
1:06:47
keyboard accessibility let's move on screen readers and voiceovers so let's see there are
1:06:55
multiple screen readers. For Windows, there is something called even narrator. So even if you
1:07:01
don't install anything, you press your window button and search for narrator, you will get a
1:07:05
narrator that is an inbuilt screen reader kind of thing. But there is a NVDA as well, which comes
1:07:12
free for Windows. I use normally NVDA to test for accessibility. Then for Mac also, there is
1:07:19
buy software which is inbuilt and it free again JAWS is a software which many professionals use and that is a paid one but I think it gives more accuracy or something then we have for everyone like there Orca for Linux for Android also we have accessibility
1:07:35
shoot and for iPads as well for iPhones also we have something called voiceover but I have
1:07:41
not used ever so and then I have also listed some of the links here because screen reader is actually
1:07:49
so like when we saw with keyboard keyboard was seemed to be pretty easy just you just have to
1:07:54
use keyboard tab tab you get to know and things like that but screen readers are little tricky so
1:08:00
when you are using screen reader it takes little bit of learning curve and even when i started i
1:08:05
found it really hard i'm still learning to be honest so i have given some examples on screen
1:08:12
reader so and some links where they give some of the ways in which we should use screen readers and
1:08:18
some of the important things which we can test using screen readers, right? So it will take time
1:08:25
but I think it's worth investing time into learning some screen reader functionality
1:08:30
because it really pays off. We really don't want our users to like go away from our websites or
1:08:37
feeling frustrated because they are not able to use our websites, right? So it's really a good
1:08:44
investment learning screen readers so whenever we are using screen readers what should we test
1:08:51
right so landmarks so now you just saw that when we were uh looking at amazon websites there were
1:09:00
lots of links lots of images buttons etc right now if i have to go like somewhere on the bottom
1:09:08
let's say so the user will keep tabbing on everything until they reach to the end right
1:09:14
that is not a good user experience so landmarks means what landmarks are they give you a list of
1:09:20
different things on your website so in screen readers we have shortcuts for that like we press
1:09:26
some buttons and the landmark pop-up opens up it gives you all the landmarks on your website all the
1:09:33
links on your websites all the headers on your website so that if you want to navigate via headers
1:09:38
you can do that as well so we will see it in a while so these are different things uh so whenever
1:09:44
we are testing we should test for these also because uh in a good website in a like good
1:09:50
accessible website there should be predefined landmarks so the user must be able to understand
1:09:55
what is a header what is a footer what is your main what are your different navigation parts
1:10:01
and like in heading also which is h1 which is h2 h3 because they are normally in hierarchy
1:10:08
so they should be able to understand that and they use this uh landmark thing to to jump to
1:10:15
different parts of your website so if we do not have landmarks on our websites and if you are
1:10:20
using html5 you know semantic html used for that only we have header footer nav different types of
1:10:27
elements which really define these roles. So if everything is just div and span, they want to be
1:10:35
able to understand where to go. But if we have clearly defined roles for our different elements
1:10:41
and sections, they will really understand where they need to go in order to perform any action
1:10:49
Then images. If there are images on our websites, we must make sure that we are providing a good
1:10:56
alt description, like a good alternative for those. Because if I cannot see, I really want to be able
1:11:01
to understand what that image is. So I will rely solely on what the screen reader reads to me
1:11:08
So if that image contains any important information, we should add alt for it so that
1:11:14
that information is read out to the users. So this is something which screen readers can really test
1:11:19
then form labels so uh there are different techniques in which if you're you are creating
1:11:26
a form even if you have not provided the labels visually you can still uh provide some hidden
1:11:33
labels for those so that when they are accessed via you know your screen readers they still read
1:11:39
out those labels so if there's a form with two input on um like visually you do not show anything
1:11:46
but when I am using screen reader that should read out to me that hey you need to input maybe
1:11:52
first name in this last name in this email in this and so on so this is something which is
1:11:57
screen readers can test our so dynamic changes so uh many times we have many dynamic things to do
1:12:07
on our website so let's say there's a form then a form when I click on submit there is something
1:12:13
happening like a loading or something like your form is being processed and then either success or
1:12:18
error response comes so these changes must be announced to the user so if I can see I will be
1:12:24
able to see what is the status but someone who cannot see they won't be able to understand
1:12:29
right that they won't be able to understand if the error came or success came so for those
1:12:35
these things should be announced then again yeah so whatever content you have so I read it
1:12:43
I find it very good but what if you just listen to it and try to make sense of it that someone who
1:12:49
is solely like need to understand it based upon listening will they able to understand that context
1:12:55
that content and what operation they need to perform so will they be really making any sense
1:13:01
when they are just hearing they cannot see anything visually they can just hear so we need to test for
1:13:07
that let's see a small thing also so here when we are using the screen readers it might be a little
1:13:16
frustrating as well so bear with me so I will be firing up my NVIDIA we'll make it small okay so just
1:13:27
to so okay where is it okay okay amazon.com toolbar address and search bar edit has auto complete
1:13:44
control plus l select so uh i just opened up my screen reader i just wanted to show you how
1:13:50
it reads the contents so that you understand. So I will press tab to go through these things
1:13:58
Amazon.com online shopping for electronics, apparel, computers, books, DVDs and more document
1:14:06
clickable clickable skip to main content. Okay so it just told me that you can skip to main
1:14:12
content so I know that okay there is a button to skip to main content but I don't want to do that
1:14:17
I will go ahead. So this is also which comes under dynamic changes
1:14:33
because we just opened up a drop down but it is able to read it from there
1:14:38
because we need to understand where we are currently because I want to maybe search for electronics
1:14:45
So I can press enter and then I can... search for some electronics here. So and then let's see some of the links
1:14:52
Okay main landmark clickable click here to go to amazon beauty pics graphic link so if you see it just told me beauty pics graphics link so when it reads the image it reads it that way and if you
1:15:08
have written something very descriptive about that image then it will read it shop now let's get fit
1:15:13
at home computers and accessories link okay shop by category shop now link we ship 45 million
1:15:23
products around the world graphic link. So here because there was some text written which they
1:15:28
wanted to read so it read it but if there was no alt tag there then it would read it very
1:15:34
differently just say graphics which is really not a good experience. So what I want to show you here
1:15:40
is I want to show you the landmarks mainly. So there are lots of links so the user might press
1:15:48
for windows it's insert and f7 so if i press that this pop-up comes up so
1:15:56
does the font size increase no so this pop-up comes up so if you
1:16:01
so if you see here there are multiple things i can navigate to all the links
1:16:07
to all the headings so these are all the headings then all the forms if i am
1:16:13
searching for any form specifically i can directly go to form fields and go to
1:16:17
the forms. There are buttons. Landmarks. So banner is the header. Then there is a main. There is a
1:16:24
navigation. So what if I want to. Navigation 303 level zero. Yes. So I want to go to the navigation
1:16:31
So if I go to here and press enter. So it directly took me to navigation. This is here all the footer
1:16:39
links. So these are all the navigation. So it will take me there. So this is a very important thing
1:16:45
So we need to make sure that all landmarks are visible. So you can play around more with your screen reader and check
1:16:54
I will just stop it because it will keep on speaking. Excellent, NVDA
1:16:59
Okay. So let's go to another one. Tools and extensions. So they again come under, you can say semi-automated or automated
1:17:12
They really help us figure out accessibility. So they have those rules predefined and they try to parse the websites and the DOM and they try to give us some information on what is accessible, what is not
1:17:25
But this is something which we can really use to check. But this is not something which we should rely on
1:17:32
Like so I will there are multiple tools and extensions. Most popular ones are the Lighthouse
1:17:37
This is inbuilt in your dev tools. Then there is X extension
1:17:42
So if you see Lighthouse, okay, so yeah. So this is the website where I've opened DevTools
1:17:50
So DevTools are something where in any website, you can go ahead, click, just right click and say inspect or say Control-Shift-I in Windows
1:18:00
For Mac, it should be maybe Command-Shift-I. So here Lighthouse is inbuilt
1:18:06
So you can always go to Lighthouse and start checking for accessibility
1:18:11
So that I have done already because whenever I am presenting, it never works
1:18:16
So I just tried to yze it previously. But just to show you what you can do on any website is that, yes, you can go to the lighthouse and click on accessibility desktop and click on generate report
1:18:30
Since I have already done it once, so it's not letting me do
1:18:34
That's OK. But this is how we can generate it. Then the second one is Axe
1:18:40
So for Axe, what we have to do, Axe is we need to install it
1:18:44
For Axe DevTools, you need to install it. And then it again comes in this DevTools itself
1:18:50
So actually Lighthouse and Axe, they are based on the same principle
1:18:54
So Lighthouse internally uses Axe to figure out the accessibility issues. And this provides some more detailed information
1:19:03
But still, since it's already there, I tend to use it more
1:19:07
Then there is something called Accessibility Pane. So what accessibility pain is? So, for example, let's focus on this here. What I did that I just ran this lighthouse report for Flipkart, right? So it gave me a score 63. Many people really rely on this score that is not valid. So it might even have 100 score. Still, you might have accessibility issues because it doesn't test everything of accessibility. And so here what it does, it gives you a score, it gives you some information. So what are the errors
1:19:38
So let's say there was a button which did not have an accessible name
1:19:41
So this one. So it didn't have accessible name. So if you see, if I would have, like if you would have seen from screen reader or let's
1:19:50
say now we can check it from here as well. So this is a button. Inside it, there is just an SVG
1:19:56
There is no label on it. So what are they going to like pronounce to the user
1:20:01
So there is something where we can see the accessibility issues. So if you are in elements, DevTools elements, in any particular element, you can go to this accessibility pane on the right
1:20:13
Normally, it's hidden. It's on the same styles, but it's hidden. So you go here and you click on that particular element
1:20:20
So, okay, this was the button. So if you see here, it will give you all information, all accessible information
1:20:26
So here there is no label. There is no ARIA label, no label, no title, nothing
1:20:30
So it's not going to read out anything. It will just say maybe graphics or something because it's SVZ
1:20:36
So it's not going to read out anything. So user will not be able to understand what that button is going to be used for
1:20:43
Right. So that's why this is error where it says that this button doesn't have an accessible name
1:20:48
So these are some things which this tool really helps and catches
1:20:52
Then using descriptive, alternative description, it really catches the alternative descriptions. Like you see, there are multiple images which don't have alt
1:21:01
it caught those then if the contrast is not good it even checks that these so these are really
1:21:08
some things which can be checked from these tools so we should definitely run and fix these issues
1:21:14
after that it also tells you that hey there are some things which i cannot test so you need to
1:21:20
check these manually like when you are tabbing it should be in order logical order and the focusable
1:21:25
so which we saw first we used keyboard to test that right so this is not able to use so these
1:21:30
are some things which we need to test manually. So we must also test these whenever we are testing
1:21:36
And this same information comes in AXDEV tools as well in a different format. Then we saw
1:21:42
accessibility pane. There is another thing which is called WAVE. So WAVE is another extension and
1:21:47
it comes as extension. So in after address bar there is an icon with the blue WAVE and you can
1:21:54
click on it. You don't need to click on it. What you can do is let's see here. You right click here
1:22:00
and you get an option in this when you right click on the website you get an option to waive this
1:22:05
page so when you click on this the page reloads and you get a very good information on the left
1:22:11
side so this is the wave results and it also shows you multiple it shows you like you can click on it
1:22:18
and see what was the contrast issue so there are multiple contrast issues there are multiple
1:22:23
all text missing issues these things you can click on them you can check the structure of this websites you can also check the contrast This is the contrast checker inbuilt which you can use to check those contrasts of
1:22:35
different elements. So this is a very good tool again. Then the last one was actually no coffee
1:22:41
but I think this has been taken off. It was a very good one, but I found another one for that
1:22:48
matter. So if I stop the wave, this is actually color blindness simulator. So in Chrome, we have
1:22:54
something called chrome lens so it again comes in extension and this is something which which is
1:23:02
again in your dev tools so if you go to dev tools there is another one called chrome lens if you go
1:23:11
to chrome lens what all you can do is you can simulate different types of color blindness so
1:23:16
let's see here i click on enable lens and i have selected full blindness so now you cannot see
1:23:22
anything so you can simulate a full blindness and you can try to navigate to it so it's currently
1:23:27
navigating and if you use screen reader you will hear some feedback uh this is helpful because so
1:23:33
that you can you are not like biased like you can see something and you will say okay i can see i
1:23:38
can understand and you might be biased when you are seeing things and trying to test using a screen
1:23:44
reader so this is really helpful but there is more to it like you can test for partial blindness so
1:23:49
what if user can see blurry or some color blindness. So in which different type of color is shown
1:23:56
I mean, they can see different bandwidth of color. So these are different things which we can test
1:24:01
using this tool. So these are very important, very nice tools which we can use and you can directly install it
1:24:10
and get started. So I hope it will be helpful. You can try testing using these
1:24:17
So yeah, we tested it along with. Automated tools, the last one
1:24:21
So what can we automate? So there are multiple automated tests, but let's see some of the things which we can automate
1:24:27
Again, automation is something which will not catch all of the errors
1:24:31
30, 40, 50% maybe, but you still need to test manually. Some of the things which can be automated are page titles
1:24:39
So if you are on a page, so let's say I am again in Amazon
1:24:43
and I have multiple tabs open or even not. So if you can see, these are the titles of the pages
1:24:48
So by title, I can understand where I am, right? So I can understand using the title
1:24:56
So this is something which can be automated. The headings, different HTML structure, the landmarks, the ARIA labels
1:25:03
So ARIA labels, again, if you don't want to provide something just for assistive technologies
1:25:10
then you can use different types of ARIA roles and labels. So these are something which we can automate and test if they're present or not
1:25:17
color contrast, image text alternatives. These are some things which can be automated
1:25:23
tested. So let's see, Axe core is again a very important, very nice tool, which helps us with
1:25:30
automation testing as well. There are different variants to it. There is Axe CLI doesn't need
1:25:35
any kind of library or something. Then there is Cypress. We can also have Axe for Cypress
1:25:42
selenium and there are multiple ones we are going to see today for axcli why because we don't need
1:25:48
to write any code here on your laptop you should have node installed and then you should have npm
1:25:54
and then you can go ahead what we can do just run npm install minus hyphen g for globally installing
1:26:02
it ax hyphen cli so if you install it you have axcli available and you can start testing in your
1:26:09
terminal about any accessibility of any website. Let's see how we do it. So again, it's straightforward
1:26:18
Just write X space and the URL which you want to test. So I want to test a URL. I just say X space
1:26:25
that URL. That is a simplest command which we can use to test accessibility. Again, this sometimes
1:26:32
takes time when I am really testing it while presenting. So I already, you know, did some of
1:26:40
the testing. So let me show a different one. Yeah. So for Amazon, if you saw what we did was
1:26:46
for Amazon, we just checked in a UI, right? We didn't check anything. So what I tried to do
1:26:52
I ran X on amazon.com to check the accessibility issues. So here, if you see by default, if you
1:27:00
don't provide anything else, it runs in a Chrome headless. So headless Chrome, it runs the, okay, what happened
1:27:08
Okay, yeah. So it runs your website in that accessibility test in headless Chrome
1:27:13
So it runs it and it gives errors. So if you see there are multiple errors, there is this violation
1:27:19
of ARIA valid attribute. You can read it. It's very nice. There are some image whose alt are like repeat, not repeated
1:27:29
add text so yeah there's multiple alt which has repeating text so it it gave this error
1:27:35
then uh there are multiple errors which it gives you can directly see this now this issue you got
1:27:41
you can read it but we can do more than that so you can also test any different url so i here what
1:27:48
i'm doing this is a website which i have created what i did okay so uh this is a website which i
1:27:55
I've created I can check any path as well so I wanted to check a path called model on it so it
1:28:00
gave me one error again we can read it now what if I want to test it on some browser you can do
1:28:07
that so if you run axe on till now so like say hyphen hyphen browser and then you give the browser
1:28:14
name let's say chrome so it runs on real chrome browser and then gives you the result and also
1:28:20
because just running is not enough. I want to have the result and try to make some use of it
1:28:26
For that, you can use a save command. So if I use save and I gave it a path
1:28:30
So I told that, hey, save this result here in this path. So what it did, it ran this
1:28:36
and it also saved the result of it in this JSON file
1:28:41
at the path which I gave. So let me show you how the result comes
1:28:46
So this is how the result comes. It's in JSON. and it shows you and it's actually a big file because it gives you results of all the tests
1:28:54
that it might have run. So if I am particularly trying to see what are the errors or violations
1:29:01
search for violation. Then since we saw there were four violations here, you will see four
1:29:07
entries here and it will provide all the description and why that was an error, all those
1:29:13
different things. What is the impact? So you get four of these. So you will get this very nice in
1:29:18
JSON form and you can read it, you can use it to create some reports as well. And this is a very
1:29:25
nice thing because you can also integrate these in your CI CD pipeline as well. And so that you
1:29:30
know, it gives you a feedback there as well. So this automated tests are like really important and
1:29:37
nice nice tools to run tests on. Again I want to repeat like and if you see in results as well it
1:29:45
shows it tells you that only 20 to 50 percent of issues can be detected so always test manual
1:29:53
testing so it gives you this information every time so and yeah it also gives you a link this is
1:29:59
Very nice website, DQ University. It really provides a very good curriculum and information on how to test for accessibility
1:30:09
Do explore it. Then, okay, so let's conclude. I showed you some of the examples and tips on how to test for accessibility
1:30:19
So in conclusion, what I want to tell you is that always think from user perspective
1:30:24
whenever you are creating something and whenever we are creating start for accessibility from the
1:30:30
very start it should not be an afterthought like i should create the whole product whole website and
1:30:36
then in the end i will go and run something and see okay these are some of the things i need to
1:30:40
fix no we should always test it from the beginning at least for the new things which we are starting
1:30:46
now uh it's like it's never late right start it now start it today from today onwards whatever you
1:30:52
creating you know create it with accessibility mindset test it and fix the issues which come
1:30:58
don't don't delay it they are really important again automation helps but manual testing is
1:31:05
always always always important and also testing with real users is really important because they
1:31:11
can really give us feedback which we might not be able to uh comprehend so since uh if i uh am like
1:31:18
For example, I can see. So I really cannot understand issues which a person who cannot see might be facing
1:31:26
So feedback from them is also really important. So focus on accessibility just as everything else
1:31:35
And I have action items for you today. So if you learn something, please pass on the learnings
1:31:43
And together we all can spread the awareness and work on making web more accessible
1:31:48
So it responsibility of all of us Let join hands together and make world more accessible These are some resources which I used and they are really good resources to get started with accessibility
1:32:03
So I will share this presentation and you will find all the links here
1:32:12
And so this also will be present on my GitHub website. So github.com slash anuk79 slash tech hyphen talks hyphen links
1:32:23
So this is the link where I put all the presentations and details about my talks
1:32:30
So you can anytime check all these presentations and all these resources
1:32:35
You can also scan this QR code if you want and you will be navigated directly to that website
1:32:40
and in last what I would like to tell you which I actually forgot to tell you there is a website
1:32:47
which I have created which is called explore web accessibility so I try to add information here
1:32:55
about accessibility it's not full-fledged but there are lots of examples here you can go here
1:33:01
it also gives you good like links where you can go ahead and read about accessibility and some of
1:33:07
the examples on how to create accessible things. So do check it out and let me know how it is
1:33:13
So, yeah. Thank you. And I will be taking questions if you any
1:33:19
This was something amazing. I've never seen so much in details about
1:33:25
accessibility and how important it was. You won't believe while you're talking
1:33:29
I have all my tabs open to all the resources you gave
1:33:33
And I've been actually playing around with it. And it's something crazy
1:33:38
Like, we don't think about it, right? But somebody might require this at watching sites
1:33:43
or anything and stuff. And I was wondering is it also possible to do only apps or even while also a similar thing Yes for mobile apps there are so far like for mobile it different
1:33:58
Like in mobile, you cannot have keyboard, so you can't click on it. So there's tap, and still there is tap there
1:34:05
So, but there is something called like voiceover or, so in every, if you are using Android or iPhone, there will be something
1:34:11
But it's very difficult to get out of it if you get into. so train before you open it otherwise i have been stuck there once so yes it's tricky uh so we need
1:34:22
to read it first before trying our hands but you know if you see someone yeah if you have any if
1:34:28
you see any youtube video there are multiple youtube videos where the users really so how
1:34:33
they use any website on mobile like as a blind user so you will see how difficult it is for them
1:34:40
like they have to hear everything and understand so if we don't make it proper then it's more
1:34:46
difficult for them so yeah right and this session actually came in a very right time we have been
1:34:51
making something for the elderly people uh like a website where they can do stuff for themselves
1:34:57
and trust me this is gonna be a big a passer for us because i never know it's that easy and
1:35:04
that's doable. I think Google is providing all these extensions and then you have your
1:35:11
own stuff. It's really good. Like we never thought it can be customizable. Also, that's
1:35:16
the best part of it. You can make sure what has to be read and what has to be easy or
1:35:22
not to be read. Right. So this is something amazing. I would love to be in touch with
1:35:26
you for this. This is something amazing. And I see people commenting on these great sessions
1:35:32
in very informative sessions. Thanks, Anuradha. It's really going well. Thanks for coming up today
1:35:39
I don't think any questions here, but give me one second let me have a check Thank you Evan I hope it was helpful So Manfred I have pinned the slide link
1:35:52
So I don't know how to put it there. So you can ping there as well. I will be also posting it on my
1:35:58
Twitter and LinkedIn. But paste it here so that they get linked to all the resources
1:36:03
Totally. That would be super helpful. Thank you so much for coming
1:36:08
Thank you so much. So everyone here, we are at the end of our monthly session
1:36:14
We'll try to be regular. The problem is we don't want trouble people
1:36:20
They're already having hard times. But if you all want to be a speaker, want to listen to some certain topics, please drop
1:36:28
me an email. Please shoot an email at the C-Shop Corner, and we will bring that speaker for you on
1:36:34
that particular topic on you. and I think we will just end it on a note
1:36:39
be safe, take care of yourself need anything, just let us know
1:36:43
we will help you in whatever way we can but be a little vigilant
1:36:47
about your neighbors, about your people your relatives, your brothers, sisters it's important
1:36:52
if people around you are happy around that environment, everybody keeps on doing the same thing and keeps on increasing
1:36:59
so I will be signing off this is Manfreet and we'll see you again
1:37:06
next month. Bye-bye. Take care
#Arts & Entertainment
#Jobs & Education
#Social Issues & Advocacy
#Charity & Philanthropy
#Poverty & Hunger
#Windows & .NET