Up next in 10


Save time and money with these secret cake decorating tools you already have in your kitchen! Tell me in the comments which is your favourite!
*LEARN The Basics of Buttercream, The Basics of Cake and hundreds of cake designs and decorating techniques on my online cake school
https://britishgirlbakes.teachable.com/
*Take my FREE course on 10 Frosting Techniques
https://www.britishgirlbakes.com/free-course/
*My 4 Minute Buttercream recipe
https://www.britishgirlbakes.com/recipes/buttercream-frosting/
*READ a written version of this tutorial (with photos!)
https://www.britishgirlbakes.com/12-secret-cake-decorating-tools-you-already-have/
*SUBSCRIBE to my channel for a new cake decorating tutorial every week!
*SAY HI!
Website: https://www.britishgirlbakes.com
Instagram: https://www.instagram.com/britishgirlbakes
Show More Show Less View Video Transcript
0:00
I'm going to show you 12 tools that you already have in your kitchen that you can use to decorate cakes
0:05
Use these instead of buying fancy cake decorating tools and you'll save money and space
0:15
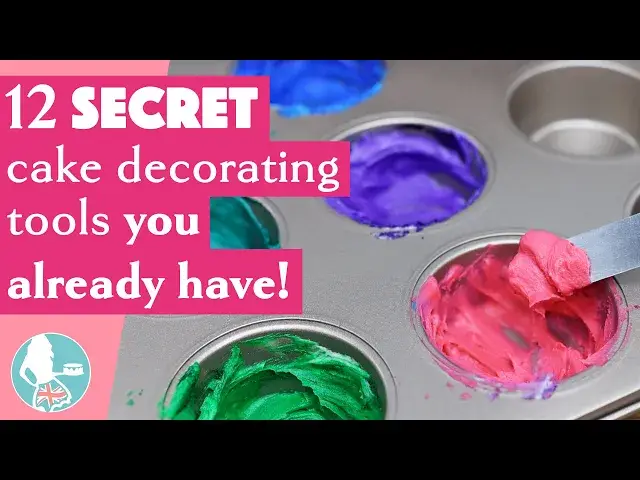
Cupcake pans aren't just for baking cupcakes. Those little cups in the pan are perfect for tinting small amounts of frosting for cake designs
0:22
instead of using lots of little balls which will take you forever to wash afterwards
0:26
Since you'll only have a tiny amount of frosting in each cup, you'll only need a tiny drop of gel to get really bright colours
0:34
Casserol dishes or baking dishes can double up as cake pans. You'll need to bake the cake for a few more minutes than normal since a glass or ceramic dish is thicker than a metal cake pan
0:44
This makes a cake that you decorate inside the dish, so you don't have to worry about covering up the sides
0:51
Piping is a fun way to add lots of colour and texture, or you can spread frosting to cover the top instead
0:56
You're not limited to cakes either. Try this with brownies or chocolate chip cookie dough
1:02
These are quick and easy to decorate and they're easy to transport to an event and also easy to serve
1:09
Leftover buttercream, don't throw it away. Pipe or spoon it into a Ziplock bag, which is airtight to keep the buttercream fresh for two weeks in the fridge or two months in the freezer
1:20
After you push the air out, it lies flat, taking up almost no space
1:24
I share everything I know about buttercream in my master course on the basics of butter cream
1:28
and the link is up in the top of the screen and in the video description. You can also use Ziploc bags for piping beaded borders or piped lines or dotted decorations If you run out of piping bags or want to use that butter cream in a Ziploc bag from the freezer without dirtying a piping bag
1:45
You'd never guess this border was piped with a Ziplock bag. Let's make this stencil next
1:51
Partiment paper or wax paper is perfect for stencils because it's easily available, it's cheap, it's lightweight and it's flexible
1:58
Draw your design or you can trace an image and then cut it out and wrap the stencil around
2:03
round a cake after chilling it. This is my four minute buttercream which gets really firm when it's cold
2:08
so you won't damage it with the stencil. The recipe for my buttercream is at the top of the screen and in the video description
2:14
Spread butter cream all over the stencil, scrape off the excess to leave a thin, smooth layer
2:19
and then peel the stencil off. Now you can create any design on a cake instead of buying expensive stencils
2:26
Non-slip mats are intended to line drawers and shelves, but any mesh one will act as a non-slip mat
2:32
to stop your cakes sliding around on the turntable. You only need a small piece, and this makes frosting cakes so much easier
2:40
You can also use it inside cake boxes if your cakeboard isn't as big as the box
2:44
to stop the cake from moving within the box. You can wash and dry these and use them again and again
2:50
I always have a box of toothpicks handy because they're great for outlining designs
2:54
and they're so tiny that they're the perfect tool for manipulating frosting
2:58
to tidy up lettering, stencil smudges, or borders on cakes. Cleaning up isn as fun as baking and decorating so make that part as quick as possible by putting your cake on a tray or baking sheet when you using sprinkles The tray will catch any sprinkles that roll off the cake board saving you from crunchy footsteps and finding stray sprinkles everywhere for days When you
3:21
finish decorating, tilt the tray to pour the sprinkles down into one corner and into a bowl or jar to
3:27
use for another project. Boba straws are these wide straws and they're stronger than normal
3:33
straws which makes them perfect for supporting tier cakes. Use one to measure the height of the cake and then
3:39
measure that against the rest of the straws so that they're all the same length
3:43
Push them into the cake and these will hold up the next cake on its own cake board so the top cake
3:48
doesn't sink into the bottom cake. Use paper straws to make your own cake toppers of any
3:53
shape and size. Draw or trace your shape, tape a piece of parchment or wax paper on top and put
3:59
it on a plate or tray or cutting board, something flat and small enough to put in the freezer
4:04
melt chocolate chips, spoon them into a Ziploc bag, cut off a corner, and squeeze the melted chocolate through the hole to outline the shape and then fill it in
4:13
This doesn't need to be perfectly neat. Use a toothpick or a spoon or a small offset spatula to spread the chocolate flat and then pull more sprinkles on top straight away while the chocolate is still soft and sticky
4:25
Press the sprinkles gently into the chocolate and then put the plate into the freezer for five minutes to set the chocolate and attach the sprinkles
4:34
lift the shape off the parchment paper and flip it over and make a little line of melted
4:38
chocolate towards the bottom of the shape which will act as glue. Push a paper straw into the
4:43
melted chocolate leave it to set and then push the straw into a cake to make a fun
4:48
colourful cake topper Ice cream scoops can be used to divide batter between cupcake wrappers without spilling onto the top edge of the wrappers or onto the cupcake pan and if you fill the scoop with the same amount of batter each time all of your cupcakes will be the
5:02
same size. You can do this for cake batter too which will make sure you have the same
5:07
amount of batter in each pan so each cake layer is the same height. It's also great
5:11
for marble cakes so you can alternate between different flavors of batter and then
5:15
and swell them together to marble them at the end. Another multipurpose utensil is a basic fork
5:22
As soon as you frosted a cake, while the frosting is still soft before it sets
5:26
press the prongs of a fork gently into the frosting and spin the cake to imprint whatever
5:30
pattern you like. This is an easy way to add lots of texture and detail without needing to buy a
5:36
cake comb, and the process with a fork is much quicker than with a cake comb
5:41
Finally, a tall glass will be your best friend when you're using piping bags
5:46
Drop the piping bag in so that the piping tip is at the bottom of the glass and fold
5:50
the top edge of the bag over the room of the glass. Spoon your frosting into the bag, unfold the bag, squeeze the frosting down to the bottom
5:57
twist the bag, and this way you'll keep the top edges of the piping bag clean so you don't
6:02
get frosting all over your hands when you pipe. I hope these tips have been useful
6:06
For more ideas for easy cake decorating, subscribe to my channel for a new tutorial every week and
6:11
visit my online cake school for hundreds of cake designs and techniques and join my club
6:16
plus for access to every mini course master course and live workshop the link is at the top of the
6:20
screen and in the video description or go to british girlbakes.com thanks for watching
Online Video
Cooking & Recipes
Desserts
Food
Food & Grocery Retailers
Baked Goods
Hobbies & Leisure
Bakeries