Up next in 10


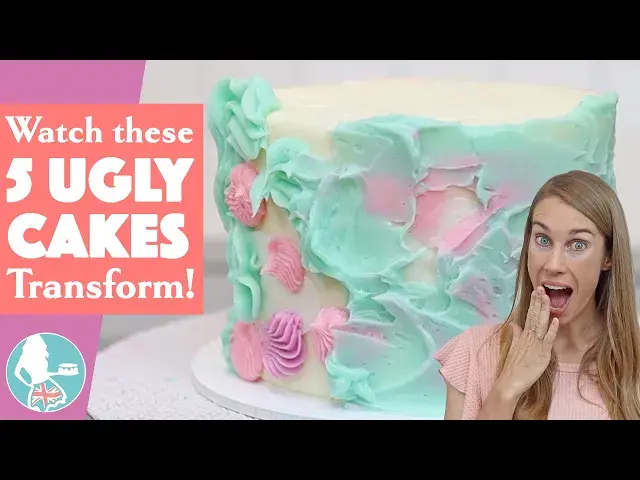
These cakes look like train wrecks in their early stages but watch each of them transform from ugly to beautiful! Here are the links for the tutorials for each of these designs:
3 Techniques for Character Cakes: https://youtu.be/Qho0nyH-MOc
Watercolour Peekaboo Hearts: https://youtu.be/blCGVQrBl-0
Half and Half Cakes: https://youtu.be/fcNJATiFRbM
Cartoon Cake Slice: https://youtu.be/Gmc_Emo9zS4
Facelift Frosting: https://youtu.be/AXEkaledyJU
*Start your FREE 7 day trial on my cake school
https://britishgirlbakes.teachable.com/p/all-you-can-cake/
*LEARN The Basics of Cake and The Basics of Buttercream in my most popular online courses!
https://britishgirlbakes.teachable.com/
*My 4 Minute Buttercream recipe
https://www.britishgirlbakes.com/recipes/buttercream-frosting/
*READ a written version of this tutorial (with photos!)
https://www.britishgirlbakes.com/5-ugly-cakes-that-become-beautiful/
*SUBSCRIBE to my channel for a new cake decorating tutorial every week!
Show More Show Less View Video Transcript
0:00
These cakes look like train wrecks in their early stages
0:03
but watch each of them transform from ugly into stunning beauties. Let's start with a buttercream transfer
0:12
You trace an image onto parchment paper or wax paper, something non-stick that you can see through
0:17
and then pipe over it. You start with the smallest details and put this into the freezer for five minutes between each addition
0:24
That way, when you pipe on the next detail, you won't blend the colours or damage what you've already made
0:30
It will look messy and ugly, or in this particular case demonic
0:34
but this side is going to be hidden. It's the bottom side that's pressed down against the parchment paper that you'll see
0:41
Finish with the largest area, the background colour, outlining it and then zigzagging to fill it in
0:47
and spread it all over to make the rest of the design, the frozen parts, sticky
0:52
Then flip this over onto a cake and put it in the freezer for 10 minutes or the fridge for 30 minutes
0:56
and then peel the parchment off and voila. Still ugly? If there are any gaps or indents in the design
1:03
spread some more buttercream over them, and scrape off the excess to leave your flawless design underneath
1:10
This next one looks really questionable until it's finished. Cut out hearts or any other simple shape, out of parchment paper or wax paper
1:18
and, very important, cut a slit in the middle of each one
1:22
Choose some colours and press your hearts onto a cake and then pipe the colours around them
1:26
to attach the hearts to the cake. Do this for all of your hearts and if you think the random piping looks ugly now wait for it to get a lot worse as you spread it to cover the whole cake trying to avoid the middle of each heart so you can still
1:39
see those slits you cut earlier. My kids were watching me do this, and they were not impressed
1:44
at this point. Scrape around the cake with your cake comb a few times, until you have a smooth
1:49
watercolour effect, and then poke a toothpick into the slit in the middle of a heart, and peel the
1:54
heart off. And now it all makes sense. Peel off all of the hearts, tidy up the top edge of the
2:00
frosting on the cake, and add a border on top if you like. I teach all of these cake decorating techniques
2:05
on my YouTube channel and the links for those tutorials are in the video description. A half and half
2:11
cake sounds like a genius idea for a shared birthday celebration, or just to include two different
2:16
flavours for any occasion worthy of cake. But the road is bumpy until you get to the finish line
2:21
You start by cutting your cake layers in half and attaching half of each flavor together
2:26
using a line of buttercream, and then pipe along the middle and around the edge to make walls or dams to hold in two separate fillings
2:34
caramel and Nutella for this cake. Add another two halves of cake with some buttercream glue to attach them together
2:40
So far, so good. Chill the cake and then wrap half of it in parchment paper, attaching it to the cake with a dab of buttercream
2:47
and spread frosting over the exposed half of the cake. coat, so it's going to be crumbly. Peel the parchment off, chill the cake to set the first half
2:57
and then wrap that half in parchment while you frost the other half. Peel the parchment off
3:02
chill the cake and repeat for the final layer of frosting which you make much more of an effort with since it going to be visible Chill again and frost the other half and when you peel this last piece of parchment off you expect it to look great but it still ugly I think it reassuring to know that
3:17
beautiful cakes you see on social media often start out looking like this. The join between
3:22
the two halves isn't ideal, so add some piping. This is two-tone to incorporate both flavors of the
3:27
cake, the chocolate frosting and the caramel frosting. And when it's finished, the cake looks stunning
3:32
Even more important, there are two flavours to choose between, so everyone will be happy
3:37
I'm sure you've seen the trending cartoon-style cakes, and if you haven't made one yourself
3:42
you might be surprised at how ugly they are until they're finished. A lot of the cake is going to be covered with buttercream details, like piped filling and frosting
3:49
drips, so the first colour of frosting might have shadowing and other imperfections that will
3:54
eventually be covered up. Since this cake is meant to look like a cartoon, everything is supposed to look flat, which is really
4:01
tricky to achieve with buttercream. To create straight edges on buttercream, you chill the cake to set
4:07
the buttercream and then cut neat lines. And for smooth frosting that's shaped as filling or wavy dribs
4:14
use a hot metal cake comb to gently scrape off the outer layer of buttercream. Next, you add black
4:20
lines around each section to outline it, and at first the black looks awful against the pretty colours
4:25
of the cake. And the first broken line will look like a mistake. But the design comes together as you
4:31
pipe more and more lines. Add some unfinished circles and pipe a swell a frusting on top
4:37
which you also outline And the finished result looks pretty awesome like an optical illusion or a superimposed image rather than actual edible cake You probably had moments when you decorating a cake and you panic because in the early stages everything looks messy and it difficult to imagine it turning out the way you envisioned
4:56
This is definitely one of those. You pipe onto a cake using at least two colors and when you choose your design, just keep in mind that all of the texture is going to disappear
5:06
and the final design will be completely flat. After piping, put the cake in the freezer for 20 minutes and boil some water and dip a metal
5:14
cake comb into it. Dry it off, take your cake out of the freezer and scrape around the cake
5:20
destroying your piping for now. It will get messy and ugly and you'll panic but hang in there
5:26
It's all part of the process. When the frosting is fairly smooth but still has lots of gaps
5:31
inside the texture, use the frosting you scraped off to fill in those gaps and then
5:36
scrape again to take off the excess. And you'll give your frosting a facelift, as if you've sliced
5:41
right through the middle of it to reveal a cross-section, which is a really unique effect if you're
5:46
brave and patient enough to keep going until the end. I hope you've seen some techniques you'd
5:51
like to try. Check out my online cake school on Britishgirlbakes.com to learn hundreds of cake decorating
5:56
techniques and designs, and join my Club Plus membership for access to every master course
6:01
mini-course, live workshop and five-minute Fridays, where I teach tips and techniques, and
6:06
and demonstrate frequently asked questions in under five minutes. Thanks for watching
#Desserts
#Food
#Baked Goods
#Bakeries