Up next in 10


This stand up rainbow cake looks impressive, especially when sliced. This cake decorating tutorial show how to turn a single round cake layer into a stunning vertical rainbow cake. Ask me any questions in the comments and see below for useful links!
⭐Join my channel for members-only perks!
https://www.youtube.com/channel/UC1k3PDqnjUG8wMH1vY3yojA/join
🥣My Recommended Cake Decorating Tools: https://www.britishgirlbakes.com/my-recommended-tools-for-cake-decorating
💫Start your FREE 7 day trial on my cake school: https://britishgirlbakes.teachable.com/p/all-you-can-cake
🎂Take my FREE course on 10 Frosting Techniques: http://britishgirlbakes.com/free-course
👩🏼🍳My 4 Minute Buttercream recipe
https://www.britishgirlbakes.com/recipes/buttercream-frosting/
📄READ a written version of this tutorial (with photos!)
https://www.britishgirlbakes.com/stand-up-rainbow-cake/
👍Please LIKE and SUBSCRIBE to my channel for a new cake decorating tutorial every week!
💬 SAY HI!
Show More Show Less View Video Transcript
0:00
Let's make this standup rainbow cake using different piping tips, rainbow colours mixed
0:04
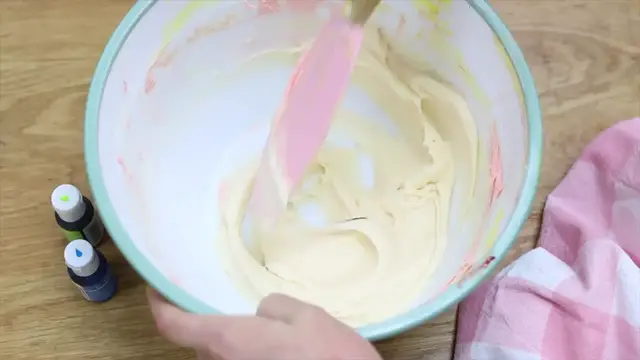
in just one bowl, and only one layer of cake. Let's start with how to mix the colours in an
0:09
order you probably wouldn't expect. This is my 4 Minute Buttercream and I'm starting with yellow,
0:14
mixing it in and scooping it up and then adding more plain white buttercream and adding orange.
0:19
Mix it, scoop it up, and add more white buttercream. Add pink or red next, mix it in,
0:25
scoop it up, then more buttercream, and add purple next. Mix it in. Scoop it up. More buttercream.
0:31
And then blue. And for each colour, scrape around the bowl to mix in all of the previous colour into
0:36
this colour. And this is the reason for this order - the colours naturally blend into each
0:40
other. Finish with more plain white buttercream and add green. And now let's prep six piping bags.
0:45
These are the tips I'll be using: a number 104 petal tip, a 2D closed star tip to make flowers,
0:51
a number 32 open star tip, a Russian tip or flower nozzle, a 4B which is another bigger open star
0:58
tip, and a 1M. The easiest way to fill a piping bag is to drop it into a glass and fold the top of
1:03
the bag over the rim of the glass and then spoon the buttercream in so that when you unfold the bag
1:08
and pull it out of the glass, the piping bag is clean on the outside and you don't get coloured
1:12
buttercream all over your hands. Twist the top of the bag to keep it tight and that way you only
1:16
need a minimal amount of pressure to squeeze the buttercream out of the bag. I'm using an 8 inch
1:21
cake layer, my Perfect Chocolate Cake, drizzled with some simple syrup to keep it moist and then
1:25
cut in half. And for the filling of the cake, I'm using the piping bags that I've already prepared,
1:30
piping in the order of the colours of the rainbow, but as you can see, I'm using pink
1:33
instead of red. This is good practice if there are any piping tips you haven't used before and
1:37
also just to get used to the consistency of your buttercream so that when you use this
1:41
on the outside of the cake later, you've already done a test run. Put the second half of your cake
1:46
layer on top and spread some buttercream along a cakeboard and then flip the cake over and attach
1:51
the flat side down onto the buttercream line on your cakeboard. For the crumb coat, I want the
1:55
colours to match the piping that's going to go on next, so that if there are any gaps in the piping,
2:00
you'll be able to see the same colour underneath it and it won't be as noticeable. So I'm using
2:05
the same piping bags, but instead of piping properly, I'm just squeezing the buttercream
2:09
out because this needs to be flat anyway, so no need for neat piping. Use an offset spatula or
2:14
an angled pallet knife, or you could use a cake scraper to smooth this frosting in an arc around
2:19
the front and back of the cake and also along the top of the cake. And now it's time to pipe. It's
2:23
easiest to start with the purple at the middle of the cake because then you have the most space
2:28
to make these ruffles. And you'll need the narrow end of the petal piping tip to be facing outwards
2:34
away from the cake to make these so ruffly. And you'll do this on both sides of the cake. Next,
2:38
for the blue buttercream with the 2D piping tip, twist your wrist so that your thumb is as close to
2:44
your forearm as possible. Squeeze the buttercream and then spin the piping bag around clockwise.
2:50
That will let the petals fan out from the middle of the flower as you pipe. There might be some
2:55
little gaps in between the flowers and that's why the rainbow crumb coat is a good idea rather than
2:59
using just plain white buttercream. This shell border using green buttercream is the easiest
3:05
technique I think. Squeeze the piping bag and hold still for a moment to let the buttercream
3:09
pipe out. And then as you release your pressure on the bag, swipe down and away. And that will
3:14
leave a little tail on the shell which you'll cover up with the next piping. Russian tips
3:19
take a while to get used to, which is why it was a good idea to practice for the filling
3:22
of the cake. You'll probably find that your first flower won't attach to the crumb coat because the
3:27
buttercream at the end of the piping bag has dried out and crusted, so it's not sticky anymore. So,
3:32
squeeze a little bit of the yellow buttercream out into a bowl and then pipe onto the cake, and this
3:37
sticky buttercream will attach to the crumb coat. For the orange buttercream, I'm using the 4B tip,
3:42
which is the larger version of the number 32 tip I used for the green buttercream for the same shell
3:48
border. And when you're choosing your piping tips, if you want variety without needing to use lots of
3:52
different techniques, then using the same piping tip of a different size is a good way to make each
3:57
colour piping look different. You'll need the most of your pink or red buttercream because this is
4:02
going to be not only the top of the side of the rainbow, but also the entire top surface of the
4:08
cake. You'll notice this is the same shell border technique, but with a 1M piping tip instead of an
4:14
open star tip. A 1M piping tip is just the regular star- shaped tip that you usually use when you
4:20
pipe swirls onto the top of a cupcake. And this is another easy way to add variety to your cake - I'm
4:25
using the same technique as I did for the open star piping tips, but by using a different shaped
4:30
tip, this star shape with really long prongs, it's creating a very different texture and adding lots
4:36
of variety to the cake. Piping onto the top of the cake is, I think, the easiest because you're
4:41
piping down instead of sideways, so it's less awkward and it goes really quickly. And although
4:46
the cake layers on this cake are standing up instead of lying flat down on the cake board,
4:52
there really isn't any difference to how you would store and serve this cake. I recommend storing all
4:56
buttercream cakes in the fridge until 2 to 4 hours before you serve them, which keeps the decorations
5:01
looking perfect, but it also gives the cake enough time to warm up to room temperature before serving
5:06
it, and that's when the cake and buttercream taste their best. I hope you've enjoyed this tutorial.
5:11
Ask me any questions in the comments! Join my YouTube membership for access to my course on
5:15
Perfectly Smooth Frosting and visit my cake school on www.britishgirlbakes.com to learn
5:18
hundreds of cake decorating techniques and designs. See you there! Thanks for watching!