Up next in 10


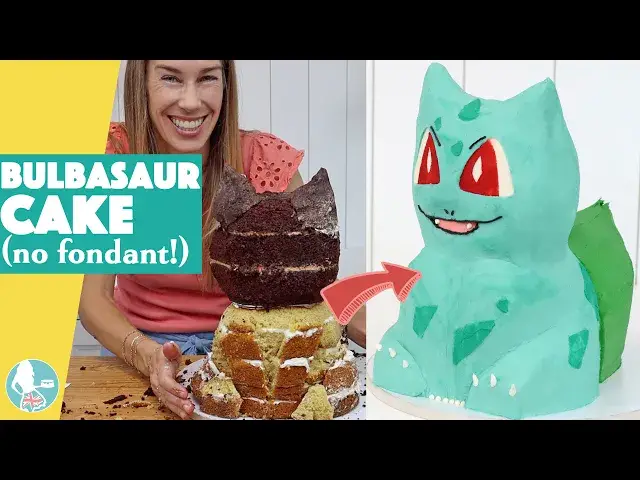
Make this cute buttercream Bulbasaur Pokémon cake with no fondant! The only special tools you'll need are parchment or wax paper and some straws.
📄GET THE RECIPE and a written version of this tutorial (with photos!)
https://www.britishgirlbakes.com/buttercream-bulbasaur-cake/
0:00 Intro
0:08 Bake the cake layers
0:45 Make a template
1:37 Assemble the bottom cake
2:56 Carve Bulbasaur’s body
4:10 Add supports
5:38 Make Bulbasaur’s head
7:02 Shape the bulb and ears
8:15 Crumb coat the cake
9:18 Add some details to Bulbasaur
11:09 Frost Bulbasaur
14:01 Add more details
14:01 Storing and transporting
15:30 Serving a sculpted cake
💫Start your FREE 7 day trial on my cake school
https://britishgirlbakes.teachable.com/p/all-you-can-cake/
Show More Show Less View Video Transcript
0:00
let's make this cute Bulbasaur Pokémon
0:02
cake with buttercream and the only
0:03
special tools you'll need are parchment
0:05
or wax paper and some straws of course
0:08
the first step is to bake your cakes
0:10
you'll need a 4in cake and two 8in cakes
0:13
I baked both vanilla and chocolate cake
0:16
layers to offer different flavors for
0:17
the top and bottom half of the cake if
0:20
you're not going to serve the cake on
0:21
the same day I really recommend using
0:23
simple syrup this is half a cup of water
0:26
and half a cup of white sugar simmered
0:28
together until the sugar dissolves and
0:30
after it cools I use a squeezy bottle to
0:32
drizzle it or you can use a pastry brush
0:34
wrap the layers in cling film or Saran
0:36
Wrap and put them in the fridge for an
0:38
hour or the freezer for 30 minutes for
0:40
the filling and frosting I'm using my
0:42
4-minute buttercream the recipes for all
0:44
of these are in the video description
0:46
before assembling and carving the cake
0:48
you'll need a template and I like to do
0:50
this by setting up a fake cake using the
0:53
pans I baked my cake layers in and I've
0:55
used a bowl to prop up the top one so
0:57
that the pans are the same height as the
1:00
cake will be this cake will be about 8
1:02
in wide and 11 in high which is almost
1:04
the same as a piece of printer paper
1:06
plus the green plant bulb on the back
1:09
sketch your Bulbasaur I'm using pictures
1:11
from a Google search as references the
1:14
body should fit within the paper but the
1:16
green plant bulb at the back can stick
1:18
out because that will be made from
1:20
carvings and the little 4in cake draw
1:23
the outline from three angles the front
1:25
the side and the top of the head is
1:27
useful too you can measure it by tracing
1:29
the the head on the sketches you drew of
1:31
the front and the side view these don't
1:33
have to be super accurate they're just a
1:35
guideline to use when you're carving
1:38
once you have your sketches it's time to
1:39
stack the cakes to support the weight of
1:42
Bulbasaur you'll need a cake drum which
1:44
is a thick cake board or if you don't
1:46
have one you can glue together four
1:48
cardboard cake boards to make a thicker
1:50
board take your cake layers out of the
1:52
fridge or freezer and stack them and
1:55
it's hard to imagine these being a
1:56
Pokémon character cake but trust the
1:58
process slide the 8 in layers off center
2:01
to make space for the 4-in cake behind
2:04
it's quickest to stack the cake using
2:05
buttercream in a Piping Bag so spoon
2:08
some in and then cover the rest of the
2:09
buttercream with cling film or Saran
2:11
Wrap so it doesn't dry out and crust
2:14
pipe a blob of buttercream onto the
2:15
cakeboard and press your first 8in cake
2:17
layer down onto it then pipe buttercream
2:20
to cover the first layer and repeat with
2:22
the rest of the 8in vanilla cake layers
2:24
to stack the bottom half of the cake
2:26
which will be the body instead of
2:28
buttercream filling you can use any
2:29
other filling but still pipe the outer
2:31
ring of buttercream which will act as a
2:33
wall to hold in runny fillings like jam
2:36
or caramel next add the 4in layers which
2:39
are the beginning of the plant bulb on
2:41
Bulbasaur's back attach the first layer
2:43
with a DOT of buttercream on the
2:45
cakeboard and another dot against the 8
2:47
in layer to stick the body and the bulb
2:49
to each other the rest of the bulb will
2:52
be made with the cake carved off the
2:54
body and head later to carve the cake so
2:57
far hold up the sketch of the front view
2:59
you after cutting along the outline to
3:01
take off the rest of the paper and cut
3:03
around the shape cut diagonally down
3:06
from the top to trim off two chunks of
3:08
cake to create the approximate shape
3:10
first saving these C offs for later do
3:13
the same for the side view then cut out
3:16
smaller pieces to create the details
3:18
like the gaps between the outsides of
3:20
the arms and in between the arms when
3:23
you've made the general shape of the
3:24
body trim around any angular parts to
3:27
make them curved or rounded and the body
3:29
will start to come into being for the
3:32
legs use the two chunks you cut off at
3:34
the beginning and pipe a squiggle of
3:36
buttercream where they're going to go
3:37
and then press the chunks of cakes into
3:39
that buttercream which will act as glue
3:42
to attach them for the feet pipe a bit
3:44
more buttercream onto the front of each
3:46
leg and then choose any large-ish
3:48
triangular-shaped piece for each foot or
3:51
you can attach two pieces stuck together
3:52
with a bit more buttercream when you
3:54
cover the body with frosting that will
3:56
give it a more precise accurate shape
3:59
it's really St to look like a Bulbasaur
4:01
sitting down but before moving on to
4:02
this onion shape at the back I'm going
4:04
to carve the head so that I can use the
4:06
off cuts from that to build up the shape
4:09
of the onion at the back you'll need a
4:10
small cakeboard and some boba straws for
4:13
this next part this is a 7in cardboard
4:16
cake board and I'm cutting it to be the
4:18
size and shape of the top of the body
4:20
the head will sit on this board to hold
4:23
it up use Boba straws as supports these
4:26
are wider and stronger than regular
4:28
straws push one into to the cake about
4:30
an inch from The Edge all the way down
4:32
until you feel it hit the cake drum at
4:34
the bottom and then pinch it where it
4:36
sticks out of the cake and pull it up
4:38
and cut it there so it's exactly the
4:40
same height as the cake hold it up
4:42
against the other three straws and use
4:44
it to measure and cut them so that
4:46
they're all the same height these straws
4:48
will prop up the cakeboard you cut with
4:50
the head on top so that it doesn't sink
4:53
down into the body and squash it push
4:55
the first straw back into the cake where
4:57
it was before and then push the other
4:59
Tree in for each one check it from
5:01
different angles as you push it into the
5:03
cake to make sure it's going down
5:05
straight and not at an angle because a
5:07
straight support is much stronger than a
5:09
leaning one use the straws to make a
5:11
square formation with all of them about
5:13
an inch from the edge of the cake
5:16
optionally cut a hole about half an inch
5:18
wide in the middle of the board by
5:20
poking a scissor blade through it if the
5:22
cake is going to be driven anywhere and
5:23
I'll show you what to do with this hole
5:25
later and then press down the cake board
5:27
that you cut then pick the the cake up
5:30
and put it into the fridge to chill
5:31
before you add the head when the cake is
5:33
cold it will be firmer and
5:37
sturdier for bulbas sace head I'm making
5:39
chocolate buttercream filling by adding
5:41
melted chocolate to two cups of the
5:43
buttercream and also cocoa powder mixed
5:45
with just enough water to make a thin
5:47
paste this will make it super
5:50
chocolatey while the bottom half of the
5:52
cake is still in the fridge stack the
5:54
chocolate layers which will become the
5:56
head alternate cake layers with the
5:58
chocolate buttercream as filling or use
6:00
whatever other filling you like and then
6:02
use the sketch of the top view of
6:04
Bulbasaur's head pushing it to one side
6:06
of the cake instead of placing it in the
6:08
middle and carve around it to give you
6:10
the shape of the head at its widest part
6:13
you'll trim it to shape it later take
6:16
Bulbasaur's body out of the fridge and
6:18
if you're going to transport the cake
6:19
push a wooden dowel through the hole you
6:21
cut in the cake board this will stop the
6:24
top of the cake sliding around in the
6:26
car you can buy the dowels from cake
6:28
decorating or craft stores I bought this
6:30
one from Michaels or Joann's measure the
6:32
height of the cake and cut it just a
6:34
tiny bit shorter if the cake isn't going
6:36
anywhere skip the dowel spread some
6:38
chocolate buttercream on top of the
6:40
cakeboard and then pick up the chocolate
6:41
cake and lower it down onto the dowel to
6:44
center it on top of the board now it's
6:46
time to carve the head which is much
6:48
simpler than the body cut a diagonal
6:50
chunk off the top of each side carving
6:53
down and inwards and then cut diagonally
6:55
upwards then use little sawing motions
6:57
to make the head curve around at the top
6:59
and the bottom so it's not so angular
7:02
next you'll need the rest of the
7:03
chocolate cake that you cut off when you
7:05
trimmed around the sketch of the top of
7:07
the head use two cuts to divide it into
7:10
three pieces like this and you'll use
7:12
these to make the bulb shape start with
7:15
the two outer pieces attaching those
7:18
onto each side of the 4in cake using
7:20
some buttercream as glue and then cut
7:22
the middle section of that chocolate
7:23
cake in half and attach each of those
7:25
pieces using buttercream next to the
7:28
body to fill out the b bulb shape for
7:31
the tip of the bulb and the pointed ears
7:33
crumble up the rest of the cake carvings
7:35
and mix them with just enough
7:36
buttercream to hold the crumbs together
7:38
the mixture should feel like Play-Doh
7:41
push them onto the top of the bulb to
7:42
make it rounded with its tip pointing up
7:45
at the back then use little sawing
7:47
motions to make the bulb curve around so
7:49
it's not so angular for the ears pipe or
7:53
spread a DOT of buttercream where you
7:54
want each one to go and it's easiest to
7:56
start with a bowl of the cake and
7:58
frosting mixed a bit bigger than a golf
8:00
ball and press it into the head and mold
8:03
it with your fingers when the
8:05
buttercream sets it will hold the ears
8:07
in place so that they're sturdy enough
8:08
to
8:09
frost put the cake back into the fridge
8:11
for 30 minutes to an hour to set the
8:13
buttercream so that the cake firms up
8:16
and the next step is to crumb coat it
8:18
you'll need about 5 cups of buttercream
8:20
for this or 1.2 kg and doing the crumb
8:23
coat is much easier with a thin
8:25
consistency of buttercream rather than
8:27
when it's stiff so add some milk milk
8:29
until you can stir it easily and it
8:31
looks smooth like this use a small
8:33
offset spatula or pallet knife to spread
8:35
the buttercream all over the cake you
8:37
need to completely cover the cake so
8:39
there's no naked cake exposed because
8:42
this layer of frosting is going to trap
8:43
any crumbs that come off the cake and
8:45
after this layer sets those crumbs won't
8:48
be able to get into the next layer of
8:49
frosting so you won't be able to see
8:51
them this doesn't need to be perfectly
8:53
smooth because it's going to be covered
8:55
up soon but you don't want any bumps or
8:57
bulges of buttercream to stick out
8:59
because those could poke through the
9:00
final layer of frosting so try to get
9:02
the crumb coat fairly smooth you can use
9:04
a small offset spatula for this or cut a
9:07
small piece of acetate and use that to
9:09
scrape the frosting smooth like this
9:11
look how much smoother the frosting is
9:13
now after using acetate to smooth it
9:16
compared to just using an offset spatula
9:19
back into the fridge for 30 minutes to
9:20
an hour to set the crumb coat and
9:22
meanwhile set aside one cup of
9:24
buttercream and tint the rest turquoise
9:26
for the body you'll use the leftovers to
9:29
tint darker for the tail markings on the
9:31
body and also for the green bulb for
9:33
turquoise you can use turquoise gel or
9:36
sky blue with a tiny bit of green and I
9:38
like to add a really small amount of
9:40
avocado green or brown to make it less
9:42
bright a bit duller with the cup of
9:45
white buttercream you set aside get two
9:48
little bowls and put about 2 tablespoons
9:50
into each to one of the bowls add a tiny
9:53
drop of red to make pink for Bulbasaur's
9:55
mouth add a few drops of red to the
9:57
other Bowl to make red for that eyes
10:00
draw a triangle onto parchment or wax
10:02
paper for Bulbasaur's eye cut out two of
10:05
these and also the pink part of
10:07
Bulbasaur's mouth then take your cake
10:09
out of the fridge spread the pink
10:11
frosting where you want the mouth to go
10:13
and white frosting where you want the
10:15
eyes to go you might be able to see dark
10:17
colored cake crumbs through the white
10:19
frosting and if you can spread on
10:21
another layer until it covers up the
10:22
cake underneath then press the parchment
10:25
eyes and mouth onto the patches of
10:26
frosting my 5-year-old made sure he told
10:29
me me that I made Bulbasaur's eyes too
10:30
close
10:32
together chill the cake for about 30
10:34
minutes to set this frosting and then
10:36
peel the parchment eyes off use another
10:39
two pieces of parchment cut in a curve
10:41
shape as stencils to cover up the parts
10:44
of the eyes that you want to be white
10:46
the rest will be red so also cut two
10:48
little ellipses or pointed ovals to be
10:51
the reflections within the red eyes now
10:54
you can spread the red buttercream over
10:56
the eyes and when you eventually peel
10:57
the parchment off the buttercream
10:59
underneath the paper will stay white but
11:01
for now keep the entire eye covered with
11:03
the parchment triangle you cut out
11:05
earlier then scrape away any buttercream
11:07
that's sticking out around the parchment
11:10
and then Frost the whole cake with your
11:11
turquoise buttercream by now the red
11:14
buttercream will be cold and firm
11:16
because it's sitting on top of cold
11:17
buttercream and cake that's been in the
11:19
fridge the next part is definitely the
11:21
most timec consuming stage which is
11:23
smoothing this turquoise buttercream you
11:25
can use your offset spatula for this
11:27
which will smooth the frosting that the
11:29
blade scrapes over but it will leave a
11:31
trail of texture along both ends of the
11:34
blade or you can use a piece of acetate
11:36
which works really well for sculpted or
11:38
carved cakes because it curves around
11:40
the cake creating smooth rounded shapes
11:43
and since it's so thin it doesn't leave
11:45
the trails of texture that an offset
11:47
spatula does it will pick up buttercream
11:50
as you smooth which you'll have to
11:52
scrape off into your bowl of frosting
11:53
and then wipe the acetate clean before
11:55
using it again and this process is
11:58
slower with acetate than with an offset
12:00
spatula so I think the quickest
12:02
smoothing technique with the neatest
12:04
results is to use an offset spatula
12:06
first to get the frosting as smooth as
12:08
you can with that and then use a piece
12:10
of acetate to get the frosting even
12:12
smoother and since the frosting is
12:14
already quite smooth the acetate won't
12:16
pull off as much buttercream so you
12:18
won't need to clean it as often compared
12:20
to skipping the offset spatula stage and
12:22
going straight in with the acetate and
12:25
just to set your expectations spreading
12:27
and smoothing this turquoise butter
12:29
cream took me 49 minutes so make sure
12:31
you give yourself enough time for this
12:33
part chill again in the fridge for 15 to
12:35
30 minutes to set this turquoise
12:37
frosting and then to get the parchment
12:39
off the eyes use a toothpick to scrape
12:41
gently from the middle of the eye
12:43
outwards and you'll feel the smooth firm
12:46
surface of the parchment underneath your
12:47
toothpick and when that surface changes
12:50
youve come to the edge of the parchment
12:52
use your toothpick to pry up the edge of
12:53
the parchment and then pinch it and peel
12:55
it away from the cake do the same for
12:57
the mouth and also for the white
12:59
Reflections within the eyes set aside
13:02
about a/4 of a cup of turquoise
13:04
buttercream for the teal skin markings
13:06
and tint the rest to be a bright green
13:09
before spreading this all over the plant
13:11
bulb use strips of parchment to cover up
13:14
the turquoise body along the join of the
13:16
body and the bulb and this will keep the
13:18
green frosting off the body so that it
13:20
only covers the plant bulb smooth this
13:23
I'm using my offset spatula first to get
13:26
it fairly smooth and then finishing with
13:27
a piece of acetate to make it it even
13:29
smoother to create the curves of the
13:32
bulb I'm using an offset spatula dipped
13:34
in warm water to Mark out the different
13:36
sections but if you wanted to you can
13:38
spread the buttercream more thickly and
13:40
then use your acetate to carve some of
13:42
it out between each section to make the
13:44
grooves deeper pinch the edge of the
13:46
parchment and peel it away from the cake
13:49
to get the frosting even smoother you
13:51
can put the cake back into the fridge
13:53
for 30 minutes to set the frosting and
13:55
then press a piece of parchment paper
13:57
over any texture and rub against it with
13:59
your fingers to flatten the buttercream
14:02
underneath now for the final details add
14:05
more blue and green gel to the little
14:07
bowl of turquoise frosting you set aside
14:09
to make it a darker taal and use a few
14:11
small pieces of parchment paper to cut
14:13
out the markings on Bulbasaur's face and
14:15
body press them against the cake and
14:17
spread the tail buttercream over them
14:19
scraping a few times to take off the
14:21
excess frosting to leave a thin smooth
14:23
layer behind for the line details on the
14:26
face tint about 2 tablespoons of the
14:28
left over green buttercream using black
14:31
gel and put it into a Piping Bag with a
14:33
small round piping tip this is a number
14:35
three and pipe the eyebrows and the
14:37
nostrils and also outline the mouth to
14:40
make a smile or whatever expression you
14:42
want to give yours finally use the
14:44
leftover white buttercream also in a
14:46
Piping Bag but with a medium round tip
14:49
like a number eight to pipe the nails or
14:51
claws on the feet and hands and also the
14:54
teeth oh my goodness this Bulbasaur is
14:57
so adorable now St storage and
14:59
transportation and serving details keep
15:02
the cake in the fridge to keep
15:03
everything firm and stable and take it
15:06
out just before you transport it if
15:08
you're taking it somewhere else to serve
15:10
for transportation it's really important
15:12
it's on a flat surface to keep
15:14
everything in place and that Central
15:16
dowel is going to prevent anything from
15:17
sliding around this is a cake safe which
15:20
comes with a central dowel but I'm not
15:23
using that because I already put one in
15:25
place it somewhere flat in the car like
15:27
in the boot or trunk or in the footw in
15:30
front of the passenger seat if you're
15:32
not taking the cake anywhere take it out
15:34
of the fridge about 2 hours before you
15:35
serve it so that the cake and frosting
15:37
comes to room temperature and that's
15:39
when it will taste the best serving this
15:41
cake is really straightforward start at
15:43
the top cutting down into the head and
15:46
you'll feel the knife hit the cakeboard
15:47
under the head slide your cake slicer or
15:50
server in there just above the cakeboard
15:52
and serve the top half of the cake like
15:54
this when you've sliced all of that lift
15:57
up the cake board that was in the middle
15:58
of the cake and serve the bottom half of
16:00
the cake you can serve about 60 people
16:03
with this cake we cut up the leftovers
16:05
and kept them in a tupperware in the
16:07
fridge to enjoy for the next week or you
16:08
could freeze them for longer so that's
16:11
it everything you need to know to make a
16:13
buttercream Bulbasaur cake with no
16:15
fondant ask me any questions in the
16:17
comments or tell me which character
16:19
you'd like to see next and visit my cake
16:21
school on British girl bak.rr.com
#Arts & Entertainment
#Desserts
#Hobbies & Leisure