Up next in 10


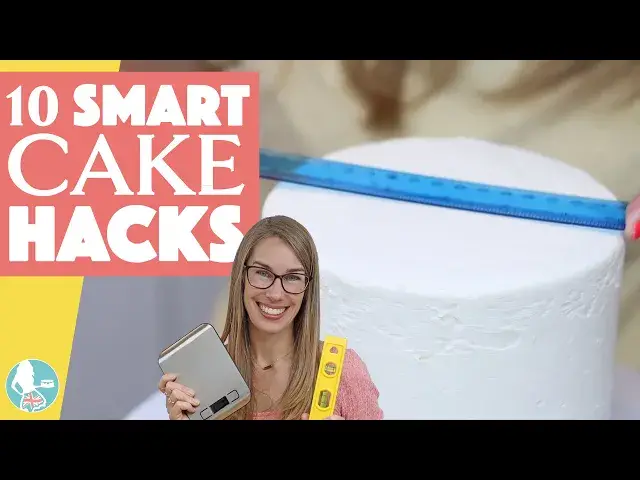
Use these smart cake decorating hacks for smooth frosting and neat decorations: colour theory for white buttercream, pi for wrapped designs, multiplications to convert recipes and more!
💫Start your FREE 7 day trial on my cake school
https://britishgirlbakes.teachable.com/p/all-you-can-cake/
🎂LEARN The Basics of Cake and The Basics of Buttercream in my most popular online courses!
https://britishgirlbakes.teachable.com/
👩🏼🍳My 4 Minute Buttercream recipe
https://www.britishgirlbakes.com/recipes/buttercream-frosting/
📄READ a written version of this tutorial (with photos!)
https://www.britishgirlbakes.com/10-smart-cake-decorating-hacks/
👍Please LIKE and SUBSCRIBE to my channel for a new cake decorating tutorial every week!
💬 SAY HI!
Website: https://www.britishgirlbakes.com
Instagram: https://www.instagram.com/britishgirlbakes
Show More Show Less View Video Transcript
0:00
use color theory to make really white
0:02
buttercream Pythagoras to wrap a design
0:05
around a cake multiplications to use
0:07
recipes to make a bigger or smaller cake
0:10
the contents of your pencil case and
0:12
toolbox and even a toothpick for these
0:14
smart cake hacks for smooth frosting and
0:16
neat decorations ready let's get started
0:20
conversions are useful if you want to
0:22
bake a cake that's bigger or smaller
0:24
than your recipe did you know that if
0:26
you have an 8in cake recipe and you have
0:28
it you'll have enough batter for a 6-in
0:30
cake and if you divide a 6-in recipe by
0:33
three to make a third of the batter you
0:35
can make a mini cake with 4in pans so
0:38
with a 6-in recipe you can make one 6-in
0:41
cake or three mini cakes and with an 8
0:44
in recipe you can make one 8in cake or
0:46
two 6in cakes now for some color theory
0:50
the colors opposite each other on a
0:52
color whel are complimentary colors and
0:54
they cancel each other out so if you
0:56
have yellow buttercream add Violet to
0:59
make it look whiter just a tiny amount
1:02
which is easiest to do by dipping a
1:04
toothpick into Violet gel and then
1:06
dragging the toothpick through your
1:07
buttercream look at the difference this
1:09
makes before and after adding Violet
1:13
another use for toothpicks is to make
1:15
yourself a guide for piping Trace around
1:18
your cake pan onto a piece of paper and
1:20
cut out that circle fold it in half and
1:23
in half again and again and then unfold
1:25
it and place it on top of a frosted cake
1:28
poke a toothpick into the Frosted ing
1:30
below each crease and use this to guide
1:32
you as you pipe so that the decorations
1:34
are evenly spaced around the cake for
1:37
decorations that wrap around a cake and
1:40
need to fit perfectly like stencil
1:42
patterns or chocolate collars or cages
1:45
and buttercream wraps you'll save time
1:47
by using Pythagoras to find the length
1:51
that will wrap around the cake measure
1:53
the width of the cake the diameter and
1:56
multiply by pi which is 3.14
2:00
cut a piece of parchment or wax paper so
2:02
it's that length and then it will wrap
2:04
snugly around the cake this is perfect
2:06
for stencils so that a pattern lines up
2:09
neatly but if you're going to pipe onto
2:11
it with buttercream to make a design and
2:13
then wrap it around the cake add about
2:16
an inch to make room for that layer of
2:18
buttercream keep your pencil case out
2:20
because a ruler can also be used to
2:22
frost a cake after spreading buttercream
2:25
or any other frosting onto your cake
2:27
press the base of a clean ruler down on
2:30
the cakeboard to line it up straight and
2:31
then press the edge very gently into the
2:33
frosting as you spin the turntable the
2:36
edge of the ruler will smooth the
2:37
frosting as the cake turns around and
2:39
after two or three laps around the cake
2:42
you'd never know it was a ruler not a
2:44
cake comb that made this frosting so
2:47
smooth here's another tool you can use
2:49
for cake decorating you probably didn't
2:52
expect to need your toolbox to make a
2:54
cake but a spirit level is an excellent
2:56
tool to make sure your cakes are level
2:58
on top ESP especially before you stack a
3:01
tear cake if the little bubble isn't in
3:03
the center push down on one side of the
3:05
cake before you frost it and that side
3:08
of the cake layers will push down into
3:09
the filling to straighten and level the
3:11
cake then chill to set the cake and
3:14
frost it and check the top again with a
3:16
spirit level and now it's ready to
3:19
decorate to make a neat straight cake as
3:22
well as straight cake layers you'll also
3:24
want them to be the same height as each
3:26
other for the most beautiful slices bake
3:29
even cake layers with this cake hack
3:31
weigh your mixing bowl before you
3:33
prepare your cake batter and then weigh
3:35
it again with the batter inside subtract
3:38
the weight of the bowl and divide by the
3:41
number of pans now put a pan on your
3:43
scale and zero the scale and scoop the
3:46
batter in until you get to that number
3:48
you just calculated repeat for the rest
3:50
of your pans and this way you'll have
3:52
exactly the same amount of batter in
3:54
each pan and your slices will be the
3:56
neatest looking I did a geeky experiment
3:59
on the fastest way to make a cake
4:01
testing which methods will save you the
4:03
most time when you assemble and frost a
4:05
cake spoiler alert before we get to the
4:08
end piping the filling and frosting is
4:10
much faster than scooping it up from the
4:12
bowl and spreading it straight onto the
4:14
cake and using cold cake layers that
4:17
have been in the fridge or freezer for a
4:18
few minutes will make the process much
4:20
quicker too is there a smart hack to
4:23
tackle condensation absolutely avoid
4:26
these moisture droplets and running
4:28
colors on your Cakes by paying attention
4:29
ention to temperatures condensation
4:32
happens when a cake goes through a big
4:33
difference in temperature fast for
4:36
example from a freezer of 0° fah moving
4:39
to room temperature of about
4:41
72° the difference between the warm room
4:44
outside of the cake to the cold inside
4:46
of the cake is a big difference which
4:48
will cause condensation or cake sweat
4:51
instead if your cake is Frozen move it
4:53
to the fridge for 24 hours to thaw and
4:56
then to room temperature to minimize the
4:58
temperature difference even if you don't
5:00
use a freezer if your room is too hot
5:03
and your cake starts to sweat while
5:04
you're decorating it if you can't lower
5:07
the temperature of the room you can dab
5:09
the cake with a paper towel to absorb
5:10
the moisture droplets which will
5:12
disappear once the cake warms up to the
5:14
temperature of the
5:16
room for great cake photos I think the
5:19
best trick is to make the background
5:20
blurry or out of focus to really draw
5:23
attention to your cake you can do this
5:25
on a camera or a phone by adjusting the
5:28
F stop or F number for the best results
5:31
move your cake as far away from the
5:32
background as possible I like to use F2
5:35
or three which makes the background
5:37
really blurry or out of focus let's crop
5:40
this a bit now scroll up to an 11 and
5:43
look at how sharp or INF Focus the
5:45
background is those lines look really
5:47
obnoxious here but when they're blurry
5:50
in the background they look more
5:51
interesting than distracting on an
5:54
iPhone choose portrait mode and tap the
5:56
F up here which will display a bar over
5:59
here scroll anywhere up to a 16 or
6:01
anywhere down to 1.4 and look at the
6:04
difference 1.4 compared to 16 the outer
6:09
Focus background really makes all of
6:10
these photos look so much better than
6:12
having everything in Focus so even
6:15
though cake decorating seems creative
6:18
using your brain and nerdiness or
6:21
geekiness can really help you make more
6:23
practical and beautiful cakes to learn
6:25
more cake decorating techniques visit my
6:27
cake school on British gb.com
6:30
thanks for watching
#Cooking & Recipes
#Desserts
#Bakeries