Up next in 10


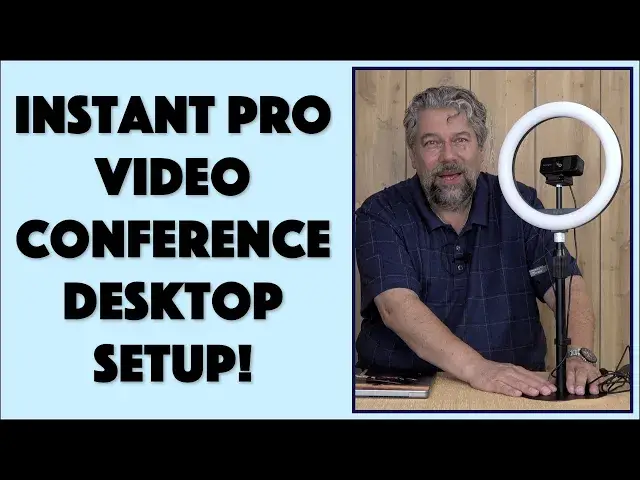
If you're ready to level up your video conferencing setup, then you'll love the Kensington Pro Video Conferencing setup. Tech expert Dave Taylor checks out the 1080p HD Webcam, terrific ring light and handy desktop stand and how they work together - with a bit of help from the Kensington Konnect app - to make you instantly look more professional on any video call, from Zoom to Skype, Google Meet to Microsoft Teams.
Check the setup out at: https://www.Kensington.com/
Then visit Dave's Q&A Web site at: https://www.AskDaveTaylor.com/
#kensington #webcam #ringlight #zoom #skype #video #desktopvideo #askdavetaylor
Show More Show Less View Video Transcript
0:00
You'll be ready to go with this professional video conferencing setup
0:03
Let's check it out. Dave Taylor here and I do a lot of webinars
0:14
In fact, later today I'm going to be on Zoom for two hours
0:18
So I spend a lot of time thinking about lighting and thinking about webcams
0:23
Enter Kensington. They have put together a set of products that gives you a really great professional video
0:31
conferencing solution. This is the desktop setup. They have other ways and other configurations
0:37
But this is the stand, the ring light, and the webcam. And this whole thing is about $120
0:45
But let's actually, I'm going to demo it. But before I even get there, let me tell you about all the pieces
0:51
So first off, here's the webcam. And this is a 1080p webcam
0:55
This is the W1050. And it's a fixed focus 1920 by 1080 webcam
1:03
Super easy to work with. It even has a sliding shutter. And you get on the right side
1:08
There we go. So you can, when you have it turned off, you know it's turned off
1:13
And you can see sort of that it has one of these little clip mounts
1:18
So if you want to just put this on the back of your computer screen
1:23
you can adjust it and get it just the right angle. But one of the things Kensington also has is they have something called Kensington Connect
1:30
which is software for Mac or PC that gives you the ability to really fine tune how this works
1:36
adjust for colors, all sorts of things. Whatever you need to do to make it look great, it can do it
1:42
And that software can help you. Now, it's a 95 degree field of view
1:47
And it has a noise reduction stereo microphone system. I already showed you the privacy cover
1:52
And this unit is, well, no, wait, let's do the demo and then I'll tell you the prices
1:59
Now, number two on this setup is this. This is the L1000 bi-color ring light
2:05
And I'm going to actually plug it into my computer because each of these needs to be plugged in
2:11
The ring light, I think most people are probably going to actually just plug into the wall
2:16
rather than their computer. But you can do it either way as long as you're pushing enough power out
2:22
And I'll do this. And then all the controls are in line in this very simple to work with control
2:29
For example, I can turn it on and I can change color temperatures
2:35
So it supports cool, natural, or warm temperatures. And that gives you different lighting
2:41
If I put it on my face, you can see much better lighting
2:45
And as I change different colors, it brings out different tones on my skin
2:52
And this warm color, which you can see here, is probably the one that looks the best
2:57
And then I can adjust how bright it is. So I can go, let's make it super bright, which gets it up to 930 lumens
3:05
Or I can step it down to considerably less. So it's almost more like a fill light at this point
3:12
Or I can just turn it off, right? Super easy to work with
3:16
Nice long cord. You do need to figure out how to power it
3:20
It doesn't come with a little like wall adapter or anything. But honestly, if you choose to go that route, you can pick one up for like five bucks or so
3:29
Or probably you have spares from some of your devices. Or like I said, you can just plug it directly into a device
3:36
And it works with USB-A on that end. So it's a USB-A connector
3:42
And then I'm using a USB-A to USB-C adapter. So I can have it powered with my MacBook Pro
3:50
So that's the ring light. So now the third piece is this
3:55
And this is a telescoping desk stand. So you can raise it up
3:59
You can bring it down. So at its minimum height, it is 11.8 inches
4:06
And at its maximum height, it is 19 inches. It's a really nice little metal stand
4:12
Really solid feel. Has non-skid feet on it. And it comes with a little wire management clip
4:19
If that's something that you want to have it look neat. And why wouldn't you
4:23
So you can do this. And then you can just pull the wires to get them nice and neat
4:27
And that's going to help your whole desktop setup look good. And generally what people are going to do is they're going to actually have it behind their computer
4:35
So it might be like this, for example. And then obviously you're seeing me through the ring light
4:43
This is not a normal configuration. But this is a pretty typical way people would set it up for an actual web conference
4:50
So what I'd like to do is I'd like to actually get it all hooked up
4:54
I'm going to switch over to my computer. Like I said, this is a MacBook Pro
4:59
And then we're going to go in and let's see. We're going to record
5:08
So you're going to be able to see and hear how this thing works
5:12
So let me just get things set up and I'll be right back. For this first demo, I'm showing you the camera by actually recording what it sees
5:22
And you can see it's a really clean, crisp signal. This is a 1080p full HD
5:28
Now I do have my controls here. So I'm going to go ahead and turn on the light
5:34
And you'll see the lighting on my face is significantly different. We'll just change color temperatures
5:41
That's a little more blue. That's a cool light. And that's a warm light
5:45
And generally warm lights are going to do better with skin tones
5:49
But that's something you can experiment with. Nonetheless, if this is something as it is that I just have hooked up to my computer
5:56
it's giving me a really clean, really sharp, vivid image. And the sound is actually entirely acceptable too
6:04
So that's the whole setup. Now, let me switch things around one more time
6:10
And I'll show you how the Kensington Connect program works. So let me do that too
6:14
Okay, now you can see Kensington Connect. And I'm looking at the camera, not at the app
6:20
But you can see that it has device effects and adjust on the left hand side
6:25
So if I'm on device, I can do things like zoom in. And it's not a huge zoom
6:32
There's a little bit of a pan and tilt feature. But honestly, you're probably more likely to adjust that manually on the device
6:39
And that's okay. Now let's go to effects. And effects are fun because you can say
6:44
let's make this a little more noir. So it's now black and white
6:48
Generally not a great look for most people. Or you can do color but with more contrast
6:53
which is sort of really pretty contrasty. Or warm. It's so hot today
7:01
I know. So all of these. I'm not going to go through them all. Don't panic. And then we'll go back to none
7:07
And then we can go to adjust. And you can see there are some basic adjustments you can make here that work pretty darn well
7:15
So for here, I might say, let's turn up the brightness a little bit on the camera to compensate for how dark it is
7:22
Now, of course, I could also go back to the default. Let's move it back here
7:28
And then I can simply use my ring light, which is on. And I can just turn it up
7:32
And now I have different lighting and it's a different look. So it's not the most complex piece of software in the world
7:39
but it gives you the controls that you want to be able to fine-tune the experience that you have
7:45
So cool. That's all the demos. Let me get back on the regular camera
7:49
So there you have it. It's actually really easy to work with this whole setup
7:53
The only criticism I have is I wish instead of having two cables
7:58
and both of them, by the way, are USB-A. They're rectangular. I wish there was some sort of splitter or merger or something
8:06
but I talked to Kensington and they said because the light has such a power demand
8:10
they don't recommend using a splitter. But still, maybe have this have just a little more demand
8:16
and have a way for this to sort of tap into that connection
8:20
So again, probably the easiest way to solve this would be to take the ring cable
8:27
and plug that straight into the wall. So you just don't have to worry about it
8:31
And then the camera cable is the one you hook up on your computer
8:34
So pretty easy solution. Either way, what I really like about it is it's completely self-contained
8:41
I don't have to do anything else to go from crummy webcam built into my Chromebook
8:47
or into my old PC to really nice webcam, really nice audio, great lighting and everything
8:54
And boom, I just look a whole lot better. I mean, didn't that look good
8:58
Didn't you think that looked pretty clean? So we need to talk about prices
9:02
But before we get to the prices, I'm going to ask if you could actually connect
9:07
and subscribe to my channel. So super easy, click or tap on that subscribe button
9:12
turn on notifications so you know what's going on and we're connected. Great
9:16
Now from the middle, this is the W1050 1080p webcam and it's $49.99 at kensington.com
9:27
It's an entry-level webcam for them, but it's really pretty crisp as you saw
9:32
Then this is the L1000 bi-color ring light and that's $39.99 at kensington.com
9:41
And finally, the stand is the A1010 telescoping desk stand and it is $29.99
9:50
All of these are at kensington.com. And in total, if you want to buy the whole setup, you can get the whole thing for $119.97
9:59
So for under $120, you can have a huge step up in the quality of your web conference calls
10:07
and your web lectures and whatever else you're doing online or whatever you're doing with the video
10:13
If you're working from home and your company wants you to look better, this is the solution
10:17
right here. It's all in one. Hook the whole thing together. It took me like 90 seconds to do that and you're ready to go
10:24
You don't even have to use their software if you really don't want to. If you're happy with its default settings, then just plug the whole thing in and start
10:32
up Microsoft Teams or Google or Zoom or Skype, whatever it is
10:37
Even FaceTime could use this thing, right? So really, really cool solution
10:42
Definitely one worth checking out. Hope you enjoyed my demo. That's all I got
10:46
So I'll catch you in my next video. ♪♪��
#Camera & Photo Equipment
#Multimedia Software
#Email & Messaging
#Voice & Video Chat
#Photo & Video Services
#Teleconferencing
#Video Sharing
#Event & Studio Photography