Up next in 10

Discover the secret to perfect Classic Cut-Out Sugar Cookies with this step-by-step guide! These cookies are a holiday favorite in my home, and in this video, I’ll show you how to create soft, buttery cookies that hold their shape beautifully—perfect for decorating! Whether you’re baking for Christmas, birthdays, or any special occasion, these sugar cookies are sure to impress.
In this video, I’m making a double batch for my holiday baking marathon. Don’t worry, though—the recipe in the description includes single-batch measurements. I’ll also share tips on mixing, rolling, and cutting the dough to achieve perfect results every time. Let’s get baking!
💡 What you’ll learn:
How to make sugar cookie dough from scratch
Pro tips for rolling and cutting cookies
How to chill dough for better baking results
🔗 Full Recipe and More Tips: https://arinaphotography.com/classic-cut-out-sugar-cookies/
🥄 EQUIPMENT
Measuring spoons https://amzn.to/3GcPxu8
Measuring Cup https://amzn.to/3mKlEKB
Glass mixing bowl https://amzn.to/3spLnHY
Blending whisk https://amzn.to/2vQdHYB
Kitchen Aid mixer https://amzn.to/2X5212P
silicone spatulas https://amzn.to/2ZUb3jK
Show More Show Less View Video Transcript
0:00
today we're diving into a recipe that's a true staple in my home classic cutout
0:05
sugar cookies perfect for any occasion these cookies are versatile soft and
0:11
hold their shape beautifully in the oven from birthdays to holidays they're a blank canvas for all your decorating
0:19
creativity in this video you'll notice I'm making a double batch because this isn't just for fun it's part of my
0:26
holiday baking Marathon I like to have plenty of cookies for gifting and freezing so doubling up is a must don't
0:35
worry though the recipe in the description below includes measurements for a single batch to handle this larger
0:42
quantity of dough I rely on my KitchenAid stand mixer it's a lifesaver
0:48
for thick heavy batches if you're planning to double your batch too I highly recommend using
0:54
a mixer with a larger capacity to make the process smoother I'm a Ena and I'm
1:01
excited to share my favorite recipes and baking tips with you straight from my kitchen to yours my goal is to help you
1:09
create treats that not only taste amazing but look incredible
1:14
too in the description below you'll find links to all the tools and other recipes
1:20
I mention so everything you need is just a click away let's Jump Right In and get
1:28
started before anything else I like to get organized I measure out all my
1:33
ingredients ahead of time and have my tools ready to go this step is key for a
1:39
stress-free baking experience especially if you have little helpers in the kitchen I start with 2 and 1/2 cups of
1:48
allpurpose flour to keep the cookies light and tender I recommend sifting the
1:54
flour you can use a simple hand whisk to blend the flour or if if you want to go
2:01
the extra mile sift everything through a sifter for an ultra smooth
2:07
texture sifting helps eliminate clumps and air rates the flour which makes a
2:12
noticeable difference in the final cookies next I add half a teaspoon of
2:18
salt to the flour this small but essential ingredient balances the
2:23
sweetness brings out the flavor of the cookies here's a tip if you want to
2:28
ensure your cookies hold their shape even better try adding 1 tblsp of cornstarch cornstarch helps prevent
2:36
spreading during baking giving you sharp clean edges on your cutout cookies it
2:43
also adds a slightly softer texture to the dough making the cookies extra
2:49
tender without compromising their structure whisk or sift everything
2:55
together to ensure it's well combined and evenly distributed
3:00
once everything is Thoroughly mixed I set the bowl aside ready for the next
3:17
step in a separate Bowl I crack one large egg large eggs are ideal for this
3:24
recipe as they provide just the right amount of structure to hold the dough together without making it too dry or
3:32
sticky next I add one teaspoon of vanilla extract to the egg vanilla is
3:37
the star of sugar cookie flavors it brings a warm cozy sweetness that ties
3:46
all the ingredients together and makes the cookies taste Timeless and irresistible I grab my whisk and blend
3:53
the egg and vanilla together until the mixture is smooth and fully combined
4:00
this step is quick but important to ensure that the egg is evenly distributed throughout the dough later
4:08
on whisking also helps create a silky texture that makes mixing into the
4:14
butter and sugar affords once everything is well mixed I
4:20
set this bowl aside keeping it ready to join the party in The Mixing Bowl soon
4:38
now it's time to bring out the big guns my KitchenAid mixer this trusty helper
4:44
is an absolute Life Saver especially for recipes like this where the dough is
4:50
thick and needs to be perfectly Blended I start by adding 1 cup of softened unsalted butter to The Mixing
4:58
Bowl sof often butter is key here it's been sitting at room temperature just
5:03
long enough to blend easily and create that light fluffy texture we're aiming for by the way if your butter isn't
5:11
quite at room temperature yet check out my blog post on how to soften butter
5:17
quickly it's packed with easy tips to save time and get that perfect creamy
5:23
consistency for mixing next I add 2/3 of a cup of granulated sugar
5:30
sugar not only sweetens the cookies but also works with the butter to build a
5:38
delicate tender structure at this point the bowl is ready to go and so is my
5:44
paddle attachment I set the mixer to low speed at first because let's be honest
5:50
no one no one wants your sugar explosion flying
5:57
all over the kitchen once everything starts to combine I gradually increase
6:03
the speed to medium then I let the butter and sugar cream together for about 2 to 3 minutes this step is Magic
6:11
it transforms the mixture into something light Airy and pale in color setting the
6:18
stage for cookies that melt in your mouth [Music]
6:58
I hope you're having a much fun making these cutout cookies as I am if you're
7:03
enjoying this recipe be sure to give it a thumbs up subscribe and hit the
7:09
notification Bell so you don't miss out on more delicious baking ideas have you
7:14
made cutout cookies before how did they turn out got any tips or creative
7:20
decorating ideas to share I'd love to hear from you thanks for hanging out
7:25
with me let's get back to making these perfectly baked cookies [Music]
7:57
cookies after creaming the butter and sugar I grab my trusty silicone spatula
8:02
and scrape down the sides of the bowl this ensures no sneaky bits of butter or
8:08
sugar are hanging out unblended in the corners it's a small step but it makes a
8:14
big difference in the final texture of the dough
8:34
[Music]
9:14
now it's time to add the wet ingredients I pour in the egg and
9:20
vanilla mixture that I whisked earlier back to medium speed on the mixer it
9:26
goes and I let everything blend until it's smooth and fully Incorporated by now the batter smells so
9:33
good it's hard not to grab a spoonful for quality control but patience the
9:43
cookies will be worth it [Music]
9:59
oh
10:53
ch [Music]
11:32
now it's time to bring in the dry ingredients and this is where the dough
11:37
really starts to come together I add the dry mixture gradually about a third at a
11:44
time while keeping the mixer on low speed this avoids the dreaded flour
11:50
explosion I've had enough snowstorms in my kitchen and ensures everything Blends
11:56
smoothly as the dough thickens here here's my go-to tip if it feels too
12:02
sticky add a tablespoon of flour at a time until it's firm but
12:07
pliable if it's too dry or crumbly a small splash of milk will fix it right
12:14
up the dough should feel like soft clay smooth pliable and ready to roll a quick
12:21
pinch test will tell you it's perfect if it holds together without cracking or
12:27
sticking
12:45
if you're looking for healthier alternatives to some of the ingredients in this recipe I've got you covered on
12:52
my blog I've included a list of substitutions to make these cutout
12:57
cookies a bit lighter while keeping them just as delicious whether you want to
13:03
reduce sugar try whole wheat flour or adjust the butter you'll find all those
13:10
options detailed in my post it's a great way to customize the cookies to fit your
13:16
dietary needs or preferences check out the full recipe
13:21
and the healthier substitutions on my blog the link is in the description below
13:28
[Music]
14:03
once it's just right I stop the mixer and scrape down the paddle attachment
14:12
with a silicone spatula because no dough goes to waste here a quick check at the
14:17
bottom of the bowl ensures no sneaky flower is Left Behind and I fold it in by hand if needed these little steps
14:27
make all the difference when it's time to roll and cut your cookies
14:32
[Music]
15:19
next I carefully divide the dough into two equal portions a little Precision
15:25
here saves me from having one massive disc and one tiny one later using a
15:31
silicone spatula I scoop each portion onto a piece of food wrap here's my
15:37
personal trick I Loosely wrap the dough first then press it into a flat disc
15:44
this keeps my hands clean and avoids the sticky mess of handling the dough
15:49
directly plus shaping the dough into discs now save so much time when it's
15:56
time to roll out once the discs are neatly wrapped I pop them into the
16:02
refrigerator to chill for at least an hour trust me this step is
16:09
non-negotiable chilling the dough firms it up making it easier to roll out and
16:14
ensuring your cookies hold their crisp clean edges during
16:19
baking skipping this step has resulted in some shapeless blobs in my oven more
16:25
times than I'd like to admit if you're not baking right away say prepping ahead
16:32
for the holidays these dough discs freeze beautifully for up to 3 months
16:38
just wrap them in an extra layer of plastic wrap or foil to prevent freezer burn my Pro tip always label your discs
16:47
with the date and sugar cookie dough using a Sharpie there's nothing worse
16:52
than pulling out a mystery dough and playing the guessing game mid Holiday Rush when you're ready to to bake simply
17:00
throw the discs in the fridge overnight and they'll be as good as
17:26
fresh there's a saying in my my house when words fail cookies speak and let me
17:34
tell you cookies have gotten me out of a lot of sticky situations there's just something about
17:41
a homemade batch of cookies that says I'm sorry in the sweetest way possible
17:48
literally I remember one time when my daughter made a mistake she felt so bad and wasn't sure how to make things right
17:56
that's when I had an idea we'd B cookies together as a way to
18:02
apologize not only did it give her a chance to do something thoughtful but it
18:07
also helped her process the situation and feel more in control we whipped up a
18:14
batch of our favorite cutout cookies decorated them with bright cheerful
18:20
designs baking cookies as an apology isn't just about making something delicious it's about showing someone you
18:27
care enough to take the time and effort and honestly who can stay mad when
18:33
they're holding a plate of beautifully decorated cookies it's a universal piece
18:40
offering if you'd like to see how we make and decorate our cookies check out
18:45
the video I created with my daughter it's one of my favorite videos because
18:50
it shows how much fun we have in the kitchen while also teaching her how to
18:57
turn a simple recipe into a meaningful gesture have you ever baked cookies to
19:04
say I'm sorry or maybe you've used another creative way to
19:09
apologize I'd love to hear your stories or tips in the comments below let's Inspire each other to make things a
19:16
little sweeter one cookie at a time
19:23
[Music]
19:51
I like to start my holiday baking prep early usually in September it's a system
19:57
I've perfected over the years to keep things stressfree during the busy holiday season first I make the dough
20:05
and freeze it in neat labeled discs this sugar cookie dough fits perfectly into
20:11
that process after dividing and wrapping it into discs I either refrigerate it
20:17
for baking later in the week or freeze it if I'm planning ahead for the holidays each disc is carefully labeled
20:25
with the date and sugar cookie dough using a trusty shoie so there's no
20:30
confusion when I'm juggling batches of gingerbread dough and other holiday treats by October or November I'm in
20:39
full baking mode pulling out discs of dough as needed and baking cookies in
20:44
big batches if I'm not decorating them right away I freeze the baked cookies to
20:50
keep them fresh finally December is all about decorating and packaging that's
20:56
when the magic happens turning these cookies into festive gifts for family
21:02
and friends chilling the dough is an essential step in my process it firms up
21:08
the dough making it easier to roll and cut into shapes that hold beautifully in
21:14
the oven I divide the dough into two portions scoop each onto a piece of food
21:21
wrap with a silicone spatula Loosely wrap it and press it into a flat disc
21:28
this keeps my hands clean and makes Rolling a breeze later on if I'm
21:33
freezing the discs they'll stay fresh for up to 3 months ready to be thawed
21:40
overnight in the fridge whenever inspiration or holiday prep strikes
21:47
starting early takes the pressure off and lets me truly enjoy the holiday season seeing neatly stacked discs of
21:55
dough and trays of cookies in my freezer is so satisfying it's like having my own little baking
22:00
headquarters ready to go at any time whether you're a planner like me or prefer last minute baking this recipe is
22:08
a must for any holiday lineup trust me it's worth the prep
22:36
after the dough has chilled I take one disc out of the refrigerator here's a
22:41
personal tip from me when you're ready to roll out your chilled dough let the disc sit on the counter for about 10
22:49
minutes before diving in straight out of the fridge the dough can feel like a hockey puck thanks to all that butter
22:57
giving it a little time to soften saves you from a serious arm workout and keeps your
23:05
rolling pin and your sanity intact trust
23:10
me your wrists will thank you before diving into rolling out your dough and
23:15
cutting out cookies it's time to gather your trusty tools don't worry if you
23:21
don't have the exact ones I mention there's always a simpler alternative hiding in your kitchen first first up
23:28
are cookie cutters the stars of the show Fancy Cutters make perfectly shaped
23:35
cookies but if you don't have any a drinking glass or an empty can works
23:40
wonders for simple round shapes feeling creative grab a knife and
23:47
freehand some designs but maybe don't expect a cookie Masterpiece on your
23:52
first try next a cake spatula is your best friend for carefully lifting cut C
23:58
cookies and transferring them to the baking sheet without stretching or tearing them if you don't have one a
24:05
pancake spatula works just as well or even a wide knife will do the trick just
24:12
go slow and steady this is cookie making not a race to get perfectly even dough
24:19
every time an adjustable rolling pin with thickness Rings is ideal no
24:24
adjustable pin no worries a wine bottle
24:30
preferably empty or a traditional rolling pin works just fine just keep an
24:36
eye on the thickness of your dough and try to keep it consistent for sticky dough situations disposable vinyl gloves
24:45
come in handy to keep your hands clean and the dough mess free if you don't
24:51
have gloves lightly flower your hands but fair warning flower covered hands
24:57
usually mean flour covered everything else when it's time to bake you'll need
25:02
a baking sheet lined with parchment paper to keep your cookies from sticking if parchment isn't an option a silicone
25:10
baking mat Works beautifully in a pinch you can grease your baking sheet but be
25:16
prepared for crispier cookie bottoms finally my favorite little
25:23
helper a dread Shaker filled with allpurpose flour for dusting the rolling
25:28
surface evenly no dread Shaker a sifter fine mesh strainer or even a light
25:35
sprinkle by hand wool will work too it might just get a little messy but hey isn't that part of the fun once you've
25:42
got your tools ready you're set to start rolling and cutting and if you end up with flour all over your kitchen like I
25:49
always do just remind yourself that the best cookies come from a little bit of
25:55
Chaos
26:18
on a lightly flowered surface I roll the dough out to about 1/4 in thickness
26:25
keeping the dough evenly rolled is essential so all the cookies bake at the same rate uneven thickness can lead to
26:33
some cookies being underbaked While others burn so I take my time with this
26:38
step I also like to group cookies of the same size on one baking sheet to ensure
26:43
they bake evenly no tiny cookies overbaking while waiting for the larger
26:49
ones to catch up then comes the fun part cutting out shapes I press my favorite Cutters into
26:58
the dough to create festive designs making sure to use up every bit of space
27:03
before Gathering the scraps to reroll once all the shapes are cut I carefully
27:09
transfer them to a baking sheet lined with parchment paper I place each cookie
27:15
with care leaving enough room between them for slight expansion during
27:20
baking by the end of this process the baking sheet is filled with perfectly
27:25
shaped cookies ready for the oven it's a satisfying moment to see all
27:33
those neatly arranged designs waiting to bake knowing they'll soon turn into
27:40
delicious [Music]
27:51
treats here's a tip from me when lifting cutout cookies from the surface always
27:58
remove the excess dough around the shapes first before lifting the cookies
28:03
themselves this makes it much easier to slide your spatula or hands underneath
28:09
the cookies without stretching or distorting their shapes if you try to
28:14
lift the cookies with the extra dough still in place they're more likely to stick or lose their clean edges removing
28:22
the extra dough first gives you a clean surface and ensures your cookies stap
28:27
pict your
28:39
perfect when I'm done cutting out cookies I never let the scraps go to waste I gather them up in my hands mash
28:47
them back together into a disc roll them out again and cut more cookies I keep
28:52
repeating this process until I've cut every possible shape from the dough it's
28:58
a bit like a game how many cookies can I squeeze out of one batch when I get down to the last tiny
29:06
scraps that just can't make another cookie I wrap them in food wrap and set them aside this keeps them from drying
29:14
out while I grab the next fresh dough
29:20
disc from the fridge after cutting out cookies from the new disc I combine the
29:25
scraps from both rounds mash them together roll them out and keep going
29:31
waste not want not right here's a tip I've learned the hard way if the dough
29:36
starts sticking to your rolling pin and you feel like you're wrestling with it lightly flower the pin it makes
29:43
everything Glide smoothly and keeps the dough from turning into a sticky Mass plus it saves you from wanting to
29:51
throw the rolling pin across the kitchen don't ask how I know with this method
29:58
method you'll get the most out of your dough and have plenty of perfectly shaped cookies ready to bake
30:06
[Music]
30:32
before baking I always chill the cutout cookies on the baking sheet for another
30:38
10 minutes this quick step is especially helpful if your kitchen is warm it firms
30:44
up the dough again so the cookies hold their clean edges while baking trust me
30:50
it's worth the weight to avoid your carefully cut stars or gingerbread people turning into something that
30:57
resembles ex ract art in the oven once chilled I bake the cookies in a
31:02
preheated oven at 350° f for 8 to 10
31:09
minutes I keep an eye on them to make sure the edges turn lightly golden while
31:14
the centers stay soft the centers might look slightly underdone when you take
31:20
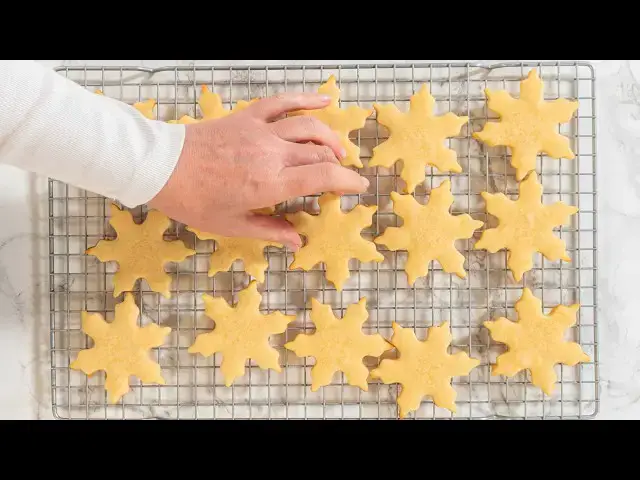
them out but don't panic they'll firm up as they cool if you don't have a wire
31:26
rack for cooling no worries just leave the
31:32
cookies on the baking sheet until they're fully feel like cool it's not
31:37
fancy but it works and you won't risk accidentally cracking a cookie during
31:43
the transfer here's a tip I've learned
31:48
through plenty of trial and error I always bake my first tray at the lower temperature mentioned
31:55
in the recipe this gives me a chance to check on the cookies and adjust the time or
32:02
temperature for the next batches if needed baking at high altitude comes with its own quirks so I've had to
32:09
figure out what works best for me plus every oven has its own personality what
32:15
bakes beautifully in one might come out a little too crispy in
32:20
another let's just say I've had a few learning experiences along the way
32:28
once baked and cooled you'll have cookies with crisp edges soft centers
32:34
and that perfect homemade touch and hey if a few cookies look less than perfect
32:39
just call them unique and eat them before anyone else notices that's the baker's privilege
32:56
right while the cook cookies cool I like to get my decorating supplies ready
33:02
these cookies are a blank canvas just waiting for your Creative Touch whether
33:08
you're working with royal icing chocolate icing or even a simple dusting
33:14
of powdered sugar if you're new to decorating with royal icing be sure to
33:20
check out my video where I show you step by step how to flood cookies with royal
33:25
icing for a professional finish trust me it's easier than it looks and the
33:30
results are totally worth it here's another tip if you're not ready to
33:36
decorate right away you can freeze the cookies while they're still undecorated just layer them between
33:42
sheets of parchment paper in an airtight container and they'll stay fresh for for
33:48
weeks then when you're ready to
33:53
decorate whether it's next week or closer to a big event you can simp thaw them out and get to work this makes
34:00
holiday baking a breeze especially if you're juggling multiple projects these
34:07
cookies are as versatile as they are delicious whether you're planning
34:12
intricate designs or keeping it simple they're the perfect foundation for
34:18
whatever your creative heart desires just don't forget to save a few plain
34:23
ones for taste testing because we all know that's the best part a
#Desserts
#Food & Grocery Retailers
#Baked Goods
#Holidays & Seasonal Events
#Bakeries