Up next in 10

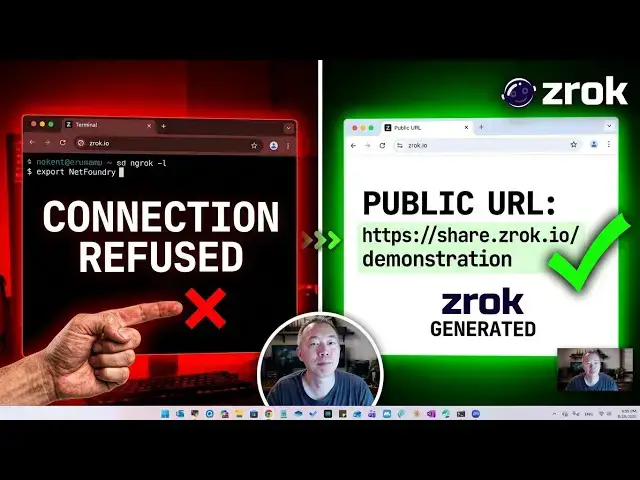
Free Share Your Internal Services Using OpenSource Tool zrok, a ngrok alternative
Aug 31, 2026
zrok is a secure, open source tool to share your local services over the internet without opening firewall ports or setting up complex routing in your system. This video is demonstrating some basic usages to share your local services such as website, and RDP tcp 3389 port to others in public or in private.
🔰https://github.com/openziti/zrok
Related Post:
✍https://blog.51sec.org/2026/08/zrok-secure-open-source-platform-for.html
Related Videos:
🌟How to Use Ngrok to Expose Internal Host Service to Internet - https://youtu.be/ggYRGnfGX2c
🌟Free Share Your Internal Using OpenSource zrokngrok alternatives - https://youtu.be/t3H5CjSy77Q
💖Chapters:
0:00 - Introduction
2:08 - Lets start it
3:21 - 1. Create an account & Get zrok2 file
7:26 - 2. Create a Private & Prublic Share
12:56 - 3. Tunnel RDP Port Out in a Secure Way
17:43 - End Scene
✅#51Sec #NetSec #Cyber #Security #CyberSecurity #HomeLab
If you found this video has some useful information, please give me a thumb up and subscribe this channel to get more updates:
⚡https://www.youtube.com/c/Netsec?sub_confirmation=1
⚡Resource Collection and Bookmarks: https://sites.51sec.org/
Learning and Sharing - 🔊海内存知己,天涯若比邻! A bosom friend afar brings a distant land near!
Discord: https://discord.gg/fCW9phn, Blog: https://blog.51sec.org
Show More Show Less View Video Transcript
0:01
[music]
0:06
>> Hello everyone. Welcome back to my
0:08
channel Ns Tech. In this video, I'm
0:11
going to show you an amazing open source
0:14
software t log
0:16
which is similar as the ngrok.
0:19
You must heard about it.
0:21
Amazing development tool which you can
0:24
use it to tunnel your internal services
0:28
to the public.
0:31
t log is similar as ngrok but open
0:35
source, better, and also providing more
0:39
generous free plan comparing to ngrok.
0:43
It has five daily free plan comparing to
0:46
ngrok. 1 GB data transfer, 20K HTTPS
0:51
request, three online endpoints,
0:54
5GB for the home use, 25 environment, 50
0:58
share backend, 50 private access front
1:01
end, which is definitely
1:04
more than enough for a home or small lab
1:07
or even a small team to use.
1:10
More than that, ngrok is also having an
1:13
issue when you trying to download the
1:17
Windows package directly because there's
1:20
a lot of misuse ngrok for tunneling for
1:24
some malicious usage. The downloading
1:27
might causing a security warning or it's
1:32
prohibited by the third party companies,
1:35
especially when you using some word VPS
1:38
or you want to trying to tunnel in it
1:40
out, it might be got banned or got
1:44
prohibited because of that.
1:47
Luckily, we have t log as alternatives
1:50
which still doesn't have that limitation
1:54
for most of the use cases. So, that's
1:56
why I'm testing this. I'm going to show
1:58
you how good it is and how it's working
2:01
and how you can tunnel your internal
2:03
services public or private. Now, let's
2:07
get into it.
2:13
How it is working?
2:15
Zlog provide private or public instant
2:19
secure tunneling.
2:21
So, this is private sharing. So,
2:23
basically, you enable your Zlog service
2:26
and then
2:27
privately share your target, which is
2:29
usually a port, a service to a certain
2:34
person to use.
2:36
For privately access, you need to have a
2:38
token.
2:39
Once you have a token, then you will get
2:41
a null link to access your shared
2:46
private service.
2:48
That's our one usage.
2:50
The second usage
2:53
is public. You also can share your
2:57
private services running in your private
3:02
network to the public. So, public can
3:05
access this using standard web browser
3:09
to access your internal service through
3:12
open ZT or this zero trust network.
3:17
Now, I'm going to show you how to get it
3:19
working.
3:25
First, of course, you need to get your
3:27
own account.
3:29
You can get started from the home page.
3:33
The first step, get your account.
3:36
Go to myzlog.io.
3:41
Then, you need to sign in.
3:44
Assuming you already have account, if
3:46
not, sign up with your email address and
3:48
you should be able to get your free
3:50
account.
3:51
I'm going to sign up account with my
3:53
email address.
3:55
I have read and agree.
3:57
Sign up.
3:59
Save it.
4:01
Now you're logged in, but you still need
4:02
to link a Zlog account. So,
4:06
Zlog
4:08
create.
4:11
So, now we successfully
4:14
created our new Zlog account.
4:18
Here it says you need to use in Zlog
4:20
enable. This is my token. So, once I use
4:25
in this on my local account, my local
4:28
computer going to link to this account.
4:32
But, that's only the first step. We will
4:34
stop here, go back to the guide here.
4:38
We do need to go to our API console.
4:42
So,
4:44
here is API console Zlog. Click on it.
4:48
So, this is API version one console. So,
4:53
that's when you follow that, you will
4:55
get a lost because you will see lots of
4:59
command is Zlog two command.
5:02
We are going to use in Zlog two. So, in
5:04
this way,
5:06
let's change it to Zlog version.
5:11
We need to log in
5:13
as using our new created account email
5:16
and password.
5:20
So, now we are on API version two. You
5:24
do have version one and then version
5:25
two. So, when you download latest
5:28
package, it will be version two.
5:32
So, that's why I'm asking you to sign in
5:35
to the API-V2.zlog.io.
5:39
And in the documentation side is also
5:42
shows version 2.0 as well.
5:45
So, we need to get
5:48
second stab, which is install zlog2
5:51
command. As you can see here, now it's
5:53
zlog2. If you were still in the zlog1,
5:56
you will get a little bit of loss
5:57
because
5:59
it will be different.
6:02
As you can see here,
6:04
it will be different. All command will
6:06
be zlog2 command here.
6:08
And in the documentation also says
6:10
zlog2. So, that's one confusing. I try
6:13
to make it clear.
6:15
So, we're going to download the package.
6:18
And we're going to use it.
6:21
As you can see,
6:23
ngrok has been marked as a wireless,
6:27
but zlog is fine.
6:29
You need to keep that in mind. When you
6:31
have a problem with ngrok, then you
6:34
might want to try zlog here.
6:36
So, I put the zlog
6:38
file into my temp folder. Now, let's go
6:42
to my
6:43
temp folder here.
6:45
So, you should be able to see zlog2
6:48
folder, and then you will see this
6:50
almost 100 MB zlog2.exe
6:54
file. That's the one you will see. So,
6:56
to see zlog2.exe,
6:58
you should be able to
7:01
here to issue the command status and
7:04
overview.
7:09
So, we are going to enable our
7:11
environment, and then create our first
7:13
share which you will try private, and
7:16
then public. After that, we also going
7:19
to try how to tunnel your TCP such as
7:22
RDP from your local network and the to
7:25
public.
7:30
Since we already have zlog2
7:34
exe file downloaded, now we should be
7:37
able to enable it in our environment,
7:40
and which is enable your local net
7:42
computer to the the log
7:46
API environment. Just connect it to it.
7:49
So, basically you can run this command
7:52
through your command. Previously, I
7:54
already have
7:56
the log two enabled on another
8:00
environment. So, if you have same issue
8:02
when you're doing the lab, this one you
8:05
need to disable first.
8:08
As I can show you here, disable.
8:11
So, that
8:13
environment going to be disconnected
8:16
from your local computer. Now, you
8:18
should be able to run this again.
8:20
So, it's connecting that the log server
8:23
and then
8:24
right away, you should be able to see
8:27
this computer
8:29
DA with an account connecting to your
8:33
the log
8:35
API console. So, you should be able to
8:38
see it here.
8:40
That's how easy you can enable your
8:42
environment.
8:44
To continue that, we're going to do a
8:47
couple of command to testing it. What
8:50
we're going to testing it is we're going
8:52
to do the log two
8:55
test endpoint.
8:59
This command going to spin up a
9:02
lightweight web service on your local
9:05
computer on port 1990.
9:08
After that, you should be able to share
9:11
it. So, we're going to try to share it
9:13
privately, which you will need that
9:15
token to access this shared service. In
9:19
this case, we need to open another
9:21
command line window. In this command
9:23
line window, we're going to CD the log
9:26
two folder and run the log two command.
9:30
We're going to share private port 1990.
9:36
Since when you use test endpoint, level
9:39
going to spin up lightweight web service
9:42
on this port 1990. So, we going to share
9:46
it privately.
9:49
You will need to access your share with
9:52
DayLark tool
9:54
access private
9:56
this command.
9:58
We going to
10:01
copy it in our third command line
10:04
window. So, we going to
10:06
go to DayLark tool folder first and then
10:10
directly copy this
10:12
private share command.
10:14
Which is token. This token
10:17
privately. Whoever has this token and
10:20
this DayLark tool command, then you can
10:22
access to it.
10:24
So, we share the command.
10:26
Now, we can access it through this URL.
10:30
So, let's copy it.
10:34
127.0.0.1
10:37
localhost 9191.
10:41
By the way, you should be able to see
10:42
this DayLark test endpoint. So, in this
10:46
way, it's secured, shared. It's not
10:48
going to public. Nobody else going to
10:50
access it without that token.
10:53
But, we also can share it in public. So,
10:56
let's do that.
11:00
So, I'm going to
11:03
stop all the command. Control C.
11:07
Control C.
11:09
Control C.
11:10
So, all command stopped. So, we going to
11:13
start from here. Last time we shared
11:15
privately, we going to share public. We
11:18
change from private public here.
11:21
We will see
11:23
what we will get.
11:24
A URL. Which is publicly available URL.
11:31
You can just directly it. You don't need
11:34
another terminal window to help you.
11:36
Come on, I'm in the to help you. You can
11:38
directly paste the in here.
11:43
So, here it's saying, "You are about to
11:44
read the Zlogger share located at this
11:47
URL. This share is made available for
11:49
free through Zlogger cloud. You should
11:52
only read this share if you trust
11:53
whoever sent you the link. Be careful
11:56
about disclosing any personal or
11:58
financial information like password,
12:01
phone number, or credit card.
12:03
We trust it. We are owner, so we can
12:06
read this share.
12:07
The page isn't working. It's saying it's
12:11
not
12:13
available. The reason why is because we
12:16
didn't start service.
12:18
So, let's do this.
12:20
Zlogger 2 exe test endpoint.
12:24
Now,
12:25
the URL is the still same.
12:28
No change. Last time when we tried it,
12:30
yes, error, but now let's try it.
12:34
We get the same web page as when we
12:38
tried in private mode. So, that's how
12:41
easy you can spin up a tunnel to share
12:45
your local service to the world or in
12:48
private.
12:49
Next session, I'm going to show you how
12:51
to share your TCP 3389
12:55
RDP port.
13:00
If you are planning to share your TCP or
13:02
UDP services out, you might need this
13:06
document help. It shows how to share SSH
13:11
or database to the other parties.
13:15
Uh unfortunately, there's no public
13:17
available share. You cannot share like
13:19
public, but you do able to share it in
13:22
private using a token.
13:24
So, that's to we're we to do?
13:26
We going to share our RDP to someone
13:31
else who knows the token.
13:33
We will not do the SSH since the command
13:35
or here.
13:37
To do that, we need two computers. Right
13:40
now,
13:41
we only have one, so I'm going to
13:45
get the second machine up and then we
13:49
going to work from there. So, I already
13:51
download Zlock to command here. I just
13:55
need to paste Zlock enable command in so
13:58
that we can use it.
14:02
We will do same. We will do Zlock
14:04
disable.
14:08
And enable again.
14:15
Come back here again. Now, we will see
14:17
we have two computers. One DA, one is
14:20
desktop, which we just recently added
14:22
in.
14:25
We going to do TCP tunneling 3389. So,
14:29
that's what Zlock
14:32
to
14:33
share private
14:37
backend mode TCP
14:40
tunnel localhost
14:43
3389.
14:48
We got the token.
14:50
So, we going to use in the private this
14:52
token.
14:54
But, remember,
14:56
this is not web service. This is TCP
14:58
port. So, it's going to be different
15:01
than mapping a web service is out. Just
15:05
like we did in previous section. We
15:07
going to go back to our machine DA
15:10
machine and then
15:12
try it from there.
15:13
Sweet. Now, you can see service 3389
15:17
is shared with this computer. Now, we
15:21
going to accessing from here, which is
15:24
kind of computer
15:26
to this port.
15:33
Originally, command we got from a
15:36
Tailscale private share is to list, but
15:39
we have to modify a bit since we are not
15:42
going to access in a web service. We're
15:44
going to access in the port 3389. So,
15:48
what we're going to do is we're going to
15:50
do the bind.
15:52
We're going to bind the local host port,
15:56
for example,
15:57
338999.
16:00
So, basically, we're telling Tailscale
16:02
if anybody access in 33899,
16:06
let go through the tunnel.
16:08
So, because this is PowerShell command,
16:11
so we can add this to Tailscale tool
16:14
.exe.
16:17
Now, you can see the tunnel 33899
16:22
port on local going to go through the
16:24
tunnel. So, we're going to try this.
16:28
mstsc
16:31
and using 127.0.0.133899,
16:35
we're going to connect to it.
16:38
You can see there's connection. We have
16:40
admin password.
16:42
We're going to put that in.
16:45
Okay, looks like good. We got the
16:47
certificate error warning. Now, we have
16:50
RDP.
16:54
We do able to see this system we are in.
16:57
That's how easy you can map your local
16:59
port, even RDP port, out to the internet
17:05
in a secure way.
17:07
You also can do more. You can do UDP,
17:09
which is angle might not able to do it.
17:13
You can further find other use cases
17:15
using agent. That's going to of a
17:17
different topic, but based on my
17:19
testing, this is fantastic.
17:22
The speed even faster comparing to
17:25
Angular. I hope you like this video and
17:28
then find this video helpful and then
17:31
you can start into explore the log this
17:33
application. If you do like this video,
17:36
give me a thumb up. Also, subscribe my
17:38
channel if you haven't. Thank you very
17:41
much. See you in my next one.
17:50
>> [music]
17:55
[music]
Science