0:00
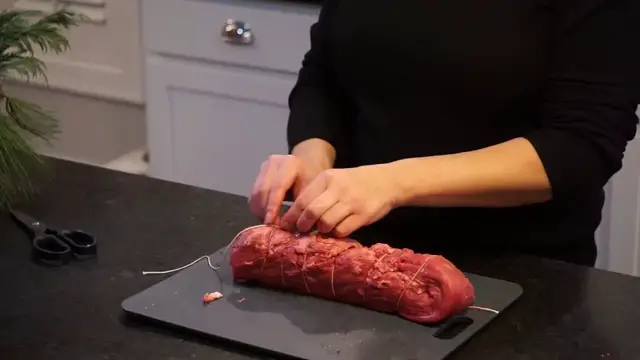
Hey, I'm Jocelyn and today we're going to do a little tip on how to tie a beef tenderloin
0:05
This is not a cheap piece of meat so you really want it to cook very evenly. So to do that, you can see there's this thinner part and then it gets bigger
0:13
So all we're going to do is tuck that in so that this gets to be about, we want it all
0:18
to be sort of the same size, right? So we've done that, it's tucked really nicely
0:25
And we're just going to take some butcher's twine. This is just a cotton twine, and you can get it in any grocery store
0:31
And we're going to tie this up so it doesn't change shape
0:36
And then when it's really even, it'll cook more evenly. So this looks more complicated than it is
0:44
I'm always a little bit nervous doing it. You know what? Because you don't want to mess up, go ahead and practice a couple of times
0:51
It's okay. You're just wasting string. It's not like you know you're wasting a very expensive piece of meat
0:57
So we're going to start by taking this tail and we're just going to tie it around
1:02
And actually I loop it two times because if you loop twice it stays tight
1:08
So I even do that when I wrapping presents for Christmas and stuff too Anyway that kind of hold it down tight to the meat And you not going to try and squish this We just trying to keep it all the same size right
1:21
So we've done that and then I will just tie this into a square knot at the first. And we're going
1:27
to do this about every inch, inch and a half. So now we make a loop and it's pretty easy. You just
1:32
take this and you loop it around your hand and let bring the string toward you so that you've
1:38
made this little loop and you pull it under here and you pull it tight. Sometimes you have to kind
1:45
of work the string a bit just to get it all straight and nice and even. But you can do that
1:54
Okay and then it should be about even on the bottom as well and then we're going to make
2:00
another loop again. So wrap it around your hand, bring that string toward you, the tail, and then
2:08
put this over your meat. And then you just pull it tight again
2:14
so that there's tension. You're not doing this really tight. Okay okay so I have brought this down and the next thing we going to do is to take this flip
2:41
this over and we're going to go back along the other side and first before you do that
2:46
let's just make sure I've got them all really nice and even about the same width apart this
2:54
This one's a bit wide. And then we're going to take this tail and we're going to go under each string, under
3:03
the first string and then back over it. So you're just making a little loop around the string, pull it so there's tension and
3:09
keep doing that process under each of these and then over each
3:17
Okay, so I mis-measured my string. I just kind of guessed and that's fine because the great thing about string is that I can
3:26
just take a little bit more and knot it on the end, nice and tight
3:31
We're going to make this a good tight square knot and I'll just roll out a bunch more and
3:37
then we'll be fine. Not a big deal This is pretty forgiving Okay you can see I have just brought this under each and then back
3:57
over each and pulled it through. We're going to turn it back around and we're going to take this
4:02
up and we're going to tie this end right there at that first knot that you that you made and
4:08
there we go just a nice little square knot nothing exciting just enough to keep it all even and then we just trim off our ends
4:19
and this is ready to be cooked so that's how you tie a beef tenderloin i hope that it helps
4:25
and it does take a little practice sometimes i sometimes i do it once sometimes i take it all
4:30
off and do it again and that's okay. It's just going to make your meat cook much more evenly and
4:36
you don't want to waste a really good piece of meat like this. So see you later