live_tv
Livestream Starting Soon
00
Hours
:
00
Minutes
:
00
Seconds
Up next in 10

PHP 8 Image Intervention Library Crash Course to Resize & Add Watermark to Images
Jan 9, 2025
PHP 8 Image Intervention Library Crash Course to Resize & Add Watermark to Images
Show More Show Less View Video Transcript
0:00
uh hello guys welcome to this video so
0:02
in this video I will actually show you a
0:04
open-source PHP image processing Library
0:08
it's really popular and the name of this
0:10
library is image intervention so this is
0:14
actually the uh website of this Library
0:17
image
0:19
intervention. the latest version is
0:21
version 3 and uh you can just check out
0:25
their examples it has called a nice
0:27
little documentation it basically can
0:30
do anything with the image it can
0:32
convert image from one format to another
0:34
it can resize image it can scale image
0:36
it can add Watermark to images so I will
0:39
show you how to do this using very
0:42
simple example in PHP the latest version
0:44
it requires you to have the latest
0:46
version of PHP at least eight version so
0:49
if you check the latest version of PHP
0:52
at the time of recording this video is
0:54
8.3 so this Library assumes that you
0:58
have versions of PHP at least eight so
1:03
my version is 8.2 so I can use this
1:05
Library so the very first thing we need
1:07
to do in order to install this library
1:09
is uh we need to Simply write composer
1:12
we will be using this dependency manager
1:14
for PHP for installing third party
1:16
packages so composer require
1:18
intervention the name of the library
1:22
intervention SL image so this is
1:25
actually the command of composer that is
1:28
required composer requires the name of
1:30
the library intervention do/ image so
1:34
just enter it and it will install the
1:37
actual
1:38
Library it will create a vendor folder
1:41
if you see it has created this vendor
1:43
folder and it has actually installed
1:46
created this composer file and it is
1:48
using the latest version which is 3.8
1:51
now to get started we will actually
1:54
start so first of all you need to
1:57
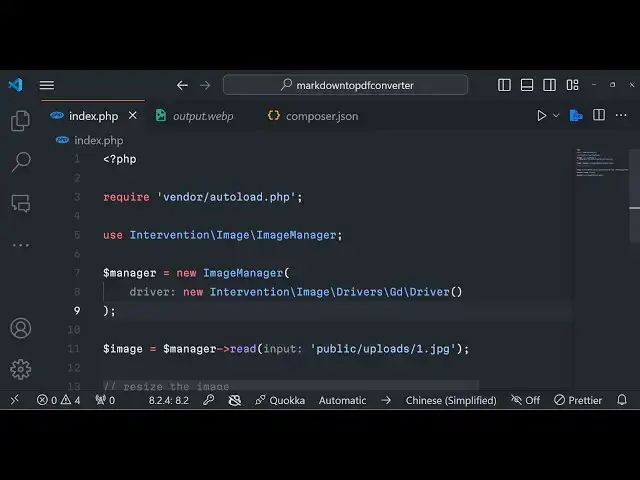
actually write this PHP
2:01
tags so we have this file of PHP so
2:05
first of all we do need to require the
2:06
vendor file we need to include this
2:08
vendor file for the including the
2:12
library autoload.php so for every
2:15
package there is a autoload file if you
2:18
see the vendor folder it contains this
2:20
file called as autoload.php so we are
2:23
simply including this file to actually
2:25
load the actual Library so after loading
2:28
this we will be using the class that we
2:30
will be using which is use
2:33
intervention slash the image module
2:37
slash image
2:39
manager
2:41
so this is actually class responsible
2:44
for processing images so we simply
2:47
included this class at the very top now
2:49
we can initialize this class by
2:52
instantiating a new instance of it
2:54
creating an object New Image
2:57
manager and basically it it uh takes
3:01
a Constructor of new intervention slash
3:07
image and here we need to provide the
3:09
actual drivers
3:11
drivers
3:14
GD you can even use image magic as well
3:17
but we will be using GD here
3:20
slash driver we'll call this
3:23
function so in this way you can
3:25
initialize this
3:27
Library so after we get get this
3:31
initialize this this object of manager
3:34
it actually contains a lot of methods
3:36
first of all this object contains a
3:40
method for reading the
3:42
file reading the input image file so
3:45
this actually contains this read
3:47
function so read function what it does
3:50
it actually takes the path of the image
3:53
so we'll be taking a sample image one.
3:55
jpg so taking this image jpg image so
3:59
here it is present in the public SL
4:01
upload SL one.jpg so we will simply
4:05
provide the path of the image to this
4:06
function so after we get this image we
4:08
can simply now actually do anything with
4:11
it we can resize it add
4:14
Watermark so I will show you each method
4:17
so the first method here we will be
4:19
doing it we will be resizing the image
4:22
for resizing this image we have a
4:25
function in this Library which is
4:27
resize and it takes 2 hour arguments
4:30
first is the width so here you need to
4:32
provide the width you need to resize let
4:34
me provide 300 and then the height also
4:39
300 so now if you want to save this
4:46
image there is a save function
4:49
available so if you want to save this
4:53
simply say image save and here you need
4:57
to provide the output name like let me
5:00
provide output.
5:03
jpg so this is actually the PHP script
5:06
that we written and now if I run this
5:07
PHP script it will resize this input
5:10
image 300 by 300 and it will save this
5:13
in root directory output. jpg so if I
5:17
just run
5:18
this you see will the output JPG file is
5:23
created and if you now see it has been
5:26
resized to 300 width 300 height
5:31
right this was the original image you
5:34
can just see and it has been
5:37
resized so if you want it let's suppose
5:40
higher the width you can make it 800
5:44
again run
5:46
this so now you can see the width is
5:49
larger height is 300 so in this way you
5:52
can resize the image and now I will show
5:54
you how to add a watermark so after
5:58
resizing it if you want to add a
5:59
watermark there is a method available in
6:01
this Library which is called as Place
6:03
method you can use this place method and
6:07
let me add this YouTube Watermark image
6:10
which is the PNG image transparent logo
6:13
if I want to add this logo onto this
6:14
image you can simply use the place
6:17
method and
6:18
just this is the image name which is
6:22
present the same directory and the
6:25
second argument it is take is the
6:27
position the positions can be five top
6:30
left top bottom bottom left bottom
6:33
right top right and Center Center so if
6:37
I want to place it on the top left
6:38
position this is a
6:41
position and then Offset you can give it
6:44
10 comma 10 if you don't want to give it
6:46
it's okay so if you run this now you
6:49
will also see a watermark will also get
6:53
added if you open the output image you
6:57
can now see top left position it has
7:00
added the
7:02
watermark so if you want to resize this
7:05
logo you can even provide 10 comma 10 so
7:07
this will be the width and height of the
7:09
logo so if you again run this
7:13
now it will look something like
7:20
this if I open this output image
7:29
so if you because the image is resized
7:32
to a smaller size that's why you are
7:35
seeing the watermark is higher so what I
7:38
will do I will remove this resize
7:40
function and again run
7:47
this if I open this once
7:51
again so now you can see it has placed
7:54
the watermark at the top left position
7:57
you can just change the positions as
8:02
well if you want to top right position
8:06
again run this code you will see it will
8:23
now if I open the output you will now
8:26
see it is now added in the top right
8:28
position
8:30
same goes with if you want to add it in
8:32
the center Center Center just add this
8:35
run code now it will be in the
8:39
center if you want to do it in the
8:42
bottom
8:47
center so right in the bottom center
8:50
position so in this
8:51
way you can control the positioning of
8:54
the water mark in the image you can
8:56
place it in any location
9:01
and then we also have the method to
9:05
actually convert this image from one
9:08
format to another so you can just see
9:10
it's a JPG image that we are processing
9:12
it if you want to convert into a PNG
9:15
image you can simply say
9:19
image can create a new variable encode
9:22
it and then we can take this input image
9:25
we can just add a method to you can see
9:29
all these methods are available 2 PNG
9:32
two uh Tiff webp as well so I will say 2
9:36
PNG I will make this and then I will
9:40
change the file name to
9:43
output.png and if you run this code
9:47
now just make it uh
9:54
encoded not this image just make it
9:56
encoded
10:01
so if you now see it has created this
10:03
output.png and same file if you
10:08
see you can even convert to webp as
10:13
well and then change it to
10:17
webp so now it has the webp image so
10:20
webp image opens in the browser you'll
10:22
see that so it's a very vast Library it
10:26
basically supports multiple operations
10:28
such as related to to image I can't
10:30
cover all operations in the single video
10:32
I just wanted to introduce to this
10:34
Library it's a number one library in PHP
10:37
for image processing it depends upon
10:39
image magic and GD Library the base
10:42
libraries of PHP so for using this
10:44
Library you should have at least 8.1
10:46
version of PHP installed and you can
10:49
just see it has got 2.7 million
10:52
downloads per month so it's open source
10:55
Library so no need to pay for anything
10:58
it's a free open source library and
11:00
through this Library you can make
11:02
awesome tools for related to image you
11:05
can resize insert Watermark text
11:09
everything you can do it so thank you
11:11
very much for watching this video and I
11:13
will be seeing you in the next one