live_tv
Livestream Starting Soon
00
Hours
:
00
Minutes
:
00
Seconds
Up next in 10

Node.js Express Project to Build FFMPEG Video Editor to Trim & Cut Videos in Browser Using JS
Jan 9, 2025
Buy the full source code of the application here:
https://procodestore.com/index.php/product/node-js-express-project-to-build-ffmpeg-video-editor-to-trim-cut-videos-in-browser-using-javascript/
Hi Join the official discord server to resolve doubts here:
https://discord.gg/cRnjhk6nzW
Visit my Online Free Media Tool Website
https://freemediatools.com/
Buy Premium Scripts and Apps Here:
https://procodestore.com/
Show More Show Less View Video Transcript
0:00
uh hello guys welcome to this video so
0:02
in this video I will basically talk
0:04
about that how I build this video
0:06
trimmer kind of application inside fmpg
0:09
in nodejs Express in browser with live
0:12
preview so you will be able to cut your
0:14
videos or trim your videos based upon a
0:16
starting time and end time so if I
0:18
reload the application it will look
0:20
something like this here you can
0:22
basically have a button right here if
0:24
you click this button you will be able
0:26
to select your video file all video
0:29
types are supported MP4 Avi any
0:32
extension that you can select this is my
0:34
mp4 file so as you load basically this
0:37
file will be uploaded and it will be
0:39
displayed right here and you can
0:41
navigate to any portion right here and
0:43
uh if I turn on the volume you will see
0:47
as I play the video see that we so
0:50
delete rotate Pages delete pages and
0:53
all so you can see the video is playing
0:56
right here and if you see in the UI we
0:59
have this in the left hand side you can
1:01
here select the starting time so as I
1:04
move here automatically the start time
1:07
has been selected so I'm there inside 2
1:10
minute 3 second so you can see this is a
1:13
start time which is automatically
1:15
selected and now for setting the end
1:17
time you can manipulate directly
1:21
here how much uh minutes that you want
1:24
to cut so let's suppose I want to cut
1:26
this portion 2.3 up to here you can
1:30
mention it accordingly
1:35
2 110 so this is the end time that I
1:39
given just 210 from
1:42
23 I think the length of the video will
1:44
be 6 seconds so as I click
1:47
the cut button you will see the video
1:50
will process and you will see the length
1:52
of the video will remain 7 you can
1:55
just number you need so length of the
1:58
video is 8 seconds and you can see
2:01
that and now after doing it we can
2:04
download this video and you can play
2:06
this video right here rate the second
2:09
page input
2:11
number so in this video uh you can see
2:14
you can trim your videos like this you
2:17
can select it you can select the
2:19
starting duration and the ending
2:20
duration and then you can simply cut you
2:24
can basically deploy this application on
2:25
your own website it works in the browser
2:27
itself it doesn't require any service
2:30
site code you just need to have a nodejs
2:32
server involved where we are actually
2:35
doing this you can select the duration
2:38
you can mention the duration right
2:40
here and then whichever from this
2:44
portion up till the end of the video I
2:46
need to cut you will see as I click cut
2:49
the video will be cut right here so 1
2:51
minute 27 second and then again if you
2:54
want to cut once
2:56
again from 42 second up to till now you
2:59
will see
3:00
the video will be cut
3:02
0.45 so as you are cutting the video
3:05
there will be a folder created in the
3:07
temp directory draw folder this is
3:11
truncated videos that will be stored
3:14
right here if you see all these videos
3:17
will be stored inside this
3:19
folder that are simply cut you will see
3:22
that so all these things are there in
3:26
the addited folder in the back
3:28
end and and if you need the full source
3:31
code guys the link is given you can
3:33
directly purchase the full source code
3:35
uh you can from PayPal and after that
3:38
you will get a zip file from Google
3:40
Drive and you can extract the zip file
3:42
to get this directory structure and uh
3:45
here we are actually using the fmpg
3:47
module in Express and nodejs and also we
3:50
are using malar library for file
3:52
uploading purposes to actually first of
3:54
all upload the files and these are all
3:56
the JavaScript code which is there and I
3:59
will explain you how I did this and uh
4:03
if you don't know about fmpg it's a
4:06
official open source audio and video
4:08
processing library for interacting with
4:11
audio and video files so I have
4:14
installed fmpg on my system but
4:18
this you can use this application if you
4:21
don't have
4:22
fmpg you don't have to have fmpg
4:25
installed I just want to tell you and
4:30
now I will show you how I build this
4:32
application so just want to walk you
4:35
through some of the code right here it's
4:37
a long application so it basically
4:41
starts from this app.js file so as you
4:44
basically purchase the full source code
4:46
guys you just need to install npmi so
4:51
after you get the zip file you just need
4:52
to execute this command this will
4:55
actually install all the nodejs modules
4:57
which are required for this application
4:59
and it will create a nodejs module
5:01
folders and then you just need to say
5:03
node node
5:05
modon app.js this will actually start
5:08
your backend
5:11
server sorry this is
5:23
index.js so let me just see here npm Run
5:28
start sorry you can't directly I
5:30
basically made a start script in the
5:32
package.json file if you
5:34
see you just need to run the start
5:38
script which will eventually start the
5:40
nodejs application so just execute the
5:43
script npm Run start so this will start
5:45
your backend Express server on Local
5:48
Host
5:48
3333 and you just need to go to the
5:51
browser and just open this Local Host
5:54
3333 and your application will start so
5:59
I will watch talk you through about the
6:00
code here and it basically start with
6:02
this app.js file which you see right
6:06
here this is server.js so this file
6:09
basically contain this code so we
6:13
basically require the app that we
6:15
created in the app folder and then
6:18
basically we
6:19
put the port number so if you want to
6:22
use a any other ports let's suppose I
6:25
want to start this application on Port
6:27
5000 and then app. listen
6:30
Port so now this application will listen
6:33
on Port 5,000 so if I refresh now this
6:37
will not
6:39
work so we just need to restart the
6:46
application so now it will not work you
6:48
need to go to Local Host 5,000 so if you
6:51
just want to change the port number you
6:52
can change it inside modify this file
6:55
and this is all that is there inside
6:57
this file we now need to go to app .js
7:00
this is actual file now let me also tell
7:03
you what is actually there inside this
7:06
file so first of all we are actually
7:08
importing the require Express module
7:10
which is a backend server and then we
7:12
just need to install basically require
7:15
all the routes which I mentioned inside
7:17
the routes
7:20
file routes file that we created and
7:22
then also we need to import the resolve
7:25
module which is a path buil-in module of
7:29
node JS and then we will instantiate a
7:31
new Express app like this and then we
7:34
will use some middlewares first
7:36
middleware is Express URL encoded and
7:38
extended to
7:40
false these middlewares are required
7:42
whenever you are working with forms you
7:44
just need to do it and then we need to
7:46
set the static
7:49
directory which is
7:53
uh dot
7:57
dot public directory so we have actually
8:00
created a directory called as public
8:02
where you stored all your static files
8:04
such as CSS JavaScript files uh here we
8:07
are basically passing it and then also
8:11
we
8:14
are
8:16
also D
8:19
name so here from this code you can set
8:22
multiple static directories we have set
8:25
first of all the public directory temp
8:27
directory edited directory so all these
8:29
directories that we created right here
8:31
so inside temp directory edited draw all
8:34
these are public D static directories so
8:37
this is public so it contains all your
8:39
JavaScript code uh basically all the
8:42
assets images that you store HTML code
8:44
that front end code is stored inside the
8:47
public folder so we essentially make
8:49
these two directories a
8:52
static after we do this we just need to
8:56
do basically pass the router which is we
9:00
imported it and then we simply need to
9:03
export this so that we can include this
9:05
inside server.js module. exports this is
9:09
the app.js file so after this we need to
9:13
now make the routes.js that we are
9:15
importing it inside app.js if you see so
9:18
this will actually hold all the routes
9:20
which are used inside this video that
9:21
you all see right here so the very first
9:24
thing we will do we need to Simply
9:27
import router from the ex
9:30
Express so Express has its own router as
9:33
well if you want to make custom routes
9:36
so Express Fame framework has it and
9:39
then we need to instantiate the molter
9:40
as well we need to require middle Wares
9:44
the molter middleware that we construct
9:47
and then we have some controller as well
9:50
so basically this application is built
9:52
upon MVC pattern model view controller
9:55
we have various controllers which are
9:57
responsible for different actions in the
9:59
application so one such action is
10:02
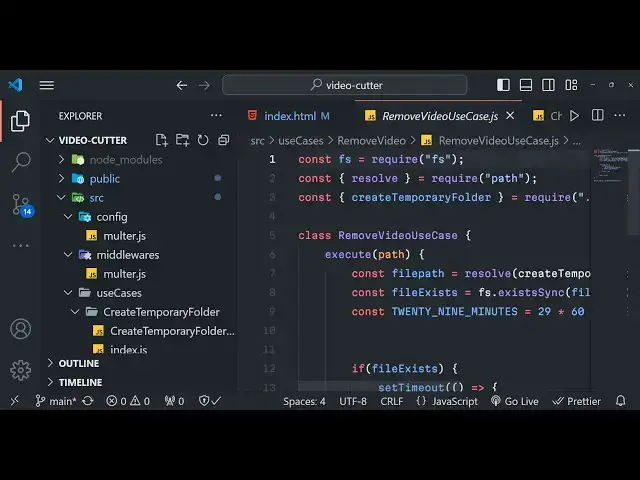
uh it is present inside use cases cut
10:06
video so cut video is responsible for
10:09
cutting the video and one such
10:11
controller is get video
10:14
controller so this controller is
10:16
responsible
10:19
for getting the video so when you
10:22
basically select the video it basically
10:26
uploads the video and then it shows the
10:28
video in the video video
10:30
player and after that we will
10:32
instantiate our router like this and
10:36
then we will instantiate a get route so
10:38
when you open the homepage
10:42
basically this call back function will
10:44
execute and here you'll basically return
10:47
a response you will send the file called
10:50
as
10:51
uh the file is present inside index.
10:55
HTML
10:57
so this file
10:59
it will look in the public folder in the
11:01
same directory will find this file
11:04
index. HTML so basically we do it and
11:08
then one such more route will be route.
11:12
poost so slashcut so we are basically
11:15
writing the post request whenever
11:17
someone's allows
11:19
to um make a post request to actually
11:22
cut the file based upon starting time
11:25
and end time so this request will take
11:27
place request response
11:30
so this call back function will take
11:33
place so here we will actually use fmpg
11:36
library to actually cut the video so we
11:40
will return this cut video controller do
11:44
handle and we will simply pass request
11:55
response and then we will again write a
11:57
get request cut
12:00
this is a dynamic parameter that we are
12:02
passing colon name this will be
12:04
different every time whenever this
12:07
request is made by the user this name
12:09
will be dynamic so request response so
12:14
based upon the name we will show the
12:17
file to the user and then we will again
12:20
say get video controller.
12:22
handle request
12:27
response and then lastly we will need to
12:30
export this file so that we can use in
12:32
different files so module exports
12:34
router that's all so this is the MVC
12:37
pattern it's followed in many software
12:39
applications when they are built so it's
12:41
better to basically destructure your
12:44
code in multiple file so that whenever
12:46
you want to make changes it is very easy
12:49
for you to make changes so it is very
12:52
good practice to write code in different
12:54
files it is not recommended to write all
12:57
the functionality in a single file
13:00
so that's why I decided to split this
13:03
code into multiple files so now we will
13:06
make our index.html file which is
13:08
present inside the public folder so I
13:10
will simply go to this uh index.html
13:13
file so inside the body so at the very
13:16
top we are actually including all the
13:18
CSS code which is required all the fonts
13:20
that we are using for this application
13:22
title everything is included so right
13:25
here in the HTML we will actually have a
13:27
section and I will will simply give it a
13:30
class here of video cutter and we will
13:33
have a basically H1 tag right here and
13:36
this I will say video cutter and trimmer
13:39
in
13:43
browser and then we will simply have a
13:45
main tag here and uh in a section we
13:50
will give it a class of Select
13:52
video and this will actually have a
13:55
form where it basically say slash
14:00
and this method will be a post method
14:03
post ID we will give it a ID to the form
14:06
and encoding type multi-art form data so
14:09
while we are working with media files so
14:11
we do need this encoding type parameter
14:14
so after you do this we will just format
14:22
this so after this guys we will have our
14:26
field
14:28
set
14:31
so here you will say that video
14:35
trimmer web
14:41
app uh this is all HTML so I don't want
14:44
to waste your time in writing the HTML
14:46
static code so I will simply copy this
14:48
code and paste it and just explain you
14:49
what is happening right here you can
14:52
basically find all this code after you
14:54
purchase it let me paste it here this is
14:57
actual interface of the application it
14:59
basically contains these fields a simple
15:01
form where you provide your input video
15:04
file you can select it so we are
15:06
actually accepting you will see all the
15:08
video types which is MP4 webm OGG FLV
15:12
video
15:13
3gp webm V
15:16
MPG and then we have a video preview
15:19
where we have basically show the video
15:21
file when the file is successfully
15:23
loaded and then here you can basically
15:25
set the starting time and the end time
15:28
this is ual format that we are taking
15:30
right here this is the end time starting
15:33
time and then we submit the form by
15:36
clicking this button right here to
15:38
actually cut the video so by default
15:41
this button is
15:44
disabled so as you basically select the
15:47
file you do need to
15:50
provide as the video is
15:53
loaded so by default this button will be
15:56
disabled so now we are actually incl
15:58
including the index.js file to this is a
16:01
front end JavaScript code which is there
16:04
in the public folder in the scripts and
16:07
index.js so
16:09
here we're including all this thing
16:12
check JS videojs input JS form JS UJS so
16:16
all these scripts are available in the
16:17
scripts folder which are responsible for
16:19
this and here we are
16:23
actually uh binding all these things we
16:26
are reading the file we are formatting
16:28
the time that is selected by the user
16:30
into a format that is
16:32
there so this is the actual front end
16:34
JavaScript code guys
16:37
and if you see we are have the
16:40
controllers folder as
16:42
well uh let me just show
16:46
you in the source folder we have the
16:49
middle wees which is malter DJs so
16:51
malter do JS is responsible for if you
16:54
open the config folder molter JS so here
16:57
we are actually importing the malter
16:59
crypto paath and here we are telling
17:03
where to save the file when the user is
17:05
selected the file so we are storing it
17:06
inside the row edited folder and then we
17:09
are giving a random file name every time
17:11
the user selects the file and this is
17:13
the actual file filter that we are
17:15
applying so we are accepting this all
17:17
these extensions which is MP4 fbm after
17:21
this we are ex exporting this this is
17:24
molter config object right here and
17:26
these are
17:27
different uh controller files which are
17:30
there to actually cut the
17:34
file and this is for creating the
17:36
temporary folder so this is a complex
17:38
application you will get all the source
17:41
code and uh you will see that for
17:43
removing the video as Wells you can see
17:46
all these things are there so after the
17:48
processing is done it will automatically
17:50
be removed from your server so you don't
17:53
need to manually remove your video files
17:55
to it will automatically do it so it's a
17:58
complete web appli application guys
17:59
which allows you to split cut the videos
18:02
in browser you just need to select your
18:03
video file then automatically starting
18:06
time will be selected and then you just
18:08
need to provide the ending time
18:12
so let me pause the video so 1 1:30 is
18:15
the starting time so I can basically
18:17
provide 140 so now if I click the cut
18:21
video it will cut the video for 10 11
18:24
seconds so you can just see and now you
18:26
can click the download button the video
18:28
will will be automatically downloaded in
18:30
the browser want this page in this
18:32
manner so it's built using fmpg if you
18:35
need the source code you can directly
18:37
purchase it the link is given in the
18:38
description and please hit that like
18:40
button subscribe the channel and I will
18:42
be seeing you in the next video
#Online Media
#TV & Video
#Programming
#Multimedia Software
#Video Sharing