live_tv
Livestream Starting Soon
00
Hours
:
00
Minutes
:
00
Seconds
Up next in 10

Javascript Google Maps API Example to Add Markers & Info Window in Maps Using Autocomplete & Places
Jan 9, 2025
Buy the full source code of the application here:
https://procodestore.com/index.php/product/javascript-google-maps-api-example-to-add-markers-info-window-in-maps-using-autocomplete-places-api/
Official Website:
https://freemediatools.com
Show More Show Less View Video Transcript
0:00
uh hello guys welcome to this video so
0:02
in this video I will basically talk
0:04
about how to add uh this Google Maps
0:07
autocomplete API inside your JavaScript
0:10
project and we have basically this input
0:13
field out there and if you enter any
0:15
address right here there will be this
0:17
auto complete right
0:19
here let's suppose if I try to enter any
0:23
location if I enter Delhi here you will
0:25
basically see it will show the auto
0:27
suggestions of the different kinds of
0:29
addresses that we have so we are also
0:31
fetching these from Google autocomplete
0:33
API so you can basically fetch any
0:36
address select this so as you select
0:38
basically it will automatically add this
0:41
marker here red marker in the Google Map
0:44
and if you just hover on to this uh
0:47
click on this you will basically see
0:49
this info window will be added right
0:51
here it will basically fetch the
0:53
information about this address which is
0:55
Place ID and the full address here you
0:57
will see that so we will try to
1:00
implement this feature inside this
1:02
application in this video you can enter
1:04
any address in the world if you just
1:06
write it
1:09
here so as you can see if you click it
1:12
it will tell you the place ID this is
1:15
the full
1:17
address you can see it will actually add
1:20
the marker here to that place ID and you
1:24
can fetch information about it you will
1:26
see that we will try to basically do
1:29
this in inside our JavaScript
1:32
application and it is built entirely in
1:34
browser and you should have Google cloud
1:38
project created and we will be actually
1:40
be creating an API key for this purpose
1:42
because we are using this places API as
1:46
well alongside with the autocomplete API
1:48
to actually fetch the places information
1:50
about the specific address and just
1:52
embedding it inside the Google Maps so
1:56
you should
1:57
have your
2:00
Google Cloud console account just uh
2:05
create a very basic account you just
2:06
need to add the credit card information
2:08
to actually create the account I've
2:10
already created Google Maps CL Cloud
2:13
platform account you just need to go to
2:15
apis and services and just you need to
2:18
click on enable apis and services and
2:21
just select this Google
2:25
Maps just enter it and there will be
2:27
various apis which will come in and uh
2:31
one such API is this Maps embed API you
2:34
just need to enable this
2:36
API and also you need to enable this
2:40
Google Places
2:44
API so this also I'm already enabled
2:47
this you will see API enabled so simply
2:50
you just need to enable that and after
2:54
this now we will be actually be building
2:55
this application so if you need the full
2:58
source code guys the link is given in
3:00
the description you can directly
3:01
purchase the full source code from the
3:03
link in the description of the video you
3:05
can go to my website and purchase the
3:07
source code so first of all what I will
3:09
do I will simply delete all this source
3:12
code and start from scratch so the very
3:14
first thing we need to do guys or you
3:17
can see I've already included Tailwind
3:19
CSS I'm using Tailwind CSS as a
3:22
framework here you can see the body
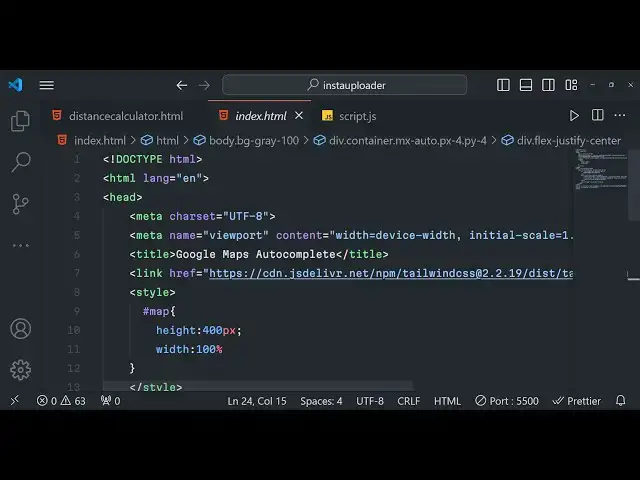
3:24
background color has been changed to
3:25
gray here BG grade 100 so this is
3:28
actually the tail CSS we are using and
3:31
we have included the CDN for Tailwind
3:33
CSS and this we have given the title
3:35
here and let me just delete that so the
3:39
very first thing we will do right here
3:41
we will basically have a div tag and it
3:44
will have a container class MX Auto and
3:47
PX4 and P py4 padding from the X
3:51
Direction and Y Direction in this we
3:53
will be actually be having a heading 3
3:56
XEL font will be bold and
4:04
mb4 and inside this heading
4:08
here we will be just be writing this
4:12
Google Maps autoc
4:16
complete so if you just refresh now
4:18
there will be this heading enter in
4:21
the you can see that so after this we
4:26
now need to have a div tag which will
4:30
have Flex justify Center so this is
4:35
these are classes of Tailwind CSS to
4:37
actually Center out everything and here
4:39
we will be having a input field and uh
4:42
this input field here we will allow the
4:45
user to and actually enter the address
4:47
we will give it an ID to it of autoc
4:50
complete and uh we will be giving a
4:53
placeholder which here we will simply
4:55
say to the user that enter your location
4:58
and then we just just need to simply be
5:01
giving a classes to it so this will be
5:04
width will be full and
5:07
py2
5:09
PX4 and the it will be rounded LG the
5:13
input field and we will also be giving a
5:16
shadow medium Shadow and it will be
5:19
Focus outline will be
5:23
null and also we will be focusing on the
5:27
ring Focus
5:31
these are pseudo classes border we will
5:33
be giving a border to it blue 300 so if
5:38
you just refresh now there will be this
5:40
input field added you just need
5:45
to refresh there will be this input
5:49
field added it will have some Shadow
5:51
right here if you see so here we will
5:53
actually allow the user to enter the
5:55
location so so the very first thing guys
5:57
we just need to create a API key after
6:00
you click on manage and just go to your
6:04
credentials and you just need to create
6:06
an API key for this purpose and just go
6:09
to your right here and API services and
6:13
go to credentials and you just need to
6:16
create an API key for this purpose
6:18
simply click on create
6:20
credentials and uh click on this purpose
6:23
API key so it will give you the random
6:25
API key and I have already let me create
6:29
this API key so it is creating this so I
6:33
will delete this API key so don't copy
6:35
my API key guys so in this way you will
6:38
get this API key simply copy this so
6:40
after this we just need to Simply create
6:43
a script tag just right here at the
6:46
bottom
6:48
side so you just need to uh include the
6:52
script tag source and here we will be
6:56
just be including the library Google
6:58
Maps API maps.
7:02
googleapis.com
7:04
map SL API
7:08
sljs question mark and then we need to
7:11
provide the API key this I will simply
7:14
paste it this API key and libraries and
7:18
we will be enabling the places API so
7:21
library is equal to places and then we
7:23
will also be having a call back function
7:26
so this API will as this API is enable
7:30
this call back function will execute I
7:32
will call this function as init map so
7:35
this function will execute guys
7:37
automatically whenever the library is
7:39
executed and also you just need to write
7:41
here async and differ so this simply
7:44
means that we are loading this library
7:48
asynchronously inside our JavaScript in
7:51
the browser so you just need to write
7:53
these to wordss async and defer so now
7:56
as soon as the library is loaded it will
7:59
look for this function which is init map
8:01
so now we just need to create this
8:03
function which will actually load the
8:05
map on the browser so we will after this
8:10
we will just create a brand new
8:13
file where we will actually write the
8:15
JavaScript code so
8:17
script.js so what I will
8:20
do just I will script.js let me just
8:24
turn on the auto save so that our work
8:27
is auto saved so inside this
8:31
script.js inside first of all index dot
8:35
we will actually be creating a
8:37
simple just after this uh we will be
8:41
creating a div tag and we will be giving
8:44
an ID to it of map and we will be giving
8:46
a class to it of margin top to8 so here
8:51
we will actually be showing the Google
8:53
Map and this map will be loaded
8:55
asynchronously inside this D tag so I
8:58
have given the the ID to it of map so
9:01
inside our JavaScript code we will
9:03
actually be writing that function which
9:05
is init map so this function will
9:07
automatically gets executed as we just
9:11
provided this call back attribute in it
9:14
map so we are actually executing or
9:16
defining that function in our
9:19
script.js so this one we will be
9:21
actually be targeting the actual map
9:24
that we have given so you'll be creating
9:25
a new Google Map which is Google maps.
9:29
Map
9:30
after that here we will be assigning our
9:33
document. get element by ID and whatever
9:36
ID that you have given right here so I
9:39
have given this ID you will see that ID
9:41
is equal to map so we are actually
9:43
targeting this by document get element
9:46
by ID and in the second parameter there
9:49
will be this object and uh we will be
9:52
centering it and here we will be
9:54
providing the latitude and the longitude
9:56
so to the coordinates which we will be
9:59
using in order to plot any certain
10:01
location in the Google Maps so latitude
10:05
I will select you can select any
10:07
latitude accordingly wherever you need
10:10
to Center your map so minus 34 397 and
10:17
longitude in this case
10:20
150.
10:22
644 so and also the second parameter we
10:25
can
10:27
provide put a comma
10:30
zoom zoom level of the map so I will set
10:32
this to eight that's all so now this is
10:39
actually completed because we have
10:42
selected this HTML tag by document get
10:45
element by ID and we have embedded this
10:48
map so if you just reload the
10:50
application your map will not be showing
10:53
if you see the map is not
10:56
showing because we haven't added our CS
11:00
so we just need to show the map so we
11:02
can inside a style tag we can basically
11:05
Target the map here we can give it a
11:08
height to
11:09
it height 400 pixel and the width 100
11:14
pixel so it takes the full width of the
11:16
screen so if you just try to embed you
11:20
will see
11:21
that this page
11:23
must see the JavaScript console
11:28
for
11:31
expired key map
11:41
error let me copy this API key
11:55
here paste it here sometimes this can
11:58
create some error now you can see that
12:00
our Google map has successfully loaded
12:02
you will see that you can basically zoom
12:05
in so by default it uh located the
12:09
center position here you can zoom in you
12:12
can go to any location you can even go
12:14
full screen and you can go to any
12:15
location in the Google Map so this is
12:19
actually using we are actually using the
12:21
Google embed API and this inside you can
12:25
make unlimited calls to this Google
12:27
embed API there is no restriction about
12:30
how many calls that you can make per day
12:32
but rest of the apis are bounded by you
12:36
can only make I think 1,000 calls free
12:39
they give you
12:41
2,000 $200 free credit after you need to
12:46
upgrade or pay money to them but they do
12:49
provide $200 free credit to test your
12:52
API so if you create a free Google Cloud
12:55
console account then this you can test
12:58
out various Google Maps API so now we
13:01
will be what we'll be doing we will add
13:02
this autocomplete feature so whenever
13:05
you select any location we will add the
13:07
certain marker to that specific location
13:09
in the Google Map so now what I will do
13:11
is that I will simply attach our we have
13:15
given this uh ID to it autocomplete to
13:18
this input field right here so inside
13:20
the JavaScript code right here we will
13:23
first of all be adding a info
13:27
window or first of of all we will be
13:30
getting
13:32
the we'll just
13:34
be turning on the auto save here so
13:39
document. get element by ID which is
13:42
autoc
13:45
complete so after this we will
13:52
say
13:54
autocomplete we will new we will
13:56
initialize the Google Maps autocomplete
13:58
AP google.
14:01
maps. places do
14:04
autocomplete and we will be passing this
14:06
input field as a argument here you can
14:10
see we are basically passing the
14:13
reference here we are targeting this
14:14
autocomplete we are passing it as a
14:17
parameter so after that we just need to
14:20
Simply write one more line to actually
14:23
bind it so autocomplete do bind to and
14:28
then
14:30
the first parameter will be bounce and
14:32
the second parameter will be the actual
14:34
map so we are basically attaching this
14:37
autocomplete to the actual map that we
14:39
created Google Map so if you just try to
14:42
refresh your application let me save
14:44
this application and
14:50
refresh so if I just enter any location
14:53
right here you will see autocomplete
14:55
suggestions will come right here as I
14:57
type the location
14:59
autoc complete suggestions are coming
15:01
right here if you
15:06
see you can enter any location right
15:09
here so all these suggestions are coming
15:11
from Google autocomplete API so in this
15:15
way you can simply bind this to the
15:17
input field right here first of all you
15:19
get the reference to that autocomplete
15:20
input field then we initialize Google
15:23
maps. places.
15:24
autocomplete and autocomplete bind to so
15:27
here we are also using the places API
15:30
right here dot places to actually get
15:32
the different kinds of places in the
15:34
autocomplete so after this whenever your
15:37
autocomplete is changed we can bind a
15:40
listener to it autocomplete do add event
15:44
listener add listener in this way so one
15:48
such event is Place changed so this
15:51
event will automatically fire whenever
15:54
your places have been changed so
15:58
whenever you enter something right here
16:00
whenever you select any location this
16:02
event will automatically
16:04
fire so what we can do is that we can
16:08
basically select the place which is
16:10
selected by the user autocomplete do get
16:14
place
16:17
so if I just console log the place right
16:20
here just to show to you what is
16:24
happening right here so if I save
16:27
this so if I just just enter any
16:29
location select the location and check
16:32
the console so this event will
16:34
automatically fire and an object will be
16:36
created so this object contains various
16:38
information right here Place ID rating
16:40
reference number of reviews types this
16:44
is geometry formatted phone number as
16:46
well you can see that formatted address
16:49
business status address so icon icon
16:53
background color so all such information
16:55
photos is also being released so you can
16:57
see that these are different photos that
17:00
you can embed as well we also get
17:04
different photographs of
17:05
this so we will just try to add a
17:09
different marker in the Google
17:12
Map so make sure that you
17:18
don't uh yeah after we get the place we
17:22
can basically have if condition that uh
17:25
if the place is
17:26
valid if the place
17:29
doesn't contain geometry in that case we
17:32
will show the user that you have entered
17:35
a invalid place so no details
17:38
available for
17:41
input that's all so now if the place is
17:44
a genuine place then in that case place.
17:48
geometry do
17:54
viewport then we will save map. fit
17:59
bounce place. geometry do
18:06
viewport so here we will be basically be
18:09
adding a marker this line is very
18:11
important because if the place is valid
18:14
place then we will be adding the
18:19
marker and if the Google Map doesn't
18:22
contain this then we will simply say map
18:24
do set
18:26
Center place. geometry
18:31
do
18:32
location and then we will manipulate the
18:34
map zoom level you can set the zoom
18:36
level dynamically by using this function
18:38
called as set Zoom so it's dynamically
18:41
set the zoom level using
18:46
JavaScript and now to add basically the
18:49
marker guys uh it's very easy how we can
18:52
do
18:53
that so just inside this uh
18:59
this all basically uh is happening
19:03
inside this place changed event handler
19:06
all this code that I'm writing right
19:07
here it is all happening
19:10
inside so now we can simply add a
19:14
marker so now to add a marker we can
19:17
basically create a variable marker and
19:21
Google maps.
19:24
marker this Constructor basically takes
19:27
this method takes an object
19:29
first is actual map wherever you need to
19:31
add the marker the second parameter is
19:34
take the position so wherever you need
19:35
to enter the marker red marker so place.
19:40
geometry do location so in this way you
19:44
can enter basically you can basically
19:46
add a marker actual map and the position
19:49
these two parameters are there and we
19:51
can simply say map. markers is equal to
19:55
the actual marker this is a simple array
19:59
and if you just reload the application
20:01
if I just uh refresh if I enter any
20:09
location so you will see automatically
20:11
at that location the marker will be
20:14
added so now we also need to add a info
20:17
window as I click the marker I need the
20:19
additional information about this place
20:21
inside the info window so what I will do
20:24
is
20:25
that and
20:27
uh when I click this marker so by we can
20:30
basically bind a event Google maps.
20:33
event. add
20:36
listener marker the first parameter and
20:39
the second parameter is the click event
20:41
handler so when we click the marker this
20:43
function will
20:45
execute call back function so right here
20:48
we will first of all create info window
20:52
or variable just at the very
20:56
top we can basically create this
21:03
you can create this variable right here
21:05
at the very
21:06
top right
21:11
here info
21:14
window new Google maps. info
21:19
window so we have basically declared
21:22
this uh variable so now we will actually
21:25
use this variable to actually uh
21:29
show the info
21:32
window to the
21:36
user so inside this we will use this
21:40
variable and this variable contains a
21:42
method called a set
21:44
content and inside
21:49
this we will have actually a div tag and
21:53
inside the div tag we will actually have
21:55
a strong
21:57
tag
21:59
so just close this single codes and we
22:01
can
22:04
concatenate Place do
22:14
name and just have a Break Tag right
22:20
here and again we can
22:24
basically have a place ID information as
22:27
well so this place ID we can say Place
22:33
dot Place uncore ID so basically we are
22:38
actually getting all this information
22:39
that I already showed you whenever you
22:42
enter a location in the autocomplete
22:44
field right here
22:45
this place we get this autocomplete
22:48
doget place so we are actually using the
22:50
Google Places API to actually fetch the
22:52
information about a particular address
22:54
this information it's an object right
22:56
here I have already showed you different
22:59
information is available so you're
23:00
actually getting the place ID and then
23:02
we are actually getting the name of the
23:04
place
23:06
so yeah just showing this information in
23:09
a info window and then you can simply
23:14
say Break
23:18
Tag and then we can say the place
23:22
formatted underscore
23:24
address then we can simply close the div
23:34
so if you see guys we are simply setting
23:36
the name Place ID and the formatted
23:38
address we are showing this in the info
23:40
window and then we now after you do this
23:44
we simply need to open this info window
23:46
automatically so for doing this we can
23:49
call the open method map and this this
23:53
will actually open the info window
23:54
automatically whenever you click the
23:56
marker so if I just save my code right
23:59
here and simply execute it just go to a
24:03
certain location and
24:10
uh so click on
24:13
that nothing happens let me see what is
24:16
the
24:22
error it has added the watermark but it
24:25
is not showing
24:27
the
24:30
I think I made a mistake right here
24:32
Google maps.
24:38
event Google maps.
24:41
event. add
24:43
list let me change this to
24:57
function
25:03
just save this code as well sorry I
25:05
think I never saved this code that's
25:11
why so now you can see that so I forgot
25:14
to save the code now as you click this
25:17
you will basically see the name of the
25:19
place syney place ID and the formatted
25:22
address you can basically put any
25:24
location right
25:27
here
25:29
you can
25:34
see this is the name full name Place ID
25:37
this is the you can basically show more
25:40
information it totally depends upon you
25:43
and make sure that
25:45
you wisely use the API calls because as
25:49
already told you the pricing is only
25:53
free uh you get almost
25:57
$200 free credit limit on a free account
26:00
then you need to upgrade so wisely use
26:02
the API calls these apis are not free so
26:06
anytime that you want to check out the
26:08
pricing Google Maps pricing you can just
26:12
see the pricing here
26:14
so so by default they come with $200
26:19
uses every month for no charge so you
26:22
will get this free limit and so that's
26:25
exactly
26:26
28,500 map loads per month for no charge
26:29
then after that they charge you by this
26:32
so you can just go to this website and
26:34
just check out this documentation so
26:36
this is actual food source code guys if
26:38
you are interested you can go to the
26:40
description and purchase the full source
26:42
code and I will be sing you in the next
26:45
video
#Web Design & Development
#Development Tools