Up next in 10

Javascript DOM-to-Image.js Example to Take Screenshot of HTML as PNG Image in Browser
Jan 9, 2025
Get the full source code of application here:
https://gist.github.com/gauti123456/2b0b1300c83fa5c687d741ba9e807273
Show More Show Less View Video Transcript
0:00
uh hello guys welcome to this video so
0:02
in this video we'll be looking at a
0:03
another JavaScript open source Library
0:06
so this time it actually takes the
0:08
screenshot of the Dom which is the
0:10
document object model it may contain
0:13
everything that you see in the web page
0:15
including all HTML tags it will take the
0:17
screenshot and it will export this you
0:20
can export this as a JPG image or PNG
0:23
image so there's this application that
0:25
you can see on your screen so we have
0:27
this uh section this section that you
0:30
can see in the card so we will try to
0:33
take the screenshot so there is a button
0:35
out there if I click this button so what
0:37
it will do after I click this button it
0:40
will take the screenshot and uh let me
0:42
press the button so as you see the
0:45
button pressed and you will actually see
0:47
the screenshot so this screenshot has
0:49
been taken of the entire Dom all the
0:54
section which contains the simple
0:55
heading and this uh paragraph and then
1:00
we can actually download this as a image
1:01
file you can see you can download this
1:04
as a PNG image file and if I open this
1:07
you will actually see this image
1:09
contains everything which was there this
1:12
is a really useful Library you can
1:15
actually take screenshots of part of the
1:18
Dom specifically in a web page let's
1:20
suppose if you want to get a screenshot
1:22
of a particular part of the web page you
1:24
can use this library for the most
1:27
important thing is that it's completely
1:28
free so the name of of the library is
1:30
Dom to image if you just type on Google
1:34
you will actually see this is actually
1:37
does have a nodejs package as well if
1:39
you want to use it on the server side
1:41
very popular package 128,000 weekly
1:44
downloads but we will be using it right
1:47
in the browser itself using a CDN link
1:50
you can go to cdnjs tocom and search for
1:52
this package Dom to image so it actually
1:55
generates an image from a Dom node using
1:58
HTML 5 canvas and Fiji so you can
2:01
actually copy this link this is a CDN
2:03
link for this Library if you want to use
2:06
this library now to get started all the
2:08
source code if you want the link is
2:10
given in the description of this video
2:12
so now to get started we will simply
2:14
make the basic HTML file and we'll
2:17
simply say JavaScript Dom to image
2:23
example so now to use this the library
2:26
we do need to include the CDN link
2:32
so just after the title we will paste
2:34
the CDM
2:36
link so you can grab it from
2:40
cdnjs then for making this application
2:42
we are also using Tailwind
2:44
CSS which is a UI framework I will also
2:47
paste the CDN for that also this is not
2:50
mandatory but we are just using it to
2:53
actually make the application look good
2:55
and then you'll be giving a BG gray
2:57
class these are all Tailwind classes
3:02
MX Auto p8 to Center everything inside
3:07
this we will have
3:10
a
3:11
heading which will
3:17
have which will simply say that Dom
3:24
to image screenshot tool
3:32
so then we will have here the section
3:34
section tag so this inside this section
3:39
tag or we can have a div tag any tag you
3:43
can have so you'll be giving an ID to it
3:46
of capture
3:48
section so that we can Target in the
3:50
JavaScript so this will have the
3:52
background white padding
3:55
it it will be rounded and also have
3:59
Shadow as well so inside this you'll
4:02
have a simple S2
4:05
tag let me this is all some basic HTML
4:10
not I will just paste it so if I just
4:13
open this application it will look
4:15
something like this we have this uh
4:18
section which contains a simple heading
4:20
a simple paragraph so you can have
4:23
complex HTML you may have buttons you
4:25
may have images you may have forms as
4:27
well so if you are building an
4:31
application I'm just showing you a very
4:33
basic example which have these two HTML
4:35
tags H2 and
4:37
paragraph and uh now after this we will
4:41
have a button right
4:46
here so upon clicking that button we
4:50
will try to take the screenshot so
4:53
inside this you will have a button which
4:55
will say that
4:58
capture
5:02
screenshot and this button will actually
5:05
have an ID here capture button so that
5:07
we can Target in JavaScript so PG blue
5:11
500 text color will be white padding
5:20
X4 so if you see now we'll have a button
5:22
right
5:25
here so now we need to write the
5:28
JavaScript code here so we can actually
5:30
write this in a separate
5:37
file so inside the JavaScript code uh we
5:41
will first of all target the button we
5:44
have given an ID to it of capture
5:47
button we will add an event listener to
5:51
it so when we click that button this
5:53
function will execute so if you close
5:56
the look uh we have given this button
5:58
and ID here capture button so we are
6:01
simply targeting it right
6:03
here so right here here we need to
6:06
select the
6:10
section to take the
6:14
screenshot so here you'll be declaring
6:17
the variable capture
6:19
section so we have given an ID to this
6:22
in the HTML if you see
6:26
capture section
6:30
so after getting reference to that we
6:32
can call this Library which is Dom to
6:35
image Dot and it contains a method if
6:38
you want to convert this to a PNG image
6:41
2 PNG and here we need to pass the
6:43
section so it will actually take the
6:45
screenshot converts it into a PNG file
6:48
and save it so this function returns a
6:50
promise so we can handle this using dot
6:52
then so then it will have the base 64
6:55
URL like this you can actually conso log
6:59
it just to
7:03
check so if you run this application
7:07
now if you check in the inspect element
7:10
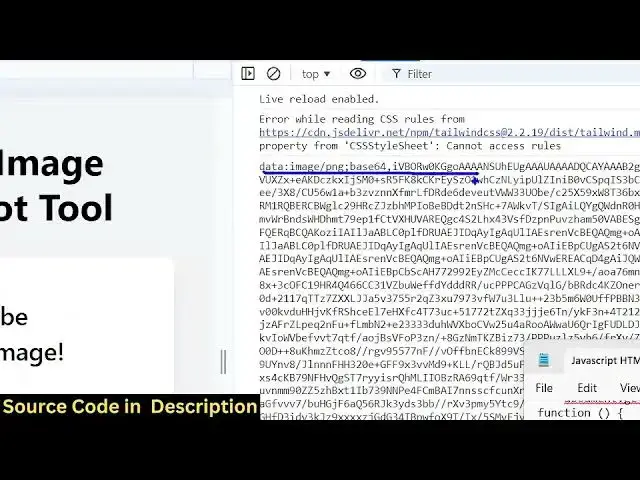
click this you now will see this base 64
7:14
code is uh
7:16
returning so now we need to actually
7:18
show convert this base 64 code to an
7:21
actual image so now in the HTML we do
7:24
need to add a live preview so that the
7:28
user can see see the image just after
7:31
this we'll have a
7:35
div which will have an ID of uh preview
7:45
container and by default it will be
7:48
hidden it we only want to show unless we
7:52
click the button of capture screenshot
7:55
then the screenshot will be shown to the
7:57
user so here inside this you have have
7:59
an heading heading
8:06
here which will simply say that
8:09
screenshot
8:13
preview then we'll be showing this
8:17
image so we will give it an ID here we
8:20
need to show the image dynamically so
8:23
that's why we giving an ID to it of
8:25
screenshot
8:26
preview we're giving an ID class to it
8:30
MX Auto border border gr
8:40
300 just after this image you'll have a
8:42
button which will say download image so
8:46
this will actually have a class of
9:04
so all these classes are in tail
9:08
B so that's all we do need to give it a
9:12
ID as well here which will be download
9:14
button so that we can Target in
9:16
JavaScript so I have given an ID here to
9:19
this image screenshot preview and button
9:21
download
9:22
button so now in the JavaScript if you
9:27
see after we get get this uh base 64 URL
9:32
you need to first of all target the
9:36
preview
9:38
container we need to get reference to
9:41
that div element that we declared so we
9:43
have given this an ID if you
9:47
check which is preview
9:50
container if you check in the HTML we
9:52
have given an ID here preview container
9:54
so we targeting this element after
9:58
getting reference to this we need to get
10:00
the actual image element again we have
10:04
given that ID screenshot
10:08
preview after this we will set this uh
10:12
attribute which is the preview container
10:15
dot class list and we will remove that
10:19
hidden class that we have given if you
10:22
see in the HTML we have given this
10:23
hidden class so we are removing it
10:25
dynamically using JavaScript using this
10:27
function of Dom class list do remove it
10:31
will remove this hidden class and then
10:33
preview image. Source will be equal to
10:37
data
10:40
URL so now if you check you will
10:44
actually see if I click this button the
10:45
image will show like this and the
10:48
download image button will also show but
10:50
if I click this button nothing will
10:52
happen we do need to
10:54
bind a onclick listener to it so
10:57
document. get element by ID so download
11:00
button whatever is the ID given so we
11:04
need to bind an on click listener to it
11:06
is so when we click the download button
11:08
this function will
11:11
execute so here we will actually create
11:16
this uh anchor
11:19
element
11:21
link. HF is equal to data
11:25
URL link. download this will be the name
11:30
given to the output image file
11:32
screenshot.png and then we'll
11:34
dynamically click it link. click this is
11:37
a four four lines of code to actually
11:39
download the image as an attachment
11:41
using an anchor
11:43
tag so if you refresh now click that
11:46
button and click on download image you
11:48
will see that everything will be
11:51
downloaded the Dom will be exported as a
11:54
PNG image using this open- Source
11:56
library of Da to image
11:59
.js so full source code is given in the
12:02
description link guys and you can even
12:06
have image file as well let's suppose I
12:08
have a local image file if I want to
12:10
reference this in the
12:11
HTML apart from this paragraph if I also
12:15
have a let's suppose a button which will
12:18
say download
12:22
image say BG blue 500
12:30
text
12:34
white and here also we also have the
12:37
image as well
12:39
image.
12:56
jpg it give some classes to it
13:01
width will be 300 height will be
13:07
300 so now you can see there is a button
13:10
uh as
13:21
well so if I click the capture
13:23
screenshot you will see the image will
13:26
be taken as a screenshot if I open this
13:29
now you will see everything which was
13:32
present it will be taking the screenshot
13:36
and it will be exported as the image
13:38
file so your HTML may contain images may
13:41
contain text may contain buttons forms
13:44
everything so you can take uh any HTML
13:48
you can take the screenshot and convert
13:50
this into a PNG image file so this was
13:53
the simple screenshot tool that we
13:55
developed in browser you can take any
13:57
screenshot of any El in the Dom and
13:59
convert that into PNG image file so
14:02
thank you very much for watching this
14:04
video and uh I will be seeing you in the
14:06
next for
#Flash-Based Entertainment
#Web Design & Development
#Online Goodies
#Clip Art & Animated GIFs
#Scripting Languages