Up next in 10

Build a Vue.js 3 Web Terminal & Command Prompt UI Component Using vue-web-terminal in TS
Jan 17, 2025
Get the full source code of application here:
https://codingshiksha.com/vue/build-a-vue-js-3-web-terminal-command-prompt-ui-component-using-vue-web-terminal-in-ts/
Show More Show Less View Video Transcript
0:00
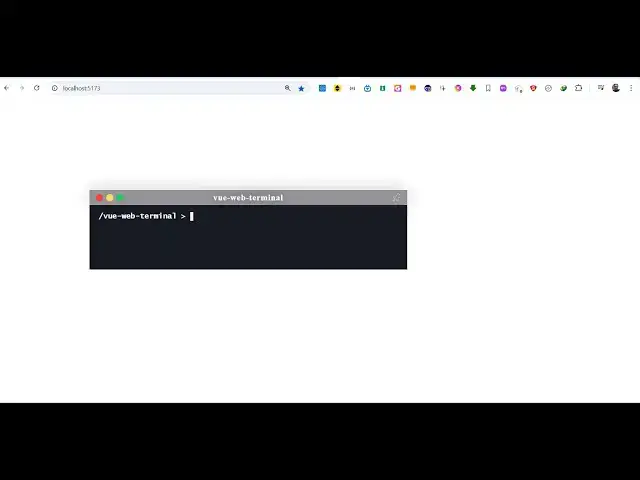
uh hello guys welcome to this video so
0:02
in this video I will show you a vuejs 3
0:05
module which allows you to build your
0:08
web terminal in the browser itself so
0:10
there is a package here which allows you
0:12
to render your command prompt or ter
0:14
terminal session right in the browser so
0:17
you can actually execute any Command
0:19
right
0:22
here can just write it
0:33
so there is a package here which allows
0:34
you to do this if you go to npmjs.com uh
0:38
just search for this
0:40
package which
0:44
is view web terminal
0:49
so just search for this package which is
0:52
view web terminal this is actually the
0:55
package
1:03
so I already installed it it's a
1:05
beautiful terminal plugin the command is
1:09
simple it's almost got 154 weekly
1:12
downloads so you can see you can create
1:16
a terminal session right in the browser
1:18
itself they have nice little demo as
1:20
well so you can see
1:22
that so if you go to their website they
1:25
offer this the documentation is great so
1:30
so so first of all what we need to do uh
1:33
we need to register this module by going
1:36
to this file main.ts which is your
1:39
typescript file so right here you need
1:42
to include this module so for including
1:45
this we need to write this import
1:48
statement so just import this module so
1:52
create
1:54
terminal which will be from view web
1:58
terminal and then we just need to
2:00
register this so we simply say app
2:02
do use and then we pass
2:06
this plugin name create terminal so you
2:09
just need to add these two lines of code
2:11
and now you can close this file move to
2:14
your app. viw
2:16
file and right here you will write our
2:20
typescript code just say setup languages
2:25
typescript and inside this we will first
2:27
of all require the module which is
2:31
terminal track config and
2:35
failed
2:38
function success so all these parameters
2:41
are available in
2:43
this terminal message
2:48
class these are all
2:51
the plugins which are there in this
2:54
module namely the terminal which is the
2:58
base package then we have the back
3:00
config where you will Define your config
3:03
messages let me import everything I have
3:06
given all the source code of this
3:08
example in the description of this
3:10
video and then here you will Define your
3:16
options
3:23
drag so this is your reactive of the
3:26
type
3:31
so you define the width of the terminal
3:33
so I will be defining the width to be
3:35
50% the height here you can even
3:37
customize
3:40
70% and Z index value it also takes 100
3:45
in it the position of the terminal so x
3:48
coordinate will be 200 you can customize
3:51
it the y coordinate will be at
3:54
200 and it will be pinned so it will be
3:57
floating if you want to for float it you
4:00
can even put true here so I will say
4:04
true so this will be Zed index sorry I
4:08
is
4:11
capital so now wherever you need to
4:13
embed this we come to the template
4:16
section and right we can directly use
4:19
the terminal component and it actually
4:21
takes some options first of all the name
4:23
of the
4:24
terminal my terminal and the theme here
4:27
you can use it dark and light as well so
4:29
I attached the dark team and then it
4:32
actually takes a call back function so
4:34
whenever you execute any command this
4:37
callback function will execute and we
4:40
can attach all these
4:42
options drag conf and here we can attach
4:47
these options so it actually takes these
4:49
four parameters the name of the terminal
4:51
the theme when you execute the command
4:53
this callback function will execute and
4:55
fourth is the options right here so
4:59
that's and now we need to execute this
5:01
execute command function so whenever you
5:04
execute any command this function will
5:08
execute on execute
5:10
command it will hold the key actually
5:14
the
5:15
command and the success message if the
5:18
command is successful and if the command
5:21
is not successful then this error
5:22
message will be
5:25
there so just it's a arrow function so
5:28
just make this ch
5:30
so so now we have to show the error
5:35
messages so for
5:37
this we will add this if
5:41
condition if the key is fail then we
5:44
will render something wrong and then we
5:46
have all these classes success error
5:48
System Info warning So based upon if the
5:51
command is successful then we show the
5:53
success
5:54
message so if you refresh you will see
6:00
the terminal and if I press
6:15
hello so you can actually do this like
6:18
this integrate this
6:23
module sorry I think I made a mistake
6:27
right here
6:32
so in this way you can initialize it so
6:35
thank you very much for watching this
6:36
video and also check out my website as
6:40
well free mediat tools.com uh which
6:43
contains thousands of tools regarding
6:45
audio video and image and I will be
6:48
seeing you guys in the next video
#Internet Software
#Computer Education