live_tv
Livestream Starting Soon
00
Hours
:
00
Minutes
:
00
Seconds
Up next in 10

Build a Vue.js 3 Image Cropper With Controls & Live Preview Using vue-advanced-cropper in TS
Jan 13, 2025
Get the full source code of application here:
https://codingshiksha.com/vue/build-a-vue-js-3-image-cropper-with-controls-live-preview-using-vue-advanced-cropper-in-ts/
Show More Show Less View Video Transcript
0:00
uh hello guys welcome to this video so
0:03
in this video I will show you how to
0:05
make a advanced image Cropper inside
0:08
vuejs so let me show you the demo here
0:11
right here where you select your images
0:14
you can select any jpg or PNG
0:17
image so once you select the image you
0:19
will see this nice little Cropper editor
0:22
with live preview so you can select any
0:25
portion that you want to crop with this
0:28
nice little control editor
0:30
and you will see the live preview so as
0:32
soon as you crop this portion it will be
0:36
updated and at the bottom side so you
0:40
can pick crop cut any portion of this
0:43
image using this control and then you
0:46
can right click save this image inside
0:48
your computer and you will see the image
0:52
is successfully cropped so for this we
0:55
are using a specific component which is
0:58
view advanced
1:03
Cropper so this is actually the package
1:06
that we are using
1:09
uh so it's almost this is actually the
1:12
command I've already installed it so
1:15
it's almost having 93,000 weekly
1:17
downloads so they do offer a nice little
1:20
documentation on
1:22
your official website this is the
1:24
official open source package so they
1:28
have nice demo as well and
1:31
very good example also given so now to
1:35
get started I have given all the source
1:38
code in the description of this video so
1:39
you can get all the source code so first
1:42
of all you will allow the user and for
1:45
this you will have this
1:47
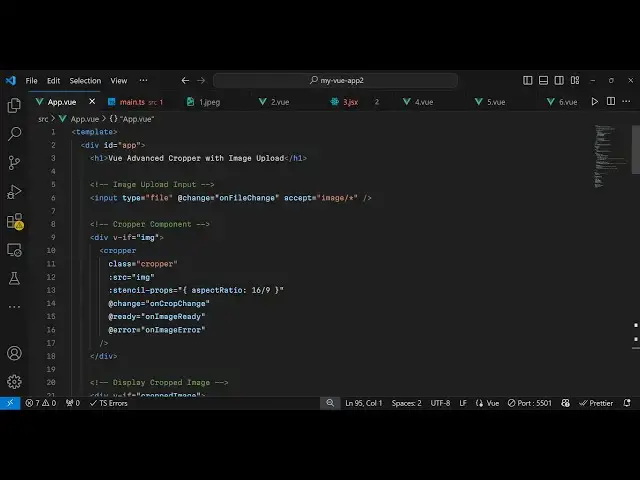
template and give it a div ID and H1 tag
1:52
that view
1:55
Advanced crer example
2:00
so here we allow the user to Simply
2:02
select a image file from their computer
2:05
for this we will have this input tag
2:07
input type file and we will simply bind
2:10
an onchange event handler inside vue.js
2:13
so we bind this custom function on file
2:18
change so we'll only be accepting image
2:21
files only so we just putting this
2:23
restriction accept and now we need to
2:26
Define this on file change function so
2:28
whenever
2:31
so now in the typescript code we can
2:33
Define this in the script
2:35
tag so first of all we import this
2:38
package by using the import statement so
2:40
we simply write import Cropper from this
2:43
package view Advanced Cropper and for
2:46
this we also need to import it CSS file
2:49
as well so which is located inside view
2:52
Advanced Cropper dis SL
2:56
style.css so we first of all import the
2:59
modu modu like this and also we import
3:02
the CSS file as well so after this we
3:05
need
3:06
to export default and then the name of
3:10
the component which is
3:12
app and here you need to define the
3:15
component here that we are using so we
3:18
are using a single component which is
3:20
this third party component Cropper and
3:22
then after this we here we need to
3:24
define the
3:26
data so
3:29
here you need to Define some State
3:32
variables so for this application we
3:34
only need two variables first of all
3:36
your input image which will be null and
3:39
then the output image cropped image
3:41
which will also be null so we have only
3:43
these two State variables input image
3:46
and output image both at this moment of
3:49
time is null and then we need to Define
3:52
all the methods that we will be using so
3:54
right here in the method section so here
3:57
we need to Define that method on file
3:59
change
4:00
so this event will automatically get
4:03
passed so we have defined this on file
4:06
change function so right here we need to
4:10
first of all read the image so for
4:13
reading it we use the file reader API so
4:16
first of all we get the access to the
4:17
file event. target. files and then here
4:21
we check that if the file is valid then
4:23
we need to read the file by using the
4:27
file reader
4:28
API and then
4:30
we need to call this function reader.
4:33
read as data URL we need to read the
4:36
base 64 code of this image and pass the
4:39
actual file and then it actually
4:41
contains this onload
4:44
function whenever you execute this
4:46
function read as data URL this triggers
4:49
this event onload so right here this
4:53
event will occur when the image is
4:55
loaded we will get this base 64 code
4:59
which is located inside e. target.
5:01
result so after getting the base 64 code
5:04
of the image now we
5:08
can uh write a function which will
5:12
handle
5:13
the cropping functionality for
5:17
us so if you at this moment of time if
5:21
you just refresh your browser you will
5:23
see this choose file button and whenever
5:26
you click this you select a file the
5:29
file is selected but the if just to show
5:33
the image Cropper now we now need to
5:36
define a function just outside
5:41
this put a comma and this will be the
5:44
function which will be responsible on
5:47
crop
5:52
change and this will actually take the
5:56
coordinates and the actual canvas on
5:59
which we need to display the Cropper and
6:03
first of all we will check here if the
6:05
canvas is defined in that case only we
6:08
need to say this. cropped
6:11
image is equal to Canvas 2 Data
6:16
URL we need to convert this into base 64
6:19
code image/png so for this you need to
6:22
first of all go to your template and
6:24
must declare
6:26
a the actual crer component
6:30
so just outside this input element right
6:33
here just at the bottom side we embed
6:35
the actual component and first of all we
6:38
will put this restriction that V if it's
6:41
a directive in vuejs it's a simple if
6:44
condition right here if the image is
6:46
already defined then only execute this
6:48
so right here inside this we will embed
6:50
this component
6:52
Cropper and here it actually takes some
6:55
properties first of all the class so we
6:58
say the Cropper class which which is a
6:59
built-in class in this and then we
7:02
attach the source which is contained
7:04
inside
7:05
image and then it takes a stencil
7:11
props so which is essentially it is
7:13
saying that how do you want to crop this
7:15
image so here you need to pass some
7:18
options first of all you need to pass an
7:20
expect ratio so I will be cropping the
7:23
image by 16 by 9 we can change this exp
7:27
ratio as well and then it takes three
7:30
call back functions on change so when
7:33
the Cropper is initialized this function
7:35
will be executed on crop change and when
7:38
the Cropper is
7:40
ready then in that case we'll execute a
7:44
function which is on image
7:47
ready and then if any sort of error take
7:51
place we also have this function on
7:53
image
7:54
error these are three call back hooks
7:57
which is there in this package on change
8:00
on ready on error so we now need to
8:02
Define all these three
8:03
methods in the method section so the
8:06
first method on crop
8:08
change it will automatically execute as
8:11
you select the
8:13
image so now we just need
8:17
to that's all that we need to do in this
8:20
function the Cropper will be initialized
8:22
with the input image that you
8:24
selected and now the next function is
8:28
actually your on image
8:33
ready and lastly your function is on
8:36
image error if any sort of error take
8:38
place so we have defined all these three
8:40
functions on crop change on image ready
8:43
on image error at this moment of time if
8:46
you refresh if you select an input image
8:48
you will see the Cropper will be
8:50
initialized and you see these controls
8:53
available you can zoom zoom the image
8:55
you can select any portion of the image
8:57
using this crer controls
9:00
you can see now the Cropper is working
9:02
but we now need to crop this image and
9:04
show the live preview as
9:06
well for that we come to the second
9:10
function which is on image ready so now
9:12
if you make the
9:14
selection after this what we need to do
9:17
we also need to show the live
9:21
preview for showing the live
9:27
preview we come to the template section
9:30
so right here after this
9:35
component just outside this diff we need
9:38
now also need to show the cropped image
9:41
for showing the cropped image we will
9:43
again use a diff again a v if condition
9:46
V if directive that if only show this
9:51
when you have the cropped image
9:52
available to so if the cropped image is
9:55
there then only show this so now we need
9:57
to display the cropped image so you will
9:59
simply say in a h2 tag that your cropped
10:03
image and you'll be displaying it in a
10:06
image tag so source is equal to the
10:09
actual cropped image
10:11
variable that's
10:15
all and just for we can attach a simple
10:20
class to
10:22
it so we have attached this class here
10:25
if you see Cropper I think we can write
10:28
some custom CSS for this so that the for
10:32
The Styling so I've given all this
10:34
custom CSS in the description all the
10:37
source code is given in the description
10:39
so if you need this you can go to my
10:41
website so then now if you see it will
10:44
now simply style this UI if you select
10:47
your image you will see now the live
10:49
preview all will also be show so as you
10:52
make the change automatically the image
10:55
will be cropped to whichever location
10:58
whichever po that you want to select and
11:00
crop so in this way you can crop your
11:03
image very easily using this package in
11:06
vuejs 3 view Advanced Cropper you can
11:09
select any portion of it and then if you
11:12
are done you can simply save this image
11:15
and now the image will be cropped so in
11:19
this way guys you can use this package
11:21
view Advanced Cropper thank you very
11:23
much for watching this video and do
11:25
check out my website as well uh free
11:28
mediat tools.com
11:29
which contains thousands of tools
11:32
regarding audio video and image and I
11:35
will be seeing you guys in the next
11:36
video
#Photographic & Digital Arts
#Multimedia Software