live_tv
Livestream Starting Soon
00
Hours
:
00
Minutes
:
00
Seconds
Up next in 10

Build a Solid.js FFMPEG Image Editor & Export JPG,PNG to ICO Files and Resize it in Browser Using TS
Jan 9, 2025
Buy the full source code of the application here:
https://procodestore.com/index.php/product/build-a-solid-js-ffmpeg-image-editor-export-jpgpng-to-ico-files-and-resize-it-in-browser-using-ts/
See the Live Demo of the tool here:
https://freemediatools.com/wasm-image-converter/
Buy Premium Scripts and Apps Here:
https://procodestore.com/
Show More Show Less View Video Transcript
0:03
uh hello guys welcome to this uh live
0:05
stream so in this live stream I will
0:08
basically talk about a application that
0:10
I developed in solid JS which is a
0:14
framework for building web applications
0:17
and we used fmpg library to build this
0:20
awesome tool that I deployed on my
0:22
website which is freem mediat tools.com
0:23
you can check out the live demo I have
0:25
given the link in the description of
0:27
this live stream so this is the uh image
0:30
converter resizer and you can even
0:32
convert your images to icons as well of
0:35
different sizes so this is the actual
0:37
thing right here if you see image
0:39
converter and resizer you can even
0:41
toggle the dark mode also off on here so
0:45
light mode dark mode so this is the
0:47
functionality and here you can drag and
0:49
drop or you can click to upload your
0:51
images let me select this image which is
0:54
a JPG image so you can see I have
0:56
selected this jpg image and now in the
0:59
drop- down I can basically select either
1:02
we can change this to PNG or we can
1:04
change it to jpg webp format we webp
1:09
format and we can even change it to Icon
1:12
let's suppose if you're developing an
1:14
application you need a icon of a certain
1:15
size you can even do that so first of
1:17
all let me show you if you want to
1:19
convert this into PNG you can even click
1:22
this option to actually resize the image
1:25
to a particular width and height you can
1:27
mention the width and the height as well
1:29
right here but I don't want to mention
1:31
width and height so I can simply toggle
1:33
off this option click on convert so now
1:36
the fmpg will do the conversion process
1:38
and automatically your image will be
1:40
downloaded if I open the same image this
1:42
is the same image which is converted to
1:44
you will see do PNG so now the image has
1:47
been converted so similarly we will take
1:50
the jpg now we will convert this into
1:53
webp format with webp format opens in
1:56
the browser only so this is the format
1:59
which is typically used in various
2:01
applications so if I click convert so
2:04
this will all open in the browser you
2:05
will see webp format so your image is
2:08
successfully converted to
2:10
webp so now let's suppose if I open the
2:13
same image which is the webp format if
2:24
you so the image that we downloaded
2:28
which is uh this 1 0 so if I want to
2:32
open this
2:37
image this is a image this is a webp
2:41
image if you see so now if I want to
2:43
convert this into PNG simply click
2:46
convert so now your image is
2:47
successfully converted to PNG you can
2:51
basically convert uh any format to any
2:53
format this is a image converter and uh
2:56
you can basically access this guys the
2:58
link is given in the description deson
3:00
on my website freem mediat tools.com so
3:02
this tool that I developed in solid GS
3:05
and let's suppose if you want to create
3:07
a icon as well of a certain size you can
3:10
resize your images so toggle this option
3:12
and basically you can provide a fixed
3:16
width and height to your image let's
3:18
suppose I want to resize this image to
3:21
200 and 200 click on convert so now your
3:24
image will be resized here you will see
3:27
the width will be 200 the height will be
3:29
200 you can basically provide any thing
3:33
here this is 100 2,000 any aspect ratio
3:36
you can provide just upload the image
3:39
click convert so now your image height
3:42
will be 1,000 and the width will be 100
3:44
so you can provide any width and height
3:47
right here and then if you want to make
3:49
a icon let's suppose I want to make a
3:51
512 icon 512 by 512 icon of this image
3:58
so you will see error occurred while
4:00
converting so you need to select the
4:03
icon right here just select an icon
4:06
based upon that I think 256 is
4:13
256 so now you can see that uh basically
4:17
it converted this do I so it has
4:21
converted to a do Ico file this is a
4:24
icon file that is basically used in
4:26
applications if you are developing a
4:28
desktop application if you're developing
4:29
Ving a web application you need such
4:32
kind of icons so you can basically use
4:34
this application to actually convert any
4:36
image to a particular icon of a
4:38
particular size
4:41
so you can basically provide any width
4:43
and height right here just select your
4:45
input
4:47
image click on convert so basically the
4:51
icons only comes with 256 by 256 so you
4:55
need
4:56
to also make sure that you provide the
4:59
correct width and
5:01
height so just refresh your application
5:08
so you need to for for the icon you need
5:11
to provide the correct width and height
5:13
so 128 by 128 icon I will basically do
5:18
so this will actually make the icon here
5:21
for me 128 by 128 this is the icon if I
5:26
open this now you can see it will make
5:28
this 128 by 12 8 icon and uh again if
5:35
I to I think 56 by 56 is also icon size
5:40
click on convert you will see that so
5:42
this is a short icon so now you can use
5:45
this application for various purposes
5:47
guys you can resize your images you can
5:49
convert from one format to another or
5:51
you can even create icons from your jpg
5:55
PNG and webp format images or it's a
5:58
onepage application single page
6:00
application that I use uses fmpg if you
6:04
load this you will see
6:06
U the fmpg library is loaded in the
6:09
browser and it is doing its job in right
6:12
here in the browser so we have used this
6:14
framework guys which is solid GS which
6:16
is a brand new framework for building
6:19
open source for building reactive web
6:22
applications and it was created in 20
6:25
2018 and uh it's a very powerful
6:28
programmatic productive framework and we
6:31
have used typescript for our uh you can
6:35
see we have used these fmpg packages in
6:37
the dependency sections and uh we have
6:40
used solid JS if you see this is a
6:42
latest version that we are using solid
6:44
JS router is also we are using right
6:46
here and we have also used Tailwind CSS
6:49
for the UI that we user interface that
6:52
we developed so we have used Tailwind
6:54
CSS alongside with solid JS and we have
6:57
used fmpg Library
7:00
uh in the background to actually carry
7:01
out this process so I have deployed this
7:04
application guys you can directly go to
7:06
my website and if you need the full
7:07
source code of this application guys the
7:09
link is given in the description you can
7:11
directly purchase the full source code
7:14
you will actually get a zip file after
7:15
you purchase it you will get a zip file
7:19
which you can actually extract and you
7:21
will get this directory structure so
7:23
basically if you purchase it you will
7:26
get this directory structure after you
7:28
do this you just need to simp simply
7:30
right here uh invoke this command which
7:33
is npmi so this will install all the
7:35
packages and it will create a node
7:37
modules folder inside your project
7:39
directory after you do this you just
7:41
need to npm run Dev this will start the
7:44
development server it is using V server
7:47
so it will start on this application on
7:50
Local Host
7:52
5173 so now if I open Local Host
7:55
5173 so you will basically see this will
7:58
start
8:00
my application locally on Local Host
8:02
5173 so now you can basically convert
8:07
jpg to PNG you can see that it will
8:10
still work locally as well you can also
8:13
deploy this on your own website as well
8:15
it is very simple for deployment purpose
8:17
if you want to deploy this you just need
8:19
to invoke this command which is npm run
8:22
build so what it will do it will
8:24
actually create a dis folder right in
8:26
the project directory it will build out
8:28
the project and it will create the
8:29
minified files JavaScript CSS and HTML
8:32
files which are necessary for deployment
8:34
purposes you can see that it has
8:36
basically build out this project and if
8:39
you open your root directory it has
8:41
created a disc folder which you can
8:44
actually deploy so these are the this is
8:47
a directory that you will need to
8:49
actually deploy this application on any
8:51
ordinary hosting plan and you can even
8:54
earn a lot of money by using deploying
8:56
this application as a single page
8:58
application after purchase you will get
9:00
full commercial rights that you can use
9:02
my application and put advertisements
9:04
and on a good chunk of money so this is
9:07
the application guys inage converter and
9:09
resizer and let me show you how I build
9:12
this application somewhat and uh these
9:15
are the different components guys which
9:17
are all coded in typescript which is
9:19
TSX so which is a super set of
9:22
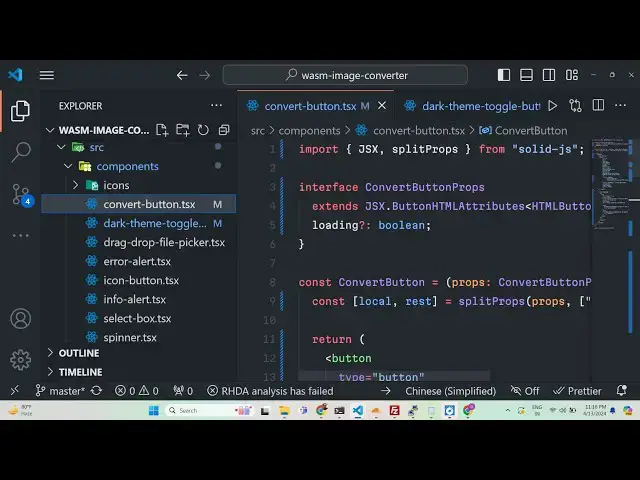
JavaScript we have uses spinner
9:25
component select box info alert icon but
9:28
error alert
9:29
drag and drop file picker Dark theme
9:32
toggle so all these components have
9:35
separate component all these
9:36
functionalities
9:38
so if you want to change the actic if
9:41
you launch the application if you see
9:44
this is having the Dark theme so let me
9:46
start the server once again and show to
9:49
you so if you start the application when
9:52
when you launch it it will automatically
9:54
be on the Dark theme let's suppose if
9:57
you want to change it this functionality
9:58
simply change this to light theme so now
10:02
when you launch this you will actually
10:05
see the light
10:11
theme if you
10:16
see uh this is you can see I think uh
10:20
you need to restart the application for
10:23
this if you make any any sort of changes
10:26
guys now you will see the application
10:29
will be on light
10:32
mode if you launch it the application
10:34
will be on light
10:38
mode so if you're opening it for the
10:41
very first time the it will be on light
10:43
mode you can just toggle this using this
10:45
component that we developed if you see
10:48
basically it is comparing if the user is
10:51
if the active theme is equal to light
10:53
then show this icon if the it show this
10:56
icon so we are using different icons
10:59
programmatically showing it this is a
11:01
simple component and uh then we have the
11:04
convert component right here based upon
11:07
if you
11:09
see BG transparent all these classes are
11:13
Tailwind CSS classes guys if you know
11:16
don't know about Tailwind CSS it's a CSS
11:19
framework which allows you to it has
11:22
pre-made classes that you can use to
11:24
actually build out user interfaces and
11:27
it eliminates writing CSS you can uh
11:30
directly attach classes to your HTML
11:32
elements and it will actually style your
11:34
UI so it's a very trendy framework
11:37
amount developers which allows you to
11:39
actually create these awesome little
11:41
user interfaces and uh for the spinner
11:44
we are using this select box info alert
11:47
all these components have pre-made
11:49
functionalities drag and drop so
11:52
whenever you do
11:53
this drag drop so it's a nicely built
11:58
out application and you will understand
12:00
the code as well once you purchase it
12:02
and uh if you try to want to uh
12:06
understand the structure of the
12:07
application you will be and now in the
12:09
functionality hooks purpose if you see
12:11
we have used fmpg right here fmpg and if
12:15
you open this uh we have different types
12:19
here for the status for showing the
12:20
status of the conversion and showing the
12:25
message right here so this is actual
12:27
functionality and use
12:30
and here we basically use these commands
12:32
to actually carry out the process so we
12:35
have used this fmpg web assembly
12:39
Library so here we have used F fmpg web
12:43
assembly library to carry out this uh
12:47
conversion so if you are interested guys
12:50
please hit that like button subscribe
12:52
the channel as well and I am seeing that
12:55
three people have liked this video so
12:57
please hit that like this video share
12:59
this video with your friends and
13:00
subscribe the channel as well so we have
13:02
used these filters that you see Das VF
13:05
stands for video filter and we've used
13:08
this command to carry out this and here
13:10
we basically provided the width and the
13:13
height width and
13:16
height this is a thing right here and
13:20
these are the themes that we are using
13:21
active active thing on the Dark theme so
13:24
there are two themes out there dark and
13:27
light and and here like this these are
13:31
the advanced settings that you scale all
13:34
these things that you can do utils
13:37
basically contains the functional for
13:39
downloading the file as an attachment so
13:41
once you are done processing the image
13:43
the image will automatically gets
13:45
downloaded so once you basically do this
13:48
uh select your image so click on any of
13:52
this
13:55
uh resize let's suppose I want to resize
13:58
to 50
13:59
pixels height 50 pixel width and height
14:03
click on convert so the file will
14:05
automatically gets downloaded
14:07
so so this is the utils function
14:10
responsible for downloading the file and
14:12
splitting the extension as
14:16
well so this is the actual uh
14:20
application guys if you are interested
14:21
the link is given in the description and
14:24
thank you very much for watching this
14:25
video and I will be seeing you in the
14:28
next live stream tooo
#Flash-Based Entertainment
#Computers & Electronics